Spring Security-查询数据库认证
查询数据库认证权限(未自定义页面)
整合mybatis-plus 完成数据库操作
1.引入相关依赖
再父工程中 增加 mybatis-plus lombok mysql 相关依赖及版本号
             org.springframework.boot
             spring-boot-dependencies
             2.6.7
             import
             pom


             mysql
             mysql-connector-java
             8.0.28


             org.projectlombok
             lombok
             1.18.24
再子项目中 引入
org.springframework.boot
spring-boot-starter-web
org.springframework.boot
spring-boot-starter-security
com.baomidou
mybatis-plus-boot-starter
3.4.2
mysql
mysql-connector-java
org.projectlombok
lombok
2.创建表 user_info

3.创建实体类
package com.entity;
import lombok.AllArgsConstructor;
import lombok.Data;
import lombok.NoArgsConstructor;
@Data
@NoArgsConstructor
@AllArgsConstructor
public class UserInfo {
private Integer id;
private String name;
private String pwd;
private String email;
private String tel;
}4.整合mybatis-plus ,创建接口 继承 BaseMapper
package com.mapper;
import com.baomidou.mybatisplus.core.mapper.BaseMapper;
import com.entity.UserInfo;
public interface UserInfoMapper extends BaseMapper {
} 5.创建service 即UserDetailsService 接口实现类
package com.service;
import com.baomidou.mybatisplus.core.conditions.query.QueryWrapper;
import com.entity.UserInfo;
import com.mapper.UserInfoMapper;
import org.springframework.beans.factory.annotation.Autowired;
import org.springframework.security.core.GrantedAuthority;
import org.springframework.security.core.authority.AuthorityUtils;
import org.springframework.security.core.userdetails.User;
import org.springframework.security.core.userdetails.UserDetails;
import org.springframework.security.core.userdetails.UserDetailsService;
import org.springframework.security.core.userdetails.UsernameNotFoundException;
import org.springframework.security.crypto.bcrypt.BCryptPasswordEncoder;
import org.springframework.stereotype.Service;
import java.util.ArrayList;
import java.util.List;
@Service("userDetailsService")
public class MyUserDetailsService implements UserDetailsService {
@Autowired
private UserInfoMapper userInfoMapper;
@Override
public UserDetails loadUserByUsername(String username) throws UsernameNotFoundException {
//根据用户名 查询
QueryWrapper wrapper=new QueryWrapper<>();
wrapper.eq("name",username); //查询 name列 的值 为 username的 数据
UserInfo info = userInfoMapper.selectOne(wrapper);
//判断
if(info==null){ //没有用户 验证失败
throw new UsernameNotFoundException("用户名不存在");
}
List list = AuthorityUtils.commaSeparatedStringToAuthorityList("admin");
//返回数据库的用户名及密码
return new User(info.getName(), new BCryptPasswordEncoder().encode(info.getPwd()),list);
}
} 6. 再启动类增加 mapperscan 或 再 4的接口增加@Mapper
package com;
import org.mybatis.spring.annotation.MapperScan;
import org.springframework.boot.SpringApplication;
import org.springframework.boot.autoconfigure.SpringBootApplication;
@SpringBootApplication
@MapperScan(basePackages = "com.mapper") //扫描mapper接口
public class SSApp {
public static void main(String[] args) {
SpringApplication.run(SSApp.class,args);
}
}7.数据库配置
 spring:
   datasource:
     driver-class-name: com.mysql.cj.jdbc.Driver
     url: jdbc:mysql://localhost:3306/ssm
     username: root
     password: 自己的密码
启动项目 , 输入 错误的用户名及密码 显示

输入 正确的用户名与密码 即可 看到页面
查询数据库认证权限(自定义页面)
上面的内容 登录均采用 secutity的登录页面,而且经过认证才可以访问controller,
其实 可以自定义登陆页面 及 不需要认证也可以访问controller
下面 我们继续学习
1.在 配置类中 编写配置
重写protected void configure(HttpSecurity http) throws Exception 方法
package com.config;
import org.springframework.beans.factory.annotation.Autowired;
import org.springframework.context.annotation.Bean;
import org.springframework.context.annotation.Configuration;
import org.springframework.security.config.annotation.authentication.builders.AuthenticationManagerBuilder;
import org.springframework.security.config.annotation.web.builders.HttpSecurity;
import org.springframework.security.config.annotation.web.configuration.WebSecurityConfigurerAdapter;
import org.springframework.security.core.userdetails.UserDetailsService;
import org.springframework.security.crypto.bcrypt.BCryptPasswordEncoder;
import org.springframework.security.crypto.password.PasswordEncoder;
@Configuration //配置类
public class SecurityConfig extends WebSecurityConfigurerAdapter {
@Autowired
UserDetailsService userDetailsService;
@Override
protected void configure(AuthenticationManagerBuilder auth) throws Exception {
auth.userDetailsService(userDetailsService).passwordEncoder(passwordEncoder());
}
@Bean
PasswordEncoder passwordEncoder(){
return new BCryptPasswordEncoder();
}
@Override
protected void configure(HttpSecurity http) throws Exception {
http.formLogin().loginPage("/login.html") // 自定义登录页面
.loginProcessingUrl("/user/login") //登录访问路径
.defaultSuccessUrl("/test/index").permitAll() //登录成功后 跳转路径
.and().authorizeRequests()
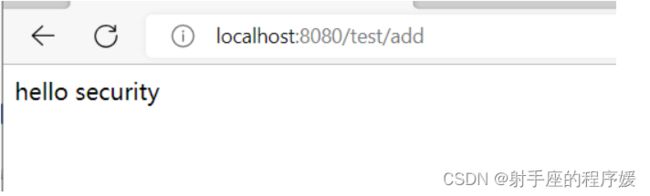
.antMatchers("/","/user/login","/test/add").permitAll() //设置哪些路径可以不认证 直接访问
.anyRequest().authenticated()
.and().csrf().disable() ; // 关闭csrf的防护
}
}
2.编写页面及controller
在 resources下 建立static ,并创建 login.html
注意: 页面中 input的 名字 必须 为 username与password , 因为 security中过滤器 会 使用 这个参数名获取
form的action 的值 与 配置类的中 登录访问路径一致
@RestController
@RequestMapping("/test")
public class TestController {
@GetMapping("/index") -----------------增加内容 配置类中配置 /test/index
public String index(){
return "hello index";
}
@GetMapping("/add")
public String add(){
return "hello security";
}
}启动 运行
在地址栏输入: http://localhost:8080/test/index 则进入到登录页面

在上面的页面上 输入正确的 用户名及密码 , 可以进入页面
