❤ Uniapp使用四( 高阶使用配置和各种实现篇)
❤ Uniapp使用四( 复杂配置和各种实现篇)
uniapp引入 vant
引入方式
1、下载vant源码
方式一:从 Vant 官网首页进入 GitHub下载对应版本的压缩包,将文件解压后备用,确保下载的压缩包里有dist 文件夹
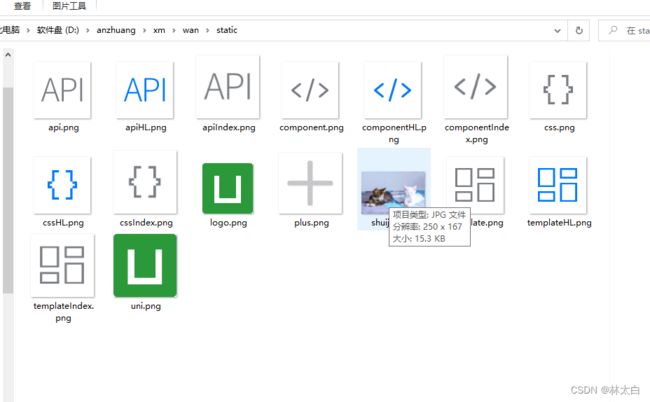
2、创建 uniapp 项目,在根目录下新建 一个文件夹wxcomponents ,将下载好的压缩包中的 dist 文件夹放到 wxcomponents 里, 推荐将 dist 重命名为 vant,
3、在根目录下App.vue中引入UI样式index.wxss,如下图
@import "/wxcomponents/vant/common/index.wxss";
4、main.js
实现配置启动页面和四个底部tab切换栏目
先放图片,开发属于底部界面tab栏目
配置启动页面和四个底部tab切换栏目
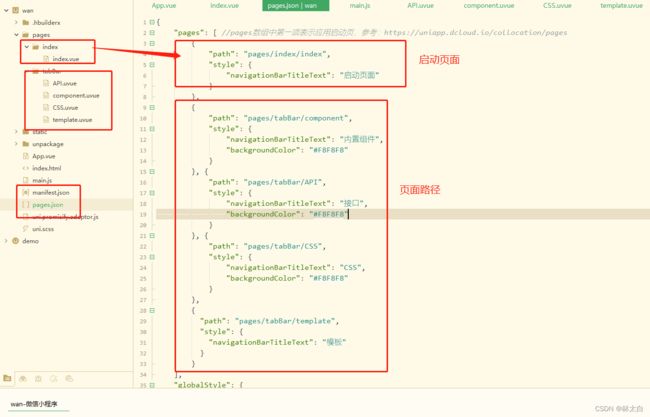
底部tab栏切换进行配置对应的界面
{
"pages": [ //pages数组中第一项表示应用启动页,参考:https://uniapp.dcloud.io/collocation/pages
{
"path": "pages/index/index",
"style": {
"navigationBarTitleText": "启动页面"
}
},
{
"path": "pages/tabBar/component",
"style": {
"navigationBarTitleText": "内置组件",
"backgroundColor": "#F8F8F8"
}
}, {
"path": "pages/tabBar/API",
"style": {
"navigationBarTitleText": "接口",
"backgroundColor": "#F8F8F8"
}
}, {
"path": "pages/tabBar/CSS",
"style": {
"navigationBarTitleText": "CSS",
"backgroundColor": "#F8F8F8"
}
},
{
"path": "pages/tabBar/template",
"style": {
"navigationBarTitleText": "模板"
}
}
],
"globalStyle": {
"navigationBarTextStyle": "black",
"navigationBarTitleText": "uni-app",
"navigationBarBackgroundColor": "#F8F8F8",
"backgroundColor": "#F8F8F8"
},
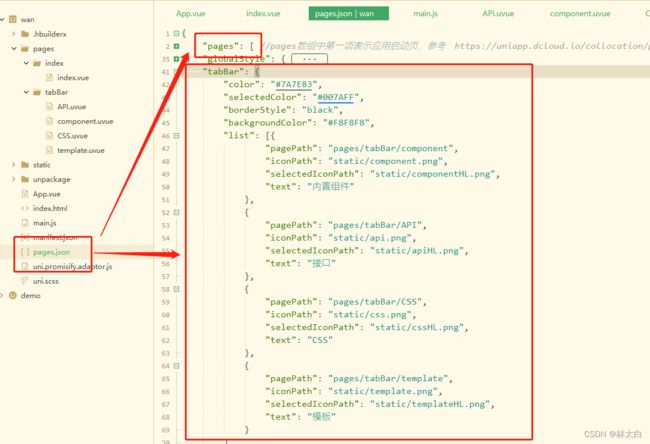
"tabBar": {
"color": "#7A7E83",
"selectedColor": "#007AFF",
"borderStyle": "black",
"backgroundColor": "#F8F8F8",
"list": [{
"pagePath": "pages/tabBar/component",
"iconPath": "static/component.png",
"selectedIconPath": "static/componentHL.png",
"text": "内置组件"
},
{
"pagePath": "pages/tabBar/API",
"iconPath": "static/api.png",
"selectedIconPath": "static/apiHL.png",
"text": "接口"
},
{
"pagePath": "pages/tabBar/CSS",
"iconPath": "static/css.png",
"selectedIconPath": "static/cssHL.png",
"text": "CSS"
},
{
"pagePath": "pages/tabBar/template",
"iconPath": "static/template.png",
"selectedIconPath": "static/templateHL.png",
"text": "模板"
}
]
},
"uniIdRouter": {}
}
配置跳转完成以后的界面:
转的主页面
uni.switchTab({
			url:'/pages/tabBar/API'
})
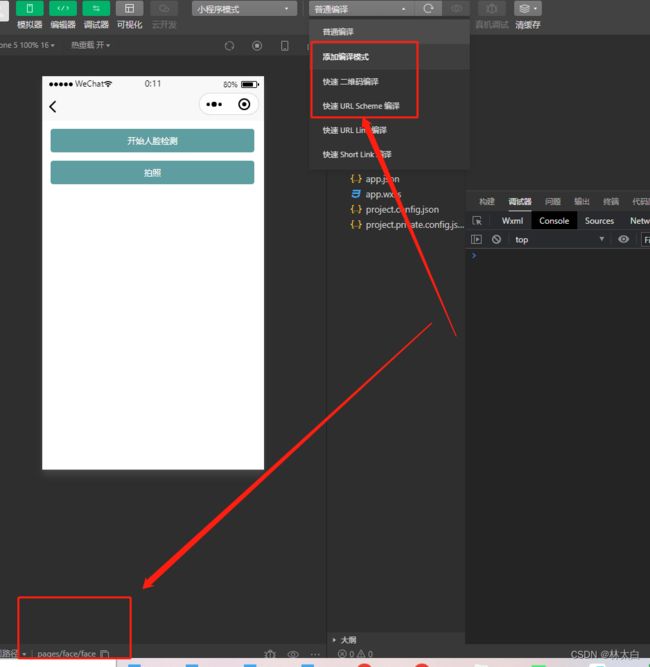
实现人脸检测
搭建
进入tabBar => 下面的component界面,因为我们设置的该页面为加载页面以后的页面:
写一个人脸检测按钮:
格外注意:
uniapp的css样式和我们的平时写的css pc端样式略微不同,采用单位为rpx
(大致就是我们px的二分之一)
uniapp的全屏宽为 750rpx;
所以按钮样式为
.btnface{
		// 750 - 690 = 60
		width: 690rpx;
		height: 80rpx;
		line-height: 80rpx;
		text-align: center;
		background-color: cadetblue;
		color: #fff;
		margin:30rpx;
		border-radius: 10rpx;
	}
为了方便,我们可以直接写一个固定的页面:方便调试
查看效果 不用想我们大致也能猜到 ,跳转进入我们的人脸检测界面
(人脸检测界面前提:我们在目录下搭建文件夹 并且 上面的pages.json 进行了配置 )
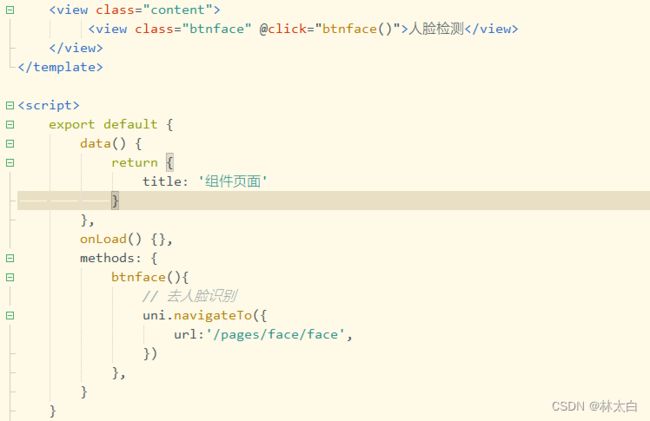
// 去人脸识别
uni.navigateTo({
		url:'/pages/face/face',
 })
思路
1 检测授权
2调用相机
(穿插是否活体检测人脸)
3开始录制
4结束录制
功能
放进去我们的相机组件和相对应的相机方法
<camera ref="video" device-position="front" flash="off" @initdone="initdone" @error="error"
		style="width:100%;height:100%;border-radius:50%;
				-webkit-backface-visibility: hidden;
				overflow: hidden;
				position: relative;
				-webkit-transform: translate3d(0, 0, 0);">
</camera>


//初始化相机以及初始化相机失败
initdone() {
				let _this = this;
				// 1、检测相机权限
				// 2、录制15s视频
				_this.ctx = uni.createCameraContext(); // 初始化相机
				//调用人脸检测方法

},
// 相机初始化失败
error(e) {
				let _this = this;
				console.log(e.detail);
				if (e.detail.errMsg == 'insertCamera:fail auth deny') {
					_this.tishimsg = '相机授权失败,点击重新授权!';
				}
				uni.showToast({
					title: '相机授权失败,请点击重新授权!',
					icon: 'none',
		duration: 2000
	});
},


//人脸检测方法
// 人脸识别start
			isfaceact() {
				let _this = this;
				console.log('走人脸识别!!!!!!!');
				_this.tishimsg = '初始化人脸识别!';
				wx.initFaceDetect();
				// console.log(wx.initFaceDetect(),'初始化人脸识别');
				// createVKSession
				// 2、创建 camera 上下文 CameraContext 对象
				// _
				// this.cameraEngine = wx.createCameraContext();
				// 3、获取 Camera 实时帧数据
				const listener = this.ctx.onCameraFrame((frame) => {
					// if (this.tempImg) {
					// 	return;
					// }
					// VKSession.detectFace
					// 4、人脸识别,使用前需要通过 wx.initFaceDetect 进行一次初始化,推荐使用相机接口返回的帧数据
					//wx.faceDetect   VKSession.detectFace
					wx.faceDetect({
						frameBuffer: frame.data,
						width: frame.width,
						height: frame.height,
						enablePoint: true,
						enableConf: true,
						enableAngle: true,
						enableMultiFace: true,
						success: (faceData) => {
							let face = faceData.faceInfo[0]
							if (faceData.x == -1 || faceData.y == -1) {
								this.tishimsg = '请保持在相机中!';
								// this.showrppg(1);

							} else {
								if (faceData.faceInfo.length > 1) {
									this.tishimsg = '请保证只有一个人';
									// this.showrppg(1);
								} else {
									const {
										pitch,
										roll,
										yaw
									} = face.angleArray;
									const standard = 0.5
									if (Math.abs(pitch) >= standard || Math.abs(roll) >= standard ||
										Math.abs(yaw) >= standard) {
										this.tishimsg = '请平视摄像头';
									} else if (face.confArray.global <= 0.8 || face.confArray
										.leftEye <=
										0.8 || face.confArray.mouth <= 0.8 || face.confArray.nose <=
										0.8 ||
										face.confArray.rightEye <= 0.8) {
										// 人脸置信度
										this.tishimsg = `请勿遮挡五官${face.confArray}`;
									} else {
										this.tishimsg = '正在录制!';
										// this.showrppg(2);
									}
								}
							}
						},
						fail: (err) => {
							if (err.x == -1 || err.y == -1) {
								this.tishimsg = '检测不到人';
								// this.showrppg(1);
							} else {
								// console.log(err.errMsg)
								this.tishimsg = '网络错误,请退出页面重试';
								// this.showrppg(1);
							}
						},
					})
				})
				// 5、开始监听帧数据
				listener.start();
},
uniapp横屏配置
在pages.json中配置 pageOrientation: “auto”
"globalStyle": {
  "pageOrientation": "auto"
}
此时已经可以全局切换横竖屏了,再分别给横竖屏各写一套样式
方式一 css 控制
/* <view class="landscape">666</view> */

/* 竖屏 */
@media screen and (orientation: portrait) {
  .landscape {
    color: #f00;
  }
}

/* 横屏 */
@media screen and (orientation: landscape) {
  .landscape {
    color: #00f;
  }
}
方式二 js 控制
在 data 里定义isLandScape: false表示是否横屏,默认为竖屏
// <view :class="{'landscape': isLandScape}">666</view>
// .landscape { color: #00f; }

onResize() {
  uni.getSystemInfo({
    success: (res) => {
      if (res.windowWidth > res.windowHeight) {
        // 横屏
        this.isLandScape = true
      } else {
        // 竖屏
        this.isLandScape = false
      }
    }
  })
}