【iOS】高德地图SDK的详细使用
文章目录
- 前言
- 需要用到的库
- 显示基础地图
- 地图定位
- 位置搜索
- 路线规划
前言
关于如何调用高德地图的SDK,项目前需要下载哪些库,还有正式开始写项目前的一些注意事项可见这篇博客【iOS】调用百度、高德地图SDK
需要用到的库
PodFile中写入以下:
platform :ios, '7.0'
target '你的工程名字' do
pod 'AMap3DMap'
pod 'AMapLocation'
pod 'AMapSearch'
end
AMap3DMap是用来显示地图等有关操作的库AMapLocation是有关定位功能的库AMapSearch是用来搜索位置等功能的库
显示基础地图
- 在AppDelegate.m中,先声明好头文件
#import
- (BOOL)application:(UIApplication *)application didFinishLaunchingWithOptions:(NSDictionary *)launchOptions {
    [AMapServices sharedServices].apiKey = @"你的KEY值";
    return YES;
}
- 在
ViewController.h中,提前声明好属性,以便使用该属性
@property (strong, nonatomic) MAMapView* mapView;
- 在
ViewController.m中,以下有关于mapView的一些其他属性设置
//把地图添加至view
    _mapView = [[MAMapView alloc] initWithFrame:CGRectMake(0, [UIScreen mainScreen].bounds.size.height * 0.12, [UIScreen mainScreen].bounds.size.width, [UIScreen mainScreen].bounds.size.height * 0.88)];
    _mapView.showsIndoorMap = YES;    	//设置显示室内地图
    _mapView.zoomLevel = 18;    		//设置缩放比例
    _mapView.zoomEnabled = YES;    		//NO表示禁用缩放手势,YES表示开启
    _mapView.rotateEnabled = NO;    	//NO表示禁用旋转手势,YES表示开启
    _mapView.delegate = self;			//设置代理
    [self.view addSubview:_mapView];
- 此外,如果您需要进入地图就显示定位小蓝点,则需要下面两行代码
	开启定位
	//是否显示用户的位置
	_mapView.showsUserLocation = YES;
    _mapView.userTrackingMode = MAUserTrackingModeFollow;
地图定位
- 先声明定位的头文件
#import,再声明一个属性
@property (strong, nonatomic) AMapLocationManager* locationManager;
- 自定义一个方法对定位初始化
//初始化定位
- (void)initLocation {
 	//持续定位
    self.locationManager = [[AMapLocationManager alloc] init];
    self.locationManager.delegate = self;
    self.locationManager.distanceFilter = 10;
    [self.locationManager setLocatingWithReGeocode:YES];
    //开启持续定位
    [self.locationManager startUpdatingLocation];
}
- 下面这个是一个回调函数(定位每次改变时都会调用)
//在回调函数中,获取定位坐标,进行业务处理。
- (void)mapView:(MAMapView *)mapView didUpdateUserLocation:(MAUserLocation *)userLocation updatingLocation:(BOOL)updatingLocation {
    NSLog(@"location:{纬度:%f; 经度:%f;}", userLocation.coordinate.latitude, userLocation.coordinate.longitude);
}
位置搜索
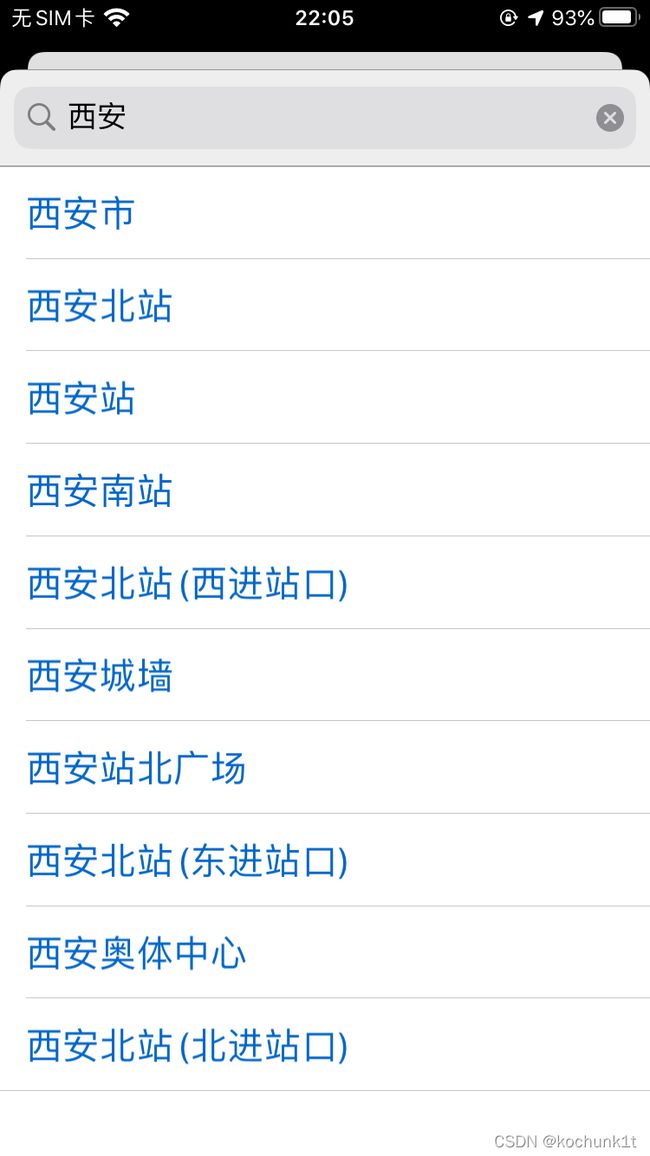
- 当我在输入框里每打出一个字,相关位置信息都会实时更改,并由
tableView展示出来 - 我新创建了一个视图控制器,专门用来呈现搜索的页面
- 这里用到了新接触的一个控件
UISearchController,专门用于搜索的一个控件 - 在新视图提前声明头文件
#import,在.h中用到了如下属性
#import "ViewController.h"
#import <AMapSearchKit/AMapSearchKit.h>

NS_ASSUME_NONNULL_BEGIN

@interface SearchViewController : UIViewController <UITextFieldDelegate, UISearchBarDelegate, UISearchResultsUpdating, UISearchControllerDelegate, UITableViewDelegate, UITableViewDataSource, AMapSearchDelegate>

@property (strong, nonatomic) NSString* searchString;
@property (strong, nonatomic) UISearchController* searchController;
@property (strong, nonatomic) UITableView* searchTableView;
@property (strong, nonatomic) NSMutableArray* listArray;
@property (strong, nonatomic) NSMutableArray* listNameArray;
@property (strong, nonatomic) AMapSearchAPI* searchAPI;

@end

NS_ASSUME_NONNULL_END
- 定义好
searchController的相关属性
	_searchController = [[UISearchController alloc] initWithSearchResultsController:nil];
    _searchTableView.tableHeaderView = _searchController.searchBar; 	//这句代码意义是将searchController添加在视图上
    _searchController.searchResultsUpdater = self;
    _searchController.searchBar.delegate = self;
    _searchController.searchBar.placeholder = @"搜索";
    _searchController.searchBar.barTintColor = [UIColor colorWithWhite:0.93 alpha:1];
- 搜索框激活时,使用提示搜索
//搜索框激活时,使用提示搜索
- (void)updateSearchResultsForSearchController:(UISearchController *)searchController {
    //发起输入提示搜索
    AMapInputTipsSearchRequest *tipsRequest = [[AMapInputTipsSearchRequest alloc] init];
    //关键字
    tipsRequest.keywords = _searchController.searchBar.text;
    //城市
    tipsRequest.city = @"西安";
    //执行搜索
    [_searchAPI AMapInputTipsSearch: tipsRequest];
}
- 实现输入提示的回调函数
//实现输入提示的回调函数
- (void)onInputTipsSearchDone:(AMapInputTipsSearchRequest*)request response:(AMapInputTipsSearchResponse *)response {
    if(response.tips.count == 0) {
        return;
    }
    //通过AMapInputTipsSearchResponse对象处理搜索结果
    //先清空数组
    [_listArray removeAllObjects];
    [_listNameArray removeAllObjects];
    for (AMapTip *obj in response.tips) {
        //把搜索结果存在数组
        [_listArray addObject:obj];
        [_listNameArray addObject:obj.name];
    }
    //_isSelected = NO;
    //刷新表视图
    [_searchTableView reloadData];
}
- 在刷新
tableView后就可以将搜索出来的相关位置展示出来了 - 之后在点击
cell后退出当前视图,并将点击的位置的相关信息通过通知传值传入到地图界面,并进行路线规划
路线规划
- 先明确起始位置和终止位置,起始位置就是自己当前的位置,终止位置就是刚才通知传值传过来的位置。
//路径规划
- (void)pathPlan {
    AMapWalkingRouteSearchRequest *navi = [[AMapWalkingRouteSearchRequest alloc] init];
    /* 出发点. */
    navi.origin = [AMapGeoPoint locationWithLatitude:_mapView.userLocation.coordinate.latitude longitude:_mapView.userLocation.coordinate.longitude];
    /* 目的地. */
    navi.destination = [AMapGeoPoint locationWithLatitude:_tipTemp.location.latitude longitude:_tipTemp.location.longitude];
    //发起路线规划
    [_searchAPI AMapWalkingRouteSearch:navi];
}
- 然后实现路径搜索的回调函数
//实现路径搜索的回调函数
- (void)onRouteSearchDone:(AMapRouteSearchBaseRequest *)request response:(AMapRouteSearchResponse *)response {
    if (response.route == nil) {
        return;
    }
    //通过AMapNavigationSearchResponse对象处理搜索结果
    NSString *route = [NSString stringWithFormat:@"Navi: %@", response.route];
    NSLog(@"%@", route);
    AMapPath *path = response.route.paths[0]; //选择一条路径
    AMapStep *step = path.steps[0]; //这个路径上的导航路段数组
    NSLog(@"%@",step.polyline);   //此路段坐标点字符串
    NSLog(@"%@",response.route.paths[0]);

    if (response.count > 0) {
        //移除地图原本的遮盖
        [_mapView removeOverlays:_pathPolylines];
        _pathPolylines = nil;

        // 只显示第⼀条 规划的路径
        _pathPolylines = [self polylinesForPath:response.route.paths[0]];
        NSLog(@"%@",response.route.paths[0]);
        //添加新的遮盖,然后会触发代理方法进行绘制
        [_mapView addOverlays:_pathPolylines];
    }
}
- 绘制遮盖时执行的代理方法
//绘制遮盖时执行的代理方法
- (MAOverlayRenderer *)mapView:(MAMapView *)mapView rendererForOverlay:(id <MAOverlay>)overlay {
    /* 自定义定位精度对应的MACircleView. */

    //画路线
    if ([overlay isKindOfClass:[MAPolyline class]]) {
       //初始化一个路线类型的view
        MAPolylineRenderer *polygonView = [[MAPolylineRenderer alloc] initWithPolyline:overlay];
        //设置线宽颜色等
        polygonView.lineWidth = 8.f;
        polygonView.strokeColor = [UIColor colorWithRed:0.015 green:0.658 blue:0.986 alpha:1.000];
        polygonView.fillColor = [UIColor colorWithRed:0.940 green:0.771 blue:0.143 alpha:0.800];
        polygonView.lineJoinType = kMALineJoinRound;//连接类型
        //返回view,就进行了添加
        return polygonView;
    }
    return nil;
}
- 路线解析
//路线解析
- (NSArray *)polylinesForPath:(AMapPath *)path {
    if (path == nil || path.steps.count == 0) {
        return nil;
    }
    NSMutableArray *polylines = [NSMutableArray array];
    [path.steps enumerateObjectsUsingBlock:^(AMapStep *step, NSUInteger idx, BOOL *stop) {
        NSUInteger count = 0;
        CLLocationCoordinate2D *coordinates = [self coordinatesForString:step.polyline
                                                         coordinateCount:&count
                                                              parseToken:@";"];
        MAPolyline *polyline = [MAPolyline polylineWithCoordinates:coordinates count:count];
        [polylines addObject:polyline];
        (void)((free(coordinates))), coordinates = NULL;
    }];
    return polylines;
}
- 解析经纬度
- (CLLocationCoordinate2D *)coordinatesForString:(NSString *)string
                            coordinateCount:(NSUInteger *)coordinateCount
                                parseToken:(NSString *)token {
    if (string == nil) {
        return NULL;
    }
    if (token == nil) {
        token = @",";
    }
    NSString *str = @"";
    if (![token isEqualToString:@","]) {
        str = [string stringByReplacingOccurrencesOfString:token withString:@","];
    }
    else {
        str = [NSString stringWithString:string];
    }
    NSArray *components = [str componentsSeparatedByString:@","];
    NSUInteger count = [components count] / 2;
    if (coordinateCount != NULL) {
        *coordinateCount = count;
    }
    CLLocationCoordinate2D *coordinates = (CLLocationCoordinate2D*)malloc(count * sizeof(CLLocationCoordinate2D));

    for (int i = 0; i < count; i++) {
        coordinates[i].longitude = [[components objectAtIndex:2 * i] doubleValue];
        coordinates[i].latitude  = [[components objectAtIndex:2 * i + 1] doubleValue];
    }
    return coordinates;
}
效果如下: