Spring Boot整合MyBatis-Plus
引言
在现代软件开发中,我们经常需要处理大量的数据。为了有效地管理这些数据,我们需要使用一些强大的框架。其中,Spring Boot和MyBatis-Plus是两个非常流行的框架。Spring Boot是一个基于Spring的开源Java框架,可以用于创建独立的、生产级别的Spring应用。MyBatis-Plus是一个MyBatis的增强工具,它在MyBatis的基础上增加了许多实用的功能,如自动分页、自动填充等。本文将详细介绍如何使用Spring Boot整合MyBatis-Plus。
Spring Boot整合MyBatis-Plus的基础配置
-
引入依赖
在pom.xml中引入MyBatis-Plus和相关数据库驱动的依赖:
            com.baomidou
            mybatis-plus-boot-starter
            3.4.3


            mysql
            mysql-connector-java
            5.1.47
-
配置数据源
在application.properties或application.yml中配置数据源信息:
spring:
  datasource:
    driver-class-name: com.mysql.jdbc.Driver
    url: jdbc:mysql://localhost:3306/mybatisplus
    username: root
    password: root
server:
  port: 8181
mybatis-plus:
  mapper-locations: classpath:/mapper/*.xml
  configuration:
    # 日志
    log-impl: org.apache.ibatis.logging.stdout.StdOutImpl
  #是否开启自动驼峰命名规则(camel case)映射,即从经典数据库列名 A_COLUMN(下划线命名)到经典 Java 属性名 aColumn(驼峰命名) 的类似映射
    map-underscore-to-camel-case: true
温馨提示
mybatis-plus:
  global-config:
    db-config:
table-prefix: tbl_ #设置所有表的通用前缀名称为tbl_-
配置MyBatis-Plus
在Spring Boot的主应用类上添加@MapperScan注解,指定Mapper接口所在的包路径:
@SpringBootApplication
@MapperScan(basePackages = "com.dao")
public class MybatisPlusApplication {
    public static void main(String[] args) {
        SpringApplication.run(MybatisPlusApplication.class, args);
    }
}
使用MyBatis-Plus进行数据访问
-
数据准备
CREATE TABLE `user` (
  `id` bigint(200) NOT NULL AUTO_INCREMENT,
  `name` varchar(20) DEFAULT NULL,
  `age` int(3) DEFAULT NULL,
  `create_time` date DEFAULT NULL,
  `update_time` date DEFAULT NULL,
  `version` bigint(10) DEFAULT NULL,
  `status` tinyint(20) DEFAULT NULL,
  `deleted` int(11) DEFAULT '0',
  PRIMARY KEY (`id`)
) ENGINE=InnoDB AUTO_INCREMENT=5 DEFAULT CHARSET=utf8-
创建实体类
@Data
@AllArgsConstructor
@NoArgsConstructor
@TableName("user")
public class User {
    @TableId(type = IdType.AUTO)
    private Long id;

    private String name;

    private Integer age;
    @JsonFormat(pattern = "yyyy-MM-dd HH:mm:ss")
    @TableField(fill = FieldFill.INSERT)
    private Date createTime;
    @JsonFormat(pattern = "yyyy-MM-dd HH:mm:ss")
    @TableField(fill = FieldFill.INSERT_UPDATE)
    private Date updateTime;

    @Version
    private Long version;

    private Integer status;

    private Integer deleted;
}-
创建Mapper接口
创建Mapper接口,继承BaseMapper接口,无需写具体的SQL语句。
public interface UserDao extends BaseMapper {

} -
创建Service接口
public interface UserService extends IService {

} -
创建Service实现类
@Service("userService")
public class UserServiceImpl extends ServiceImpl implements UserService {

} -
创建Controller类
@RestController
@RequestMapping("/user")
public class UserController {
    @Autowired
    private UserService userService;

    @GetMapping("/list")
    public List list() {
        return userService.list();
    }
}
测试应用
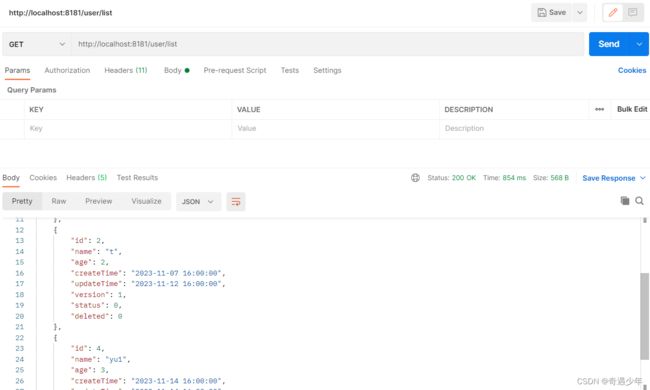
最后,我们可以运行我们的应用来进行测试。如果我们的应用能够正常运行,并且能够正确地从数据库中获取数据,那么我们就可以说我们已经成功地使用Spring Boot整合了MyBatis-Plus。
结语
Spring Boot整合MyBatis-Plus为开发者提供了一个强大而高效的数据访问解决方案。通过简单的配置,开发者可以使用MyBatis-Plus提供的便捷功能,减少了传统MyBatis开发中的样板代码,同时保留了MyBatis的灵活性。整合MyBatis-Plus的代码生成器更是提高了开发效率,使得开发者能够更专注于业务逻辑的实现。通过本文的介绍,希望读者能够深入理解Spring Boot整合MyBatis-Plus的配置和使用方法,从而更加高效地构建健壮的数据访问层。