使用nginx搭建网页
网站需求
1.基于域名[www.openlab.com](http://www.openlab.com)可以访问网站内容为 welcome to openlab!!!
2.给该公司创建三个子界面分别显示学生信息,教学资料和缴费网站,基于[www.openlab.com/student](http://www.openlab.com/student) 网站访问学生信息,[www.openlab.com/data](http://www.openlab.com/data)网站访问教学资料
[www.openlab.com/money网站访问缴费网站](http://www.openlab.com/money网站访问缴费网站)。
3.要求 (1)学生信息网站只有song和tian两人可以访问,其他用户不能访问。
(2)访问缴费网站实现数据加密基于https访问。
https简介
超文本传输协议HTTP协议被用于在Web浏览器和网站服务器之间传递信息。HTTP协议以明文方式发送内容,不提供任何方式的数据加密,如果攻击者截取了Web浏览器和网站服务器之间的传输报文,就可以直接读懂其中的信息,因此HTTP协议不适合传输一些敏感信息,比如信用卡号、密码等。为了解决HTTP协议的这一缺陷,需要使用另一种协议:安全套接字层超文本传输协议HTTPS。 HTTPS(全称:Hyper Text Transfer Protocol over Secure Socket Layer 或 Hypertext Transfer Protocol Secure,超文本传输安全协议),是以安全为目标的HTTP通道。HTTPS并不是一个新协议,而是HTTP+SSL(TLS)。原本HTTP先和TCP(假定传输层是TCP协议)直接通信,而加了SSL后,就变成HTTP先和SSL通信,再由SSL和TCP通信,相当于SSL被嵌在了HTTP和TCP之间。
思路
1、nginx的主配置文件‘vim /etc/nginx/nginx.conf’
在主配置文件中由于有include /etc/nginx/conf.d/*.conf;
他会将/etc/nginx/conf.d/目录下的所有以.conf结尾的子配置文件导入到主配置文件中加载,
所以只需在/etc/nginx/conf.d/目录下创建子配置文件配置即可。
2、创建/www/openlab/ 主目录存放网页文件
以及创建主目录下的子目录/student/ /data/ /money/ 翠芳子界面网页文件
3、创建子配置文件进行编写内容
4、安装htppd-tools,配置用户认证,并在子配置文件进行编写
5、创建https所需的密钥和数据证书,并在子配置文件对其路径进行编写
配置
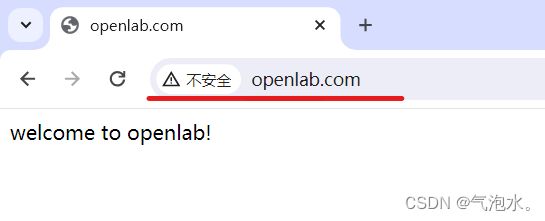
1、基于域名[www.openlab.com](http://www.openlab.com)可以访问网站内容为 welcome to openlab!!!
创建子配置文件openlab.conf文件进行配置
vim /etc/nginx/conf.d/openlab.conf # 子配置文件内容:
server {
        listen 192.168.217.133:80;        # 监听IP地址端口
        root /www/openlab;                # 主页存放路径
        server_name www.openlab.com;      # 域名
        location / {                      # location 定义用户请求的uri,并返回相应的资源文件
        }
创建/www/openlab/index.html并写入内容“ welcome to openlab!!!”
mkdir /www/openlab/ -pv # 递归创建目录
echo welcome to openlab! > /www/openlab/index.html
启动nginx服务并在浏览器测试
注意提前关闭防火墙和selinux
systemctl stop firewalld        # 关闭防火墙
setenforce 0                    # 关闭selinux
systemctl start nginx            # 开启nginx服务
2、基于上层主网站搭建子网站
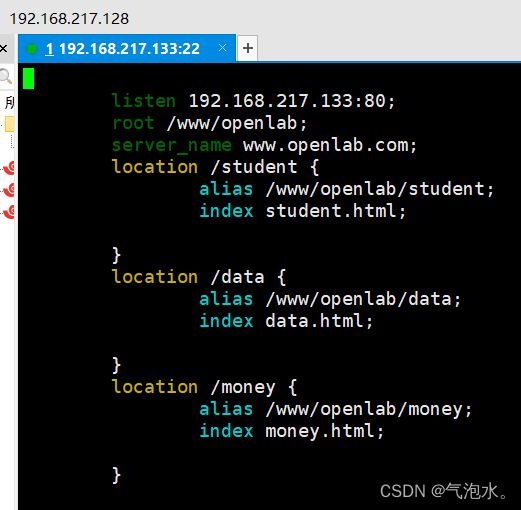
配置子配置文件openlab.conf
接着上次的内容继续编写
server {
        listen 192.168.217.133:80;
        root /www/openlab;
        server_name www.openlab.com;
# 学生信息
        location /student {                    # 基于主目录下请求子级目录的主页
                alias /www/openlab/student;    # 子路经的真实访问路径
                index student.html;            # 索引网页的文件名

        }
# 教学资料
        location /data {
                alias /www/openlab/data;
                index data.html;

        }
# 缴费网站
        location /money {
                alias /www/openlab/money;
                index money.html;

        }
}
分别创建学生信息、教学资料、缴费网站目录,并且写入内容
命令:
# 创建目录
mkdir /www/openlab/{student,data,money}  -pv

# 分别写入内容信心
echo this is student > /www/openlab/student/student.html
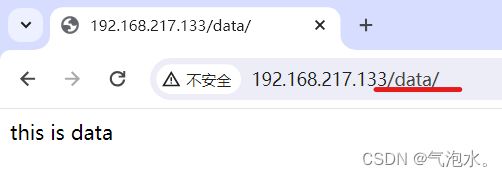
echo this is data > /www/openlab/data/data.html
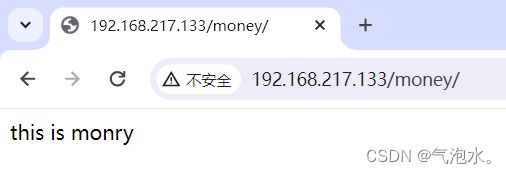
echo this is money > /www/openlab/money/money.html


# 重启nginx服务
systemctl  restart  nginx
重启nginx服务分别测试是否可以显示网页信息(在网址后面加上"/student"等即可)
3、学生信息网站只有song和tian两人可以访问,其他用户不能访问
安装httpd-tools进行用户认证配置
yum install httpd-tools -y
添加用户认证
[root@openEuler ~]# htpasswd -c /etc/nginx/conf.d/users song        # 第一次创建加-c创建文件
New password:                                # 输入密码用户
Re-type new password:                         # 再次输入确认
Adding password for user song
[root@openEuler ~]# htpasswd /etc/nginx/conf.d/users tian            # 第二次不加-c,否则覆盖上一次信息
New password:
Re-type new password:
Adding password for user tian
结果
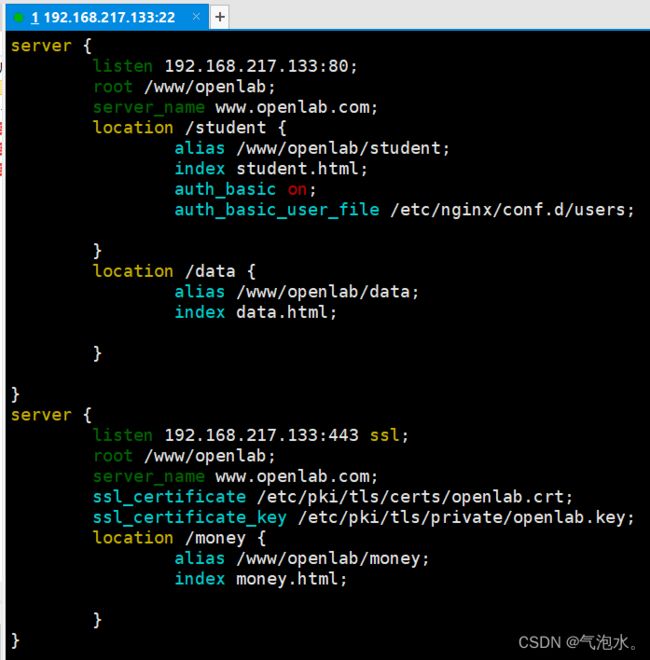
配置子配置文件,添加用户认证信息及认证的目录文件
在学生信息处添加两行配置
重启nginx服务进行测试是否有用户认证
4、访问缴费网站实现数据加密基于https访问。
创建https所需的私钥以及数字证书
# 创建密钥
[root@openEuler ~]# openssl genrsa -out /etc/pki/tls/private/openlab.key

# 创建证书
[root@openEuler ~]# openssl req -utf8 -new -key /etc/pki/tls/private/openlab.key -x509 -days 365 -out /etc/pki/tls/certs/openlab.crt
You are about to be asked to enter information that will be incorporated
into your certificate request.
What you are about to enter is what is called a Distinguished Name or a DN.
There are quite a few fields but you can leave some blank
For some fields there will be a default value,
If you enter '.', the field will be left blank.
-----
Country Name (2 letter code) [AU]:86
State or Province Name (full name) [Some-State]:shaanxi
Locality Name (eg, city) []:xi'an
Organization Name (eg, company) [Internet Widgits Pty Ltd]:openlab
Organizational Unit Name (eg, section) []:ce
Common Name (e.g. server FQDN or YOUR name) []:locahost
Email Address []:[email protected]
配置子配置文件,添加ssl密钥及证书存放路径
将上次的money进行一下重新编写,监听端口为443
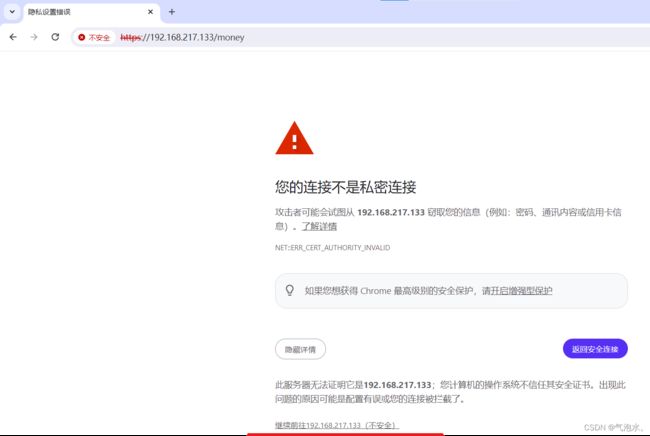
重新启动nginx服务,并且检验是否是以https访问
因为自己创建的数字证书,浏览器认为不授信,继续连接即可
5、因为www.openlab.com未备案注册,想要以域名访问需在windows或者linux的hosts文件添加映射关系,
windows:修改hosts文件方法
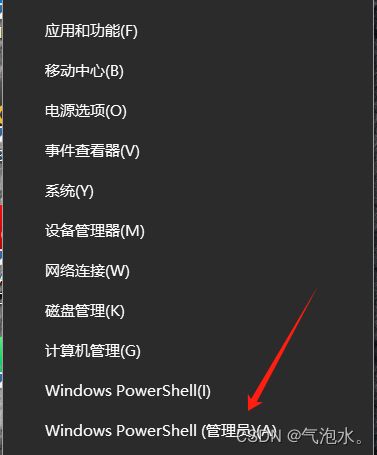
使用管理员打开记事本文件
最后一行添加映射
linux:修改hosts
vim /etc/hosts,在最后一行添加映射关系
6、测试,使用域名www.openlab.com进行访问
注意,在哪修改hosts文件就在哪个系统浏览器访问


