Django项目部署到云服务器
Django项目部署到云服务器
1.购买阿里云服务器,用xshell进行连接
记得要开启相应的端口
2.上传代码至git仓库
git init
git add .
git commit -m "first commit"
git push origin master
3.在服务器拉取相应代码
git clone xxxx
4.根据requirement.txt安装依赖
在开发机上导出
pip3 freeze > requirements.txt
查看依赖
cat requirenment.txt
上传服务器,然后在服务器安装依赖
pip install -r requirements.txt
查看已安装的依赖
pip list
5.修改settings.py中的数据库参数
DATABASES = {
    'default': {
        'ENGINE': 'django.db.backends.mysql',
        'NAME': 'house',
        'HOST': '121.41.89.89',
        'PORT': 3306,
        'USER': 'root',
        'PASSWORD': 'xxxxxxx'
    }
}
6.访问
python3 manage.py runserver 0.0.0.0:80
访问实例的公网IP地址~就可以看到你的网站啦
7.数据库
在服务器上下载安装mysql
使用Navicat连接mysql
在工具里面找到数据传输
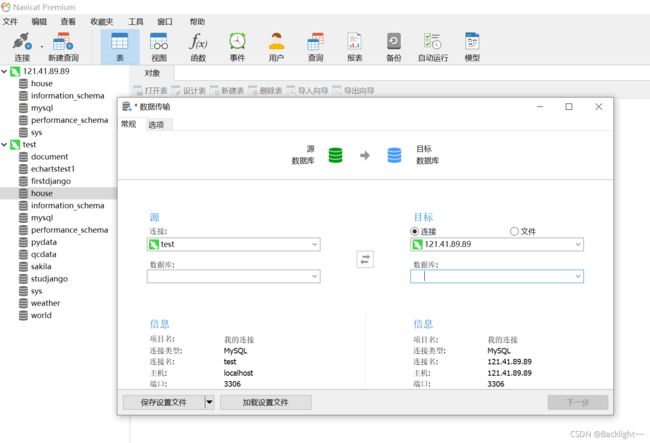
可以直接将本地的数据库传到服务器的数据库上
8.Gunicorn
下载Gunicorn
pip install gunicorn
测试Gunicorn是否能启动你的项目服务
# gunicorn --bind 0.0.0.0:8000 项目名.wsgi:application
如果报错
-bash: gunicorn: command not found
原因:未配置环境变量

解决:我安装gunicorn用的pip3,所以找到python3的bin目录,将入环境变量即可

export PATH=$PATH:/usr/local/python3/bin
也可以用守护进程的方式运行 (一直在后台运行)
# gunicorn --bind 0.0.0.0:8000 -D 项目名.wsgi:application
查看gunicorn是否成功启动
ps - ef | grep python
netstat -tpln | grep 端口号
如果发现进程被占用,使用
kill -9 进程号
杀死进程,然后重新启动
9.nginx
编辑Nginx配置文件
nginx 安装目录下,其默认的配置文件都放在这个目录的 conf 目录下,而 主配置文件
nginx.conf 也在其中,后续对 nginx 的使用基本上都是对此配置文件进行相应的修改
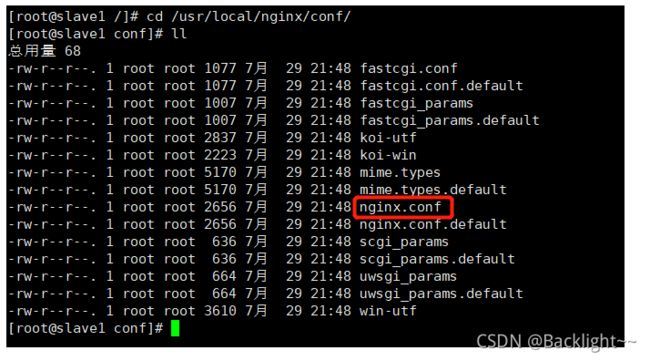
进入nginx配置目录后,打开nginx.conf
vim nginx.conf
整个配置文件如下:
user  root;
worker_processes  1;

#error_log  logs/error.log;
#error_log  logs/error.log  notice;
#error_log  logs/error.log  info;

#pid        logs/nginx.pid;

events {
    worker_connections  1024;
}

http {
    include       mime.types;
    default_type  application/octet-stream;

    #log_format  main  '$remote_addr - $remote_user [$time_local] "$request" '
    #                  '$status $body_bytes_sent "$http_referer" '
    #                  '"$http_user_agent" "$http_x_forwarded_for"';

    #access_log  logs/access.log  main;

    sendfile        on;
    #tcp_nopush     on;

    #keepalive_timeout  0;
    keepalive_timeout  65;

    #gzip  on;

    server {
        listen       80;
        server_name  121.41.89.89;

        #charset koi8-r;

        #access_log  logs/host.access.log  main;

        location /static {
            root  /root/Program/test-demo;
            autoindex on;
        }
	    location / {
            proxy_pass http://127.0.0.1:8000;

            autoindex on;
        }

        # }

        #error_page  404              /404.html;

        # redirect server error pages to the static page /50x.html
        #
        error_page   500 502 503 504  /50x.html;
        location = /50x.html {
            root   html;
        }

        # proxy the PHP scripts to Apache listening on 127.0.0.1:80
        #
        #location ~ \.php$ {
        #    proxy_pass   http://127.0.0.1;
        #}

        # pass the PHP scripts to FastCGI server listening on 127.0.0.1:9000
        #
        #location ~ \.php$ {
        #    root           html;
        #    fastcgi_pass   127.0.0.1:9000;
        #    fastcgi_index  index.php;
        #    fastcgi_param  SCRIPT_FILENAME  /scripts$fastcgi_script_name;
        #    include        fastcgi_params;
        #}

        # deny access to .htaccess files, if Apache's document root
        # concurs with nginx's one
        #
        #location ~ /\.ht {
        #    deny  all;
        #}
    }

    # another virtual host using mix of IP-, name-, and port-based configuration
    #
    #server {
    #    listen       8000;
    #    listen       somename:8080;
    #    server_name  somename  alias  another.alias;

    #    location / {
    #        root   html;
    #        index  index.html index.htm;
    #    }
    #}


    # HTTPS server
    #
    #server {
    #    listen       443 ssl;
    #    server_name  localhost;

    #    ssl_certificate      cert.pem;
    #    ssl_certificate_key  cert.key;

    #    ssl_session_cache    shared:SSL:1m;
    #    ssl_session_timeout  5m;

    #    ssl_ciphers  HIGH:!aNULL:!MD5;
    #    ssl_prefer_server_ciphers  on;

    #    location / {
    #        root   html;
    #        index  index.html index.htm;
    #    }
    #}

}
主要修改地方在这里
    server {
        listen       80;                         #  这是nginx监听的端口
        server_name  121.41.89.89;				 #  这是服务器的ip

        #charset koi8-r;

        #access_log  logs/host.access.log  main;

        location /static {                      # 这是静态资源 (动静分离)
            root  /root/Program/test-demo;
            autoindex on;
        }
	    location / {
            proxy_pass http://127.0.0.1:8000;  # 转发的地址,意思是监听到80端口就转发到127.0.0.1:8000端口(反向代理)
            autoindex on;
        }
配置完成后保存退出
在/usr/local/nginx/sbin 目录下执行
./nginx-s reload
命令总结:
进入nginx的目录    /usr/local/nginx/sbin

    1.查看nginx的版本号
        ./nginx -v
    2.查看nginx进程是否启动
    	ps -ef | grep nginx
    3.启动nginx
        ./nginx
    4.关闭nginx
        ./nginx -s stop
    5.重新加载nginx
        配置文件更改之后,需要重新加载
        ./nginx -s reload
更多nginx的知识可以查看我之前的博客https://blog.csdn.net/weixin_45730790/article/details/120047185
10.完成
现在就可以通过公网访问了
例如http://121.41.89.89/houtai/to_login/
如果还有项目要部署也是之前的操作,在nginx配置的时候多加一个server即可
**如果这篇文章对您有帮助,麻烦点赞、收藏或者关注一波哦!**