React 0基础学习路线(4)— 图解详述非受控与受控组件及属性默认值、props验证原理及children原理详述(附详细案例代码解析过程)
文章目录
- 1. 重点提炼
- 2. 表单
-
- 2. 1 example01
-
- 2. 1. 1 example01-1
- 2. 1. 2 example01-2
- 2. 1. 3 example01-3
- 3. 受控组件
-
- 3. 1 example02
-
- 3. 1. 1 example02-1
- 3. 1. 2 example02-2
- 3. 1. 3 example02-3
-
- 3. 1. 3. 1 attribute和property深入探究
- 3. 1. 3. 2 example02-2小结
- 3. 1. 4 example02-4
-
- 3. 1. 4. 1 小结
- 3. 1. 4. 2 应用场景:控制和管理用户合法输入
- 3. 1. 5 example02-5
- 3.2 input
-
- 3. 2. 1 通过受控组件,可以更加便捷的操控组件交互
- 3. 3 textarea
- 3. 4 select
-
- 3. 4. 1 多选
- 3. 4. 2 单选
- 4. 非受控组件
-
- 4. 1 example03
-
- 4. 1. 1 example03-1
- 4. 1. 2 example03-2
- 4. 2 Refs & DOM
-
- 4. 2. 1 ref 属性
-
- 4. 2. 1. 1 回调 Refs
-
- 4. 2. 1. 1. 1 example04
- 4. 2. 1. 2 React.createRef()
-
- 4. 2. 1. 2. 1 example05
- 4. 3 建议
- 5. 属性默认值
-
- 5. 1 defaultProps 静态属性
-
- 5. 1. 1 example06
-
- 5. 1. 1. 1 example06-1
- 5. 1. 1. 2 example06-2
- 5. 1. 1. 3 example06-3
- 5. 1. 2 基于 static 的写法
- 5. 2 非受控组件默认值
-
- 5. 2. 1 defaultValue 属性
- 5. 2. 2 defaultChecked 属性
- 6. props 验证
-
- 6. 1 prop-types
-
- 6. 1. 1 安装
- 6. 2 使用
-
- 6. 2. 1 example07
-
- 6. 2. 1. 1 example07-01
- 6. 2. 1. 2 example07-**02**
- 7. children
-
- 7. 1 dialog 组件
-
- 7. 1. 1 css
- 7. 1. 2 dialog.js
- 7. 1. 3 example08
-
- 7. 1. 3. 1 example08-1
- 7. 1. 3. 2 example08-2
- 7. 1. 3. 3 example08-3
- 7. 1. 4 example09
-
- 7. 1. 4. 1 example09-1
- 7. 1. 4. 2 example09-2
1. 重点提炼
- 表单
- 非受控组件和受控组件
- 受控组件:通过react来管理的组件(通过
props传递数据、onChange事件监听,来绑定表单控件的一些元素,如input输入框,其显示内容就是通过props传递数据来显示,同时监听input输入框的一些事件,来达到表单当中的内容和我们React当中state绑定的一种效果) - 非受控组件:不通过
react来管理的控件,而是通过dom元素自身来维护状态的控件
- 受控组件:通过react来管理的组件(通过
- ref
- 引用的意思,通过
ref来绑定组件(原生元素),对组件(元素)进行操作
- 引用的意思,通过
- 非受控组件和受控组件
- props 验证
- 通过
propTypes库来对组件传入的props的类型进行验证(如果使用了TS,则可以代替propTypes)
- 通过
- props 默认值
- 类似
props验证,它的作用是为传入的props进行默认值的设置
- 类似
- children
- 组件包含的内容 -
dialog - 与
vue以及 原生html中的slot(插槽)类似
- 组件包含的内容 -
2. 表单
在 React 里,HTML 表单元素的工作方式和其他的 DOM 元素有些不同。
一般来说,表单以及表单中的(受用户控制,可交互,即交互式元素)控件(如:input、select……)是页面中与 JavaScript 打交道最多的元素了。虽然我们可以通过 ref 的形式去操作它们,但是这样会比较麻烦,React.js 为我们提供了一个更好的方式把 React.js 中的数据以及逻辑与表单控件关联起来。
2. 1 example01
利用脚手架工具构建,我就不再细说,如有问题,请参考小迪之前的React文章。
2. 1. 1 example01-1
举一个例子:如何操作React的表单
react-Novice03\app\src\components\FormDemo.js
import React from 'react';
import FormDemo from "./components/FormDemo";


function App() {
  return (
    <div className="App">
      <FormDemo/>
    </div>
  );
}

export default App;
react-Novice03\app\src\App.js
import React from 'react';
import FormDemo from "./components/FormDemo";


function App() {
  return (
    <div className="App">
      <FormDemo/>
    </div>
  );
}

export default App;
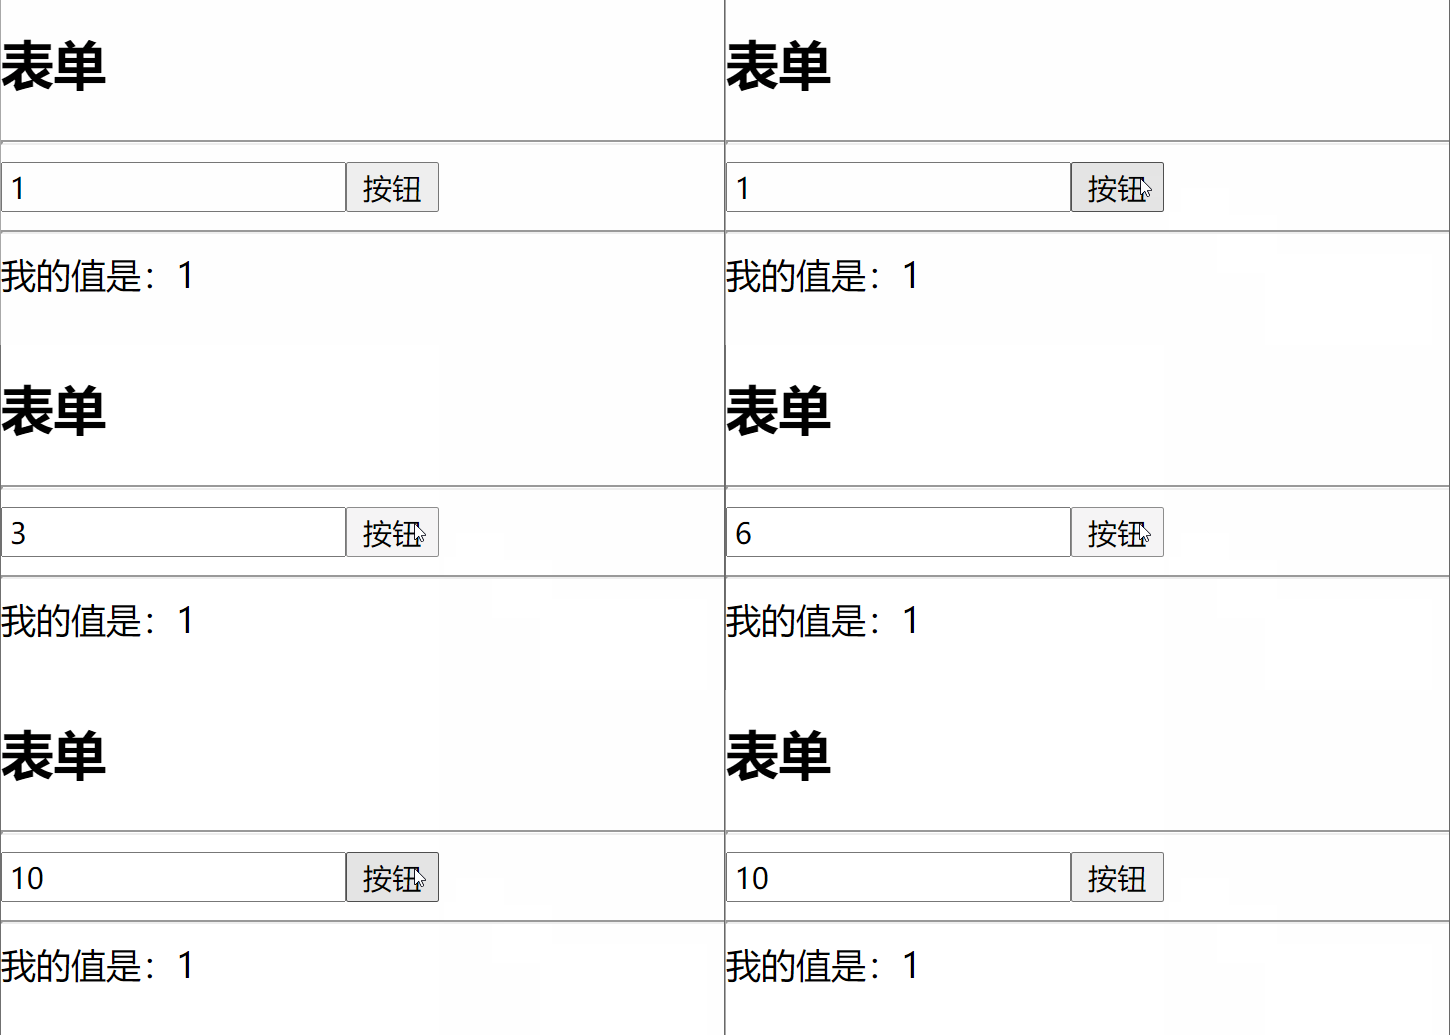
看似以上显示很正常,但我们把数据传递到表单里面了,然后在页面上往input框里输入值做修改。我们发现在页面上怎么修改都修改不成功!这是为什么呢?
因为它是非受控组件,下面我们模拟一下这个特性:非受控特性(默认情况下)。

参考:https://github.com/6xiaoDi/blog-react-Novice/tree/v1.01-1
Branch:branch2
commit description:v1.01-1-example01-1 (操作React的表单)
tag:v1.01-1
2. 1. 2 example01-2
UnControl组件其实就相当于input标签。我们往input里输入值,就相当于从外界传入了value属性,假设我们在外界想修改App中的this.state,实际就改不了(上节课知识点)。那改不了的原因是什么呢?我们再往下看。
react-Novice03\app\src\components\UnControl.js
import React from 'react';

export default class UnControl extends React.Component {

    constructor(props) {
        super(props);
    }

    render() {
        return(
            <div>
                我的值是:{this.props.value}
            </div>
        );
    }

}
react-Novice03\app\src\App.js
import React from 'react';
import FormDemo from "./components/FormDemo";
import UnControl from "./components/UnControl";


class App extends React.Component {

    constructor(props) {
        super(props);

        this.state = {
            v1: 1
        }
    }

    render() {
        return (
            <div className="App">

                <FormDemo />

                <hr/>

                <UnControl value={this.state.v1} />

            </div>
        )
    }

}

export default App;

参考:https://github.com/6xiaoDi/blog-react-Novice/tree/v1.01-2
Branch:branch2
commit description:v1.01-2-example01-2 (模拟input非受控组件)
tag:v1.01-2
2. 1. 3 example01-3
假设我们需要修改父级这个数据,我们添加事件试试:
react-Novice03\app\src\components\FormDemo.js
import React from 'react';

export default class FormDemo extends React.Component {

    constructor(props) {
        super(props);

        this.state = {
            v1: 1
        };

    }

    render() {
        return(
            <div>
                <h2>表单</h2>
                <hr/>
                <input type="text" value={this.state.v1}/>
                <button onClick={ () => {
                    this.setState({
                        v1: this.state.v1 + 1
                    })
                }}>按钮</button>
            </div>
        );
    }

}
这样是可以修改的!但是我们却不能直接修改input框里的值!
参考:https://github.com/6xiaoDi/blog-react-Novice/tree/v1.01-3
Branch:branch2
commit description:v1.01-3-example01-3 (事件修改state控制表单数据)
tag:v1.01-3
那么什么叫非受控呢?
其实表单input内部会有一个状态(私有数据),对外暴露的是一个value的props,但是对外接收到props以后,会赋值给内部这个私有状态(私有数据),而内部(非受控组件)没有提供任何方法,能去修改它的值。所以这个值我们怎么也修改不了。
其实对比理解,受控组件就是外部的用户行为可以控制组件的变化,而非受控组件则正好相反。
3. 受控组件
受控组件 : 用 props 传入数据的话,组件可以被认为是受控(因为组件被父级传入的 props 控制)
非受控组件 : 数据只保存在组件内部的 state 的话,是非受控组件(因为外部没办法直接控制 state)
广义来说,页面中的任意元素都是一个独立的组件,表单控件也是,它们内部也会维护属于自己的状态(如:value,selected,checked……),当然这些状态是由原生实现的,而非 React.js 来控制的,但是有的时候我们希望通过 React.js 来管理和维护表单控件的状态,我们把这种控件(控件)称为: 受控组件, 针对不同的组件,状态的维护方式也有所差异。
inputtextareaselect
通过 state 来控制组件状态
- 创建 state 与组件的某个状态进行绑定
- 监听组件某些事件来更新 state
反着理解上例,其实对于内部数据,外部可通过props去影响外部的数据(input组件值的变化),但是这个时候正好有一个相反的东西,是它内部数据的变化:
3. 1 example02
下面我们仔细探究一下非受控组件
3. 1. 1 example02-1
如下:假如内部的数据不绑定写死!我们还是修改不了input框里的数据。
render() {
        return(
            <div>
                <h2>表单</h2>
                <hr/>
                <input type="text" value="1"/>
                <button onClick={() => {
                    this.setState({
                        v1: this.state.v1+1
                    })
                }}>按钮</button>
            </div>
        );
    }
相信不用演示,也可以猜到,如手动修改input框中的1,肯定是没有任何反应的。因此像input内部都会维护自己的状态,除非你直接修改它的value属性,导致它的页面重新渲染。它内部的数据是内部自己维护的,我们从外部(用户行为)是无法操控的。
参考:https://github.com/6xiaoDi/blog-react-Novice/tree/v1.02-1
Branch:branch2
commit description:v1.02-1-example02-1 (指定input固定值value仍不为所动的爱情)
tag:v1.02-1
3. 1. 2 example02-2
我们再看一个例子,把state属性值,放到input和button中间。
我们把外部的值传入表单的内部,内部则会维护这个状态,即内部会有一个数据记录了我们传进去的初值。紧接着,我们希望表单当中的数据,能跟接受用户控制并且与外界的state进行关联。
我们可以通过一种方式将其变为受控型组件,是其与state相互影响。希望通过 React.js 来管理和维护表单控件的状态,我们把这种控件(控件)称为: 受控组件
希望input中的value能够随着state数据的变化而变化,即两者能够互相影响,该如何去做呢?
虽然非受控组件不受用户行为控制,但是当发生用户行为时,会触发onChange事件(注意这是原生的事件)。当这个事件触发,我们就可以搞事情了。
react-Novice03\app\src\components\FormDemo.js
import React from 'react';

export default class FormDemo extends React.Component {

    constructor(props) {
        super(props);

        this.state = {
            v1: 1
        };

        this.changeV1 = this.changeV1.bind(this);
    }

    changeV1 (e) {
        console.log('...', e.target.value);
    }

    render() {
        return(
            <div>
                <h2>表单</h2>
                <hr/>
                <input type="text" value={this.state.v1} onChange={this.changeV1}/>
                {this.state.v1}
                <button onClick={ () => {
                    this.setState({
                        v1: this.state.v1 + 1
                    })
                }}>按钮</button>
            </div>
        );
    }

}
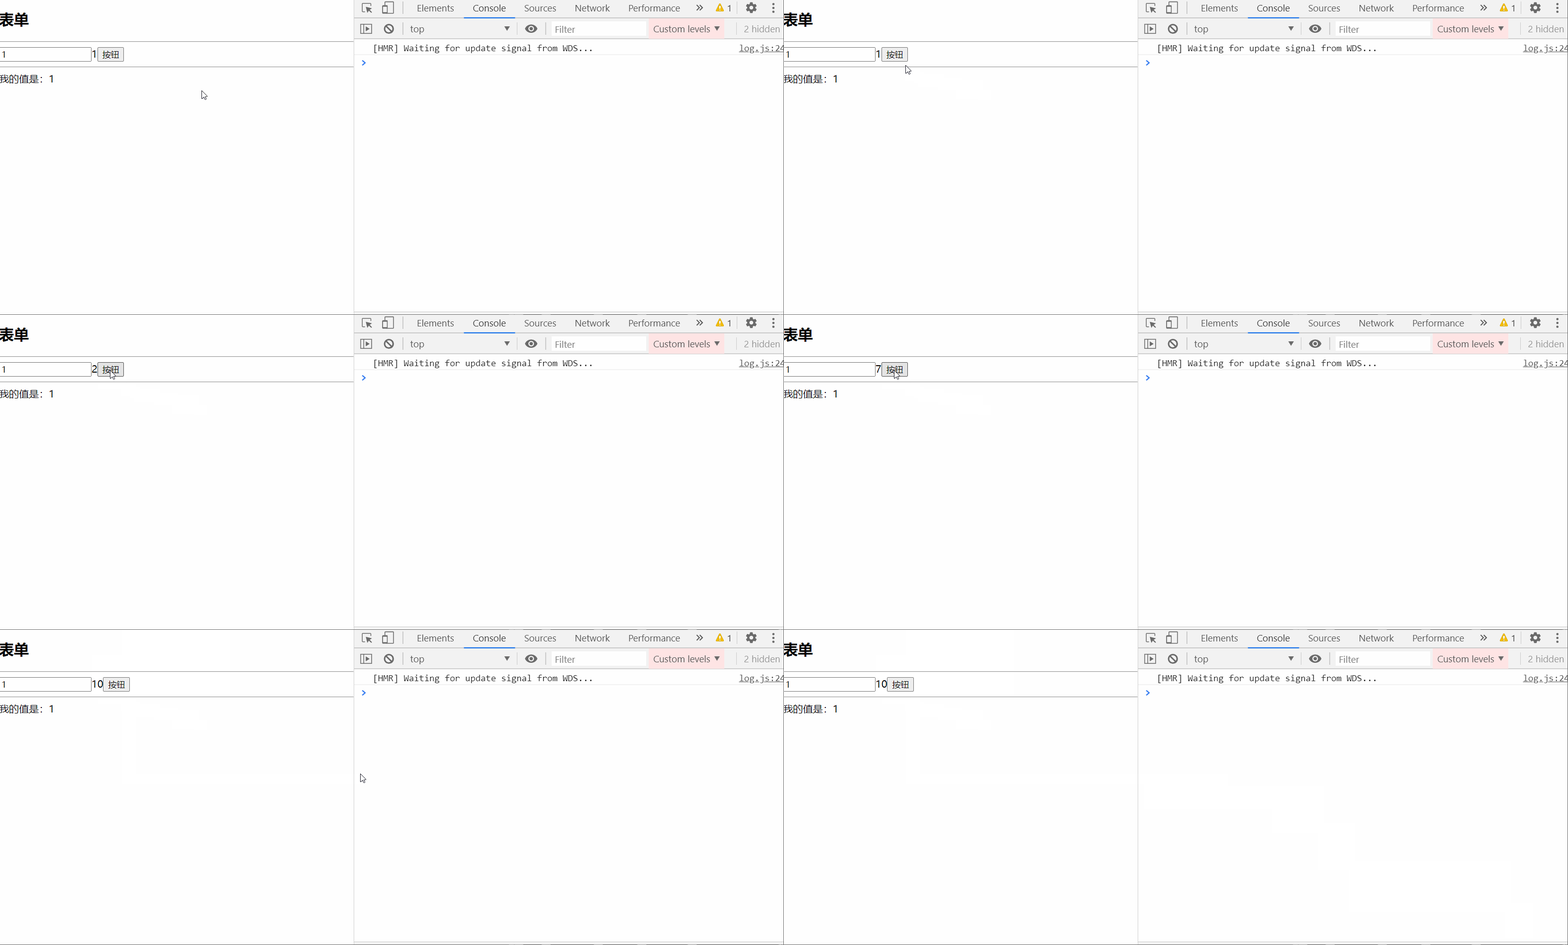
你一定会感觉很奇怪,小迪拼命往里input里输数据,为啥表单显示的值不变,而触发事件中打印的log中这个 e.target.value会发生变化呢?
参考:https://github.com/6xiaoDi/blog-react-Novice/tree/v1.02-2
Branch:branch2
commit description:v1.02-2-example02-2 (input里输数据,为啥表单显示的值不变,而触发事件中打印的log却显示呢?)
tag:v1.02-2
3. 1. 3 example02-3
我们是否掌握一个概念,叫DOM属性,了解attribute和property吗?及它两者之间的差异性。我们探究一下这里的原理。
获取一下input的value属性的方式:两中方式
js property(js对象属性)html attribute(html属性)
attribute和property.html
<html lang="en">
<head>
    <meta charset="UTF-8">
    <title>Titletitle>
head>
<body>

    <input type="text" value="1" />
    <button>按钮button>

    <script>

        let input = document.querySelector('input');
        let button = document.querySelector('button');


        button.onclick = function() {
            console.log(input.value);
            console.log(input.getAttribute('value'));
        }


    script>

body>
html>
起初我们打印的log两个属性值一致,后来我们改变input框的值,发现input.getAttribute('value')就没有同步了,这是为啥呢?
参考:https://github.com/6xiaoDi/blog-react-Novice/tree/v1.02-3
Branch:branch2
commit description:v1.02-3-example02-3(DOM属性,对attribute和property深入探究)
tag:v1.02-3
直接获取我们设置value值,我们看不出去这两种的差异!但是假若我们在浏览器中手动修改value值,就发现了两者的差异性了。这是为什么呢?
因此以上两种属性是有差异性的,第一个是js的对象属性,第二个是html的属性,但是英文单词(attribute和property)不一样!它们是有映射关系的。
3. 1. 3. 1 attribute和property深入探究
在dom解析的时候,我们经常听到dom树,dom树是什么东西,和虚拟dom是一样的,浏览器会在解析我们的html文档的时候,如果我们把html文档当作字符串去操作的话,会很麻烦的,因此做了一种关系叫对象映射,它就会分析html中的每一个元素的结构,然后把不同的元素转成js中对象去表示。就相当于我们想操作界面元素的话,直接去操作对应的对象就行了。因为它们在解析过程中会有对应关系,即映射关系,然后它内部又会做一件事,当我们去操作js当中对象的时候,它就会影响(重新渲染/重绘)我们的html。但是就如上面的代码,我们定义input对象,并不完全等于html上的input标签。
这里发现操作浏览器上的input的value值,实际操作的是js对象,而未对html标签的value值产生任何的影响!
但是我们还会发现一个现象,我们通过浏览器的F12工具栏中的Elements删除input标签,但是我们的input的js对象还是可以运行,并且也可以输出input.value。因为js中的这个对象是没有消除的,因为它是将html标签作为参考而生成的对象,并且它不等同于html元素标签。
因此回归正题,我们在浏览器里看到的value只是html标签的中value值,刚刷新页面的时候打印出来,两者的值一样。但是当我们修改了页面的input框,只是修改了映射出来的js对象的value值,并没有改变标签里的value属性。
我们还有一种做法,直接通过F12工具栏中的Elements去修改input的value值,当页面元素发生改变了以后,即当页面更新的时候,页面会动态获取,重新映射导致两个值一致了!
3. 1. 3. 2 example02-2小结
回到我们正文的React。
因此我们输入内容以后,onChange事件处理函数中的e.target.value仍然可获取。我们当前的value值是根据this.state.v1渲染出来的的,虽然我们在内部把这个原生js的元素的对象value值改了,就相当于改了input.value,但是并没有反馈到当前this.state上。
3. 1. 4 example02-4
无法修改当前this.state.v1的值,因此我们需要在触发的事件中做处理!
react-Novice03\app\src\components\FormDemo.js
import React from 'react';

export default class FormDemo extends React.Component {

    constructor(props) {
        super(props);

        this.state = {
            v1: 1
        };

        this.changeV1 = this.changeV1.bind(this);
    }

    changeV1 (e) {
        this.setState({
            v1: e.target.value
        })
    }

    render() {
        return(
            <div>
                <h2>表单</h2>
                <hr/>
                <input type="text" value={this.state.v1} onChange={this.changeV1}/>
                {this.state.v1}
                <button onClick={ () => {
                    this.setState({
                        v1: this.state.v1 + 1
                    })
                }}>按钮</button>
            </div>
        );
    }

}
组件这就受控了。
因此当我们操作input改变其value的时候,它内部会自己修改value值了,但是又不受外界的控制(不影响外层的(props)页面显示),我们的value根据this.state.v1来渲染,但内部value的变化又不会影响this.state.v1,所以导致最终input框的值未发生更改。要想改,就需要传入一个onChange事件即可。
参考:https://github.com/6xiaoDi/blog-react-Novice/tree/v1.02-4
Branch:branch2
commit description:v1.02-4-example02-4(成功将非受控组转化为受控组件)
tag:v1.02-4
3. 1. 4. 1 小结
其实默认情况下,把input标签当成一个组件就可以了,组件内部数据状态(state)的变化,它不会主动影响外界传进来的(原生js)props的,导致我们最终看到的界面就是,input标签的value根据this.state.v1进行渲染,即页面上input框的值根据this.state进行渲染,但是内部的状态变化又不会更改从外部传入的this.state.v1,所以看到效果就是我们输入的值不会显示在input框上。那么我们想利用React的外部props去控制input的数据,就只能采取事件的形式了。
3. 1. 4. 2 应用场景:控制和管理用户合法输入
修改需求:用户不管输入什么,都需要转成大写!我们只需要控制好数据,再去渲染即可。
changeV1(e) {
    console.log('...', e.target.value);
    this.setState({
        v1: e.target.value.toUpperCase()
    })
}
这里就不放案例代码,大家自己去整吧!
3. 1. 5 example02-5
回归主题,我们这里讲的是非受控组件,input标签value值的变化,只能通过内部去改变,但是在外部用户输入等外部行为,是不能改变改value值的!而我们在onChange事件中,改变state的时候,会重新渲染(调用setState方法的缘故)input的。其实就是我们第一次将v1传给非受控组件时页面渲染,会解析并同步js和html的属性值,但后面我们使js的value变了,除非你让其重新渲染,否则标签的value值肯定没有变化的,也不可能改变v1的值,因为我们无法从外界直接访问state属性的。
并且我们在起初写这个代码的时候,会发现浏览器报错!
import React from 'react';

export default class FormDemo extends React.Component {

    constructor(props) {
        super(props);

        this.state = {
            v1: 1
        };

    }

    render() {
        return(
            <div>
                <h2>表单</h2>
                <hr/>
                <input type="text" value={this.state.v1}/>
                {this.state.v1}
                <button onClick={() => {
                    this.setState({
                        v1: this.state.v1+1
                    })
                }}>按钮</button>
            </div>
        );
    }

}
有一个有问题的prop类型,你提供了一个value属性给表单控件,但是又没提供一个onChange的处理函数,这个时候就出问题了。
因此如果你希望处理当前问题,请提供onChange函数。
但是假若我们后续不需要改这个input值(只涉及一个初值即可),怎么解决这个报错问题呢?可以用defaultValue属性。
    render() {
        return(
            <div>
                <h2>表单</h2>
                <hr/>
                <input type="text" defaultValue={this.state.v1}/>
                {/**/}
                {this.state.v1}
                <button onClick={() => {
                    this.setState({
                        v1: this.state.v1+1
                    })
                }}>按钮</button>
            </div>
        );
    }
参考:https://github.com/6xiaoDi/blog-react-Novice/tree/v1.02-5
Branch:branch2
commit description:v1.02-5-example02-5(假若我们后续不需要改这个input值(只涉及一个初值即可),可以用defaultValue属性解决报错问题。)
tag:v1.02-5
同样的后面讲的textarea和select标签也是同样的原理。
3.2 input
class ControlledComponent extends React.Component {

    constructor(args) {
        super(args);
        this.state = {
            v1: '1'
        };
        this.changeValue = this.changeValue.bind(this);
    }

    changeValue({target:{value:v1}}) {
        this.setState({
            v1
        });
    }

    render() {
        return(
            <div>
                <input type="text" value={this.state.v1} onChange={this.changeValue} />
            </div>
        );
    }
}
3. 2. 1 通过受控组件,可以更加便捷的操控组件交互
...
changeValue({target:{value}}) {
      this.setState({
            v1: value.toUpperCase()
      });
}
...
3. 3 textarea
textarea 与 input 类似,但是需要注意的是: 使用 value ,而不是 内容(innerHTML)
// 正确
<textarea value={this.state.v2} onChange={this.changeValue2} cols="30" rows="10"></textarea>
// 错误
<textarea onChange={this.changeValue2} cols="30" rows="10">{this.state.v2}</textarea>
3. 4 select
select 在 React.js 中也做了一些处理,不在是通过 selected 属性来表示选中元素,而是通过 select 标签的 value 属性
<select value={this.state.v3} onChange={this.changeValue3}>
    <option value="html">html</option>
    <option value="css">css</option>
    <option value="javascript">javascript</option>
</select>
3. 4. 1 多选
我们还可以设置多选 select,对应的 value 就是一个数组。
option的值存在state的数组中,就会被选中。
...
this.state = {
      v4: ['html', 'javascript']
}
...

...
changeValue4({target:{options}}) {
  this.setState({
    v4: [...options].filter(o=>o.selected).map(o=>o.value)
  });
}
...

...
<select value={this.state.v4} onChange={this.changeValue4} multiple>
    <option value="html">html</option>
    <option value="css">css</option>
    <option value="javascript">javascript</option>
</select>
...
3. 4. 2 单选
radio 和下面的 checkbox 需要注意的是,受控的属性不在是 value ,而是 checked
...
this.state = {
      v5: '女',
        v6: ['前端', '后端'],
}

...
changeValue5(e) {
    this.setState({
          v5: e.target.value
    });
}

changeValue6({target:{value}}) {
    let {v6} = this.state;
    if (v6.includes(value)) {
          v6 = v6.filter(v=>v!==value);
    } else {
          v6.push(value)
    }
    this.setState({
          v6
    });
}
...

...
<label><input name="gender" type="radio" value="男" checked={this.state.v5==='男'} onChange={this.changeValue5} />男</label>
<label><input name="gender" type="radio" value="女" checked={this.state.v5==='女'} onChange={this.changeValue5} />女</label>

<label><input name="interest" type="checkbox" value="前端" checked={this.state.v6.includes('前端')} onChange={this.changeValue6} />前端</label>
<label><input name="interest" type="checkbox" value="后端" checked={this.state.v6.includes('后端')} onChange={this.changeValue6} />后端</label>
...
4. 非受控组件
话又说回来,通过上面的学习,我们知道,每个受控组件,且不同的类型的受控组件它能控制的状态只有那么一些:value、checked,但是实际上一个组件的状态远远不止这些,比如 input 的焦点、禁用、只读 等,都是组件的状态,如果每一个状态都通过上面的方式来管理,就会特别的麻烦了。这个时候,我们就需要用其他方式来处理了:DOM
4. 1 example03
但是利用原生dom必然会有弊端,我们举个例子看看。
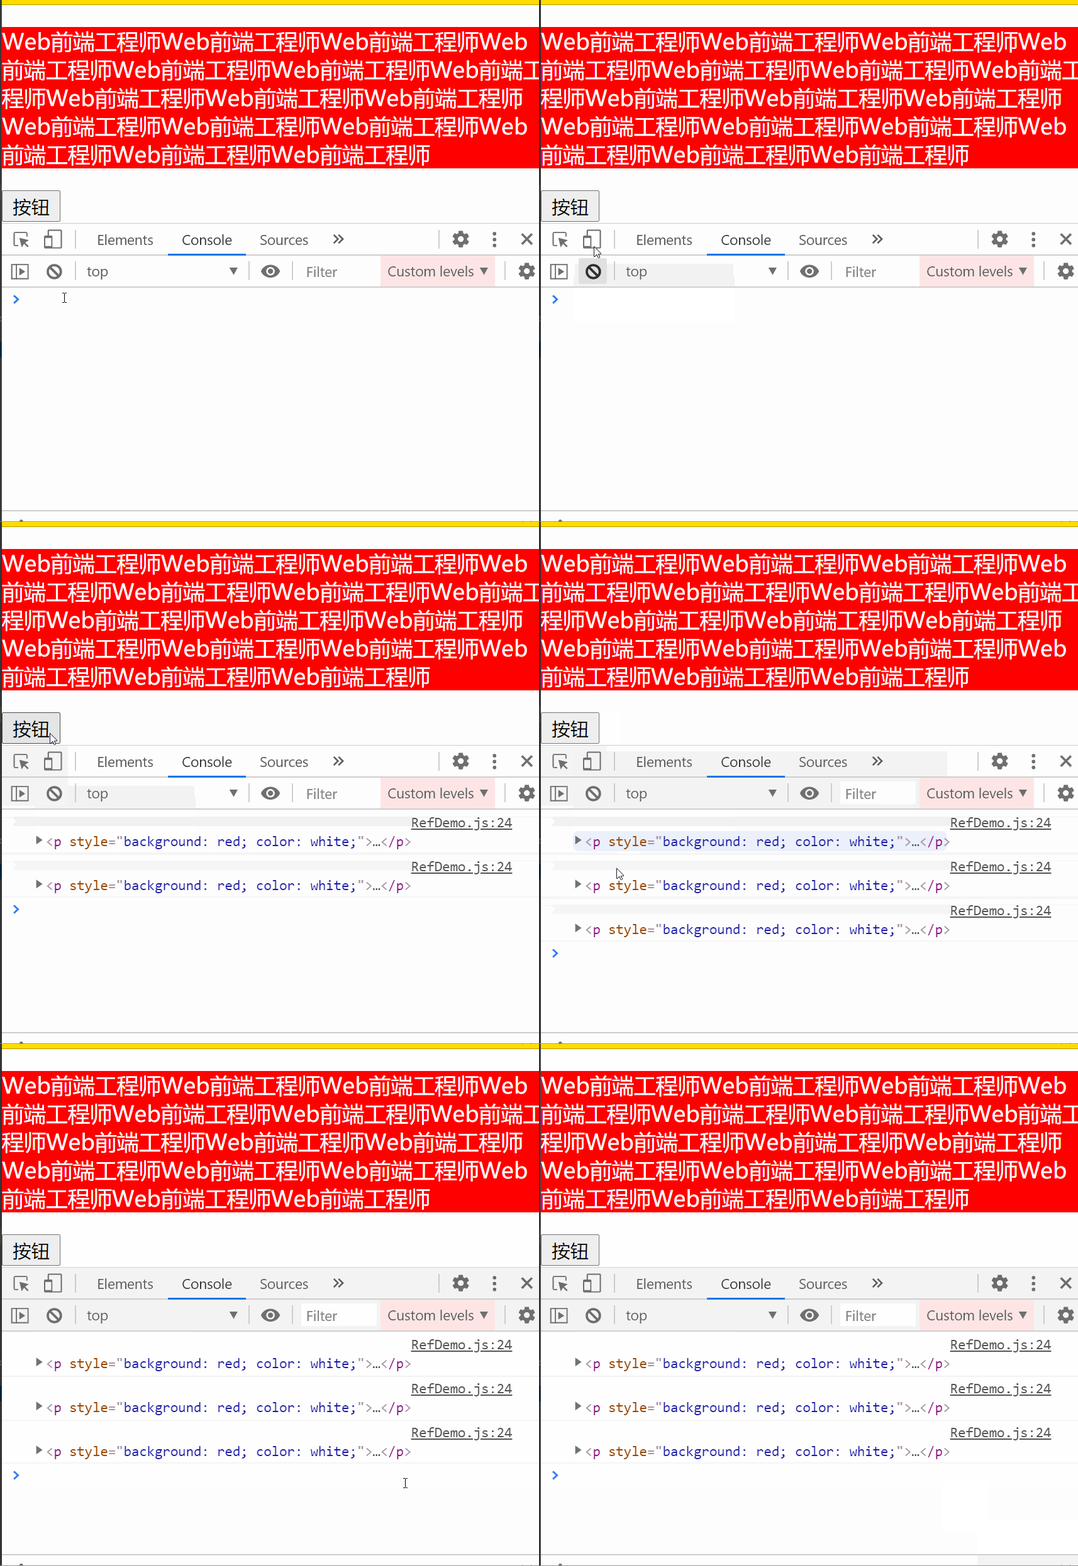
需求:点击按钮,动态获取p标签内容高度。
4. 1. 1 example03-1
React内是没有方法可以用的,我们还是得进行dom操作。因此有了框架之后,就避免所有的dom操作是不现实的,因此如果开发组件和库的话,甚至开发过程中稍微顶层一点,原生dom操作是无法避免的。
react-Novice03\app\src\components\RefDemo.js
import React from 'react';

export default class UnControl extends React.Component {

    constructor(props) {
        super(props);

        this.state = {
            content: 'Web前端工程师Web前端工程师Web前端工程师Web前端工程师Web前端工程师Web前端工程师Web前端工程师Web前端工程师Web前端工程师Web前端工程师Web前端工程师Web前端工程师Web前端工程师Web前端工程师Web前端工程师Web前端工程师'
        };

        this.getHeight = this.getHeight.bind(this);
    }

    getHeight() {
        let p = document.querySelector('p');
        console.log(p);
    }

    render() {
        return(
            <div>
                <p style={{background: 'red', color: 'white'}}>{this.state.content}</p>
                <button onClick={this.getHeight}>按钮</button>
            </div>
        );
    }

}
参考:https://github.com/6xiaoDi/blog-react-Novice/tree/v1.03-1
Branch:branch2
commit description:v1.03-1-example03-1(需求:点击按钮,动态获取p标签内容高度。dom操作。)
tag:v1.03-1
4. 1. 2 example03-2
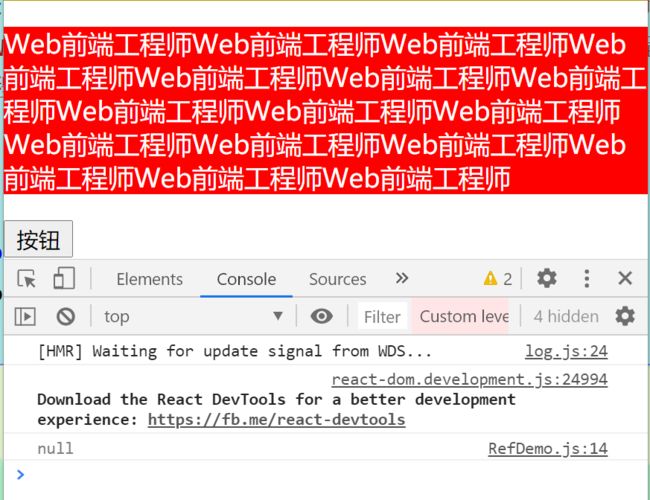
以上例子,当我们点击按钮的时候,p标签已经出现在页面上了(已经渲染出来了)。但有时候组件还没渲染出来,我们就获取它的dom节点。如在构造函数中:
    constructor(props) {
        super(props);

        this.state = {
            content: 'Web前端工程师Web前端工程师Web前端工程师Web前端工程师Web前端工程师Web前端工程师Web前端工程师Web前端工程师Web前端工程师Web前端工程师Web前端工程师Web前端工程师Web前端工程师Web前端工程师Web前端工程师Web前端工程师'
        };

        this.getHeight = this.getHeight.bind(this);
        let p = document.querySelector('p');
        console.log(p);
    }
此时获取就是null,因为在constructor执行的时候,render方法还未执行。
因此这种dom获取节点的方式,其实是不推荐的。
参考:https://github.com/6xiaoDi/blog-react-Novice/tree/v1.03-2
Branch:branch2
commit description:v1.03-2-example03-2(需求:点击按钮,动态获取p标签内容高度。dom操作弊端。)
tag:v1.03-2
4. 2 Refs & DOM
React.js 提供了多种方式来获取 DOM 元素
- 回调 Refs
- React.createRef()
4. 2. 1 ref 属性
无论是 回调 Refs 还是 React.createRef(),都需要通过一个属性 ref 来进行设置
<input ref={?} />
4. 2. 1. 1 回调 Refs
这种方式,我们在前面已经使用过了
class UnControlledComponent extends React.Component {
      constructor(props) {
          super(props);
          this.selectURL = this.selectURL.bind(this);
        this.getElementInfo = this.getElementInfo.bind(this);
      }

      selectURL() {
        this.refInput.select();
    }

    getElementInfo() {
        this.refDiv.getBoundingClientRect()
    }

      render() {
        return (
            <input ref={el => this.refInput = el} type="text" value="http://www.baidu.com" />
            <button onClick={this.selectURL}>点击复制</button>
            <hr/>
            <button onClick={this.getElementInfo}>获取元素信息</button>
            <div ref={el => this.refDiv = el} style={{width: '100px', height:'100px',background:'red'}}></div>
        )
    }
}
4. 2. 1. 1. 1 example04
ref可以传回调函数,其实它本身类似于回调函数。
如下代码,当React解析下面的p标签的时候,它发现这里有一个ref属性,并且其值是一个函数,那这个函数就会执行了。并且这个回调函数会接受一个参数,我们打印可以得到,它实际是就是这个元素。那如何实现动态获取高度呢?我们不能在这里获取,因为是点击按钮以后才获取高度的。我们可以在对象里定一个自定义属性,当ref属性被解析后,我们就赋值给该属性。当我们点击的时候,直接获取该属性下的高度即可。这样就免去了每次都需要获取dom节点了,因为在对象中原生dom操作,在构造函数中获取到全局对象必然是null(刚刚讲了原因),所以用原生的话,每个函数要用到该节点都得重新获取,会显得非常麻烦和冗余。并且原生中,你万一不确定是否解析完成,就获取成null了。而用ref,必然是解析过后才能得到的。
react-Novice03\app\src\components\RefDemo.js
import React from 'react';

export default class UnControl extends React.Component {

    constructor(props) {
        super(props);

        this.state = {
            content: 'Web前端工程师Web前端工程师Web前端工程师Web前端工程师Web前端工程师Web前端工程师Web前端工程师Web前端工程师Web前端工程师Web前端工程师Web前端工程师Web前端工程师Web前端工程师Web前端工程师Web前端工程师Web前端工程师'
        };

        this.getHeight = this.getHeight.bind(this);
        this.refE1 = null;
    }

    getHeight() {
        console.log(this.refEl.offsetHeight)
    }

    render() {
        return(
            <div>
                <button onClick={this.getHeight}>按钮</button>
                <p ref={el => {
                    console.log('...', el)
                    {
                        this.refEl = el;
                    }
                }} style={{background: 'red', color: 'white'}}>{this.state.content}</p>

            </div>
        );
    }

}
参考:https://github.com/6xiaoDi/blog-react-Novice/tree/v1.04
Branch:branch2
commit description:v1.04-example04(需求:点击按钮,动态获取p标签内容高度。回调Refs实现。)
tag:v1.04
4. 2. 1. 2 React.createRef()
该方法返回一个 ref 对象,在 jsx 通过 ref 属性绑定该对象,该对象下的 current 属性就指向了绑定的元素或组件对象
class ChildComponent extends React.Component {
    constructor(props) {
        super(props);
    }

    hello() {
        console.log('ChildComponent');
    }

    render() {
        return(
            <div>
                <h2>ChildComponent</h2>
            </div>
        );
    }
}

class UnControlledComponent extends React.Component {
      constructor(props) {
          super(props);
          this.selectURL = this.selectURL.bind(this);
        this.getElementInfo = this.getElementInfo.bind(this);

          this.refInput = React.createRef();
        this.refDiv = React.createRef();
        this.refChild = React.createRef();
      }

      selectURL() {
        this.refInput.current.select();
    }

    getElementInfo() {
        this.refDiv.current.getBoundingClientRect()
    }

      getElementInfo() {
        this.refChild.current;
    }

      render() {
        return (
            <input ref={this.refInput} type="text" value="http://kaikeba.com" />
            <button onClick={this.selectURL}>点击复制</button>
            <hr/>
            <button onClick={this.getElementInfo}>获取元素信息</button>
            <div ref={this.refDiv} style={{width: '100px', height:'100px',background:'red'}}></div>
              <hr/>
            <ChildComponent ref={this.refChild} />
            <button onClick={this.getReactComponent}>获取 React 实例对象</button>
        )
    }
}
4. 2. 1. 2. 1 example05
import React from 'react';
export default class UnControl extends React.Component {
constructor(props) {
super(props);
this.state = {
content: 'Web前端工程师Web前端工程师Web前端工程师Web前端工程师Web前端工程师Web前端工程师Web前端工程师Web前端工程师Web前端工程师Web前端工程师Web前端工程师Web前端工程师Web前端工程师Web前端工程师Web前端工程师Web前端工程师'
};
this.getHeight = this.getHeight.bind(this);
this.refE1 = null;
// 自动生成帮助赋值节点的函数,但是并不是直接就是这个元素标签,得到是一个对象,对象内的current才是真正的标签对象
this.refEl2 = React.createRef();
}
getHeight() {
console.log(this.refEl2);
console.log(this.refEl2.current.offsetHeight);
}
render() {
return(
<div>
<button onClick={this.getHeight}>按钮</button>
{/* {*/
}
{/* console.log('...', el)*/}
{/* {*/}
{/* this.refEl = el;*/}
{/* }*/}
{/*}} style={{background: 'red', color: 'white'}}>{this.state.content}*/}
<p ref={this.refEl2} style={{background: 'red', color: 'white'}}>{this.state.content}</p>
</div>
);
}
}
参考:https://github.com/6xiaoDi/blog-react-Novice/tree/v1.05
Branch:branch2
commit description:v1.05-example05(需求:点击按钮,动态获取p标签内容高度。React.createRef()实现。)
tag:v1.05
4. 3 建议
- 尽量避免从 props 中派生 state
- 尽量使用 props,避免使用 state
5. 属性默认值
5. 1 defaultProps 静态属性
defaultProps 可以为 Class 组件添加默认 props。这一般用于 props 未赋值,但又不能为 null 的情况
注意:defaultProps 是 Class 的属性,也就是静态属性,不是组件实例对象的属性
class MyComponent extends React.Component {
constructor(props) {
super(props);
}
render() {
return(
MyComponent - {this.props.max}
);
}
}
MyComponent.defaultProps = {
max: 10
}
ReactDOM.render(
5. 1. 1 example06
5. 1. 1. 1 example06-1
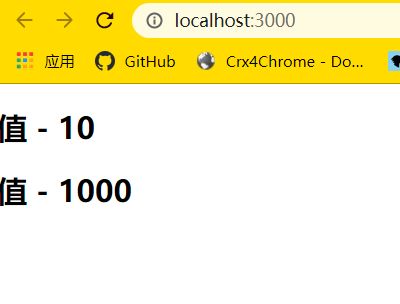
引例
react-Novice03\app\src\components\PropsDefaultValueDemo.js
import React from 'react';

export default class PropsDefaultValueDemo extends React.Component {

    constructor(props) {
        super(props);
    }

    render() {
        return(
            <div>
                <h2>值 - {this.props.max}</h2>
            </div>
        );
    }

}
react-Novice03\app\src\App.js
import React from 'react';
import FormDemo from "./components/FormDemo";
import UnControl from "./components/UnControl";
import RefDemo from "./components/RefDemo";
import PropsDefaultValueDemo from "./components/PropsDefaultValueDemo";
class App extends React.Component {
constructor(props) {
super(props);
this.state = {
v1: 1
}
}
render() {
return (
<div className="App">
{/*
*/}
{/*参考:https://github.com/6xiaoDi/blog-react-Novice/tree/v1.06-1
Branch:branch2
commit description:v1.06-1-example06-1(属性默认值-引例)
tag:v1.06-1
5. 1. 1. 2 example06-2
组件其实就是函数,有的时候我们需要在组件内部控制外界传入的参数是否合法。并且有的时候没有传值,我们也希望其可以显示一个默认值。
可以用逻辑或
react-Novice03\app\src\components\PropsDefaultValueDemo.js
import React from 'react';

export default class PropsDefaultValueDemo extends React.Component {

    constructor(props) {
        super(props);
    }

    render() {
        let max = this.props.max || 1;
        return(
            <div>
                <h2>值 - {max}</h2>
            </div>
        );
    }

}
react-Novice03\app\src\App.js
import React from 'react';
import FormDemo from "./components/FormDemo";
import UnControl from "./components/UnControl";
import RefDemo from "./components/RefDemo";
import PropsDefaultValueDemo from "./components/PropsDefaultValueDemo";
class App extends React.Component {
constructor(props) {
super(props);
this.state = {
v1: 1
}
}
render() {
return (
<div className="App">
{/*
*/}
{/*<PropsDefaultValueDemo max={1000} />
参考:https://github.com/6xiaoDi/blog-react-Novice/tree/v1.06-2
Branch:branch2
commit description:v1.06-2-example06-2(属性默认值-用逻辑
或)tag:v1.06-2
5. 1. 1. 3 example06-3
react-Novice03\app\src\components\PropsDefaultValueDemo.js
import React from 'react';

export default class PropsDefaultValueDemo extends React.Component {

    /**
     * 给当前组件的props设置默认值
     */
    static defaultProps = {
        max: 10
    };

    constructor(props) {
        super(props);
    }

    render() {
        return(
            <div>
                <h2>值 - {this.props.max}</h2>
            </div>
        );
    }

}
参考:https://github.com/6xiaoDi/blog-react-Novice/tree/v1.06-2
Branch:branch2
commit description:v1.06-3-example06-3(属性默认值-defaultProps)
tag:v1.06-3
5. 1. 2 基于 static 的写法
class MyComponent extends React.Component {
      static defaultProps = {
          max: 10
    }
    constructor(props) {
        super(props);
    }

    render() {
        return(
            <div>
                <h2>MyComponent - {this.props.max}</h2>
            </div>
        );
    }
}

ReactDOM.render(
    <MyComponent />,
    document.getElementById('app')
);
5. 2 非受控组件默认值
有的时候,我们希望给一个非受控组件一个初始值,但是又不希望它后续通过 React.js 来绑定更新,这个时候我们就可以通过 defaultValue 或者 defaultChecked 来设置非受控组件的默认值
5. 2. 1 defaultValue 属性
<input type="text" defaultValue={this.state.v1} />
5. 2. 2 defaultChecked 属性
<input type="checkbox" defaultChecked={this.state.v2}  />
<input type="checkbox" defaultChecked={this.state.v3}  />
6. props 验证
随着应用的不断增长,也是为了使程序设计更加严谨,我们通常需要对数据的类型(值)进行一些必要的验证,React.js 提供了一个验证库:prop-types
主要是对传入对props参数对数据类型进行安全(合法性)验证,主要进行类型验证。不过还是推荐使用typescript做验证,它的功能更为强大,官方也是推荐使用ts。但两者是有差异的,ts是在编译过程中作类型检测,prop-types是针对代码层面的,还会附件一些功能。
6. 1 prop-types
prop-types 是一个独立的库,需要安装
https://www.npmjs.com/package/prop-types
6. 1. 1 安装
npm i -S prop-types
6. 2 使用
import PropTypes from 'prop-types';
它的使用并不复杂,与 defaultProps 类似,我们在组件类下添加一个静态属性 propTypes ,它的值也是一个对象,key 是要验证的属性名称,value 是验证规则
MyComponent.propTypes = {
// You can declare that a prop is a specific JS primitive. By default, these
// are all optional.(提供的验证函数如下)
optionalArray: PropTypes.array, // 是不是数组
optionalBool: PropTypes.bool,
optionalFunc: PropTypes.func, // 是不是函数
optionalNumber: PropTypes.number,
optionalObject: PropTypes.object, // 是不是对象
optionalString: PropTypes.string,
optionalSymbol: PropTypes.symbol,
// Anything that can be rendered: numbers, strings, elements or an array
// (or fragment) containing these types.
optionalNode: PropTypes.node, // 是不是node节点
// A React element (ie. 6. 2. 1 example07
使用演示。
6. 2. 1. 1 example07-01
react-Novice03\app\src\components\PropTypesDemo.js
import React from 'react';
import PropTypes from 'prop-types';

export default class PropTypesDemo extends React.Component {

    static propTypes = {
        // 会把props的值传给PropTypes.number函数,对其进行数字验证。如果没满足要求则抛出一个错误。
        max: PropTypes.number
    };

    constructor(props) {
        super(props);
    }

    render() {
        return(
            <div>
                <h2>值 - {this.props.max}</h2>
            </div>
        );
    }

}
react-Novice03\app\src\App.js
import React from 'react';
import FormDemo from "./components/FormDemo";
import UnControl from "./components/UnControl";
import RefDemo from "./components/RefDemo";
import PropsDefaultValueDemo from "./components/PropsDefaultValueDemo";
import PropTypesDemo from "./components/PropTypesDemo";
class App extends React.Component {
constructor(props) {
super(props);
this.state = {
v1: 1
}
}
render() {
return (
<div className="App">
{/*
*/}
{/*<PropTypesDemo max={'csdn'} />
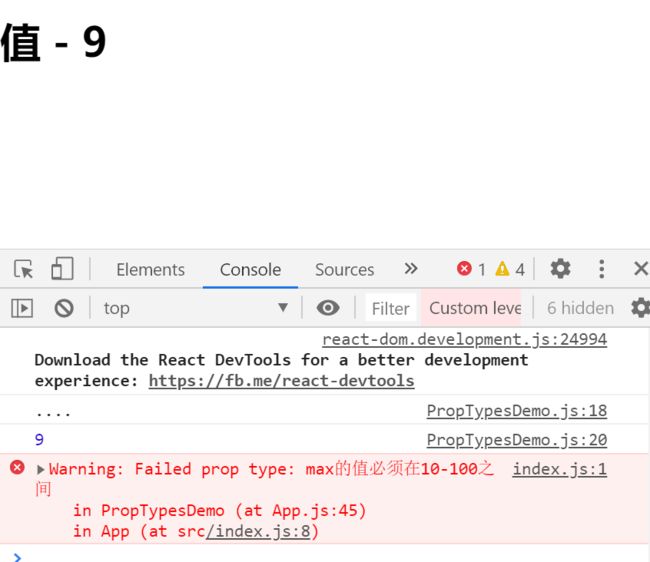
报错:有一个不可接受的(失败的)props类型数据,string类型的,但我们只允许number。
必传参,不能省略
max: PropTypes.any.isRequired
参考:https://github.com/6xiaoDi/blog-react-Novice/tree/v1.07-1
Branch:branch2
commit description:v1.07-1-example07-1(props验证测试)
tag:v1.07-1
6. 2. 1. 2 example07-02
需求:max的值必须在10-100之间
react-Novice03\app\src\components\PropTypesDemo.js
import React from 'react';
import PropTypes from 'prop-types';

export default class PropTypesDemo extends React.Component {

    static propTypes = {

        // props对象 propName:props名称 componentName 组件名称
        max(props, propName, componentName) {
            console.log('....');
            let v = props[propName]; // 取值方式
            console.log(v);
            if (v < 10 || v > 100) {
                throw new RangeError('max的值必须在10-100之间');
            }
        }
    };

    constructor(props) {
        super(props);
    }

    render() {
        return(
            <div>
                <h2>值 - {this.props.max}</h2>
            </div>
        );
    }

}
react-Novice03\app\src\App.js
import React from 'react';
import FormDemo from "./components/FormDemo";
import UnControl from "./components/UnControl";
import RefDemo from "./components/RefDemo";
import PropsDefaultValueDemo from "./components/PropsDefaultValueDemo";
import PropTypesDemo from "./components/PropTypesDemo";
class App extends React.Component {
constructor(props) {
super(props);
this.state = {
v1: 1
}
}
render() {
return (
<div className="App">
{/*
*/}
{/*<PropTypesDemo max={19} />
参考:https://github.com/6xiaoDi/blog-react-Novice/tree/v1.07-2
Branch:branch2
commit description:v1.07-2-example07-2(props验证测试——需求:max的值必须在10-100之间)
tag:v1.07-2
7. children
一个组件通过 props 除了能给获取自身属性上的值,还可以获取被组件包含的内容,也就是外部子组件,前面我们写的组件更多的是作为一个单标签组件,实际应用中很多组件是双标签的,也就是可以包含内容的,也可称为:容器组件,那么组件包含的内容,我们就可以通过 props.children 来获取
7. 1 dialog 组件
7. 1. 1 css
.dialog {
    position: fixed;
    left: 50%;
    top: 30%;
    transform: translateX(-50%) translateY(-50%) ;
    border-radius: 2px;
    box-shadow: 0 1px 3px rgba(0,0,0,.3);
    box-sizing: border-box;
    background: #fff;
    width: 60%;
}
.dialog_header {
    padding: 20px 20px 0;
    text-align: left;
}
.dialog_title {
    font-size: 16px;
    font-weight: 700;
    color: #1f2d3d;
}
.dialog_content {
    padding: 30px 20px;
    color: #48576a;
    font-size: 14px;
    text-align: left;
}
.dialog_close_btn {
    position: absolute;
    right: 10px;
    top: 5px;
}
.dialog_close_btn:before {
    content: 'x';
    color: #999;
    font-size: 20px;
    cursor: pointer;
}
7. 1. 2 dialog.js
import React from 'react';
import './dialog.css';

export default class Dialog extends React.Component {

    static defaultProps = {
        title: '这是默认标题'
    }

    render() {
        return(
            <div className="dialog">
                <i className="dialog_close_btn"></i>
                <div className="dialog_header">
                    <span className="dialog_title">{this.props.title}</span>
                </div>
                <div className="dialog_content">
                    {this.props.children}
                </div>
            </div>
        );
    }

}
7. 1. 3 example08
需求:模拟对话框
7. 1. 3. 1 example08-1
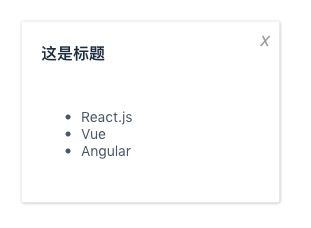
实现框子
对话框样式,可以自己完善,或者参考小迪github上的源码。
react-Novice03\app\src\components\ChildrenDemo.js
import React from 'react';
import './dialog.css';

export default class ChildrenDemo extends React.Component {

    static defaultProps = {
        title: '这是默认标题',
        content: '这是默认的内容'
    }

    render() {
        console.log(this.props);
        return(
            <div className="dialog">
                <i className="dialog_close_btn"></i>
                <div className="dialog_header">
                    <span className="dialog_title">{this.props.title}</span>
                </div>
                <div className="dialog_content">{this.props.content}</div>
            </div>
        );
    }
}
react-Novice03\app\src\App.js
import React from 'react';
import FormDemo from "./components/FormDemo";
import UnControl from "./components/UnControl";
import RefDemo from "./components/RefDemo";
import PropsDefaultValueDemo from "./components/PropsDefaultValueDemo";
import PropTypesDemo from "./components/PropTypesDemo";
import ChildrenDemo from "./components/ChildrenDemo";
class App extends React.Component {
constructor(props) {
super(props);
this.state = {
v1: 1
}
}
render() {
return (
<div className="App">
{/*
*/}
{/*参考:https://github.com/6xiaoDi/blog-react-Novice/tree/v1.08-1
Branch:branch2
commit description:v1.08-1-example08-1(需求:模拟对话框——实现框子)
tag:v1.08-1
7. 1. 3. 2 example08-2
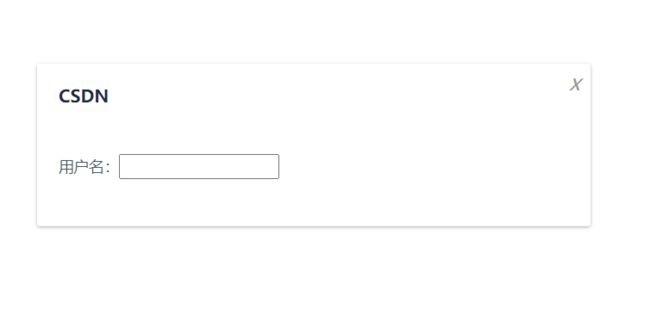
如果对话框中内容放入一个表单
     <ChildrenDemo title={'CSDN'} content={
                    <form>
                        <p>
                            用户名:<input type="text"/>
                        </p>
                    </form>
                }/>
如果我们还想往里嵌套组件,参数写起来就像之前的递归一样,一层一层可读性极差!
参考:https://github.com/6xiaoDi/blog-react-Novice/tree/v1.08-2
Branch:branch2commit description:v1.08-2-example08-2(需求:模拟对话框——嵌套表单)
tag:v1.08-2
7. 1. 3. 3 example08-3
实际上结构不要写在属性上,可以把当成容器一样使用。这就更类似于我们平时写的html了,可读性会更好。
                <ChildrenDemo title={'CSDN'}>
                    <form>
                        <p>
                            用户名:<input type="text"/>
                        </p>
                    </form>
                </ChildrenDemo>
但是在页面中并不存在此结构,貌似并没有将其放入props。这其实就是我们常说的影子dom和子元素之间的差异性了。ChildrenDemo的背后其实是我们在src/components/ChildrenDemo.js中的render中返回值,而在这里包含的是我们所写的表单标签。
假设ChildrenDemo是一个盒子,而src/components/ChildrenDemo.js中的render中返回值就是修饰盒子的边框,这里的我们所写的表单标签就是盒子里存放的物品(子元素),两者不是一套东西。
我们看到log中,其实这些物品是放在props的children属性中,这其实是一个虚拟dom节点(其实就是把这些物品解析成虚拟dom)。
再修改代码:
react-Novice03\app\src\components\ChildrenDemo.js
import React from 'react';
import './dialog.css';

export default class ChildrenDemo extends React.Component {

    static defaultProps = {
        title: '这是默认标题',
        content: '这是默认的内容'
    }

    render() {
        console.log(this.props);
        return(
            <div className="dialog">
                <i className="dialog_close_btn"></i>
                <div className="dialog_header">
                    <span className="dialog_title">{this.props.title}</span>
                </div>
                <div className="dialog_content">{this.props.children ? this.props.children : this.props.content}</div>
            </div>
        );
    }
}
react-Novice03\app\src\App.js
import React from 'react';
import FormDemo from "./components/FormDemo";
import UnControl from "./components/UnControl";
import RefDemo from "./components/RefDemo";
import PropsDefaultValueDemo from "./components/PropsDefaultValueDemo";
import PropTypesDemo from "./components/PropTypesDemo";
import ChildrenDemo from "./components/ChildrenDemo";
class App extends React.Component {
constructor(props) {
super(props);
this.state = {
v1: 1
}
}
render() {
return (
<div className="App">
{/*
*/}
{/* 这其实是经常会用到的,假若我们写一个组件,我们不可能把组件的所有内容都能够定义好,很多时候,这个组件其实是一个容器型组件,它里边还可以放很多其他东西,这个时候可由外部决定。有两种方式,第一种直接传参,但有的时候结构可能会很复杂,传参会很麻烦(可读性极差),我们就可以用类似html的嵌套形式即可(解析为虚拟dom放在children属性里)。
参考:https://github.com/6xiaoDi/blog-react-Novice/tree/v1.08-3
Branch:branch2commit description:v1.08-3-example08-3(需求:模拟对话框——最终版)
tag:v1.08-3
7. 1. 4 example09
7. 1. 4. 1 example09-1
实现一个可拖拽的div元素组件,即扩展为选择哪个元素,就可以进行拖拽。如第三方库不具备此特性,我们怎样将其加工为可拖拽呢(禁止更改其源码)?
类似于面向对象的设计模式—装饰者模式:通过一种无侵入式的方式(不需要修改此对象的本身,而对这个对象进行功能等扩展,得到一个具有新特性的对象),来扩展某个元素的特性。
react-Novice03\app\src\components\Drag.js
import React from 'react';

export default class Drag extends React.Component {

    constructor(props) {
        super(props);


    }

    render() {

        // 被拖拽的元素
        let el = this.props.children;
        console.log(el);// 虚拟dom对象,不是原生js对象

        return(
            <div>
                {this.props.children}
            </div>
        );
    }
}
react-Novice03\app\src\App.js
import React from 'react';
import FormDemo from "./components/FormDemo";
import UnControl from "./components/UnControl";
import RefDemo from "./components/RefDemo";
import PropsDefaultValueDemo from "./components/PropsDefaultValueDemo";
import PropTypesDemo from "./components/PropTypesDemo";
import ChildrenDemo from "./components/ChildrenDemo";
import Drag from "./components/Drag";
class App extends React.Component {
constructor(props) {
super(props);
this.state = {
v1: 1
}
}
render() {
return (
<div className="App">
{/*
*/}
{/**/ }
{/* }
{/* */
}
{/* 用户名:*/}
{/* */}
{/* */}
{/**/}
{/*装饰者*/}
<Drag>
<div ref={el => {
console.log(el); // 解析过后的元素
}} style={{
width: '100px',
height: '100px',
position: 'absolute',
background: 'red',
}}></div>
</Drag>
</div>
)
}
}
export default App;
虚拟dom对象里有一个ref属性,这里会解析成真实dom,我们来完善拖拽!
参考:https://github.com/6xiaoDi/blog-react-Novice/tree/v1.09-1
Branch:branch2commit description:v1.09-1-example09-1(需求:React实现拖拽——框子)
tag:v1.09-1
7. 1. 4. 2 example09-2
关于拖拽原理小迪不再重复了,请参考小迪的详细探究拖拽原理的博客。
推荐 Event事件学习实用路线(10)——Event事件之拖拽原理思路详解
import React from 'react';
import FormDemo from "./components/FormDemo";
import UnControl from "./components/UnControl";
import RefDemo from "./components/RefDemo";
import PropsDefaultValueDemo from "./components/PropsDefaultValueDemo";
import PropTypesDemo from "./components/PropTypesDemo";
import ChildrenDemo from "./components/ChildrenDemo";
import Drag from "./components/Drag";
class App extends React.Component {
constructor(props) {
super(props);
this.state = {
v1: 1
}
this.moveElemnt = this.moveElemnt.bind(this);
}
moveElemnt(el) {
let startPos = {} // 1. 鼠标点击的位置
let boxPos={} // 2. 元素的初始位置
el.addEventListener("mousedown", (e)=>{
// 保存
// 初始鼠标位置
startPos.x = e.clientX;
startPos.y = e.clientY;
// 元素的初始位置
boxPos.x = parseFloat(getComputedStyle(el).left);
boxPos.y = parseFloat(getComputedStyle(el).top);
document.addEventListener("mousemove", drag);
let i = 1;
el.addEventListener("mouseup", ()=>{
console.log(i++);
document.removeEventListener("mousemove", drag);
},{
// 只绑定一次事件
once:true
});
});
function drag(e){
let nowPos = {
x : e.clientX,
y : e.clientY
}
let dis = {
x : nowPos.x - startPos.x,
y : nowPos.y - startPos.y
}
let newBoxPos = {
left : boxPos.x + dis.x,
top : boxPos.y + dis.y
}
// 限制左侧
if (newBoxPos.left < 0){
newBoxPos.left = 0;
}
// 限制右侧
let maxLeft = document.documentElement.clientWidth - el.offsetWidth;
if (newBoxPos.left > maxLeft){
newBoxPos.left = maxLeft;
}
// 限制上侧
if (newBoxPos.top < 0){
newBoxPos.top = 0;
}
// 限制下侧
let maxTop = document.documentElement.clientHeight;
if (newBoxPos.top > maxTop) {
newBoxPos.top = maxTop;
}
el.style.top = newBoxPos.top + 'px';
el.style.left = newBoxPos.left + 'px';
}
}
render() {
return (
<div className="App">
{/*
*/}
{/**/ }
{/* }
{/* */
}
{/* 用户名:*/}
{/* */}
{/* */}
{/**/}
{/*装饰者*/}
<Drag>
<div ref={el => {
console.log(el); // 解析过后的元素
this.moveElemnt(el);
}} style={{
width: '100px',
height: '100px',
position: 'absolute',
background: 'red',
}}></div>
</Drag>
</div>
)
}
}
export default App;
参考:https://github.com/6xiaoDi/blog-react-Novice/tree/v1.09-2
Branch:branch2
commit description:v1.09-2-example09-2(需求:React实现拖拽——最终版)
tag:v1.09-2
(后续待补充)
