CentOS 7 部署 Redis
文章目录
- 1、前言
- 2、安装部署
-
- 2.1、单机模式
-
- 2.1.1、通过 yum 安装(不推荐,版本老旧)
- 2.1.1、通过源码编译安装(推荐)
- 2.2、主从模式
- 2.3、哨兵模式
- 2.4、集群模式
- 2.5、其他命令
- 2.6、其他操作系统
- 3、使用
-
- 3.1、Java 代码 —— SpringBoot
- 4、总结
1、前言
参考文档:
- Redis 官网
- Redis 官方下载地址
- 相关文章:Redis 四种模式的介绍
环境说明:
- 操作系统版本:CentOS Linux release 7.9.2009 (Core)
- 操作系统安装包:CentOS-7-x86_64-Minimal-2009.iso
- Redis 版本:7.2.3
- Redis 客户端(Windows):RedisDesktopManager 0.8.3.3850
- Redis 客户端(Windows)安装文件:redis-desktop-manager-0.8.3.3850.exe
2、安装部署
2.1、单机模式
Redis 可通过 yum 进行安装部署,但是默认安装的版本比较老旧,配置第三方非官方源存在一定风险。因此,安装部署较新版本最安全的方法,是需要通过 Redis 源码编译,进行安装的方式。
服务器配置如下:
| 序号 | 服务器IP | 服务器配置 | 说明 |
|---|---|---|---|
| 1 | 192.168.2.131 | 4C 8G | 源码编译(资源多点吧,要不有点慢) |
2.1.1、通过 yum 安装(不推荐,版本老旧)
# 安装 epel 源
yum install epel-release
# 安装 Redis
yum install redis
# Redis 版本 3.2.12-2.el7
# 查看安装版本
redis-server --version
# Redis server v=3.2.12 sha=00000000:0 malloc=jemalloc-3.6.0 bits=64 build=7897e7d0e13773f
# 卸载
rpm -e redis
2.1.1、通过源码编译安装(推荐)
Redis 源码下载地址
安装
# 安装相关依赖
yum -y install wget python3 gcc
# 安装目录
cd /opt
# 获取源码
wget https://codeload.github.com/redis/redis/tar.gz/refs/tags/7.2.3
# 解压
tar -zxvf 7.2.3
# 进入目录
cd redis-7.2.3
# 编译 && 安装
make && make install
# 启动服务(未更改配置,需要新窗口启动 redis-cli 客户端)
# redis-server
# 创建日志目录
mkdir logs
# 后台启动服务(未更改默认配置文件)
nohup redis-server redis.conf >./logs/stdout.log 2>&1 &
测试
# 通过 Redis 客户端访问 Redis 服务
[root@localhost redis-7.2.3]# redis-cli
127.0.0.1:6379> ping
PONG

# redis-cli -h 192.168.56.108
配置文件没有变更,使用源码默认配置文件。此时,只能本地通过 redis-cli 客户端进行访问。需要通过网络访问,需要修改配置文件 redis.conf
vi /opt/redis-7.2.3/redis.conf
更改内容如下
bind 0.0.0.0
# 不设置 bind IP 和密码,只允许本地通过 127.0.0.1:6379 访问,拒绝远程访问
protected-mode no
# 默认密码
requirepass foobared
重启服务
# 停止服务
[root@localhost redis-7.2.3]# ps -ef|grep redis
root      6747  1530  0 14:07 pts/0    00:00:00 src/redis-server 127.0.0.1:6379
root      6776  1530  0 14:09 pts/0    00:00:00 grep --color=auto redis
[root@localhost redis-7.2.3]# kill 6747
# 或者
pgrep -f redis-server | xargs kill
# 或者
[root@localhost redis-7.2.3]# redis-cli
127.0.0.1:6379> shutdown
not connected>

# 启动服务
cd /opt/redis-7.2.3
nohup redis-server redis.conf >./logs/stdout.log 2>&1 &
ss -ntl|grep 6379

# 防火墙开放端口
firewall-cmd --zone=public --add-port=6379/tcp --permanent
systemctl restart firewalld.service
firewall-cmd --zone=public --list-ports
测试
通过 redis-cli 连接测试
[root@localhost redis-7.2.3]# redis-cli -c -h 192.168.2.131 -a foobared
Warning: Using a password with '-a' or '-u' option on the command line interface may not be safe.
192.168.2.131:6379> ping
PONG
192.168.2.131:6379> exit
[root@localhost redis-7.2.3]#
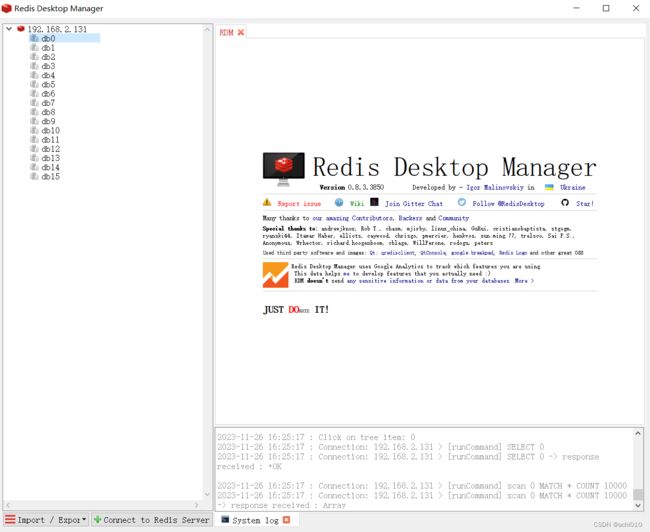
通过 Windows 客户端进行连接测试

至此,单机部署完成。
提示:生产环境,请根据需求进行参数优化配置!
2.2、主从模式
相关文章:主从模式的原理介绍
服务器配置如下:
| 序号 | 服务器IP | 服务器配置 | 说明 |
|---|---|---|---|
| 1 | 192.168.2.131 | 4C 8G | 源码编译(资源多点吧,要不有点慢)主节点 |
| 2 | 192.168.2.132 | 1C 1G | 从节点 |
将编译好的 Redis 文件夹压缩,传给从节点
主节点操作
# 停止服务
pgrep -f redis-server | xargs kill
# 压缩文件夹为 tar 包
tar -cf redis-7.2.3.tar redis-7.2.3
# 启动服务
nohup redis-server redis.conf >./logs/stdout.log 2>&1 &
从节点操作
cd /opt
# copy 主节点压缩包
scp 192.168.2.131://opt/redis-7.2.3.tar ./
# 输入主节点服务器密码
# 解压
tar -xf redis-7.2.3.tar
说明:
- 主节点配置与单机部署相同,无需变更
- 从节点配置 redis.conf 在单节点配置基础上增加
# 主节点 IP 端口
replicaof 192.168.2.131 6379
# 主节点密码
masterauth foobared
启动服务
# 安装服务
cd /opt/redis-7.2.3
make install
# 启动服务
nohup redis-server redis.conf >./logs/stdout.log 2>&1 &
# 查看日志
tail -100f logs/stdout.log
# 其中显示
MASTER <-> REPLICA sync: Finished with success

# 防火墙开放端口
firewall-cmd --zone=public --add-port=6379/tcp --permanent
systemctl restart firewalld.service
firewall-cmd --zone=public --list-ports
验证
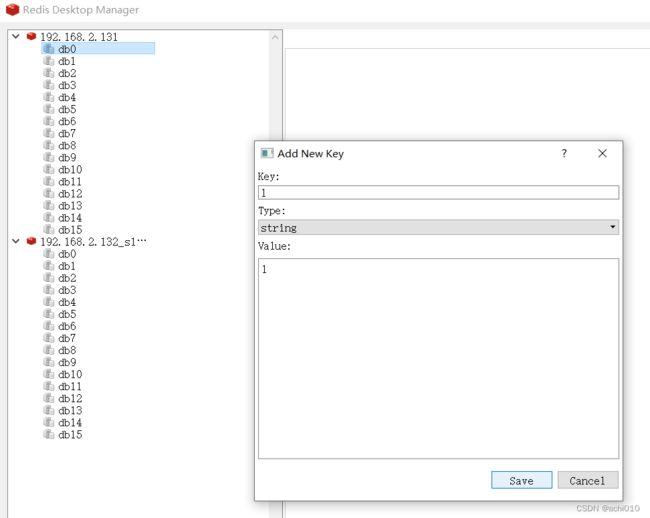
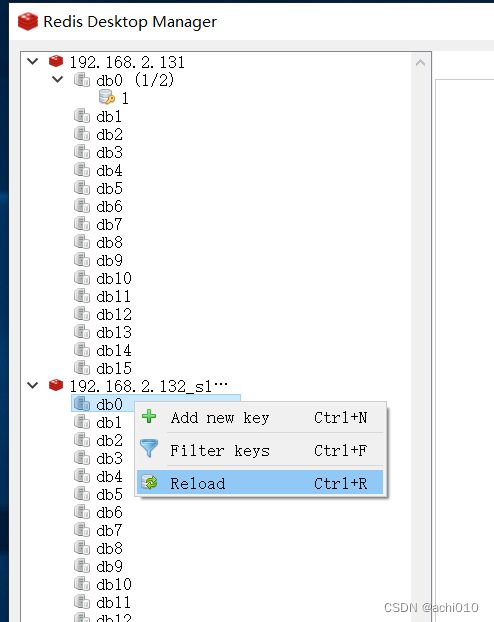
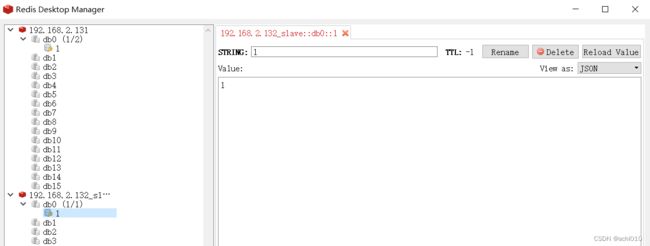
通过客户端在 131 主节点进行操作,132 会进行数据同步。包括:新增、更新、删除。


至此,主从模式部署完成。
提示:生产环境,请根据需求进行参数优化配置!
2.3、哨兵模式
服务器配置如下:
| 序号 | 服务器IP | 服务器配置 | 说明 |
|---|---|---|---|
| 1 | 192.168.2.131 | 4C 8G | 源码编译(资源多点吧,要不有点慢)主节点 + 哨兵 |
| 2 | 192.168.2.132 | 1C 1G | 从节点+ 哨兵 |
| 3 | 192.168.2.133 | 1C 1G | 哨兵 |
说明:
- 主从模式下,增加哨兵
- 哨兵模式可通过代码进行验证
将主节点的 tar 包 copy 到 哨兵节点
cd /opt
# copy 主节点压缩包
scp 192.168.2.131://opt/redis-7.2.3.tar ./
# 输入主节点服务器密码
# 解压
tar -xf redis-7.2.3.tar
哨兵配置 /opt/redis-7.2.3/sentinel.conf (3个节点都需要配置)
# protected-mode no # 默认配置,无需更改
# 哨兵监控的主节点 IP 端口 2个哨兵节点同时判断redis节点异常才有效
sentinel monitor mymaster 192.168.2.131 6379 2
# 主节点密码
sentinel auth-pass mymaster foobared
启动服务(3个节点都需要启动哨兵服务)
# 安装服务
cd /opt/redis-7.2.3
make install
# 启动哨兵服务
nohup src/redis-sentinel sentinel.conf >./logs/sentinelStdout.log 2>&1 &
# 通过查看端口监测情况,验证哨兵是否正常启动
ss -ntl|grep 26379

# 开放防火墙端口
firewall-cmd --zone=public --add-port=26379/tcp --permanent
systemctl restart firewalld.service
firewall-cmd --zone=public --list-ports
其他命令
# 停止哨兵服务
pgrep -f redis-sentinel | xargs kill
至此,哨兵模式部署完成。
提示:生产环境,请根据需求进行参数优化配置!
2.4、集群模式
相关参考文档:Redis 集群搭建
说明:
- Redis 集群对节点数要求为奇数,因此至少需要三个节点,并且每个节点至少有一个备份节点。结论:Redis 集群至少6个 redis 节点。
- 节点可部署在相同的服务器,但是生产环境不推荐,避免服务器故障引起集群不可用
- 集群模式可通过代码进行验证
服务器配置如下:
| 序号 | 服务器IP | 服务器配置 | 说明 |
|---|---|---|---|
| 1 | 192.168.2.131 | 4C 8G | 源码编译(所以资源多点),主从关系自动分配,无法提前确认 |
| 2 | 192.168.2.132 | 1C 1G | 主从关系自动分配,无法提前确认 |
| 3 | 192.168.2.133 | 1C 1G | 主从关系自动分配,无法提前确认 |
| 4 | 192.168.2.134 | 1C 1G | 主从关系自动分配,无法提前确认 |
| 5 | 192.168.2.135 | 1C 1G | 主从关系自动分配,无法提前确认 |
| 6 | 192.168.2.136 | 1C 1G | 主从关系自动分配,无法提前确认 |
安装依赖
yum -y install ruby
开放相关端口
端口列表参考文档
firewall-cmd --zone=public --add-port=6379/tcp --add-port=16379/tcp --add-port=6380/tcp --add-port=26379/tcp --permanent
systemctl restart firewalld.service
firewall-cmd --zone=public --list-ports
单机部署配置下 redis.conf 增加相关配置(注意:主从模式、哨兵模式产生的数据对集群模式有影响。如果无法确认影响程度,那干脆将虚拟机恢复到干净的快照,再进行相关操作!)
# 开启集群模式
cluster-enabled yes
# 集群配置文件(首次自动生成)
cluster-config-file nodes-6379.conf
生成压缩包,准备发送到其余 5 个节点
# 停止服务
pgrep -f redis-server | xargs kill
# 压缩文件夹为 tar 包
tar -cf redis-7.2.3.tar redis-7.2.3
启动服务(6个节点全部启动)
tar -xf redis-7.2.3.tar
cd redis-7.2.3
make install
nohup redis-server redis.conf >./logs/stdout.log 2>&1 &
创建集群(注意:在任意一台上运行,不要在每台机器上都运行,运行一次即可)
[root@localhost redis-7.2.3]# redis-cli --cluster create 192.168.2.131:6379 192.168.2.132:6379 192.168.2.133:6379 192.168.2.134:6379 192.168.2.135:6379 192.168.2.136:6379 --cluster-replicas 1 -a foobared
Warning: Using a password with '-a' or '-u' option on the command line interface may not be safe.
>>> Performing hash slots allocation on 6 nodes...
Master[0] -> Slots 0 - 5460
Master[1] -> Slots 5461 - 10922
Master[2] -> Slots 10923 - 16383
Adding replica 192.168.2.135:6379 to 192.168.2.131:6379
Adding replica 192.168.2.136:6379 to 192.168.2.132:6379
Adding replica 192.168.2.134:6379 to 192.168.2.133:6379
M: 8ad6b5f89470f24c7c747ede0532f3c58665a36f 192.168.2.131:6379
   slots:[0-5460] (5461 slots) master
M: 068cb1887faef1e992e5fe4f63e04d3022016a73 192.168.2.132:6379
   slots:[5461-10922] (5462 slots) master
M: 8e55d559efad0bc6c06450c40e81f005ae2521a7 192.168.2.133:6379
   slots:[10923-16383] (5461 slots) master
S: 58b7d94d41c537252cb5f54918aae55fa09fc876 192.168.2.134:6379
   replicates 8e55d559efad0bc6c06450c40e81f005ae2521a7
S: c913f4da1d29ce54f6c062384aa8bfc6beaef553 192.168.2.135:6379
   replicates 8ad6b5f89470f24c7c747ede0532f3c58665a36f
S: 6337b662b08d4bd32388b18ccf687e87f9f09bc6 192.168.2.136:6379
   replicates 068cb1887faef1e992e5fe4f63e04d3022016a73
Can I set the above configuration? (type 'yes' to accept): yes
>>> Nodes configuration updated
>>> Assign a different config epoch to each node
>>> Sending CLUSTER MEET messages to join the cluster
Waiting for the cluster to join

>>> Performing Cluster Check (using node 192.168.2.131:6379)
M: 8ad6b5f89470f24c7c747ede0532f3c58665a36f 192.168.2.131:6379
   slots:[0-5460] (5461 slots) master
   1 additional replica(s)
M: 8e55d559efad0bc6c06450c40e81f005ae2521a7 192.168.2.133:6379
   slots:[10923-16383] (5461 slots) master
   1 additional replica(s)
M: 068cb1887faef1e992e5fe4f63e04d3022016a73 192.168.2.132:6379
   slots:[5461-10922] (5462 slots) master
   1 additional replica(s)
S: 6337b662b08d4bd32388b18ccf687e87f9f09bc6 192.168.2.136:6379
   slots: (0 slots) slave
   replicates 068cb1887faef1e992e5fe4f63e04d3022016a73
S: 58b7d94d41c537252cb5f54918aae55fa09fc876 192.168.2.134:6379
   slots: (0 slots) slave
   replicates 8e55d559efad0bc6c06450c40e81f005ae2521a7
S: c913f4da1d29ce54f6c062384aa8bfc6beaef553 192.168.2.135:6379
   slots: (0 slots) slave
   replicates 8ad6b5f89470f24c7c747ede0532f3c58665a36f
[OK] All nodes agree about slots configuration.
>>> Check for open slots...
>>> Check slots coverage...
[OK] All 16384 slots covered.
集群验证
[root@localhost redis-7.2.3]# redis-cli -c -h 192.168.2.131 -a foobared
Warning: Using a password with '-a' or '-u' option on the command line interface may not be safe.
192.168.2.131:6379> set name userName
-> Redirected to slot [5798] located at 192.168.2.132:6379
OK
192.168.2.132:6379> get name
"userName"
192.168.2.132:6379> exit
至此,集群模式部署完成。
提示:生产环境,请根据需求进行参数优化配置!
2.5、其他命令
redis-server        //启动服务
redis-benchmark     //测试性能
redis-check-aof     //检查aof持久化文件
redis-sentinel
redis-cli          //客户端

# 正式关闭redis服务
# 在redis-cli中,无 Authentication 才可以
shutdown

# 卸载redis
make uninstall
# 或者
rm -rf /usr/local/bin/redis-*
rm -rf /usr/local/redis
说明:make、 make install、make uninstall 的作用参考文档
2.6、其他操作系统
Ubuntu/Debian 安装部署,可参考官方文档
3、使用
3.1、Java 代码 —— SpringBoot
Java 版本:JDK 17.0.6
SpringBoot 版本: 3.0.2
IDE 版本:IntelliJ IDEA 2023.2.5 (Community Edition)
Postman 版本:November 2023 (v10.20)
其他配置:详情见 Demo 及相关配置图片
配置图片
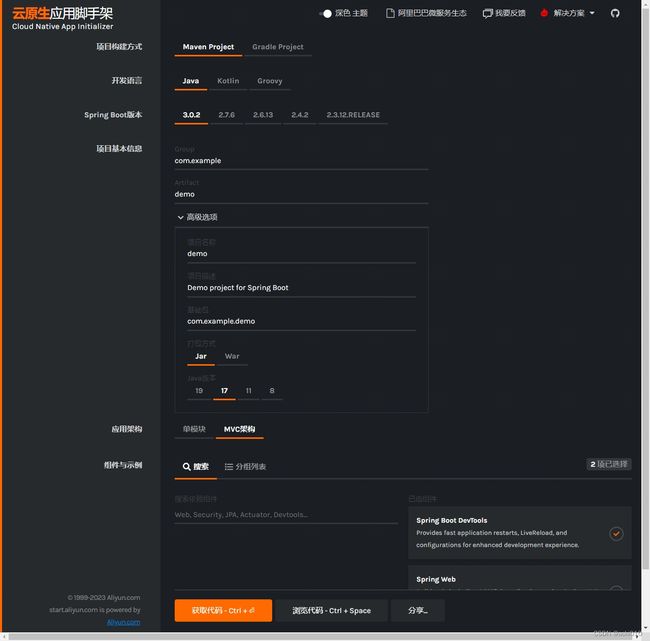
SpringBoot 新建项目 Demo 下载地址
pom.xml 文件如下
<project xmlns="http://maven.apache.org/POM/4.0.0" xmlns:xsi="http://www.w3.org/2001/XMLSchema-instance"
    xsi:schemaLocation="http://maven.apache.org/POM/4.0.0 https://maven.apache.org/xsd/maven-4.0.0.xsd">
    <modelVersion>4.0.0modelVersion>
    <groupId>com.examplegroupId>
    <artifactId>demoartifactId>
    <version>0.0.1-SNAPSHOTversion>
    <name>demoname>
    <description>Demo project for Spring Bootdescription>
    <properties>
        <java.version>17java.version>
        <project.build.sourceEncoding>UTF-8project.build.sourceEncoding>
        <project.reporting.outputEncoding>UTF-8project.reporting.outputEncoding>
        <spring-boot.version>3.0.2spring-boot.version>
    properties>
    <dependencies>
        <dependency>
            <groupId>org.springframework.bootgroupId>
            <artifactId>spring-boot-starter-data-redisartifactId>
        dependency>
        <dependency>
            <groupId>org.springframework.bootgroupId>
            <artifactId>spring-boot-starter-webartifactId>
        dependency>

        <dependency>
            <groupId>org.springframework.bootgroupId>
            <artifactId>spring-boot-devtoolsartifactId>
            <scope>runtimescope>
            <optional>trueoptional>
        dependency>
        <dependency>
            <groupId>org.springframework.bootgroupId>
            <artifactId>spring-boot-starter-testartifactId>
            <scope>testscope>
        dependency>
    dependencies>
    <dependencyManagement>
        <dependencies>
            <dependency>
                <groupId>org.springframework.bootgroupId>
                <artifactId>spring-boot-dependenciesartifactId>
                <version>${spring-boot.version}version>
                <type>pomtype>
                <scope>importscope>
            dependency>
        dependencies>
    dependencyManagement>

    <build>
        <plugins>
            <plugin>
                <groupId>org.apache.maven.pluginsgroupId>
                <artifactId>maven-compiler-pluginartifactId>
                <version>3.8.1version>
                <configuration>
                    <source>17source>
                    <target>17target>
                    <encoding>UTF-8encoding>
                configuration>
            plugin>
            <plugin>
                <groupId>org.springframework.bootgroupId>
                <artifactId>spring-boot-maven-pluginartifactId>
                <version>${spring-boot.version}version>
                <configuration>
                    <mainClass>com.example.demo.DemoApplicationmainClass>
                    <skip>trueskip>
                configuration>
                <executions>
                    <execution>
                        <id>repackageid>
                        <goals>
                            <goal>repackagegoal>
                        goals>
                    execution>
                executions>
            plugin>
        plugins>
    build>

project>
Spring 相关配置 application.yaml
# 应用服务 WEB 访问端口
server:
  port: 8080

spring:
  data:
    redis:
      password: foobared

#      # 直连 Redis
#      host: 192.168.2.131
#      port: 6379

#      # redis哨兵配置
#      sentinel:
#        # 主节点名称
#        master: mymaster
#        nodes:
#          - 192.168.2.131:26379
#          - 192.168.2.132:26379
#          - 192.168.2.133:26379

      # 集群的部署方式
      cluster:
        nodes:
          - 192.168.2.131:6379
          - 192.168.2.132:6379
          - 192.168.2.133:6379
          - 192.168.2.134:6379
          - 192.168.2.135:6379
          - 192.168.2.136:6379
        # 最大重定向次数(由于集群中数据存储在多个节点,所以在访问数据时需要通过转发进行数据定位)
        max-redirects: 2

#      # 其他相关配置
#      lettuce:
#        pool:
#          # 连接池中的最大空闲连接
#          max-idle: 10
#          # 连接池最大阻塞等待时间(使用负值表示没有限制)
#          max-wait: 500
#          # 连接池最大连接数(使用负值表示没有限制)
#          max-active: 8
#          # 连接池中的最小空闲连接
#          min-idle: 0
Demo 基础上增加 Redis 相关操作
增加 UserService
package com.example.demo.demos.service;

import com.example.demo.demos.web.User;
import jakarta.annotation.Resource;
import org.springframework.data.redis.core.RedisTemplate;
import org.springframework.stereotype.Service;

@Service
public class UserService {

    @Resource
    private RedisTemplate redisTemplate;

    public User saveUser(User u) {
        String name = u.getName();
        redisTemplate.opsForValue().set(name, u.getAge());
        return findUser(name);
    }

    public User findUser(String username) {
        User user = new User();
        Integer age = (Integer) redisTemplate.opsForValue().get(username);
        user.setName(username);
        user.setAge(age);
        return user;
    }

}
变更 BasicController
package com.example.demo.demos.web;

import com.example.demo.demos.service.UserService;
import jakarta.annotation.Resource;
import org.springframework.stereotype.Controller;
import org.springframework.web.bind.annotation.*;

@Controller
public class BasicController {

    @Resource
    private UserService userService;

    // http://127.0.0.1:8080/hello?name=lisi
    @RequestMapping("/hello")
    @ResponseBody
    public String hello(@RequestParam(name = "name", defaultValue = "unknown user") String name) {
        return "Hello " + name;
    }

    // http://127.0.0.1:8080/user?username=lisi
    @GetMapping("/user")
    @ResponseBody
    public User user(@RequestParam String username) {
        return userService.findUser(username);
    }

    // http://127.0.0.1:8080/save_user
    @PostMapping("/save_user")
    @ResponseBody
    public User saveUser(@RequestBody User u) {
        return userService.saveUser(u);
    }

}
启动服务,并通过访问接口地址进行相关验证
# 验证接口是否畅通
curl --location 'http://127.0.0.1:8080/hello?name=lisi'
# 添加数据
curl --location 'http://127.0.0.1:8080/save_user' \
--header 'Content-Type: application/json' \
--data '{
    "name": "lisi",
    "age": 18
}'
# 查询数据
curl --location 'http://127.0.0.1:8080/user?username=lisi'
4、总结
无论哪种 Redis 模式的安装,都不算复杂。阅读相关文档,理解好原理,安装部署都比较简单。
但是实际生产环境,仍存在比较复杂的实际使用场景,以及更加奇怪的问题有待我们去探索!