SpringSecurity框架学习(尚硅谷的)
目录
1. SpringSecurity 框架简介
2.SpringSecurity 入门案例
(1)创建一个springboot项目
1.1.springboot项目
1.2.Application启动类
1.3.application.yml配置类
1.4.依赖pom.xml
1.5.引入SpringSecurity依赖
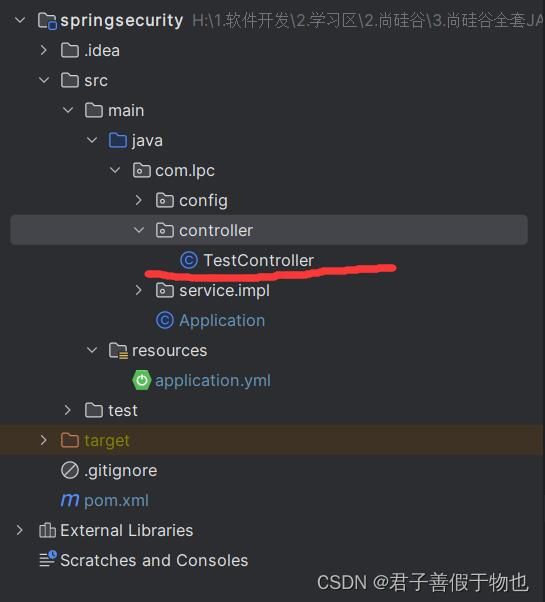
1.6写个测试controller
成功:
3.SpringSecurity 基本原理
4.SpringSecurity Web 权限方案
1.我们自己来设置用户名和密码
方式一:application里面
方式二:config
方式三:查询数据库
2.实现数据库认证来完成登录
准备数据库表sql
图片展示顺序
1.Application
2.pom.xml
3.application.yml
4.Users
5.UsersMapper
6.UsersService
7.UsersServiceImpl
8.TestController
9.SecurityConfig
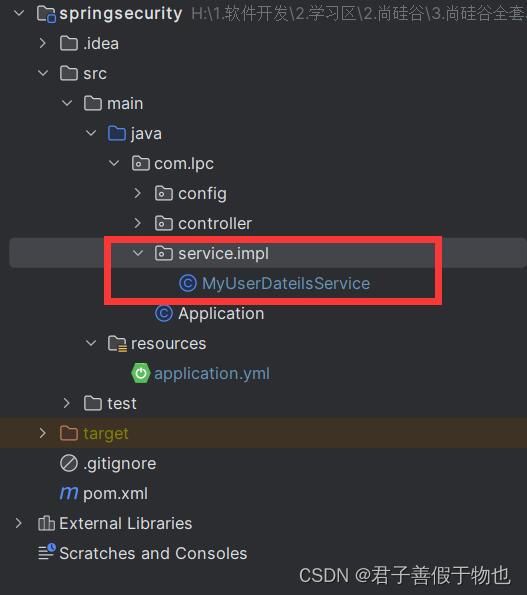
10.MyUserDateilsService
3.自定义登录页面----在实现数据库认证来完成登录基础上
就在SecurityConfig里面写就行了
然后写静态资源
login.html
然后写登录成功后跳转的路径
TestController
4.基于角色或权限进行访问控制
4.1 hasAuthority方法
1.SecurityConfig里面写这句
2、在UserDetailsService,把返回user对象设置权限
4.2.hasAnyAuthority---如何让admins,role都可以访问“/test/index”这个路径
1.改配置
1. SpringSecurity 框架简介
2.SpringSecurity 入门案例
(1)创建一个springboot项目
1.1.springboot项目
1.2.Application启动类
package com.lpc;

import lombok.extern.slf4j.Slf4j;
import org.springframework.boot.SpringApplication;
import org.springframework.boot.autoconfigure.SpringBootApplication;

/**
 * @Author lpc
 * @Date 2024 01 05 10 13
 *
 * springboot项目启动类
 *
 *
 * @SpringBootApplication 它的作用是将当前类标识为 Spring Boot 应用的入口点,并启用自动配置和组件扫描。
 *
 * @Slf4j 在这里就是这个作用 log.info("项目启动成功。。。。。");
 * @Slf4j 用于自动为类生成一个名为 “log” 的日志对象。它是 Lombok 项目中提供的一个注解,通过在类上添加 @Slf4j 注解,
 * 可以方便地在代码中使用日志记录功能。
 *
 **/


@SpringBootApplication
@Slf4j
public class Application {
    public static void main(String[] args) {
        SpringApplication.run(Application.class,args);
        log.info("项目启动成功。。。。。");
    }
}
1.3.application.yml配置类
server:
  port: 8001
  #连接数据库
  datasource:
      driver-class-name: com.mysql.cj.jdbc.Driver
      url: jdbc:mysql://localhost:3306/你的数据库名?serverTimezone=Asia/Shanghai&useUnicode=true&characterEncoding=utf-8&zeroDateTimeBehavior=convertToNull&useSSL=false&allowPublicKeyRetrieval=true
      username: root
      password: 密码
1.4.依赖pom.xml
        org.springframework.boot
        spring-boot-starter-parent
        2.3.5.RELEASE


        1.18.16


            org.springframework.boot
            spring-boot-starter


            org.springframework.boot
            spring-boot-starter-test
            test


            org.springframework.boot
            spring-boot-starter-web
            compile


            org.projectlombok
            lombok
            ${lombok.version}


            org.springframework.boot
            spring-boot-starter-security


                org.springframework.boot
                spring-boot-maven-plugin


                    com.lpc.Application
                    ZIP
                    true


                            repackage
1.5.引入SpringSecurity依赖
            org.springframework.boot
            spring-boot-starter-security
1.6写个测试controller
package com.lpc.controller;

import org.springframework.web.bind.annotation.GetMapping;
import org.springframework.web.bind.annotation.RequestMapping;
import org.springframework.web.bind.annotation.RestController;

/**
 * @Author lpc
 * @Date 2024 01 05 10 34
 **/

@RestController
@RequestMapping("/test")
public class TestController {

    /**
     * 测试
     * 路径:localhost:8001/test/add
     */
    @GetMapping("/add")
    public String add(){
       return "hello security";
    }

}
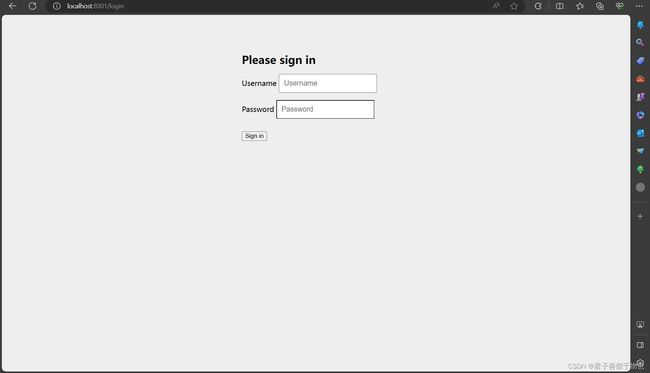
访问路径localhost:8001/test/add
就变成这样:
| username | 默认user |
| password | 控制台会输出来 |
控制台:
成功:
3.SpringSecurity 基本原理
4.SpringSecurity Web 权限方案
入门案例是他的用户名,他生成的密码,那么我们如何来设置我们的用户名和密码
1.我们自己来设置用户名和密码
方式一:application里面
如果是application.properties
spring.security.user.name=六花
spring.security.user.password=1314520
在 application.yml
验证:成功
server:
  port: 8001
spring:
  security:
    user:
     name: 六花
     password: 1314520
方式二:config
创建一个config目录
创建SecurityConfig类
package com.lpc.config;

import org.springframework.context.annotation.Bean;
import org.springframework.context.annotation.Configuration;
import org.springframework.security.config.annotation.authentication.builders.AuthenticationManagerBuilder;
import org.springframework.security.config.annotation.web.configuration.WebSecurityConfigurerAdapter;
import org.springframework.security.crypto.bcrypt.BCryptPasswordEncoder;
import org.springframework.security.crypto.password.PasswordEncoder;

/**
 * @Author lpc
 * @Date 2024 01 05 15 11
 **/
@Configuration
public class SecurityConfig extends WebSecurityConfigurerAdapter {


    /**
     * 配置类完成:设置登录系统的账号、密码
     *
     */
    @Override
    protected void configure(AuthenticationManagerBuilder auth) throws Exception {
        //new一个加密器
        BCryptPasswordEncoder bCryptPasswordEncoder = new BCryptPasswordEncoder();
        //调用bCryptPasswordEncoder里面的方法,进行加密
        String password = bCryptPasswordEncoder.encode("1314520");
        //设置登录系统的账号、密码
        auth.inMemoryAuthentication().withUser("蕾姆").password(password).roles("admin");
    }

    /**
     * 默认没有,手动调用一下
     * 密码加密接口 PasswordEncoder
     */
    @Bean
    PasswordEncoder passwordEncoder(){
        return new BCryptPasswordEncoder();
    }
}
把六花注释掉
去访问接口验证:成功
方式三:查询数据库
package com.lpc.config;

import org.springframework.beans.factory.annotation.Autowired;
import org.springframework.context.annotation.Bean;
import org.springframework.context.annotation.Configuration;
import org.springframework.security.config.annotation.authentication.builders.AuthenticationManagerBuilder;
import org.springframework.security.config.annotation.web.configuration.WebSecurityConfigurerAdapter;
import org.springframework.security.core.userdetails.UserDetailsService;
import org.springframework.security.crypto.bcrypt.BCryptPasswordEncoder;
import org.springframework.security.crypto.password.PasswordEncoder;

/**
 * @Author lpc
 * @Date 2024 01 05 15 11
 **/

@Configuration
public class SecurityConfig extends WebSecurityConfigurerAdapter {

    @Autowired
    private UserDetailsService userDetailsService;

    @Override
    protected void configure(AuthenticationManagerBuilder auth) throws Exception {
        auth.userDetailsService(userDetailsService).passwordEncoder(password());
    }


/**
     * 默认没有,手动调用一下
     * 密码加密接口 PasswordEncoder
     */

    @Bean
    PasswordEncoder password(){
        return new BCryptPasswordEncoder();
    }


}
去实现UserDetailsService
现在还没有查询数据库,先简单做个测试:
package com.lpc.service.impl;

import org.springframework.security.authentication.jaas.AuthorityGranter;
import org.springframework.security.core.GrantedAuthority;
import org.springframework.security.core.authority.AuthorityUtils;
import org.springframework.security.core.userdetails.User;
import org.springframework.security.core.userdetails.UserDetails;
import org.springframework.security.core.userdetails.UserDetailsService;
import org.springframework.security.core.userdetails.UsernameNotFoundException;
import org.springframework.security.crypto.bcrypt.BCryptPasswordEncoder;
import org.springframework.stereotype.Service;

import java.util.List;


/**
 * @Author lpc
 * @Date 2024 01 05 21 07
 **/

@Service
public class MyUserDateilsService implements UserDetailsService {
    @Override
    public UserDetails loadUserByUsername(String s) throws UsernameNotFoundException {

        /*创建一个包含角色信息的权限列表 List。
         在这里,使用了 AuthorityUtils 类的 commaSeparatedStringToAuthorityList 方法,
         将包含角色的字符串 “role” 转换成了一个权限列表。*/
        List auths= AuthorityUtils.commaSeparatedStringToAuthorityList("role");
        /*
         然后,使用 User 类创建一个用户对象。User 是 Spring Security 提供的一个实现了 UserDetails 接口的默认用户类
         构造方法的参数依次是用户名、加密后的密码和权限列表
         */
        return new User("勇太",new BCryptPasswordEncoder().encode("123456"),auths);
    }
}
访问:localhost:8001/test/add
验证:成功
2.实现数据库认证来完成登录
完成自定义登录
导入依赖
            mysql
            mysql-connector-java
            runtime
准备数据库表sql
创建一个简单的数据库表
CREATE TABLE `users` (
  `id` bigint(20) NOT NULL AUTO_INCREMENT,
  `username` varchar(20) NOT NULL,
  `password` varchar(100) DEFAULT NULL,
  PRIMARY KEY (`id`),
  UNIQUE KEY `username` (`username`)
) ENGINE=InnoDB DEFAULT CHARSET=utf8mb4;
添加依赖后面要用
            com.baomidou
            mybatis-plus-boot-starter
            ${mybatis-plus.version}


        1.18.16
        3.4.1
图片展示顺序
有些顺序是可以变的
1.Application
package com.lpc;

import lombok.extern.slf4j.Slf4j;
import org.mybatis.spring.annotation.MapperScan;
import org.springframework.boot.SpringApplication;
import org.springframework.boot.autoconfigure.SpringBootApplication;

/**
 * @Author lpc
 * @Date 2024 01 05 10 13
 *
 * springboot项目启动类
 *
 *
 * @SpringBootApplication 它的作用是将当前类标识为 Spring Boot 应用的入口点,并启用自动配置和组件扫描。
 *
 * @Slf4j 在这里就是这个作用 log.info("项目启动成功。。。。。");
 * @Slf4j 用于自动为类生成一个名为 “log” 的日志对象。它是 Lombok 项目中提供的一个注解,通过在类上添加 @Slf4j 注解,
 * 可以方便地在代码中使用日志记录功能。
 *
 **/


@SpringBootApplication
@Slf4j
@MapperScan("com.lpc.mapper")//作用是找到我们的mapper
public class Application {
    public static void main(String[] args) {
        SpringApplication.run(Application.class,args);
        log.info("项目启动成功。。。。。");
    }
}
2.pom.xml
    4.0.0


        org.springframework.boot
        spring-boot-starter-parent
        2.3.5.RELEASE


    org.example
    springsecurity
    1.0-SNAPSHOT


        8
        8
        UTF-8


        1.18.16
        3.4.1
        3.8.1


            org.springframework.boot
            spring-boot-starter


            org.springframework.boot
            spring-boot-starter-test
            test


            org.springframework.boot
            spring-boot-starter-web
            compile


            org.projectlombok
            lombok
            ${lombok.version}


            org.springframework.boot
            spring-boot-starter-security


            mysql
            mysql-connector-java
            runtime


            com.baomidou
            mybatis-plus-boot-starter
            ${mybatis-plus.version}


                org.springframework.boot
                spring-boot-maven-plugin


                    com.lpc.Application
                    ZIP
                    true


                            repackage
3.application.yml
server:
  port: 8001
spring:
  #连接数据库
  datasource:
      driver-class-name: com.mysql.cj.jdbc.Driver
      url: jdbc:mysql://localhost:3306/你的数据库?serverTimezone=Asia/Shanghai&useUnicode=true&characterEncoding=utf-8&zeroDateTimeBehavior=convertToNull&useSSL=false&allowPublicKeyRetrieval=true
      username: 你的用户名
      password: 你的密码
mybatis-plus:
  configuration:
    #在映射实体或者属性时,将数据库中表名和字段名中的下划线去掉,按照驼峰命名法映射
    map-underscore-to-camel-case: true
    log-impl: org.apache.ibatis.logging.stdout.StdOutImpl
  global-config:
    db-config:
      id-type: ASSIGN_ID
4.Users
package com.lpc.entity;

import lombok.Data;

/**
 * @Author lpc
 * @Date 2024 01 08 10 24
 **/

@Data //简化实体类,get,set,构造都有了
public class Users {
    private Integer id;
    private String username;
    private String password;
}
5.UsersMapper
package com.lpc.mapper;

import com.baomidou.mybatisplus.core.mapper.BaseMapper;
import com.lpc.entity.Users;


/**
 * @Author lpc
 * @Date 2024 01 08 10 28
 **/
public interface UsersMapper extends BaseMapper {
}
6.UsersService
package com.lpc.service;

import com.baomidou.mybatisplus.extension.service.IService;
import com.lpc.entity.Users;

/**
 * @Author lpc
 * @Date 2024 01 08 10 27
 **/
public interface UsersService extends IService {
}
7.UsersServiceImpl
package com.lpc.service.impl;

import com.baomidou.mybatisplus.extension.service.impl.ServiceImpl;
import com.lpc.entity.Users;
import com.lpc.mapper.UsersMapper;
import com.lpc.service.UsersService;
import org.springframework.stereotype.Service;

/**
 * @Author lpc
 * @Date 2024 01 08 10 36
 **/
@Service
public class UsersServiceImpl extends ServiceImpl implements UsersService {
}
8.TestController
package com.lpc.controller;

import org.springframework.web.bind.annotation.GetMapping;
import org.springframework.web.bind.annotation.RequestMapping;
import org.springframework.web.bind.annotation.RestController;

/**
 * @Author lpc
 * @Date 2024 01 05 10 34
 **/

@RestController
@RequestMapping("/test")
public class TestController {

    /**
     * 测试
     * 路径:localhost:8001/test/add
     */
    @GetMapping("/add")
    public String add(){
       return "hello 六花,我喜欢你";
    }

}
9.SecurityConfig
package com.lpc.config;

import org.springframework.beans.factory.annotation.Autowired;
import org.springframework.context.annotation.Bean;
import org.springframework.context.annotation.Configuration;
import org.springframework.security.config.annotation.authentication.builders.AuthenticationManagerBuilder;
import org.springframework.security.config.annotation.web.configuration.WebSecurityConfigurerAdapter;
import org.springframework.security.core.userdetails.UserDetailsService;
import org.springframework.security.crypto.bcrypt.BCryptPasswordEncoder;
import org.springframework.security.crypto.password.PasswordEncoder;

/**
 * @Author lpc
 * @Date 2024 01 05 15 11
 **/

@Configuration
public class SecurityConfig extends WebSecurityConfigurerAdapter {

    @Autowired
    private UserDetailsService userDetailsService;


    /**
     *使用userDetailsService来加载用户的信息,并给用户的密码进行
     */
    @Override
    protected void configure(AuthenticationManagerBuilder auth) throws Exception {
        auth.userDetailsService(userDetailsService).passwordEncoder(password());
    }


     /**
     * 默认没有,手动调用一下
     * 密码加密接口 PasswordEncoder
     */

    @Bean
    PasswordEncoder password(){
        return new BCryptPasswordEncoder();
    }


}
10.MyUserDateilsService
import com.baomidou.mybatisplus.core.toolkit.StringUtils;
import com.baomidou.mybatisplus.core.toolkit.Wrappers;
import com.lpc.entity.Users;
import com.lpc.service.UsersService;
import org.springframework.beans.factory.annotation.Autowired;
import org.springframework.security.authentication.jaas.AuthorityGranter;
import org.springframework.security.core.GrantedAuthority;
import org.springframework.security.core.authority.AuthorityUtils;
import org.springframework.security.core.userdetails.User;
import org.springframework.security.core.userdetails.UserDetails;
import org.springframework.security.core.userdetails.UserDetailsService;
import org.springframework.security.core.userdetails.UsernameNotFoundException;
import org.springframework.security.crypto.bcrypt.BCryptPasswordEncoder;
import org.springframework.stereotype.Service;

import java.util.List;


/**
 * @Author lpc
 * @Date 2024 01 05 21 07
 **/

@Service
public class MyUserDateilsService implements UserDetailsService {

    @Autowired
    private UsersService usersService;
    @Override
    public UserDetails loadUserByUsername(String username) throws UsernameNotFoundException {
        //根据用户名查询数据库
        Users users=usersService.getOne(Wrappers.lambdaQuery(Users.class)
                .eq(Users::getUsername,username)
        );
        //如果返回的users为空
        if (users==null){//说明数据库就没有该用户
            //可以直接抛异常
            throw  new UsernameNotFoundException("用户名不存在");
        }

        /*创建一个包含角色信息的权限列表 List。
         在这里,使用了 AuthorityUtils 类的 commaSeparatedStringToAuthorityList 方法,
         将包含角色的字符串 “role” 转换成了一个权限列表。*/
        List auths= AuthorityUtils.commaSeparatedStringToAuthorityList("role");
        /*
         然后,使用 User 类创建一个用户对象。User 是 Spring Security 提供的一个实现了 UserDetails 接口的默认用户类
         构造方法的参数依次是用户名、加密后的密码和权限列表

         auths是权限不能为空哦,现在我们是自己给他的,后面是要查询数据库出来的
         */
        return new User(users.getUsername(),new BCryptPasswordEncoder().encode(users.getPassword()),auths);
    }
}
3.自定义登录页面----在实现数据库认证来完成登录基础上
就在SecurityConfig里面写就行了
import org.springframework.beans.factory.annotation.Autowired;
import org.springframework.context.annotation.Bean;
import org.springframework.context.annotation.Configuration;
import org.springframework.security.config.annotation.authentication.builders.AuthenticationManagerBuilder;
import org.springframework.security.config.annotation.web.builders.HttpSecurity;
import org.springframework.security.config.annotation.web.configuration.WebSecurityConfigurerAdapter;
import org.springframework.security.core.userdetails.UserDetailsService;
import org.springframework.security.crypto.bcrypt.BCryptPasswordEncoder;
import org.springframework.security.crypto.password.PasswordEncoder;

/**
 * @Author lpc
 * @Date 2024 01 05 15 11
 **/

@Configuration
public class SecurityConfig extends WebSecurityConfigurerAdapter {

    @Autowired
    private UserDetailsService userDetailsService;


    /**
     *使用userDetailsService来加载用户的信息,并给用户的密码进行
     */
    @Override
    protected void configure(AuthenticationManagerBuilder auth) throws Exception {
        auth.userDetailsService(userDetailsService).passwordEncoder(password());
    }


     /**
     * 默认没有,手动调用一下
     * 密码加密接口 PasswordEncoder
     */

    @Bean
    PasswordEncoder password(){
        return new BCryptPasswordEncoder();
    }


    @Override
    protected void configure(HttpSecurity http) throws Exception {
        http
                // 配置登录表单
                .formLogin()
                .loginPage("/login.html") // 设置自定义的登录页面
                .loginProcessingUrl("/user/login") // 设置登录表单的提交路径
                .defaultSuccessUrl("/test/index").permitAll() // 配置登录成功后的默认跳转路径,并允许所有用户访问
                .and()
                // 配置请求的权限限制
                .authorizeRequests()
                .antMatchers("/", "/test/hello", "/user/login").permitAll() // 设置一些公开的请求路径,允许所有用户访问
                .anyRequest().authenticated() // 其他请求需要进行身份验证
                .and()
                // 关闭CSRF保护(Cross-Site Request Forgery)
                .csrf().disable();
    }
}
然后写静态资源
login.html
    xx


表单提交
然后写登录成功后跳转的路径
controller里面写
TestController
package lpc.com.controller;

import io.swagger.annotations.Api;
import io.swagger.annotations.ApiOperation;
import org.springframework.web.bind.annotation.GetMapping;
import org.springframework.web.bind.annotation.RequestMapping;
import org.springframework.web.bind.annotation.RestController;

/**
 * @Author lpc
 * @Date 2024 01 05 10 34
 **/

@RestController
@RequestMapping("/test")
@Api(tags = "公共接口")
public class TestController {

    /**
     * 测试
     * 路径:localhost:8001/test/add
     */
    @GetMapping("/add")
    public String add(){
       return "hello 六花,我喜欢你";
    }

    /**
     * 设置了不需要认证就能访问
     * 路径:localhost:8001/test/hello
     * OK
     */
    @GetMapping("/hello")
    public String hello() {
        return "hello security";
    }

    /**
     * 登录成功跳转的路径
     */
    @GetMapping("/index")
    public String index() {
        return "hello index";
    }


}
名字必须是这个
4.基于角色或权限进行访问控制
4.1 hasAuthority方法
如果当前的主体具有指定的权限,则返回true,否则返回false.
修改配置类。
1.SecurityConfig里面写这句
//当前登录用户,只有具有admins权限才可以访问这个路径“/test/index”
                .antMatchers("/test/index").hasAuthority("admins")
这个配置里面的:
@Override
    protected void configure(HttpSecurity http) throws Exception {
        http
                // 配置登录表单
                .formLogin()
                .loginPage("/login.html") // 设置自定义的登录页面
                .loginProcessingUrl("/user/login") // 设置登录表单的提交路径
                .defaultSuccessUrl("/test/index")// 配置登录成功后的默认跳转路径,并允许所有用户访问
                .and()
                // 配置请求的权限限制
                .authorizeRequests()
                .antMatchers("/login.html", "/test/hello", "/user/login").permitAll() // 设置一些公开的请求路径,允许所有用户访问
                //当前登录用户,只有具有admins权限才可以访问这个路径“/test/index”
                .antMatchers("/test/index").hasAuthority("admins")
                .anyRequest().authenticated() // 其他请求需要进行身份验证
                .and()
                // 关闭CSRF保护(Cross-Site Request Forgery)
                .csrf().disable();
    }
2、在UserDetailsService,把返回user对象设置权限
import com.baomidou.mybatisplus.core.toolkit.StringUtils;
import com.baomidou.mybatisplus.core.toolkit.Wrappers;
import com.lpc.entity.Users;
import com.lpc.service.UsersService;
import org.springframework.beans.factory.annotation.Autowired;
import org.springframework.security.authentication.jaas.AuthorityGranter;
import org.springframework.security.core.GrantedAuthority;
import org.springframework.security.core.authority.AuthorityUtils;
import org.springframework.security.core.userdetails.User;
import org.springframework.security.core.userdetails.UserDetails;
import org.springframework.security.core.userdetails.UserDetailsService;
import org.springframework.security.core.userdetails.UsernameNotFoundException;
import org.springframework.security.crypto.bcrypt.BCryptPasswordEncoder;
import org.springframework.stereotype.Service;

import java.util.List;


/**
 * @Author lpc
 * @Date 2024 01 05 21 07
 **/

@Service
public class MyUserDateilsService implements UserDetailsService {

    @Autowired
    private UsersService usersService;
    @Override
    public UserDetails loadUserByUsername(String username) throws UsernameNotFoundException {
        //根据用户名查询数据库
        Users users=usersService.getOne(Wrappers.lambdaQuery(Users.class)
                .eq(Users::getUsername,username)
        );
        //如果返回的users为空
        if (users==null){//说明数据库就没有该用户
            //可以直接抛异常
            throw  new UsernameNotFoundException("用户名不存在");
        }

        /*创建一个包含角色信息的权限列表 List。
         在这里,使用了 AuthorityUtils 类的 commaSeparatedStringToAuthorityList 方法,
         将包含角色的字符串 “role” 转换成了一个权限列表。*/
        List auths= AuthorityUtils.commaSeparatedStringToAuthorityList("role");
        /*
         然后,使用 User 类创建一个用户对象。User 是 Spring Security 提供的一个实现了 UserDetails 接口的默认用户类
         构造方法的参数依次是用户名、加密后的密码和权限列表

         auths是权限不能为空哦,现在我们是自己给他的,后面是要查询数据库出来的
         */
        return new User(users.getUsername(),new BCryptPasswordEncoder().encode(users.getPassword()),auths);
    }
}
将里面的role改成admins
4.2.hasAnyAuthority---如何让admins,role都可以访问“/test/index”这个路径
1.改配置
@Override
    protected void configure(HttpSecurity http) throws Exception {
        http
                // 配置登录表单
                .formLogin()
                .loginPage("/login.html") // 设置自定义的登录页面
                .loginProcessingUrl("/user/login") // 设置登录表单的提交路径
                .defaultSuccessUrl("/test/index")// 配置登录成功后的默认跳转路径,并允许所有用户访问
                .and()
                // 配置请求的权限限制
                .authorizeRequests()
                .antMatchers("/login.html", "/test/hello", "/user/login").permitAll() // 设置一些公开的请求路径,允许所有用户访问
                //当前登录用户,只有具有admins权限才可以访问这个路径“/test/index”
                //.antMatchers("/test/index").hasAuthority("admins")
                //如何让admins,role都可以访问“/test/index”这个路径
                .antMatchers("/test/index").hasAnyAuthority("admins,role")
                .anyRequest().authenticated() // 其他请求需要进行身份验证
                .and()
                // 关闭CSRF保护(Cross-Site Request Forgery)
                .csrf().disable();
    }


