【小程序·开发】支付宝小程序接入<内容风险识别服务>流程指南
支付宝小程序接入<内容风险识别服务>流程指南
- 前言
- 接入过程
-
- 申请接口
- 获取小程序的信息
-
- 获取Appid
- 获取公钥和私钥
- 获取AES密钥
- 云函数配置
- 本地调用云函数
- 后语
前言
最近微信云开发涨价了,想把小程序迁移到支付宝,结果图片处理不过审,只能接入支付宝提供的<内容风险识别服务>,(详见我的上一篇文章),由于官方文档写得太垃圾,百度也找不到支付宝小程序的接入指引,只能自己一番摸索,终于接入成功了,把过程与代码记录于此,供大家参考。
接入过程
申请接口
参考文档内容风险识别接口服务,此处不再赘述。
获取小程序的信息
登录支付宝小程序开放平台
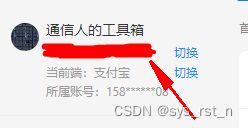
获取Appid
获取公钥和私钥
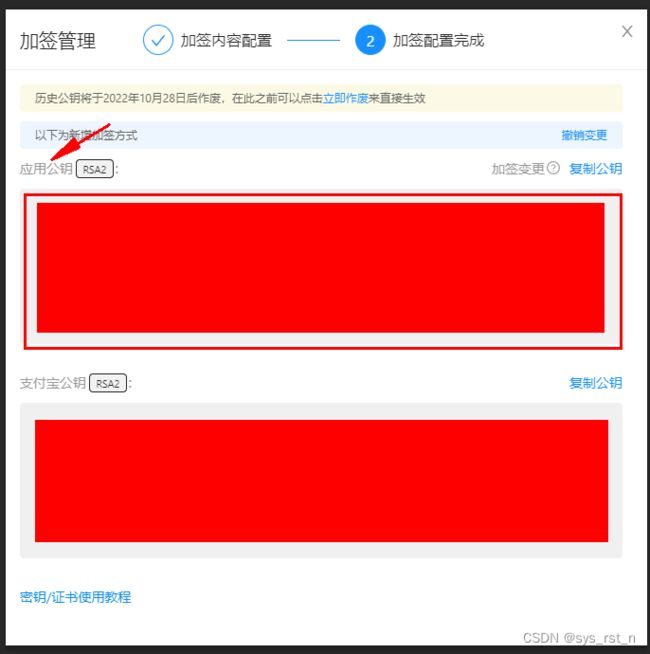
公钥可前往:开发平台->开发设置->接口加签方式(密钥/证书)->设置/查看处获取,注意是应用公钥
私钥无法通过开放平台获取,应该是你当年用工具生成然后填写的,请查看自己的备份,或者重新生成一个。
获取AES密钥
前往:开发平台->开发设置->接口内容加密方式:->查看,获取。

云函数配置
由于支付宝的接口强制要求加签名,签名过程自己实现过于复杂,所以本文调用了alipay-sdk依赖来实现接口实现,但实测发现该接口在本地会报错,报错class为保留的关键字,按照提示进行了设置也不行,或许未来不会还是我的方法错了?
另外,初始化alipay-sdk需要AppID、商户私钥、公钥以及可能需要的AES密钥,这些敏感信息放小程序本地或者代码中保不准会被破解导致不安全。
因此,我把alipay-sdk依赖放到了云函数中执行。
- 新建云函数,名字可以自己指定,示例命名为photo_check。
- 在云函数目录的"package.json"文件中添加alipay-sdk依赖:
{
  "name": "photo_check",
  "version": "1.0.0",
  "description": "",
  "main": "index.js",
  "keywords": [],
  "author": "",
  "license": "ISC",
  "dependencies": {
    "alipay-sdk": "^3.2.0"
  }
}
- 编辑云函数的index.js,在其中调用支付宝接口,由于我只需要图片的审核,所以下方的代码基于图片审核实现,需要文字审核的只需要按照官方手册《内容风险识别接口服务》修改参数即可。由于图片审核实测需要间隔一定时间后查询审核结果,所以代码在第一次查询得到结果后,设置了一个超时回调,在其中查询之前提交图片的查询结果,并异步返回。
const AlipaySdk = require('./node_modules/alipay-sdk/lib/alipay').default;
const privateKey = '你的私钥'
const publicKey = '你的公钥'
const appID = '你的appID'
const encryptKey = '你的AES密钥'

module.exports = async function (ctx) {
  const { args, mpserverless } = ctx
  const log = [];
  return new Promise((resolve, reject) => {
    const alipaySdk = new AlipaySdk({
      // 参考下方 SDK 配置
      appId: appID,
      privateKey: privateKey,
      alipayPublicKey: publicKey,
      //可设置AES密钥,调用AES加解密相关接口时需要(可选)
      encryptKey: encryptKey
    });
    alipaySdk.exec('alipay.security.risk.content.analyze',{
      timestamp: DateFormatter(new Date(),'yyyy-MM-dd hh:mm:ss'),
      method: 'alipay.security.risk.content.analyze',
      charset : 'utf-8',
      sign_type: 'RSA2',
      version: '1.0',
      app_id: appID,
      bizContent: {
        app_name: 'app_post',
        app_scene: 'cs_open_service',
        publish_date: DateFormatter(new Date(),'yyyy-MM-dd hh:mm:ss'),
        check_labels: 'politics,porn,illegal,terrorism,qrcode,advert',
        account_id: appID,
        app_scene_data_id: args.userId,
        picture_urls: [args.fileUrl]
      }
    },{
    }).then(res=>{
      log.push(res);
      if(res.msg == "Success"){
        if(res.needQuery == 'need' || res.resultAction == 'CC'){
          //需要异步接收结果
          setTimeout(()=>{
            //等待3秒后
            alipaySdk.exec('alipay.security.risk.content.result.get',{
              timestamp: DateFormatter(new Date(),'yyyy-MM-dd hh:mm:ss'),
              method: 'alipay.security.risk.content.result.get',
              charset : 'utf-8',
              sign_type: 'RSA2',
              version: '1.0',
              app_id: appID,
              bizContent:{
                app_scene_data_id: args.userId,
                app_scene: 'cs_open_service',
                event_id: res.eventID,
              }
            },{}).then(res=>{
              log.push(res);
              reject({res,log});
            }).catch(res=>{
              log.push(res);
              resolve({res,log});
            });
          },3000);
        } else {
          //无须异步查询
          reject({res,log});
        }
      } else {
        resolve({res,log});
      }
    }).catch(res=>{
      resolve({res,log});
    });
  });
};

function DateFormatter (thistime, fmt) {
  let $this = new Date(thistime)
  let o = {
    'M+': $this.getMonth() + 1,
    'd+': $this.getDate(),
    'h+': $this.getHours(),
    'm+': $this.getMinutes(),
    's+': $this.getSeconds(),
    'q+': Math.floor(($this.getMonth() + 3) / 3),
    'S': $this.getMilliseconds()
  }
  if (/(y+)/.test(fmt)) {
    fmt = fmt.replace(RegExp.$1, ($this.getFullYear() + '').substr(4 - RegExp.$1.length))
  }
  for (var k in o) {
    if (new RegExp('(' + k + ')').test(fmt)) {
      fmt = fmt.replace(RegExp.$1, (RegExp.$1.length === 1) ? (o[k]) : (('00' + o[k]).substr(('' + o[k]).length)))
    }
  }
  return fmt
}
- (可选)云函数部署后,建议前往阿里云OpenAPI开发者门户,修改本云函数photo_check的超时时间为10秒,否则一些场景可能会出错。
本地调用云函数
以下代码不全,仅为关键部分,以供参考。需要注意的是,图片审核结果有以下四种:
- PASSED(“正常,建议直接放行”)
- REJECTED(“违规,建议直接拦截”)
- CC(“需要异步查询结果”)
- REJECTED_CC(嫌疑,建议入审)
我这里为了安全起见,仅放行第一种,实际应该根据您的应用场景实行相对的审核策略。
  //上传到云文件
  const src = '需要审核图片的地址'
  my.serverless.file.uploadFile({
    filePath:src,
  }).then(e => {
    //调用云函数发送图片审核请求
    //这里是我获取用户的ID作为检测id,获取失败则用12位随机数代替
    const userId = app.globalData.user.userId ? app.globalData.user.userId:(Math.random()*12).toFixed(0);
    my.serverless.function.invoke('photo_check',{
      userId: userId,
      fileUrl: e.fileUrl
    }).then(e=>{
      console.log('审核结果');
      console.log(e);
      if(e.success && e.result.res.resultAction == "PASSED"){
          //审核通过
          my.showToast({
            content: '图片审核通过',
            type: 'success'
          });
       } else {
          //审核不通过
          /* 审核结果有4种,但为了安全起见,仅通过审核认为应该放行的 */
          my.showToast({
            content: '图片审核不通过',
            type: 'success'
          });
	   }
    }).catch(e=>{
      console.error('审核出错')
      console.error(e);
    });
  });
后语
我的小程序迁移真的一波三折,这次已经接入了审核接口,提交了审核,还不知道能否通过。。。看到这了,不点个赞再走吗?
