Window10中成功安装TensorFlow-GPU版本!
背景:
我的计算机GPU版本为NVIDIA GeForce RTX 3070
![]()
首先,查看显卡的版本以及对应的CUDA
桌面鼠标右键->NVIDIA控制面板->帮助->系统信息


一.TensorFlow安装(试错阶段,不想安装TensorFlow2的可直接跳到下一节)
1.安装CUDA
本人计算机CUDA对应的版本为11.2.162
在官网中找到相应的版本号进行下载
https://developer.nvidia.com/cuda-toolkit-archive
下载后安装即可
2.安装cuDNN
从官网中下载对应版本(需要先进行注册,按照要求注册就行)
https://developer.nvidia.com/rdp/cudnn-archive

适合我安装的是版本为v8
3.安装TensorFlow
根据以下网站找到对应的tensorflow版本
https://tensorflow.google.cn/install/source_windows

此时,我只能选择tensorflow-gpu 2.4.0版本
在cmd中输入命令
>pip install tensorflow-gpu
安装最新版本的 tensorflow
二.TensorFlow1安装
我想要安装TensorFlow1(目前,大部分人推荐初学者选用TF1),所以只能降版本安装
1.anaconda安装
对应上节图表得知,TensorFlow1只支持python3.5-3.7版本
通过下图找到想要安装的版本号

首先卸载我原来的内置python3.8的anaconda
在官网下载只看到最新版本的anaconda
所以,到清华大学开源软件镜像站,找到合适版本下载安装
https://mirrors.tuna.tsinghua.edu.cn/anaconda/archive/

我想要安装3.7,选择的是上图中红框版本。
(注意:1.一定要选对位数,如果计算机是64位就下载"x86_64"的,我开始没注意下载了32位的,全部安装后失败又重来了一遍
2.不要安装anaconda4.6.11版本,会出现其特有的bug,安装tensorflow出现错误:The conda.compat module is deprecated and will be removed in a future release,处理起来很麻烦,反正我不会,直接卸载换版本,又重来一遍)
如何查看安装的anaconda版本号:
conda --version
conda -V
![]()

anaconda安装时基本就是默认下一步,只有一个地方需要注意,
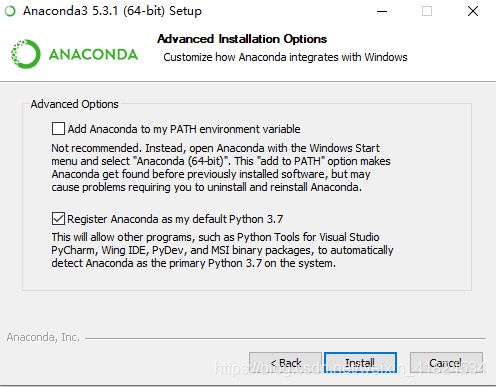
第一个选项,是否要把anaconda添加到环境变量中,有的建议不选(后面会引起错误),我就没选,但是后面不能在其他文件夹使用pip,最后还是手动添加了环境变量
在我的电脑右键->属性->高级系统设置->环境变量->系统变量
找到Path->新建以下三个路径:

2.CUDA安装
到官网中下载安装包
此次选择10版本下载

点击进去具体页面进行下载

下载完成后运行安装,全部选择下一步即可
查看是否安装成功:
执行命令
>nvcc -V
显示版本号

3.cuDNN安装
到官网中下载安装包(如果之前没有注册过需要注册一个账号才能进行下载)
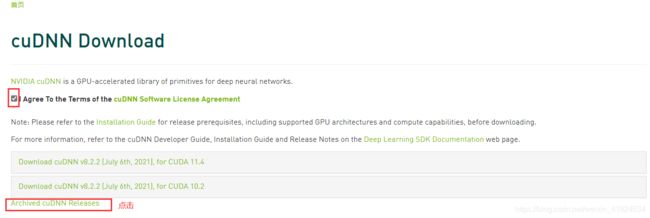
我在这里选择for cuda10 的v7.4.2版本,如下图红框所示:

将下载后的安装包解压,将包中的bin,include,lib复制粘贴到CUDA文件夹中


然后在环境变量path中,添加一项:
设置->高级系统设置->环境变量->系统变量->Path->新建:
C:\Program Files\NVIDIA GPU Computing Toolkit\CUDA\v10.0\lib\x64

4.安装TensorFlow
输入命令:
>pip install tensorflow-gpu==1.14.0 -i https://pypi.tuna.tsinghua.edu.cn/simple/
![]()
错误提示:

网上查到解决办法:
输入命令:
>pip install -U --ignore-installed wrapt enum34 simplejson netaddr
![]()
安装提示:
再次执行
pip install tensorflow-gpu==1.14.0 -i https://pypi.tuna.tsinghua.edu.cn/simple/

安装成功,测试,没有安装成功
(在网上查找了错误原因:numpy与tensorflow版本不对应造成的)
执行命令可解决:
>pip install tf-nightly
安装提示:

或另一种解决办法(网上查找,没有自己实现),重装numpy即可:
>pip uninstall numpy
>pip install numpy
再根据提示安装PyHamcrest
到官网下载
https://pypi.org/project/PyHamcrest/

点击下载即可
将下载的压缩文件解压,然后cd到该解压文件的目录,执行命令:
>pip install PyHamcrest

安装成功
5.测试
在python中写代码运行
from tensorflow.python.client import device_lib
print(device_lib.list_local_devices())
执行结果:
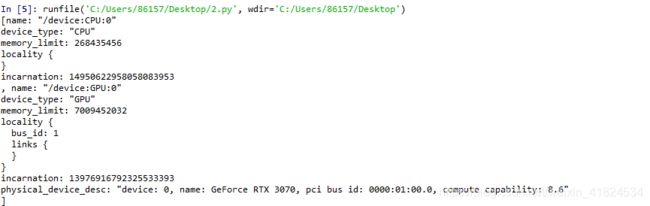
测试成功,已安装完毕!