Gateway API 实践之(八)FSM Gateway SSL 代理终端与 TLS 上游
FSM Gateway 流量管理策略系列:
- 故障注入
- 黑白名单访问控制
- 限速
- 重试
- 会话保持
- 健康检查
- 负载均衡算法
- TLS 上游
- 双向 TLS
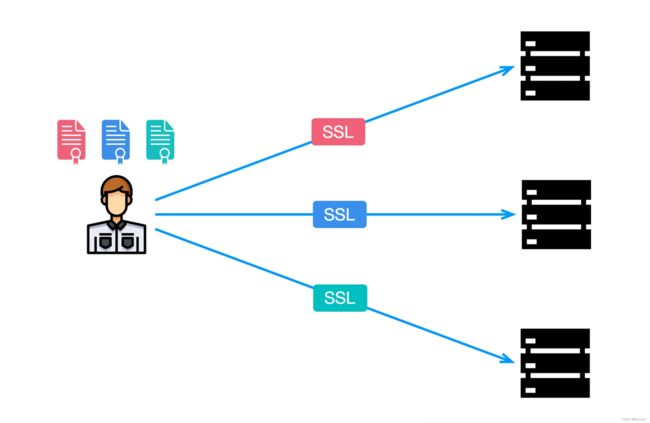
网关使用 HTTP 对外与客户端通信,而与上游服务使用 HTTPS 的功能,是一种常见的网络架构模式。在这种模式下,网关承担了 SSL/TLS 加密的终端角色,确保与上游服务之间的通信安全加密。这意味着,尽管客户端与网关之间的通信使用的是标准的非加密 HTTP 协议,但网关会将这些请求安全地转换为 HTTPS 请求与上游服务进行通信。
这种架构有几个关键优点:
- 安全性增强:通过在网关层实施 HTTPS,上游服务与网关之间的数据传输得到加密,从而增强了数据的安全性。这对于敏感数据的传输尤其重要。
- 简化证书管理:所有的 SSL/TLS 证书都可以在网关处集中管理,而不需要在每个上游服务上单独配置和管理。这大大简化了证书的更新和管理工作,降低了出错的可能性。
- 性能和兼容性:对于某些旧的或受限的客户端设备,可能不支持 HTTPS 或者 HTTPS 的开销过大。使用这种模式,可以在不牺牲内部通信安全的前提下,为这些客户端提供服务。
- 灵活的安全策略:网关可以根据需要对流量进行检查和修改,例如实施安全策略、进行内容缓存、请求路由等。
接下来,我们一起看下如何使用 FSM Gateway 的 SSL 代理终端模式来实现与上游的 TLS 加密传输。
前置条件
- Kubernetes 集群
- kubectl 工具
环境准备
安装 FSM Gateway
FSM Gateway 的安装,可以参考 安装文档。这里选择 CLI 的方式安装。
下载 FSM CLI。
system=$(uname -s | tr '[:upper:]' '[:lower:]')
arch=$(uname -m | sed -E 's/x86_/amd/' | sed -E 's/aarch/arm/')
release=v1.2.0
curl -L https://github.com/flomesh-io/fsm/releases/download/$release/fsm-$release-$system-$arch.tar.gz | tar -vxzf -
./$system-$arch/fsm version
sudo cp ./$system-$arch/fsm /usr/local/bin/fsm
在安装 FSM 时启用 FSM Gateway,默认情况是不启用的。
fsm install \
    --set=fsm.fsmGateway.enabled=true
部署示例应用
我们的上游应用是 HTTPS 的,因此需要先颁发自签名的证书。下面的命令分别生成了 CA 证书、服务器证书以及密钥。
openssl genrsa 2048 > ca-key.pem

openssl req -new -x509 -nodes -days 365000 \
   -key ca-key.pem \
   -out ca-cert.pem \
   -subj '/CN=flomesh.io'

openssl genrsa -out server-key.pem 2048
openssl req -new -key server-key.pem -out server.csr -subj '/CN=foo.example.com'
openssl x509 -req -in server.csr -CA ca-cert.pem -CAkey ca-key.pem -CAcreateserial -out server-cert.pem -days 365
使用服务器证书和密钥创建 Secret server-cert。
kubectl create namespace httpbin
#TLS cert secret
kubectl create secret generic -n httpbin server-cert \
  --from-file=./server-cert.pem \
  --from-file=./server-key.pem
示例应用依然使用 httpbin 镜像,不过这次将会使用上面创建的证书和密钥开启 TLS。
kubectl apply -n httpbin -f - <<EOF
apiVersion: apps/v1
kind: Deployment
metadata:
  name: httpbin
spec:
  replicas: 1
  selector:
    matchLabels:
      app: httpbin
  template:
    metadata:
      labels:
        app: httpbin
    spec:
      containers:
      - name: httpbin
        image: kennethreitz/httpbin
        ports:
        - containerPort: 443
        volumeMounts:
        - name: cert-volume
          mountPath: /etc/httpbin/certs  # Mounting path in the container
        command: ["gunicorn"]
        args: ["-b", "0.0.0.0:443", "httpbin:app", "-k", "gevent", "--certfile", "/etc/httpbin/certs/server-cert.pem", "--keyfile", "/etc/httpbin/certs/server-key.pem"]
      volumes:
      - name: cert-volume
        secret:
          secretName: server-cert
---
apiVersion: v1
kind: Service
metadata:
  name: httpbin
spec:
  selector:
    app: httpbin
  ports:
    - protocol: TCP
      port: 8443
      targetPort: 443
EOF
验证 HTTPS 是否已经开启。
export HTTPBIN_POD=$(kubectl get po -n httpbin -l app=httpbin -o jsonpath='{.items[0].metadata.name}')

kubectl port-forward -n httpbin $HTTPBIN_POD 8443:443 &
# access with CA cert
curl --cacert ca-cert.pem https://foo.example.com/headers --connect-to foo.example.com:443:127.0.0.1:8443
{
  "headers": {
    "Accept": "*/*",
    "Host": "foo.example.com",
    "User-Agent": "curl/8.1.2"
  }
}
创建网关和路由
接下来创建网关并为 Service httpbin 创建路由。
kubectl apply -n httpbin -f - <<EOF
apiVersion: gateway.networking.k8s.io/v1beta1
kind: Gateway
metadata:
  name: simple-fsm-gateway
spec:
  gatewayClassName: fsm-gateway-cls
  listeners:
  - protocol: HTTP
    port: 8000
    name: http
    allowedRoutes:
      namespaces:
        from: Same
---
apiVersion: gateway.networking.k8s.io/v1beta1
kind: HTTPRoute
metadata:
  name: http-route-foo
spec:
  parentRefs:
  - name: simple-fsm-gateway
    port: 8000
  hostnames:
  - foo.example.com
  rules:
  - matches:
    - path:
        type: PathPrefix
        value: /
    backendRefs:
    - name: httpbin
      port: 8443
EOF
此时,我们通过网关无法访问 httpbin,因为 httpbin 开启了 TLS 而网关无法验证 httpbin 的服务器证书。
curl http://foo.example.com/headers --connect-to foo.example.com:80:$GATEWAY_IP:8000
curl: (52) Empty reply from server
上游 TLS 策略验证
我们使用前面创建的 CA 证书创建一个 Secret https-cert。
#CA cert secret
kubectl create secret generic -n httpbin https-cert --from-file=ca.crt=ca-cert.pem
接下来创建上游 TLS 策略 UpstreamTLSPolicy。参考文档 UpstreamTLSPolicy,为上游服务 httpbin 指定承载了 CA 证书的 Secret https-cert,网关将使用该证书验证 httpbin 的服务器证书。
kubectl apply -n httpbin -f - <<EOF
apiVersion: gateway.flomesh.io/v1alpha1
kind: UpstreamTLSPolicy
metadata:
  name: upstream-tls-policy-sample
spec:
  targetRef:
    group: ""
    kind: Service
    name: httpbin
    namespace: httpbin
  ports:
  - port: 8443
    config:
      certificateRef:
        namespace: httpbin
        name: https-cert
      mTLS: false
EOF
应用该策略,待策略生效后,再次尝试通过网关访问 httpbin 服务。
curl http://foo.example.com/headers --connect-to foo.example.com:80:$GATEWAY_IP:8000
{
  "headers": {
    "Accept": "*/*",
    "Connection": "keep-alive",
    "Host": "10.42.0.25:443",
    "User-Agent": "curl/8.1.2"
  }
}
关于 Flomesh
Flomesh(易衡科技)成立于 2018 年,自主研发并开源了高性能可编程代理 Pipy(https://github.com/flomesh-io/pipy)。以 Pipy 为基础,Flomesh 研发了软件负载均衡、服务网格两款软件产品。为工信部认证的可信云产品、可信开源项目。
Flomesh 核心竞争力来自完全自研的核心组件 Pipy,该组件高性能、高可靠、低延迟、可编程、可扩展、低依赖,采用 C++ 开发,内置自研的 JS 引擎,支持适用 JS 脚本做扩展开发。支持包括 x86、arm、龙芯、海光等硬件 CPU 架构;支持 Linux、FreeBSD、OpenWrt 等多种核心的操作系统。
Flomesh 成立以来,以技术为根基、以客户为导向,产品被应用在头部股份制商业银行总行、大型保险公司、运营商总部以及研究院等众多客户和多个场景。


