全网第一篇把Nacos配置中心客户端讲明白的
入口
我们依旧拿ConfigExample作为入口
public class ConfigExample {

    public static void main(String[] args) throws NacosException, InterruptedException {
        String serverAddr = "localhost";
        String dataId = "test";
        String group = "DEFAULT_GROUP";
        Properties properties = new Properties();
        properties.put("serverAddr", serverAddr);
        ConfigService configService = NacosFactory.createConfigService(properties);
        String content = configService.getConfig(dataId, group, 5000);
        System.out.println(content);
        configService.addListener(dataId, group, new Listener() {
            @Override
            public void receiveConfigInfo(String configInfo) {
                System.out.println("receive:" + configInfo);
            }

            @Override
            public Executor getExecutor() {
                return null;
            }
        });

        Thread.sleep(300000);
        boolean isPublishOk = configService.publishConfig(dataId, group, "content");
        System.out.println(isPublishOk);

        Thread.sleep(3000);
        content = configService.getConfig(dataId, group, 5000);
        System.out.println(content);

//        boolean isRemoveOk = configService.removeConfig(dataId, group);
//        System.out.println(isRemoveOk);
//        Thread.sleep(3000);
//
//        content = configService.getConfig(dataId, group, 5000);
//        System.out.println(content);
        Thread.sleep(300000);

    }
}
NacosFactory.createConfigService
套路和之前差不多, 加速过
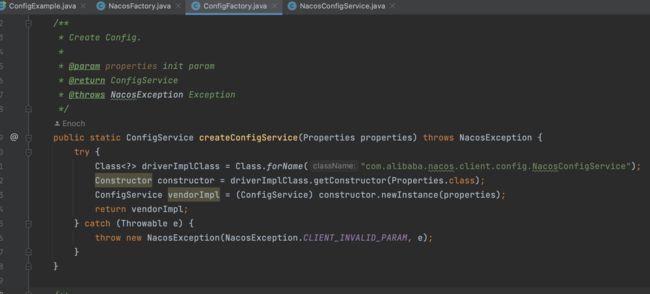
会走到NacosConfigService的构造方法里面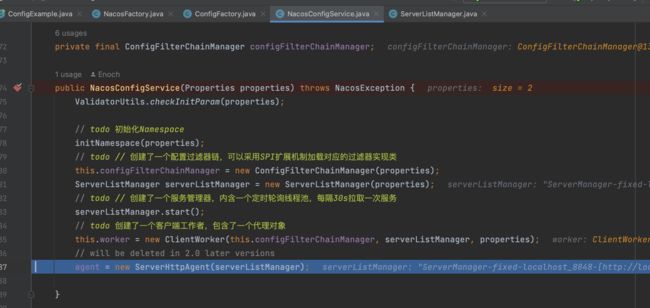
NacosConfigService.getConfig

   private String getConfigInner(String tenant, String dataId, String group, long timeoutMs) throws NacosException {
        group = blank2defaultGroup(group);
        // todo 检查参数
        ParamUtils.checkKeyParam(dataId, group);
        ConfigResponse cr = new ConfigResponse();

        // todo // 设置配置信息
        cr.setDataId(dataId);
        cr.setTenant(tenant);
        cr.setGroup(group);

        // use local config first
        // todo 这里有个失败转移的配置。如果能读到失败转移的配置信息,则直接返回了。原因的话英文注释写的很清楚了
        // 优先使用失败转移,设计的目的是当server挂后,又需要修改配置,就可以读本地目录
        String content = LocalConfigInfoProcessor.getFailover(worker.getAgentName(), dataId, group, tenant);
        if (content != null) {
            LOGGER.warn("[{}] [get-config] get failover ok, dataId={}, group={}, tenant={}, config={}",
                    worker.getAgentName(), dataId, group, tenant, ContentUtils.truncateContent(content));
            cr.setContent(content);
            String encryptedDataKey = LocalEncryptedDataKeyProcessor
                    .getEncryptDataKeyFailover(agent.getName(), dataId, group, tenant);
            cr.setEncryptedDataKey(encryptedDataKey);
            configFilterChainManager.doFilter(null, cr);
            content = cr.getContent();
            return content;
        }

        try {
            // todo 通过客户端远程拉取配置信息
            ConfigResponse response = worker.getServerConfig(dataId, group, tenant, timeoutMs, false);
            cr.setContent(response.getContent());
            cr.setEncryptedDataKey(response.getEncryptedDataKey());
            configFilterChainManager.doFilter(null, cr);
            content = cr.getContent();

            return content;
        } catch (NacosException ioe) {
            if (NacosException.NO_RIGHT == ioe.getErrCode()) {
                throw ioe;
            }
            LOGGER.warn("[{}] [get-config] get from server error, dataId={}, group={}, tenant={}, msg={}",
                    worker.getAgentName(), dataId, group, tenant, ioe.toString());
        }

        LOGGER.warn("[{}] [get-config] get snapshot ok, dataId={}, group={}, tenant={}, config={}",
                worker.getAgentName(), dataId, group, tenant, ContentUtils.truncateContent(content));
        // todo     // 非鉴权失败的异常的,可以从本地快照中获取配置,如果有的话
        content = LocalConfigInfoProcessor.getSnapshot(worker.getAgentName(), dataId, group, tenant);
        cr.setContent(content);
        String encryptedDataKey = LocalEncryptedDataKeyProcessor
                .getEncryptDataKeyFailover(agent.getName(), dataId, group, tenant);
        cr.setEncryptedDataKey(encryptedDataKey);
        configFilterChainManager.doFilter(null, cr);
        content = cr.getContent();
        return content;
    }
总结一下做了几件事:
- 支持故障转移从本地读取配置
- 正常情况下从server获取配置
- 非鉴权失败的异常,可以从本地快照中获取配置
ClientWorker.getServiceConfig

这里的agent会被ClientWorker里面内部类的ConfigRpcTransportClient�继承,并且重写,也就是说最终会调用到ConfigRpcTransportClient.queryConfig方法

通过GrpcSdkClient往server发送请求,获取配置
NacosConfigService.pushConfig
这个比较简单,和上面逻辑类似
最终也是调用ClientWorker.publishConfig -> agent.pushConfig(实际为ClientWorker的内部类ConfigRpcTransportClient)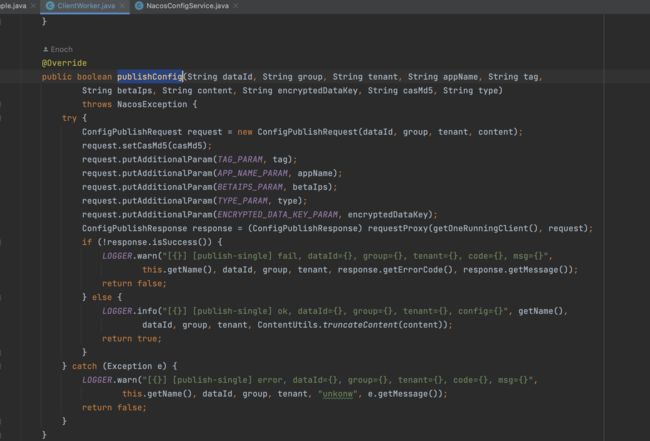
NacosConfigService.addListener
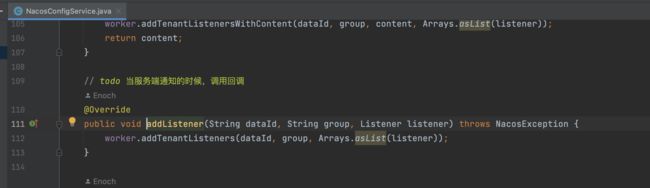


这里一共做了几件事:
- 创建CacheData,这里有一个很重要的cacheMap.size()/ParamUtil.getPerTaskConfigSize(默认是是3000),也就说对cache进行一个分组,比如size为1/3000,2/3000,这里的taskId永远为0,后面在定时任务调度,批量往server端请求的时候会用到
- 往cache里面放listener
- 设置syncWithServer为false
- agent.notifyListenConfig:ConfigRpcTransportClient.notifyListenConfig 这个比较重要

它会往这个阻塞队列里面放一个Object,为什么要放呢?那肯定有地方要取,ClientWorker在启动的时候,会有一个定时任务不断从这个阻塞队列中取,如果取到就执行
ClientWorker
NacosConfigService在创建的同时会创建ClientWorker, ClientWorker其实就是它的打手
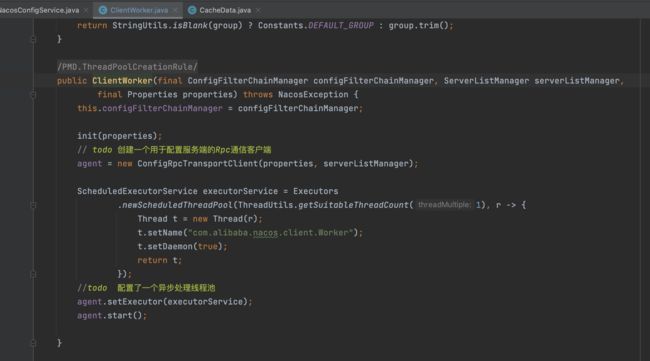
这个agent又是ClientWorker的打手,当调用到agent.start的时候,最终会调用到ClientWorker的内部类![]() 的startInternal方法,
的startInternal方法,
ClientWorker#ConfigRpcTransportClient.startInternal方法

这个方法不断在从ListenExecutebell获取,如果说一直获取不到,就超时,就进入executeConfigListen, 结合前面的notifyListenConfig其实就是给这里一个信号,触发executeConfigListen执行
ClientWorker#ConfigRpcTransportClient.executeConfigListen
 public void executeConfigListen() {
            // todo 存放含有listen的cacheData
            Map<String, List<CacheData>> listenCachesMap = new HashMap<String, List<CacheData>>(16);
            // todo 存放不含邮listen的cacheData
            Map<String, List<CacheData>> removeListenCachesMap = new HashMap<String, List<CacheData>>(16);
            long now = System.currentTimeMillis();
            // todo // 当前时间减去上次全量同步时间是否大于5分钟
            boolean needAllSync = now - lastAllSyncTime >= ALL_SYNC_INTERNAL;
            for (CacheData cache : cacheMap.get().values()) {

                synchronized (cache) {
                    // todo !!!!!!!这里,一般不会走这里,不要被误导了,我也是debug多次才发现
                    //check local listeners consistent.
                    if (cache.isSyncWithServer()) {
                        // todo // 一致则检查md5值,若md5值和上一个不一样,则说明变动了,需要通知监听器
                        cache.checkListenerMd5();
                        // todo // 是否到全量同步时间了,未到则直接跳过
                        if (!needAllSync) {
                            continue;
                        }
                    }

                    if (!CollectionUtils.isEmpty(cache.getListeners())) {
                        // todo 如果有监听器并且缓存数据并非使用本地的,则把这些缓存数据加入到需要监听的列表listenCachesMap中
                        //get listen  config
                        if (!cache.isUseLocalConfigInfo()) {
                            List<CacheData> cacheDatas = listenCachesMap.get(String.valueOf(cache.getTaskId()));
                            if (cacheDatas == null) {
                                cacheDatas = new LinkedList<CacheData>();
                                listenCachesMap.put(String.valueOf(cache.getTaskId()), cacheDatas);
                            }
                            cacheDatas.add(cache);

                        }
                    } else if (CollectionUtils.isEmpty(cache.getListeners())) {
                        // todo 即删除, 放入removeListenCachesMap
                        if (!cache.isUseLocalConfigInfo()) {
                            List<CacheData> cacheDatas = removeListenCachesMap.get(String.valueOf(cache.getTaskId()));
                            if (cacheDatas == null) {
                                cacheDatas = new LinkedList<CacheData>();
                                removeListenCachesMap.put(String.valueOf(cache.getTaskId()), cacheDatas);
                            }
                            cacheDatas.add(cache);

                        }
                    }
                }

            }
            // todo  此时,如果需要和服务端数据同步,则listenCachesMap和removeListenCachesMap存放了本地数据,需要和服务端对比
            boolean hasChangedKeys = false;

            if (!listenCachesMap.isEmpty()) {
                for (Map.Entry<String, List<CacheData>> entry : listenCachesMap.entrySet()) {
                    String taskId = entry.getKey();
                    Map<String, Long> timestampMap = new HashMap<>(listenCachesMap.size() * 2);

                    List<CacheData> listenCaches = entry.getValue();
                    for (CacheData cacheData : listenCaches) {
                        timestampMap.put(GroupKey.getKeyTenant(cacheData.dataId, cacheData.group, cacheData.tenant),
                                cacheData.getLastModifiedTs().longValue());
                    }
                    // todo 构建新增数据的请求参数,此请求用于远程和本地对比,发现变动了会进行通知
                    ConfigBatchListenRequest configChangeListenRequest = buildConfigRequest(listenCaches);
                    // todo // 配置需要新增或更新监听数据
                    configChangeListenRequest.setListen(true);
                    try {
                        // todo // 获取一个rpc的客户端
                        RpcClient rpcClient = ensureRpcClient(taskId);
                        ConfigChangeBatchListenResponse configChangeBatchListenResponse = (ConfigChangeBatchListenResponse) requestProxy(
                                rpcClient, configChangeListenRequest);
                        if (configChangeBatchListenResponse != null && configChangeBatchListenResponse.isSuccess()) {

                            Set<String> changeKeys = new HashSet<String>();
                            //handle changed keys,notify listener
                            if (!CollectionUtils.isEmpty(configChangeBatchListenResponse.getChangedConfigs())) {
                                hasChangedKeys = true;
                                for (ConfigChangeBatchListenResponse.ConfigContext changeConfig : configChangeBatchListenResponse
                                        .getChangedConfigs()) {
                                    String changeKey = GroupKey
                                            .getKeyTenant(changeConfig.getDataId(), changeConfig.getGroup(),
                                                    changeConfig.getTenant());
                                    changeKeys.add(changeKey);
                                    boolean isInitializing = cacheMap.get().get(changeKey).isInitializing();
                                    // todo  刷新配置并通知变动
                                    refreshContentAndCheck(changeKey, !isInitializing);
                                }

                            }

                            //handler content configs
                            for (CacheData cacheData : listenCaches) {
                                String groupKey = GroupKey
                                        .getKeyTenant(cacheData.dataId, cacheData.group, cacheData.getTenant());
                                if (!changeKeys.contains(groupKey)) {
                                    //sync:cache data md5 = server md5 && cache data md5 = all listeners md5.
                                    synchronized (cacheData) {
                                        if (!cacheData.getListeners().isEmpty()) {

                                            Long previousTimesStamp = timestampMap.get(groupKey);
                                            if (previousTimesStamp != null) {
                                                if (!cacheData.getLastModifiedTs().compareAndSet(previousTimesStamp,
                                                        System.currentTimeMillis())) {
                                                    continue;
                                                }
                                            }
                                            // todo  缓存数据没有变动,设置为和服务器同步
                                            cacheData.setSyncWithServer(true);
                                        }
                                    }
                                }

                                cacheData.setInitializing(false);
                            }

                        }
                    } catch (Exception e) {

                        LOGGER.error("Async listen config change error ", e);
                        try {
                            Thread.sleep(50L);
                        } catch (InterruptedException interruptedException) {
                            //ignore
                        }
                    }
                }
            }
            // todo     // 需要删除的数据不为空
            if (!removeListenCachesMap.isEmpty()) {
                for (Map.Entry<String, List<CacheData>> entry : removeListenCachesMap.entrySet()) {
                    String taskId = entry.getKey();
                    List<CacheData> removeListenCaches = entry.getValue();
                    ConfigBatchListenRequest configChangeListenRequest = buildConfigRequest(removeListenCaches);
                    // todo // 配置需要删除
                    configChangeListenRequest.setListen(false);
                    try {
                        // 获取rpc客户端
                        RpcClient rpcClient = ensureRpcClient(taskId);
                        // todo 通知服务端移除数据
                        boolean removeSuccess = unListenConfigChange(rpcClient, configChangeListenRequest);
                        if (removeSuccess) {
                            for (CacheData cacheData : removeListenCaches) {
                                synchronized (cacheData) {
                                    // todo  // 移除缓存
                                    if (cacheData.getListeners().isEmpty()) {
                                        ClientWorker.this
                                                .removeCache(cacheData.dataId, cacheData.group, cacheData.tenant);
                                    }
                                }
                            }
                        }

                    } catch (Exception e) {
                        LOGGER.error("async remove listen config change error ", e);
                    }
                    try {
                        Thread.sleep(50L);
                    } catch (InterruptedException interruptedException) {
                        //ignore
                    }
                }
            }

            if (needAllSync) {
                //todo  更新同步时间
                lastAllSyncTime = now;
            }
            //If has changed keys,notify re sync md5.
            if (hasChangedKeys) {
                // todo // 服务端告知了有数据变动,则需要再同步一次
                notifyListenConfig();
            }
        }
这段代码极其的长,现在我们来总结一一下具体做了哪些事:
-
设置两个监听器cacheMap,一个是带监听器的,一个是不带的
-
开始遍历cacheMap集合,忽略什么cache.isSyncWithServer,debug的时候走不到这里,看源码抓住核心流程,将有监听器的放到listenCachesMap(注意,这里有一个分组操作,拿到cache的taskId, 将cache的taskId和 相同taskId的cache组成一个Map:

-
如果listenCachesMap不为空,然后遍历listenCachesMap,
- 构造批量配置查询请求
- 获取一个RPC的客户端
- 发起RPC请求,查询这一个批taskId对应的cacheData发生变化了没,如果有返回值,就会走到refreshContextAndCheck 刷新配置并通知
-
refreshContentAndCheck�:通过cacheData拿到的dataId、group、tenant 通过getServerConfig调用服务端拿到这个dataId对应的配置
ClientWorker#refreshContentAndCheck

将请求回来的content、configType、encryptedDataKey都设置到cacheData中,接下来调用cacheData.checkListenerMD5()
另外注意一下cacheData.setContent:会同时设置上md5
CacheData.checkListenerMD5

listeners(ManagerListernerWrap)就是我们刚开始创建CacheData设置上的listener上面包装了一层,在创建listener的时候,会把CacheData的content、md5、还有我们创建listener都放到里面,所以这里才会判断当前CacheData里面的md5和listener里面md5是不是一样的,如果不是,就需要通知到listener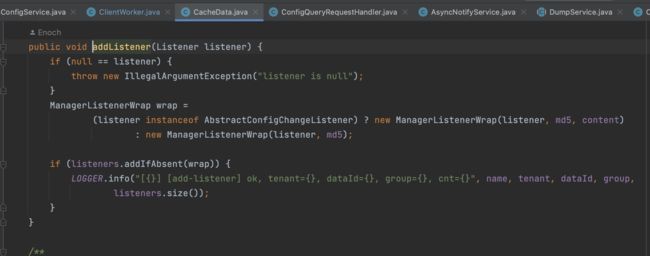
CacheData.safeNotifyListener
 private void safeNotifyListener(final String dataId, final String group, final String content, final String type,
            final String md5, final String encryptedDataKey, final ManagerListenerWrap listenerWrap) {
        final Listener listener = listenerWrap.listener;
        if (listenerWrap.inNotifying) {
            LOGGER.warn(
                    "[{}] [notify-currentSkip] dataId={}, group={}, md5={}, listener={}, listener is not finish yet,will try next time.",
                    name, dataId, group, md5, listener);
            return;
        }
        // todo 定义一个通知任务
        Runnable job = new Runnable() {
            @Override
            public void run() {
                long start = System.currentTimeMillis();
                ClassLoader myClassLoader = Thread.currentThread().getContextClassLoader();
                ClassLoader appClassLoader = listener.getClass().getClassLoader();
                try {
                    // todo 拓展点,像spring cloud alibaba就用到了,创建了NacosContextRefresher
                    if (listener instanceof AbstractSharedListener) {
                        AbstractSharedListener adapter = (AbstractSharedListener) listener;
                        adapter.fillContext(dataId, group);
                        LOGGER.info("[{}] [notify-context] dataId={}, group={}, md5={}", name, dataId, group, md5);
                    }
                    // Before executing the callback, set the thread classloader to the classloader of
                    // the specific webapp to avoid exceptions or misuses when calling the spi interface in
                    // the callback method (this problem occurs only in multi-application deployment).
                    Thread.currentThread().setContextClassLoader(appClassLoader);

                    ConfigResponse cr = new ConfigResponse();
                    cr.setDataId(dataId);
                    cr.setGroup(group);
                    cr.setContent(content);
                    cr.setEncryptedDataKey(encryptedDataKey);
                    configFilterChainManager.doFilter(null, cr);
                    String contentTmp = cr.getContent();
                    listenerWrap.inNotifying = true;
                    // todo !!!!最终回调通知,就是这里
                    listener.receiveConfigInfo(contentTmp);
                    // compare lastContent and content
                    // todo   扩展点,告知配置内容的变动
                    if (listener instanceof AbstractConfigChangeListener) {
                        Map data = ConfigChangeHandler.getInstance()
                                .parseChangeData(listenerWrap.lastContent, content, type);
                        ConfigChangeEvent event = new ConfigChangeEvent(data);
                        ((AbstractConfigChangeListener) listener).receiveConfigChange(event);
                        listenerWrap.lastContent = content;
                    }
                    // 赋予最新的md5
                    listenerWrap.lastCallMd5 = md5;
                    LOGGER.info("[{}] [notify-ok] dataId={}, group={}, md5={}, listener={} ,cost={} millis.", name,
                            dataId, group, md5, listener, (System.currentTimeMillis() - start));
                } catch (NacosException ex) {
                    LOGGER.error("[{}] [notify-error] dataId={}, group={}, md5={}, listener={} errCode={} errMsg={}",
                            name, dataId, group, md5, listener, ex.getErrCode(), ex.getErrMsg());
                } catch (Throwable t) {
                    LOGGER.error("[{}] [notify-error] dataId={}, group={}, md5={}, listener={} tx={}", name, dataId,
                            group, md5, listener, t.getCause());
                } finally {
                    listenerWrap.inNotifying = false;
                    Thread.currentThread().setContextClassLoader(myClassLoader);
                }
            }
        };

        final long startNotify = System.currentTimeMillis();
        try {
            // todo // 监听器配置了异步执行器,就用配置的执行
            if (null != listener.getExecutor()) {
                listener.getExecutor().execute(job);
            } else {
                try {
                    //todo  内部线程池执行
                    INTERNAL_NOTIFIER.submit(job);
                } catch (RejectedExecutionException rejectedExecutionException) {
                    LOGGER.warn(
                            "[{}] [notify-blocked] dataId={}, group={}, md5={}, listener={}, no available internal notifier,will sync notifier ",
                            name, dataId, group, md5, listener);
                    job.run();
                } catch (Throwable throwable) {
                    LOGGER.error(
                            "[{}] [notify-blocked] dataId={}, group={}, md5={}, listener={}, submit internal async task fail,throwable= ",
                            name, dataId, group, md5, listener, throwable);
                    job.run();
                }
            }
        } catch (Throwable t) {
            LOGGER.error("[{}] [notify-error] dataId={}, group={}, md5={}, listener={} throwable={}", name, dataId,
                    group, md5, listener, t.getCause());
        }
        final long finishNotify = System.currentTimeMillis();
        LOGGER.info("[{}] [notify-listener] time cost={}ms in ClientWorker, dataId={}, group={}, md5={}, listener={} ",
                name, (finishNotify - startNotify), dataId, group, md5, listener);
    }
�这块代码也很长,但是比较简单:
- 创建一个任务,判断是否是某种类型listener,如果是AbstractSharedListener,就回调到它的方法
- 回调到我们正常的listener方法,比如listener.receiverConfigInfo
- 判断是否是AbstractConfigChange Listener,如果是,就回调
- 看这个listener有没有配置异步执行器Executor,如果有就用它执行,如果没有,就用内部的线程池执行
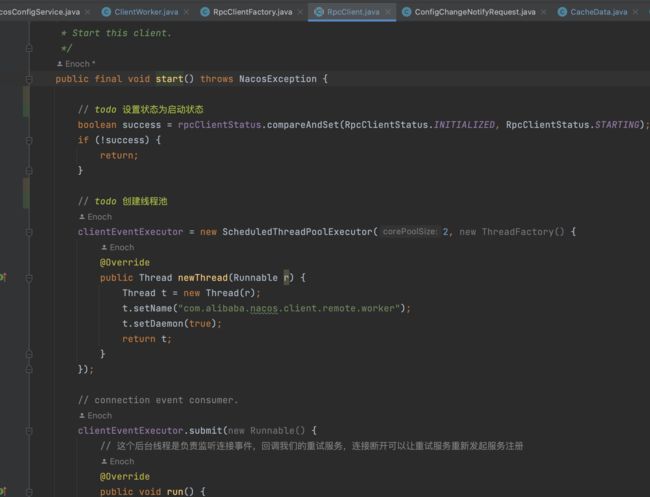
ClientWorker#ConfigRpcTransportClient�#ensureRpcClient
�到上面为止,其实客户端的主流程已经比较请求,但是在executeConfigListen方法中有一个小方法ensureRpcClient我们就简单的一笔带过,实际上在后续的与服务端请求交互比较有用,我们还是再看一下


简单总结一下:
- 通过RpcClientFactory创建了一个GrpcSDKClient,这个之前Nacos服务注册的时候也会创建,所以比较熟悉
- 初始化网络请求处理:在这里注册了服务端调用客户端的处理方法, 注意不是客户端请求,而是服务端接受客户端的请求,因为Grpc是可以双向请求的,这个最重要的就是notifyListenConfig,是不是非常熟悉,如果我们服务端改动了配置,客户端从这里就可以得到通知,然后往listenExecutebell.offer(bellItem)发送一个信号,客户端就立马开始执行executeConfigListen
- rpcClient.start:这个没什么好说的,服务注册那里说过
�