ListView蛮好用
知识点如下:
1. ListView的基本用法
2. ArrayAdapter和SimpleAdapter的用法
3. OnScrollListener 和 OnItemClickListener
4. notifyDataChanged 刷新数据
每一个ListView都可以包含很多列表项目Item。
关于适配器:
数据适配器将指定数据源(数组、链表、数据库、集合)填充在指定控件上。
ArrayAdapter :适用于数据源是集合和数组。
SimpleAdapter : 适用于特定的泛型集合(只能是集合)
实现过程: 新建适配器 –>添加数据源到适配器 –> 视图加载适配器
图例:
(左:数组适配器;右:简单适配器)
可见适配器是数据源和控件之间的桥梁。
来写两个代码试试看:
1. ArrayAdapter
布局文件:main_activity.xml
<RelativeLayout xmlns:android="http://schemas.android.com/apk/res/android"
    xmlns:tools="http://schemas.android.com/tools"
    android:layout_width="match_parent"
    android:layout_height="match_parent" >

    <ListView
        android:id="@+id/listView1"
        android:layout_width="match_parent"
        android:layout_height="wrap_content"
        android:layout_alignParentLeft="true"
        android:layout_alignParentTop="true" >
    </ListView>

</RelativeLayout>
MainActivity.java文件
public class MainActivity extends Activity
{
    private ListView listView;
    private ArrayAdapter<String> arr_adapter;

    @Override
    protected void onCreate(Bundle savedInstanceState)
    {
        super.onCreate(savedInstanceState);
        setContentView(R.layout.activity_main);

        listView = (ListView) findViewById(R.id.listView1);
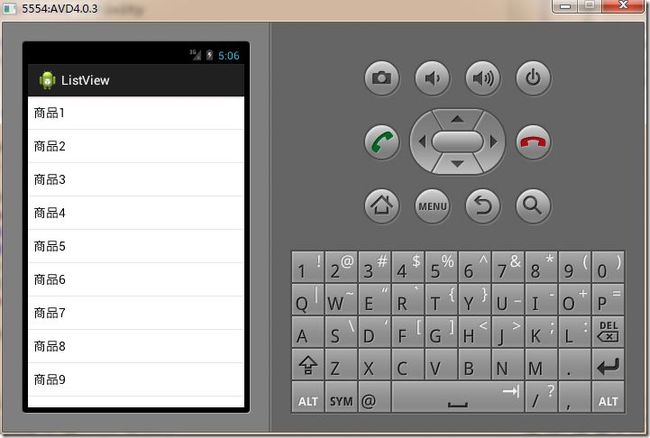
        String[] rsc = new String[]{"商品1","商品2","商品3",
                "商品4","商品5","商品6","商品7","商品8",
                "商品9","商品10","商品11","商品12","商品13"};
        //三步处理ArrayAdapter
        //1.2.新建适配器, 绑定数据源
        arr_adapter = new ArrayAdapter<String>(this,android.R.layout.simple_list_item_1,rsc);
        //3. 视图加载适配器
        listView.setAdapter(arr_adapter);
    }
}
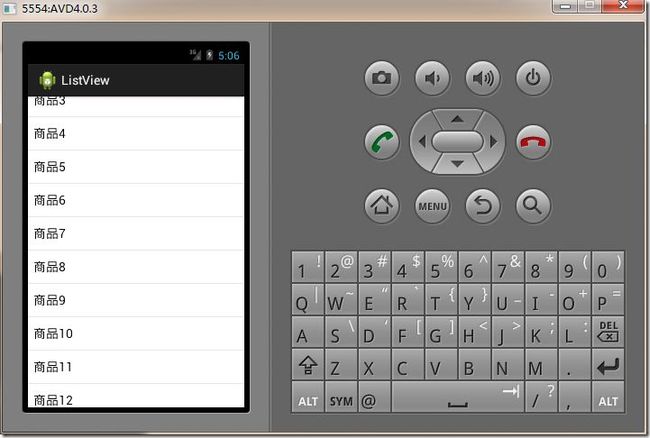
而且ListView 可以滚动,如下图:
2. 代码2 (SimpleAdapter)
在创建该适配器的时候,需要这么些参数:
simpleAdapter = new SimpleAdapter(context,data,resource,from, to);
context: 上下文
data: 数据源 List<? extends Map<String,?> data> map组成的list集合,每个map代表list中的一项item
resource: 列表项的布局文件id, 就是要指定一个布局(可以使系统提供的,也可以自己写一个,然后指定)
from: map中键的名字
to: 控件中id (from和to联合使用,指定在控件的哪个位置,加载map中的哪些数据)
首先先去写一个布局文件
item.xml
<?xml version="1.0" encoding="utf-8"?>
<LinearLayout xmlns:android="http://schemas.android.com/apk/res/android"
    android:layout_width="match_parent"
    android:layout_height="match_parent"
    android:orientation="horizontal" >

    <ImageView
        android:id="@+id/image"
        android:layout_width="wrap_content"
        android:layout_height="wrap_content"
        android:layout_marginLeft="15dp"
        android:src="@drawable/ic_launcher"
        />
    <TextView
        android:id="@+id/text"
        android:layout_width="wrap_content"
        android:layout_height="wrap_content"
        android:textSize="20sp"
        android:textColor="#000000"
        android:text="商品"
        />

</LinearLayout>
main_activity.xml和上面代码1一样,主布局不变
MainActivity.java
public class MainActivity extends Activity
{
    private ListView listView;
    private SimpleAdapter simpleAdapter;
    private List<Map<String,Object>> data;

    @Override
    protected void onCreate(Bundle savedInstanceState)
    {
        super.onCreate(savedInstanceState);
        setContentView(R.layout.activity_main);

        listView = (ListView) findViewById(R.id.listView1);

        data = new ArrayList<Map<String,Object>>();
        for (int i = 0; i < 20; i++)
        {
            Map<String,Object> map = new HashMap<String,Object>();
            map.put("pic", R.drawable.ic_launcher);
            map.put("text",    "商品"+i);
            data.add(map);
        }
        int resource =  R.layout.item ;
        String[] from = new String[]{"pic","text"};
        int[] to = new int[]{R.id.image,R.id.text};

        simpleAdapter = new SimpleAdapter(this, data,resource,from, to);
        //一定记得让视图加载适配器
        listView.setAdapter(simpleAdapter);
    }
}
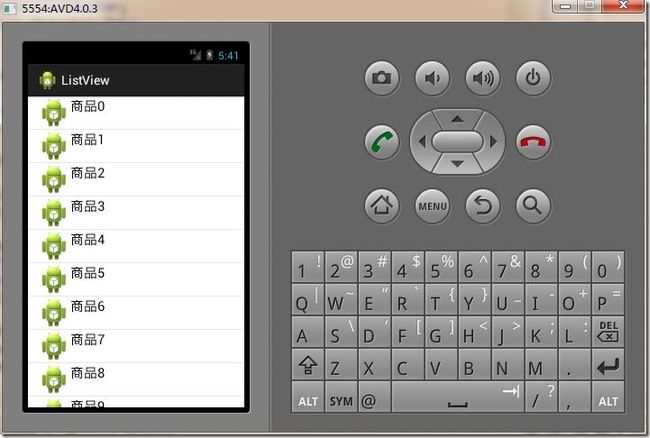
效果如下:
可以上下拖动
再添加监听器来响应该控件上相关动作
代码:
1. OnItemClickListener: 可以处理视图中单个条目的点击事件
---需要重写:OnItemClick()方法
2. OnScrollListener: 检测滚动的变化,可以用于视图在滚动中加载数据
---需要重写: onScrollStateChanged()
传入的参数 scrollState 有三个预定值:
SCROLL_STATE_TOUCH_SCROLL : 手指没有离开,视图随手指滑动
SCROLL_STATE_FLING: 手指离开了,界面依靠惯性继续滑动
SCROLL_STATE_IDLE: 视图已经停止滑动
(注意其调用顺序)
监听器是程序和用户(系统)交互的桥梁
小案例:(演示一下,手指下拉能动态的增加数据就可以了)
主要是这个方法: simpleAdapter.notifyDataSetChanged();
这个时候出错了,意思是说数据源的变化,没有通知视图
需要在SCROLL_STATE_FLING分支中加上一句话:
simpleAdapter.notifyDataSetChanged();
这句话可以通知UI控件刷新界面,但是它一个劲儿,不停地刷新----不停地增加数据-----这样不好,呵呵


![clipboard[14] clipboard[14]](http://img.e-com-net.com/image/product/52408489e1dc44d4b49be74c5d93a778.jpg)
![clipboard[17] ListView蛮好用_第7张图片](http://img.e-com-net.com/image/product/2b0cf0687a994f3eab8c9aab1a366a5f.jpg)
![clipboard[18] ListView蛮好用_第8张图片](http://img.e-com-net.com/image/product/6747310666314be987a5a3c10c09d440.jpg)
![clipboard[25] ListView蛮好用_第9张图片](http://img.e-com-net.com/image/product/89fde27d63cf43478c711e5ebc85ff36.jpg)
![clipboard[26] ListView蛮好用_第10张图片](http://img.e-com-net.com/image/product/1c74e571306546db90d9d711773e5cc1.jpg)