IOS Quartz 2D 学习(2)
翻译自http://www.techotopia.com/index.php/An_iPhone_Graphics_Drawing_Tutorial_using_Quartz_2D
欢迎转载,但是别落下东西。
iPhone绘制应用例子
这个教程中创建的应用包括一个子类化的UIView,覆写了drawRect方法,用于演示2D操作。
创建新工程
创建一个基于视图的IOS应用,(Single View Appliaction)。起名字叫draw2D。
创建UIView子类
Add -> New File.UIView ,起名为2DView,然后到ViewController.xib中修改view的类名称为刚才创建的2DView.
覆写drawRect方法
1. 画线
1) CGContextRef context = UIGraphicsGetCurrentContext();//获得当前view的图形上下文(context)


2) CGContextSetLineWidth(context, 2.0);//制定了线的宽度


3) CGColorSpaceRef colorspace = CGColorSpaceCreateDeviceRGB();

   CGFloat components[] = {0.0, 0.0, 1.0, 1.0};//颜色元素

   CGColorRef color=CGColorCreate(colorspace,components);//这两行创建颜色

   CGContextSetStrokeColorWithColor(context, color);//使用刚才创建好的颜色为上下文设置颜色
ps:创建颜色可以用下面代替,效果一样
CGContextSetStrokeColorWithColor(context, [UIColor blueColor].CGColor);
4) CGContextMoveToPoint(context, 0, 0);//设置线段的起始点

   CGContextAddLineToPoint(context, 300, 400);//设置线段的终点
上述代码指定了线段的宽度、颜色、路径,。接下来就要执行绘制操作,并且释放颜色空间:
1 CGContextStrokePath(context);//绘制

2 CGColorSpaceRelease(colorspace);

3 CGColorRelease(color);
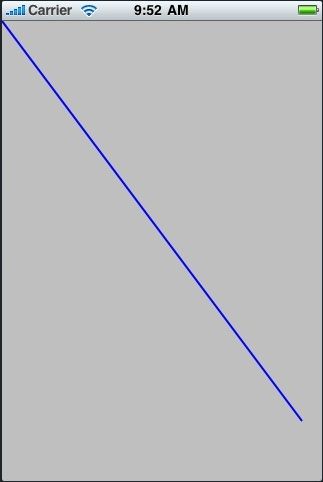
接下来执行!将会看到屏幕上有根蓝色线段。
2. 画path
你也许注意到了,上述画线的时候,我们的路径是通过两个点来指定的。定义一个包含了很多点路径可以使我们能够绘制一些列的连接的直线段,通过重复调用CGContextAddLineToPoint()函数。曲线也可以被添加到一个形状中,例如CGContextAddArc();
下面代码将创建一个菱形:
 1  CGContextRef context = UIGraphicsGetCurrentContext();

 2

 3  CGContextSetLineWidth(context, 2.0);

 4

 5  CGContextSetStrokeColorWithColor(context, [UIColor blueColor].CGColor);

 6

 7   CGContextMoveToPoint(context, 100, 100);

 8   CGContextAddLineToPoint(context, 150, 150);

 9   CGContextAddLineToPoint(context, 100, 200);

10   CGContextAddLineToPoint(context, 50, 150);

11   CGContextAddLineToPoint(context, 100, 100);

12

13   CGContextStrokePath(context);

3.画矩形
矩形的绘制除了有一点与其他路径绘制方法不同外,都相同。这一点是矩形的path(路径)是通过x,y坐标和宽高来指定的。这些信息存储与CGRect结构体中,并通过参数传递给CGContextAddRect()函数。
 1  CGContextRef context = UIGraphicsGetCurrentContext();

 2

 3  CGContextSetLineWidth(context, 2.0);

 4

 5  CGContextSetStrokeColorWithColor(context, [UIColor blueColor].CGColor);

 6

 7  CGRect rectangle = CGRectMake(60,170,200,80);

 8

 9  CGContextAddRect(context, rectangle);

10

11  CGContextStrokePath(context);

4.绘制椭圆和圆
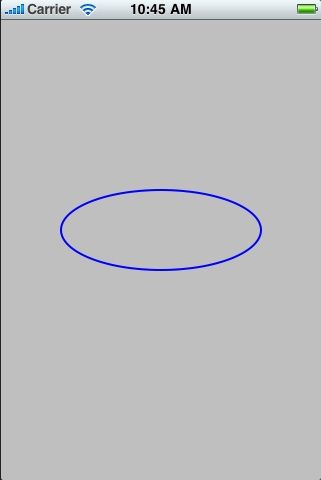
椭圆和圆的绘制是通过定义一个矩形区域,并且调用CGContextAddEllipseInRect()来完成,想要画圆的话,矩形宽高相同即可。
 1  CGContextRef context = UIGraphicsGetCurrentContext();

 2

 3  CGContextSetLineWidth(context, 2.0);

 4

 5  CGContextSetStrokeColorWithColor(context, [UIColor blueColor].CGColor);

 6

 7  CGRect rectangle = CGRectMake(60,170,200,80);

 8

 9  CGContextAddEllipseInRect(context, rectangle);

10

11  CGContextStrokePath(context);
5.为路径填充颜色
为路径填充颜色的几个函数
CGContextFillRect() 填充矩形
CGContextFillEllipse() 填充椭圆
CGContextFillPath() 填充路径
在填充之前首先要调用 CGContextSetFillColorWithColor()制定颜色。
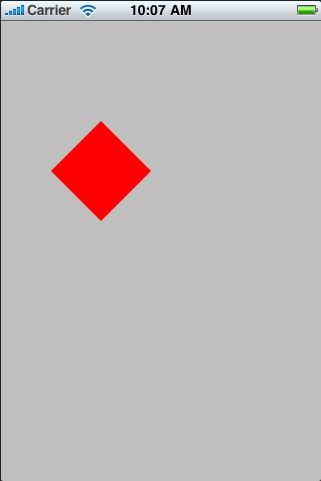
下面代码是用红色填充了一段路径:
 1  CGContextRef context = UIGraphicsGetCurrentContext();

 2

 3  CGContextMoveToPoint(context, 100, 100);

 4  CGContextAddLineToPoint(context, 150, 150);

 5  CGContextAddLineToPoint(context, 100, 200);

 6  CGContextAddLineToPoint(context, 50, 150);

 7  CGContextAddLineToPoint(context, 100, 100);

 8

 9  CGContextSetFillColorWithColor(context, [UIColor redColor].CGColor);

10  CGContextFillPath(context);
下面代码是填充一个蓝色边的红色矩形。
1   CGContextRef context = UIGraphicsGetCurrentContext();

2

3   CGContextSetLineWidth(context, 2.0);

4   CGContextSetStrokeColorWithColor(context, [UIColor blueColor].CGColor);

5   CGRect rectangle = CGRectMake(60,170,200,80);

6   CGContextAddRect(context, rectangle);

7   CGContextStrokePath(context);

8   CGContextSetFillColorWithColor(context, [UIColor redColor].CGColor);

9   CGContextFillRect(context, rectangle);

6.画弧
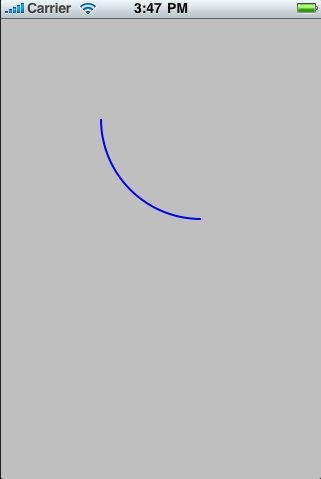
弧线的是通过指定两个切点,还有角度,调用CGContextAddArcToPoint()绘制。
1 CGContextRef context = UIGraphicsGetCurrentContext();

2

3 CGContextSetLineWidth(context, 2.0);

4

5 CGContextSetStrokeColorWithColor(context, [UIColor blueColor].CGColor);

6

7 CGContextMoveToPoint(context, 100, 100);

8 CGContextAddArcToPoint(context, 100,200, 300,200, 100);

9 CGContextStrokePath(context);
void CGContextAddArcToPoint(CGContextRef c, CGFloat x1, CGFloat y1,

    CGFloat x2, CGFloat y2, CGFloat radius)
7.绘制贝兹曲线
贝兹曲线是通过移动一个起始点,然后通过两个控制点,还有一个中止点,调用CGContextAddCurveToPoint() 函数绘制。
 1 CGContextRef context = UIGraphicsGetCurrentContext();

 2

 3 CGContextSetLineWidth(context, 2.0);

 4

 5 CGContextSetStrokeColorWithColor(context, [UIColor blueColor].CGColor);

 6

 7 CGContextMoveToPoint(context, 10, 10);

 8

 9 CGContextAddCurveToPoint(context, 0, 50, 300, 250, 300, 400);

10

11 CGContextStrokePath(context);
1 /* Append a cubic Bezier curve from the current point to `(x,y)', with

2    control points `(cp1x, cp1y)' and `(cp2x, cp2y)'. */

3 void CGContextAddCurveToPoint(CGContextRef c,CGFloat cp1x,CGFloat cp1y,
4               CGFloat cp2x, CGFloat cp2y, CGFloat x, CGFloat y)

8.绘制二次贝兹曲线
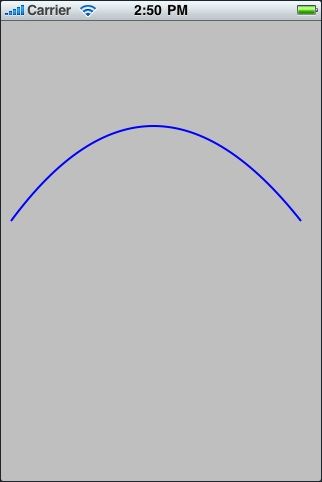
通过调用CGContextAddQuadCurveToPoint()来绘制。参数为1个控制点,一个中止点。
1 /* Append a quadratic curve from the current point to `(x, y)', with control

2    point `(cpx, cpy)'. */

3

4  void CGContextAddQuadCurveToPoint(CGContextRef c, CGFloat cpx,

5     CGFloat cpy, CGFloat x, CGFloat y)
 1   CGContextRef context = UIGraphicsGetCurrentContext();

 2

 3   CGContextSetLineWidth(context, 2.0);

 4

 5   CGContextSetStrokeColorWithColor(context, [UIColor blueColor].CGColor);

 6

 7   CGContextMoveToPoint(context, 10, 200);

 8

 9   CGContextAddQuadCurveToPoint(context, 150, 10, 300, 200);

10

11   CGContextStrokePath(context);
9.绘制虚线
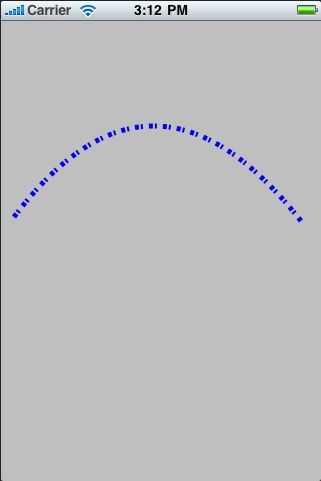
通过CGContextSetLineDash()绘制:
/* Set the line dash patttern in the current graphics state of `c'. */void CGContextSetLineDash(CGContextRef c, CGFloat phase,

    const CGFloat lengths[], size_t count)
参数:context:要描绘的上下文
phase:一个float类型的点数据,表示在第一个虚线绘制的时候跳过多少个点
lengths:一个数组,指名了虚线如何虚实,比如,{5,6,4}代表,画5个实,6个虚,4个实。
count:数组长度
http://blog.csdn.net/zhangao0086/article/details/7234859这里有详细的讲解,可以看下。
 1  CGContextRef context = UIGraphicsGetCurrentContext();

 2

 3  CGContextSetLineWidth(context, 5.0);

 4

 5  CGContextSetStrokeColorWithColor(context, [UIColor blueColor].CGColor);

 6

 7  CGFloat dashArray[] = {2,6,4,2};

 8

 9  CGContextSetLineDash(context, 3, dashArray, 4);//跳过3个再画虚线,所以刚开始有6-(3-2)=5个虚点

10

11  CGContextMoveToPoint(context, 10, 200);

12

13  CGContextAddQuadCurveToPoint(context, 150, 10, 300, 200);

14

15  CGContextStrokePath(context);
10.向Context绘制Image
绘制image需要指定坐标系统,或者缩放参数。
下面代码将Image绘制到(0,0)位置,全尺寸。
 1 - (void)drawRect:(CGRect)rect {

 2

 3  CGContextRef context = UIGraphicsGetCurrentContext();

 4

 5  UIImage *myImage = [UIImage imageNamed:@"imageName.jpg"];

 6

 7  CGPoint imagePoint = CGPointMake(0, 0);

 8

 9  [myImage drawAtPoint:imagePoint];

10

11  [myImage release];

12 }
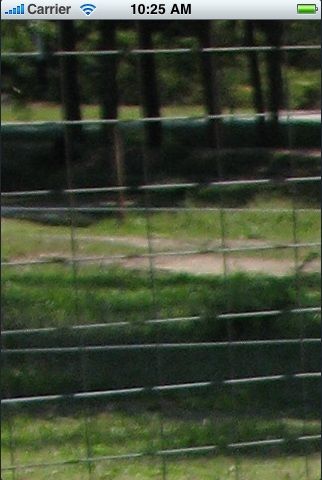
显然这超过了屏幕大小,所以要让图片适应屏幕大小drawInRect():
 1 - (void)drawRect:(CGRect)rect {

 2

 3  UIImage *myImage = [UIImage imageNamed:@"pumpkin.jpg"];

 4

 5  CGRect imageRect = CGRectMake(10, 10, 300, 400);

 6

 7  [myImage drawInRect:imageRect];

 8

 9  [myImage release];

10 }
