标签栏和选取器
用Storyboard做的。做点记录
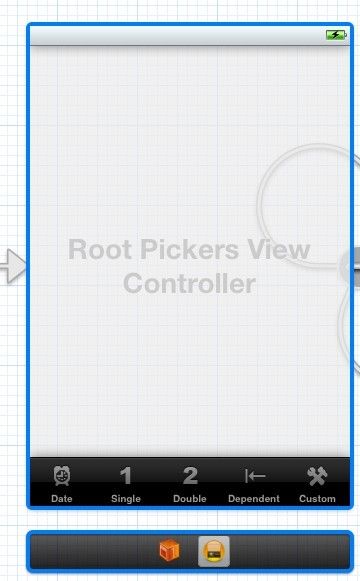
总的效果:
总的结构:
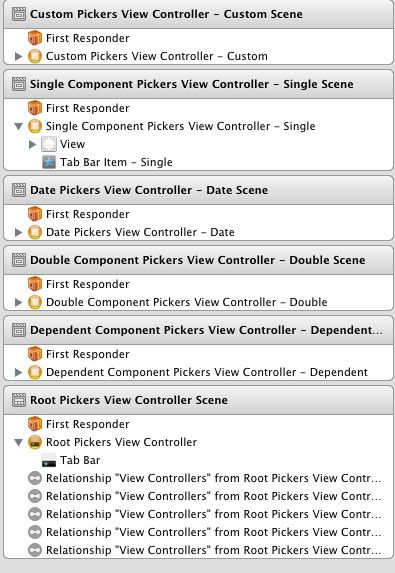
视图结构:
新建一个Tabbed Application
PS:我直接建Single View Application,然后删除里面的ViewController类文件和Storyboard中默认的控制器视图,自己添加Tab Bar Controller 控件
新建一个UITabBarController类的文件(.h,.m);PS:在本次学习内容中,对UITabBarController类文件没有修改。
Tab Bar Controller控件关联到UITabBarController实例。
分别添加标签栏中标签所对应的控制器控件(本次用到5个View Controller控件),分别关联到对应的控制器实例;
运行起来能看到有5个标签的标签栏。
总的粗糙的视图已经搭好。
========================================================================
接下来是对每个标签栏对应的视图控制器进行编辑。
提几点:
1、选取器(Picker)需要选取器委托(picker delegate)和选取器数据源(picker data source)。
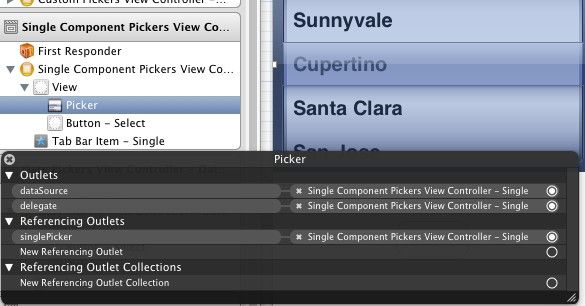
本次学习内容指定对应的视图控制器为 选取器委托 和 选取器数据源。
2、在视图控制器文件中使用协议(Protocol)
.h
 1 #import <UIKit/UIKit.h>
 2
 3 @interface SingleComponentPickersViewController : UIViewController <UIPickerViewDelegate, UIPickerViewDataSource> // Protocol
 4
 5 @property (strong, nonatomic) IBOutlet UIPickerView *singlePicker;
 6 @property (strong, nonatomic) NSArray *pickerData;
 7
 8 - (IBAction)buttonPressed;
 9
10 @end
.m
 1 #pragma mark -
 2 #pragma mark Picker Data Source Methonds
 3 - (NSInteger)numberOfComponentsInPickerView:(UIPickerView *)pickerView
 4 {
 5     return 1;
 6 }
 7
 8 - (NSInteger)pickerView:(UIPickerView *)pickerView numberOfRowsInComponent:(NSInteger)component
 9 {
10     return [self.pickerData count];
11 }
12
13 #pragma mark Picker Delegate Methods
14 - (NSString *)pickerView:(UIPickerView *)pickerView titleForRow:(NSInteger)row forComponent:(NSInteger)component
15 {
16     return [self.pickerData objectAtIndex:row];
17 }
18
19 @end
3、在- (void)viewDidLoad方法中加载用于选取器中显示的数据
1 - (void)viewDidLoad
2 {
3     [super viewDidLoad];
4     // Do any additional setup after loading the view.
5     NSArray *array = [[NSArray alloc] initWithObjects:@"Luke", @"Leia", @"Han", @"Chewbacca", @"Artoo", @"Threepio", @"Lando",nil];
6     self.pickerData = array;
7 }
4、对多组件宽度的控制
 1 #pragma mark -
 2 #pragma mark Picker Data Source Methonds
 3 ....
 4
 5 #pragma mark Picker Delegate Methods
 6 ...
 7
 8 // set the width of the component
 9 - (CGFloat)pickerView:(UIPickerView *)pickerView
10     widthForComponent:(NSInteger)component
11 {
12     if (component == kZipComponent)
13         return 90;
14     return 200;
15 }
5、实现依赖组件 (DependentComponentPickersViewController )中,选取器的数据是从资源文件statedictionary.plist中获得,那么这里用到“束”(NSBundle)。NSBundle的一个重要作用是获取添加到项目的Resources文件夹(在Xcode中已经没有这个文件夹,自己可以新建Group文件夹)的资源。在构建应用程序时,这些文件被复制到应用程序中。
通过主束获取需要的资源。
 1 - (void)viewDidLoad
 2 {
 3     [super viewDidLoad];
 4     // Do any additional setup after loading the view.
 5
 6     NSBundle *bundle = [NSBundle mainBundle];   // use the resources in the project via Bundle
 7     NSString *plistPath = [bundle pathForResource:@"statedictionary" ofType:@"plist"];
 8
 9     NSDictionary *dictionary = [[NSDictionary alloc] initWithContentsOfFile:plistPath];
10     self.stateZips = dictionary;
11
12     NSArray *components = [self.stateZips allKeys];
13     NSArray *sorted = [components sortedArrayUsingSelector:@selector(compare:)];
14     self.states = sorted;
15
16     NSString *selectedState = [self.states objectAtIndex:0];
17     NSArray *array = [self.stateZips objectForKey:selectedState];
18     self.zips = array;
19 }
6、添加图像到选取器组件中
 1 - (void)viewDidLoad
 2 {
 3     [super viewDidLoad];
 4     // Do any additional setup after loading the view.
 5
 6     UIImage *seven = [UIImage imageNamed:@"seven.png"];
 7     UIImage *bar = [UIImage imageNamed:@"bar.png"];
 8     UIImage *crown = [UIImage imageNamed:@"crown.png"];
 9     UIImage *cherry = [UIImage imageNamed:@"cherry.png"];
10     UIImage *lemon = [UIImage imageNamed:@"lemon.png"];
11     UIImage *apple = [UIImage imageNamed:@"apple.png"];
12
13     for (int i = 1; i <= 5; i++)
14     {
15         UIImageView *sevenView = [[UIImageView alloc] initWithImage:seven];
16         UIImageView *barView = [[UIImageView alloc] initWithImage:bar];
17         UIImageView *crownView = [[UIImageView alloc] initWithImage:crown];
18         UIImageView *cherryView = [[UIImageView alloc] initWithImage:cherry];
19         UIImageView *lemonView = [[UIImageView alloc] initWithImage:lemon];
20         UIImageView *appleView = [[UIImageView alloc] initWithImage:apple];
21         NSArray *imageViewArray = [[NSArray alloc] initWithObjects:sevenView, barView, crownView, cherryView, lemonView, appleView, nil];
22
23         NSString *fileName = [[NSString alloc] initWithFormat:@"column%d", i];
24         [self setValue:imageViewArray forKey:fileName];
25     }
26
27     srandom(time(NULL));
28 }
7、使用声音。
.h
1 @property (nonatomic) SystemSoundID crunchSoundID;  // 持有相应的声音
2 @property (nonatomic) SystemSoundID winSoundID;
.m
 1 // load the sound
 2 - (void)viewDidLoad
 3 {
 4     [super viewDidLoad];
 5     // Do any additional setup after loading the view.
 6     ...
 7     NSString *path = [[NSBundle mainBundle] pathForResource:@"win" ofType:@"wav"];
 8     AudioServicesCreateSystemSoundID((__bridge  CFURLRef)[NSURL fileURLWithPath:path], &winSoundID);
 9
10     path = [[NSBundle mainBundle] pathForResource:@"crunch" ofType:@"wav"];
11     AudioServicesCreateSystemSoundID((__bridge CFURLRef)[NSURL fileURLWithPath:path], &crunchSoundID);
12
13     ...
14 }
15
16 // hidden the button after click the it
17 - (void)showButton
18 {
19     self.button.hidden = NO;
20 }
21
22 - (void)playWinSound
23 {
24     AudioServicesPlaySystemSound(self.winSoundID);
25     self.winLabel.text = @"WIN!";
26     [self performSelector:@selector(showButton) withObject:nil afterDelay:1.5];
27 }
28
29 // Button控件触发的事件
30 - (IBAction)spin
31 {
32     ...
33
34     if (win)
35         [self performSelector:@selector(playWinSound)
36                         withObject:nil
37                         afterDelay:.5];
38     else
39         [self performSelector:@selector(showButton)
40                         withObject:nil
41                         afterDelay:.5];
42
43  }
链接 Audio Toolbox 框架
。


