字符设备驱动结构与开发
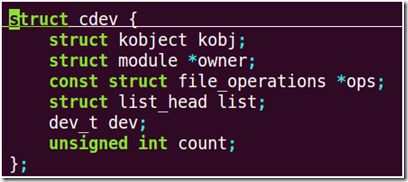
下面来分析这段代码:
struct cdev {
struct kobject kobj;
struct module *owner;
const struct file_operations *ops;
struct list_head list;
dev_t dev;
unsigned int count;
};
这实际上是通过C语言的结构体来模拟面向对象的封装特性。
struct kobject kobj;这是系统内核维护的数据结构,在开发过程中我们可以不用管。
struct module *owner;通常会赋值为一个宏THIS_MODULE,表示当前的模块。
const struct file_operations *ops;表示这个结构体的方法,这是实现驱动模块接口函数的定义,正是这个结构体提供了统一的函数接口。
struct file_operations {
struct module *owner;
loff_t (*llseek) (struct file *, loff_t, int);
ssize_t (*read) (struct file *, char __user *, size_t, loff_t *);
ssize_t (*write) (struct file *, const char __user *, size_t, loff_t *);
ssize_t (*aio_read) (struct kiocb *, const struct iovec *, unsigned long, loff_t);
ssize_t (*aio_write) (struct kiocb *, const struct iovec *, unsigned long, loff_t);
int (*readdir) (struct file *, void *, filldir_t);
unsigned int (*poll) (struct file *, struct poll_table_struct *);
long (*unlocked_ioctl) (struct file *, unsigned int, unsigned long);
long (*compat_ioctl) (struct file *, unsigned int, unsigned long);
int (*mmap) (struct file *, struct vm_area_struct *);
int (*open) (struct inode *, struct file *);
int (*flush) (struct file *, fl_owner_t id);
int (*release) (struct inode *, struct file *);
int (*fsync) (struct file *, loff_t, loff_t, int datasync);
int (*aio_fsync) (struct kiocb *, int datasync);
int (*fasync) (int, struct file *, int);
int (*lock) (struct file *, int, struct file_lock *);
ssize_t (*sendpage) (struct file *, struct page *, int, size_t, loff_t *, int);
unsigned long (*get_unmapped_area)(struct file *, unsigned long, unsigned long, unsigned long, unsigned long);
int (*check_flags)(int);
int (*flock) (struct file *, int, struct file_lock *);
ssize_t (*splice_write)(struct pipe_inode_info *, struct file *, loff_t *, size_t, unsigned int);
ssize_t (*splice_read)(struct file *, loff_t *, struct pipe_inode_info *, size_t, unsigned int);
int (*setlease)(struct file *, long, struct file_lock **);
long (*fallocate)(struct file *file, int mode, loff_t offset,
loff_t len);
};
这个复杂的file_operations结构体就定义了我们可能需要实现的函数指针,我们只需要定义相应类型的函数,将这些函数赋值给相应的函数指针,就能完成框架函数和自己实现函数之间的关联。
struct list_head list;这是系统用来将这个结构体加入系统维护链表的方式,我们不需要关心。
dev_t dev;表示设备在系统中的设备号,在Linux2.6.35中高12位表示主设备号,低20位表示从设备号
由于Linux内核在不断的进化更新中,这种分配主从设备号的方式可能会改变,所以Linux系统提供了一个宏函数来帮助我们实现构建设备号的工作。
MKDEV(主设备号,从设备号),这个宏函数会帮我们构建这个系统需要的设备号;
同时系统还提供两个宏函数来提取设备号的主设备号和从设备号,分别为:
MAJOR(设备号),返回主设备号;MINOR(设备号),返回从设备号。
#define MINORBITS 20 //定义从设备号为20位
#define MINORMASK ((1U << MINORBITS) - 1) //定义设备掩码,主要为了屏蔽主设备号使用
#define MAJOR(dev) ((unsigned int) ((dev) >> MINORBITS)) //向右移动MINORBITS位,将从设备号全部剔除
#define MINOR(dev) ((unsigned int) ((dev) & MINORMASK)) //和设备掩码与,去掉主设备号
#define MKDEV(ma,mi) (((ma) << MINORBITS) | (mi)) //主设备号移动MINORBITS位和从设备号或,构建设备号。
在这个结构体中,我们只关心dev_t dev和file_operations *ops。框架介绍完了,下面介绍基本的开发步骤。在一个模块的基础上构建驱动模块,步骤如下:
A、申明许可证,MODULE_LICENSE(“Dual BSD/GPL”);
定义设备cdev
struct cdev dev;
B、加载函数
1、申请设备号
1、静态申请
register_chrdev_region
2、动态申请
alloc_chrdev_region
2、初始化设备cdev
cdev_init
3、注册设备
cdev_add
C、卸载函数
1、注销设备
cdev_del
2、注销设备号
静态申请和动态申请都使用:unregister_chrdev_region,来注销
定义方法file_operations,并注册函数
struct file_operations fops = {
..open = XXXX,
.release = XXXX,
.write = XXXXX,
.read = XXXXXXX,
}
D、实现功能函数
根据不同的函数指针定义,定义相应的实现函数。
根据上面编写代码
my_hello.c
#include <linux/kernel.h>
#include <linux/module.h>
#include <linux/fs.h>
#include <linux/cdev.h>
//尽量避免出现整数常量
#define MAJOR_NO 365
#define MINOR_NO 0
#define DEV_COUNT 1
//声明许可证
MODULE_LICENSE("Dual BSD/GPL");
//声明方法
int my_open(struct inode *, struct file *);
int my_close(struct inode *, struct file *);
//定义属性cdev和方法file_operations,同时注册方法
static struct cdev dev;
static struct file_operations fops = {
.open = my_open,
.release = my_close,
};
dev_t dev_no; //设备号
static int my_hello_init(void)
{
int ret; //返回值
//申请设备号
//静态申请
dev_no = MKDEV(MAJOR_NO,MINOR_NO);
ret = register_chrdev_region(dev_no, DEV_COUNT, "my_hello_test");
//出错判断,编写驱动必须做好出错判断,否则会给应用开发人员造成无穷的麻烦
if (ret < 0)
{
printk("Apply for device numbers error!\n");
return ret;
}
dev.owner = THIS_MODULE;
//初始化设备
cdev_init(&dev, &fops);
//注册设备
ret = cdev_add(&dev, dev_no, DEV_COUNT);
if (ret < 0)
{
printk("Fail to add a char device to the system\n");
return ret;
}
printk("The device is initialzed,waiting for invokeing.\n");
return 0;
}
static void my_hello_cleanup(void)
{
//有注册必须要注销
cdev_del(&dev);
//有申请必须有释放
unregister_chrdev_region(dev_no, DEV_COUNT);
printk("The device is cleanup.\n");
}
//定义方法
//定义open方法,函数原型参照file_operations中的
//int (*open) (struct inode *, struct file *);
int my_open(struct inode *inode, struct file *file)
{
printk("This is my_open.\n");
return 0;
}
//定义close方法,函数原型参照
//int (*release) (struct inode *, struct file *);
int my_close(struct inode *inode, struct file *file)
{
printk("This is my_close.\n");
return 0;
}
module_init(my_hello_init); //使用宏函数将自己定义的初始化函数转化为init_module,主要是防止加载时函数重名造成的问题
module_exit(my_hello_cleanup); //转化为cleanup_module
编译上面代码并测试:
test.c
#include <stdio.h>
#include <stdlib.h>
#include <unistd.h>
#include <fcntl.h>
#include <sys/stat.h>
#include <sys/types.h>
int main(void)
{
int fd;
int ret;
fd = open("/dev/my_hello",O_RDWR);
if(fd < 0)
{
perror("open");
exit(1);
}
printf("打开成功\n");
sleep(1);
ret = close(fd);
if (ret < 0)
{
perror("close");
exit(1);
}
printf("关闭成功\n");
return 0;
}
Makefile:
ifeq ($(KERNELRELEASE),)
KERNELDIR ?= /lib/modules/$(shell uname -r)/build
PWD := $(shell pwd)
TEST = test
modules:
$(MAKE) -C $(KERNELDIR) M=$(PWD)
clean:
rm -rvf *.ko *.o *.mod.c Module* module*
test:
gcc $(TEST).c -o $(TEST)
mknod:
sudo mknod /dev/my_hello c 365 0
insmod:
sudo insmod my_hello.ko
.PHONY:modules clean mknod test insmod
else
obj-m := my_hello.o
endif


