企业商城单点部署
1.基础环境配置
1.1 规划节点
安装基础服务的服务器规划,见表1-1-1。
表1-1-1 节点规划
| IP地址 |
主机名 |
节点 |
| 192.168.100.100 |
mall |
单节点服务器 |
1.2基础准备
使用VMWare Workstation软件安装CentOS 7.2操作系统,镜像使用提供的CentOS-7-x86_64-DVD-1511.iso,最小化安装CentOS 7.2系统,YUM源使用提供的本地gpmall-repo包(在项目3-软件包/商城系统-单节点中),安装基础环境。
1.3 关闭防火墙
-
1.	[root@localhost ~]# systemctl stop firewalld
2.	[root@localhost ~]# systemctl disable firewalld
3.	[root@localhost ~]# sed -i 's/enforcing/disabled/' /etc/selinux/config
4.	[root@localhost ~]# setenforce 0
1.4 修改主机名
修改主机名命令如下所示:
[root@localhost ~]# hostnamectl set-hostname mall
[root@localhost ~]# bash
[root@mall ~]# hostnamectl
   Static hostname: mall
         Icon name: computer-vm
           Chassis: vm
        Machine ID: dae72fe0cc064eb0b7797f25bfaf69df
           Boot ID: af0da0209e864a9badd064fcc9ad7b0e
    Virtualization: kvm
  Operating System: CentOS Linux 7 (Core)
       CPE OS Name: cpe:/o:centos:centos:7
            Kernel: Linux 3.10.0-229.el7.x86_64
      Architecture: x86_64
修改/etc/hosts配置文件如下:
[root@mall ~]# cat /etc/hosts
127.0.0.1   localhost localhost.localdomain localhost4 localhost4.localdomain4
::1         localhost localhost.localdomain localhost6 localhost6.localdomain6

192.168.100.100 mall
1.5 配置本地yum源
将提供的packages包上传到服务器的/root目录下,并配置本地local.repo文件,具体代码如下所示。
[root@mall ~]# cat /etc/yum.repos.d/local.repo
[mall]
name=mall
baseurl=file:///root/gpmall-repo
gpgcheck=0
enabled=1
2.基础服务安装
安装基础服务,包括Java JDK环境、数据库、Redis、Nginx等,安装基础服务的命令具体如下。
2.1 安装Java环境
[root@mall ~]# yum install -y java-1.8.0-openjdk java-1.8.0-openjdk-devel
...
[root@mall ~]# java -version
openjdk version "1.8.0_222"
OpenJDK Runtime Environment (build 1.8.0_222-b10)
OpenJDK 64-Bit Server VM (build 25.222-b10, mixed mode)
2.2 安装Redis缓存服务
[root@mall ~]# yum install redis -y2.3 安装Elasticsearch服务
[root@mall ~]# yum install elasticsearch -y2.4 安装Nginx服务
[root@mall ~]# yum install nginx -y2.5 安装MariaDB数据库
[root@mall ~]# yum install mariadb mariadb-server -y安装ZooKeeper服务,将提供的zookeeper-3.4.14.tar.gz上传至云主机的/opt内,解压压缩包命令如下:
[root@mall ~]# tar -zxvf zookeeper-3.4.14.tar.gz进入到zookeeper-3.4.14/conf目录下,将zoo_sample.cfg文件重命名为zoo.cfg,命令如下:
[root@mall conf]# mv zoo_sample.cfg zoo.cfg进入到zookeeper-3.4.14/bin目录下,启动ZooKeeper服务,命令如下:
[root@mall bin]# ./zkServer.sh start
ZooKeeper JMX enabled by default
Using config: /root/zookeeper-3.4.14/bin/../conf/zoo.cfg
Starting zookeeper ... STARTED
查看ZooKeeper状态,命令如下:
[root@mall bin]# ./zkServer.sh status
ZooKeeper JMX enabled by default
Using config: /root/zookeeper-3.4.14/bin/../conf/zoo.cfg
Mode: standalone
安装Kafka服务,将提供的kafka_2.11-1.1.1.tgz包上传到云主机的/opt目录下,解压该压缩包,命令如下:
tar -zxvf kafka_2.11-1.1.1.tgz进入到kafka_2.11-1.1.1/bin目录下,启动Kafka服务,命令如下:
[root@mall bin]# ./kafka-server-start.sh -daemon ../config/server.propertiesnetstat -ntpl命令需要先用yum来安装才能使用 命令如下;
yum install -y net-tools使用jps或者netstat –ntpl命令查看Kafka是否成功启动,命令如下:
[root@mall bin]# jps
6039 Kafka
1722 QuorumPeerMain
6126 Jps
[root@mall bin]# netstat -ntpl
Active Internet connections (only servers)
Proto Recv-Q Send-Q Local Address           Foreign Address         State       PID/Program name
tcp        0      0 0.0.0.0:22              0.0.0.0:*               LISTEN      1008/sshd
tcp        0      0 127.0.0.1:25            0.0.0.0:*               LISTEN      887/master
tcp6       0      0 :::9092                 :::*                    LISTEN      6039/java
tcp6       0      0 :::46949                :::*                    LISTEN      6039/java
tcp6       0      0 :::2181                 :::*                    LISTEN      1722/java
tcp6       0      0 :::48677                :::*                    LISTEN      1722/java
tcp6       0      0 :::22                   :::*                    LISTEN      1008/sshd
tcp6       0      0 ::1:25                  :::*                    LISTEN      887/master
运行结果查看到Kafka服务和9092端口,说明Kafka服务已启动。
3.服务进行配置
3.1 启用数据库配置
修改数据库配置文件并启动MariaDB数据库,设置root用户密码为123456,并创建gpmall数据库,将提供的gpmall.sql导入。
修改/etc/my.cnf文件,添加字段如下所示:
vi /etc/my.cnf
#
# This group is read both both by the client and the server
# use it for options that affect everything
#
[client-server]
#
# include all files from the config directory
#
!includedir /etc/my.cnf.d
[mysqld]
init_connect='SET collation_connection = utf8_unicode_ci'
init_connect='SET NAMES utf8'
character-set-server=utf8
collation-server=utf8_unicode_ci
skip-character-set-client-handshake
启动数据库命令如下。
[root@mall ~]# systemctl start mariadb设置root用户的密码为123456并登录。
[root@mall ~]# mysqladmin -uroot password 123456
[root@mall ~]# mysql -uroot –p123456
Welcome to the MariaDB monitor.  Commands end with ; or \g.
Your MariaDB connection id is 9
Server version: 10.3.18-MariaDB MariaDB Server

Copyright (c) 2000, 2018, Oracle, MariaDB Corporation Ab and others.

Type 'help;' or '\h' for help. Type '\c' to clear the current input statement.

MariaDB [(none)]>
设置root用户的权限,命令如下:
MariaDB [(none)]> grant all privileges on *.* to root@localhost identified by '123456' with grant option;
Query OK, 0 rows affected (0.001 sec)

MariaDB [(none)]> grant all privileges on *.* to root@"%" identified by '123456' with grant option;
Query OK, 0 rows affected (0.001 sec)
将gpmall.sql文件上传至云主机的/root目录下。创建数据库gpmall并导入gpmall.sql文件。
MariaDB [(none)]> create database gpmall;
Query OK, 1 row affected (0.00 sec)
MariaDB [(none)]> use gpmall;
MariaDB [mall]> source /root/gpmall.sql
退出数据库并设置开机自启。
MariaDB [mall]> Ctrl-C -- exit!
Aborted
[root@mall ~]# systemctl enable mariadb
Created symlink from /etc/systemd/system/multi-user.target.wants/mariadb.service to /usr/lib/systemd/system/mariadb.service.
3.2 启用Redis服务
修改Redis配置文件,编辑/etc/redis.conf文件。
将61 bind 127.0.0.1这一行注释掉;80将protected-mode yes 改为 protected-mode no。
启动Redis服务命令如下。
[root@mall ~]# systemctl start redis
[root@mall ~]# systemctl enable redis
Created symlink from /etc/systemd/system/multi-user.target.wants/redis.service to /usr/lib/systemd/system/redis.service.
3.3 配置Elasticsearch服务并启动
配置Elasticsearch服务命令如下:
[root@mall ~]# vi /etc/elasticsearch/elasticsearch.yml在文件最上面加入三条语句如下:
http.cors.enabled: true
http.cors.allow-origin: "*"
http.cors.allow-credentials: true
将如下4条语句前的注释符去掉,并修改network.host的IP为本机IP。。
20cluster.name: my-application
26node.name: node-1
58network.host: 192.168.100.100
62http.port: 9200
最后修改完之后保存退出。然后启动Elasticsearch并设置开机自启,命令如下。
[root@mall ~]# systemctl start elasticsearch
[root@mall ~]# systemctl enable elasticsearch
Created symlink from /etc/systemd/system/multi-user.target.wants/elasticsearch.service to /usr/lib/systemd/system/elasticsearch.service.
3.4 启用Nginx服务
启动Nginx服务命令如下。
[root@mall ~]# systemctl start nginx
[root@mall ~]# systemctl enable nginx
Created symlink from /etc/systemd/system/multi-user.target.wants/nginx.service to /usr/lib/systemd/system/nginx.service.
4.服务进行配置
使用提供gpmall-shopping-0.0.1-SNAPSHOT.jar、gpmall-user-0.0.1-SNAPSHOT.jar、shopping-provider-0.0.1-SNAPSHOT.jar、user-provider-0.0.1-SNAPSHOT.jar 、dist这5个包部署应用系统,其中4个jar包为后端服务包,dist为前端包。
4.1 全局变量配置
修改/etc/hosts文件,全局配置如下(映射到MySQL就可以)
[root@mall ~]# vi /etc/hosts
127.0.0.1   localhost localhost.localdomain localhost4 localhost4.localdomain4
::1         localhost localhost.localdomain localhost6 localhost6.localdomain6
192.168.100.100 mall
192.168.100.100 kafka.mall
127.0.0.1 mysql.mall
192.168.100.100 redis.mall
192.168.100.100 zookeeper.mall
4.2 部署前端
将dist目录上传至服务器的/root目录下。接着将dist目录下的文件,复制到Nginx默认项目路径(首先清空默认项目路径下的文件)。
[root@mall ~]# rm -rf /usr/share/nginx/html/*
[root@mall ~]# cp -rvf dist/* /usr/share/nginx/html/
修改Nginx配置文件/etc/nginx/conf.d/default.conf,添加映射如下所示(红框部分):
[root@mall ~]# vi /etc/nginx/conf.d/default.conf
server {
    listen       80;
    server_name  localhost;

    #charset koi8-r;
    #access_log  /var/log/nginx/host.access.log  main;

    location / {
        root   /usr/share/nginx/html;
        index  index.html index.htm;
    }
    location /user {
            proxy_pass http://127.0.0.1:8082;
        }

    location /shopping {
            proxy_pass http://127.0.0.1:8081;
        }

    location /cashier {
            proxy_pass http://127.0.0.1:8083;
        }
    #error_page  404              /404.html;
}
重启Nginx服务,命令如下:
[root@mall ~]# systemctl restart nginx4.3 部署后端
将提供的4个jar包上传到服务器的/root目录下,并启动,启动命令如下:
[root@mall gpmall]# nohup java -jar shopping-provider-0.0.1-SNAPSHOT.jar &
[1] 6432
[root@mall gpmall]# nohup: ignoring input and appending output to ‘nohup.out’

[root@mall gpmall]# nohup java -jar user-provider-0.0.1-SNAPSHOT.jar &
[2] 6475
[root@mall gpmall]# nohup: ignoring input and appending output to ‘nohup.out’

[root@mall gpmall]# nohup java -jar gpmall-shopping-0.0.1-SNAPSHOT.jar &
[3] 6523
[root@mall gpmall]# nohup: ignoring input and appending output to ‘nohup.out’

[root@mall gpmall]# nohup java -jar gpmall-user-0.0.1-SNAPSHOT.jar &

[4] 6563
[root@mall gpmall]# nohup: ignoring input and appending output to ‘nohup.out’
按照顺序运行4个jar包后,至此后端服务部署完毕。
检查jar包是否运行,命令如下:
[root@jar1 ~]# ps -aux |grep java
root     11025 21.9 12.1 3605624 492588 pts/0  Sl   11:49   0:11 java -jar user-provider-0.0.1-SNAPSHOT.jar
root     11039 21.3  9.9 3596260 400936 pts/0  Sl   11:49   0:10 java -jar shopping-provider-0.0.1-SNAPSHOT.jar
root     11105 28.5  9.4 3590068 384476 pts/0  Sl   11:50   0:09 java -jar gpmall-user-0.0.1-SNAPSHOT.jar
root     11193  161 12.7 3596228 514868 pts/0  Sl   11:50   0:14 java -jar gpmall-shopping-0.0.1-SNAPSHOT.jar
重启Redis systemctl restart redis
重启nginx systemctl restart nginx
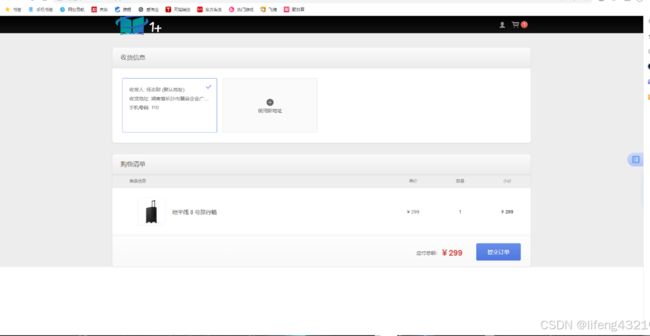
4.4 网站访问
打开浏览器,在地址栏中输入http://192.168.232.100,访问界面