Cocos2d-x制作跨平台太空射击游戏
http://www.cocoachina.com/gamedev/gameengine/2012/0502/4210.html
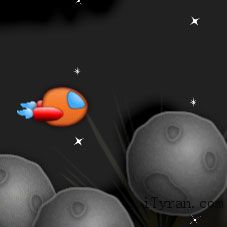
在这篇教程里,我将向你展示如何利用 How to Make a Space Shooter iPhone Game里创建的工程制作一个太空游戏。
这里有一个主要的区别——这次是用跨平台的cocs2d-x开发。
这就意味在教程里开发的游戏可以在你的iphone和andorid上运行。当然,再稍微做修改,你可以让它在Windows、Linux或者Mac下运行。
这篇教程基于我们在《COCOS2D-X跨ANDROID&IOS平台开发入门教程PART-1》里所创建的内容。如果你还没有准备好,那么最好先弄懂前面的工程,然后再继续。
深吸一口气,我们就要开始啦!
Getting Started
第一件事情就是下载并解压 space game resources ZIP file。
就像我们在之前教程里面添加两个项目里都可以使用的C++类一样,我们需要以同样的方式来添加这些资源文件使ios和andriod项目都可以引用同样的资源。
我们把这些文件添加到Android工程的Resource目录下面,然后在ios项目里面引用这个目录。
为了方便添加图片和其它资源到我们的工程里,我们需要把它们添加到 $PROJECT_HOME\Resources目录(请记住 $PROJECT_HOME是你Andriod Cocosd-X project-samplecocos2dxandroid的位置)。然而,我们的Eclipse工程只会显示$PROJECT_HOME\android目录下的文件,所以这确实是一个问题!
幸运的是这里有一个简单的变通方案:我们在$PROJECT_HOME\Resources 目录下面建立一个符号链接,指向$PROJECT_HOME\android\Resources目录,这样Eclipse就可以看到它们了。
接着,打开终端,在$PROJECT_HOME\android目录下运行如下的命令:
- ln -s ../Resources ./Resources.
现在拷贝文件到Resources文件夹。请注意,由于跨平台可移植性的原因,你需要避免使用层级式的子目录。尽管子目录在iOS下运行起来很好,但是它们不一定在Android上运行地很好。举例来说,如果你有一个Sprites.pvr.ccz文件在一个SpriteSheet子目录里,在Android里面使用CCSpriteBatchNode::bathNodeWithFile方法将会调用失败并返回一个空指针。
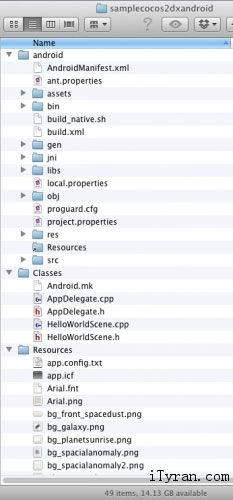
所以,从 space game resources ZIP file里面把单个的文件拷贝到Resource文件夹下去,请记得不要创建任何子目录,仅仅拷贝一个个的文件过来就可以了。在资源文件里存在一个字体的子文件夹,从字体文件夹里把所有的文件拷贝到Resources里时,直接替换就可以了。此外,在压缩文件里有个Classes子文件夹,你不必把它添加到Resources目录下,把它删除就行了。当所有的准备工作完成后就会是下面的样子:
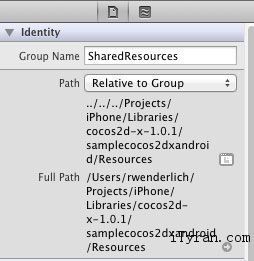
接下来,让我们在iOS工程里引用这些文件,打开你的Xcode工程,创建一个新的Group叫做SharedResources。选择新的Group,在Inspector里点击按钮选择路径,然后把你在Android工程里的资源文件夹选择上。
右键点击SharedResources组,选择添加文件,从Android文件夹里添加所有的文件。目前,你完成所有的项目配置了!
增加一个太空飞船
让我们试试,看是否工作!打开Classes\HelloWorldScene.h,在HelloWorld类开头加入下面代码(在已有public:行的上面)
- private:
- cocos2d::CCSpriteBatchNode * _batchNode;
- cocos2d::CCSprite * _ship;
上面的代码创建了两个私有实例变量 – 一个是sprite batch node,一个是太空飞船精灵
现在切换到HelloWorldScene.cpp,在init方法里,删除从注释“2. add a menu item”到方法最后的所有代码,加入下面代码:
- _batchNode = CCSpriteBatchNode::batchNodeWithFile("Sprites.pvr.ccz");
- this->addChild(_batchNode);
- CCSpriteFrameCache::sharedSpriteFrameCache()->addSpriteFramesWithFile("Sprites.plist");
- _ship = CCSprite::spriteWithSpriteFrameName("SpaceFlier_sm_1.png");
- CCSize winSize = CCDirector::sharedDirector()->getWinSize();
- _ship->setPosition(ccp(winSize.width * 0.1, winSize.height * 0.5));
- _batchNode->addChild(_ship, 1);
- return true;
注意这些代码与你过去使用的Objective-C版的cocos2d 非常类似。API是有很多相同的地方的,仅仅是有一些与C++的语法不同。
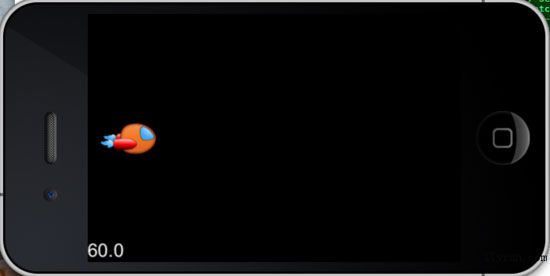
在Android模拟器中编译运行,你应该可以看到你的船出现在屏幕上

最妙的事情是在iOS上也能运行
增加视差滚动
接下来,我们会加入宇宙背景,使它以视差滚动这种很酷的方式来滚动。
首先,我们不得不在所有的类名前面加上cocos2d::这个名字空间,这太烦人了!所以在HelloWorldScene.h类声明前加入下面行:
- USING_NS_CC ;
接着在HelloWorld的private部分加入一些新的变量(注意我们不再需要加cocos2d前缀):
- CCParallaxNode *_backgroundNode;
- CCSprite *_spacedust1;
- CCSprite *_spacedust2;
- CCSprite *_planetsunrise;
- CCSprite *_galaxy;
- CCSprite *_spacialanomaly;
- CCSprite *_spacialanomaly2;
然后,在HelloWorldScene.cpp的init方法中,return语句前加入下面代码:
- // 1) Create the CCParallaxNode
- _backgroundNode = CCParallaxNode::node() ; //1
- this->addChild(_backgroundNode,-1) ;
- // 2) Create the sprites we'll add to the CCParallaxNode
- _spacedust1 = CCSprite::spriteWithFile("bg_front_spacedust.png");
- _spacedust2 = CCSprite::spriteWithFile("bg_front_spacedust.png");
- _planetsunrise = CCSprite::spriteWithFile("bg_planetsunrise.png");
- _galaxy = CCSprite::spriteWithFile("bg_galaxy.png");
- _spacialanomaly = CCSprite::spriteWithFile("bg_spacialanomaly.png");
- _spacialanomaly2 = CCSprite::spriteWithFile("bg_spacialanomaly2.png");
- // 3) Determine relative movement speeds for space dust and background
- CCPoint dustSpeed = ccp(0.1, 0.1);
- CCPoint bgSpeed = ccp(0.05, 0.05);
- // 4) Add children to CCParallaxNode
- _backgroundNode->addChild(_spacedust1, 0 , dustSpeed , ccp(0,winSize.height/2) ); // 2
- _backgroundNode->addChild(_spacedust2, 0 , dustSpeed , ccp( _spacedust1->getContentSize().width,winSize.height/2));
- _backgroundNode->addChild(_galaxy,-1, bgSpeed , ccp(0,winSize.height * 0.7));
- _backgroundNode->addChild(_planetsunrise,-1 , bgSpeed,ccp(600,winSize.height * 0));
- _backgroundNode->addChild(_spacialanomaly,-1, bgSpeed,ccp(900,winSize.height * 0.3));
- _backgroundNode->addChild(_spacialanomaly2,-1, bgSpeed,ccp(1500,winSize.height * 0.9));
再一次说明,这段代码与我们的《如何使用cocos2d制作一个太空射击游戏》非常类似,只是有些小的句法变化。你可以比较一下2个教程在句法上的不同。
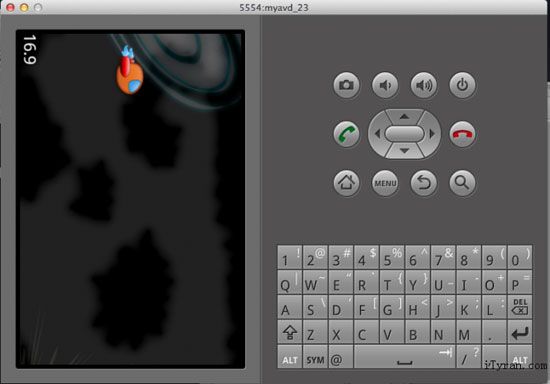
Android模拟器中编译运行,你应该可以看到一个宇宙场景的启动
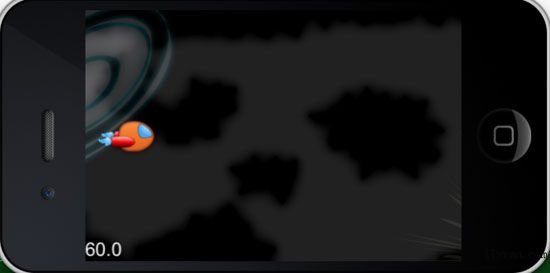
同样的,也能在iphone上运行
现在使背景滚动,在HelloWorldScene.h中预先声明update方法 – 你可以在private或public部分加入下面代码,但是既然update方法是内部使用的,所以作为一个private方法更恰当:
- // scheduled Update
- void update(cocos2d::ccTime dt);
然后在HelloWorldScene.cpp 最后加入下面的方法实现
- void HelloWorld::update(ccTime dt) {
- CCPoint backgroundScrollVert = ccp(-1000,0) ;
- _backgroundNode->setPosition(ccpAdd(_backgroundNode->getPosition(),ccpMult(backgroundScrollVert,dt))) ;
- }
最后,在init方法末尾(但是在最后的return语句前)调用scheduleUpdate方法
- this->scheduleUpdate();
编译运行,你将会看到背景滚动!
持续滚动
这时,你应该注意到了背景滚出屏幕后没有循环,那么我们来修这个bug
在我们的 《如何使用cocos2d制作一个太空射击游戏》教程中,我们通过Objective-c的分类(category)扩展了CCParallaxNode类来实现。
不幸的是,C++中是不存在分类的,所以我们需要借助继承来实现之。
我们将去定义一个CCParallaxNode扩展类来扩展标准的CCParallaNode。这样做虽然不如Objective-C优雅,但是有时我们需要为软件可移植性做一些牺牲。
在Xcode中,在Glasses group上单击右键,选择New File。选择iOS\C and C++\C++文件末尾,点击Next,为他命名为CCParallaxNodeExtras.cpp,存储到$PROJECT_HOME\Classes,然后点击创建。然后重复上述过程,但要选择iOS\C and C++\Header文件模板,来创建CCParallaxNodeExtras.h
用下面的代码替换CCParallaxNodeExtras.h中的内容
- #ifndef
- Cocos2DxFirstIosSample_CCParallaxNodeExtras_h #define
- Cocos2DxFirstIosSample_CCParallaxNodeExtras_h #include “cocos2d.h” USING_NS_CC; class CCParallaxNodeExtras : public CCParallaxNode
- { public : // Need to provide our own constructor CCParallaxNodeExtras() ; // just to avoid ugly later cast and also for safety
- static CCParallaxNodeExtras * node() ; // Facility method (we expect to have it soon in COCOS2DX) void incrementOffset(CCPoint
- offset,CCNode* node) ; } ; #endif
这里我们为CCParallaxNode添加一个新的方法(incrementOffset),我们用它来更新parallax node 每个 child 的位置。当背景移动出屏幕左端的时候我们会使用它来将背景放到屏幕的右端,来实现持续的滚动。 将下面的代码替换到CCParallaxNodeExtras.cpp
- #include "CCParallaxNodeExtras.h"
- // Hack to access CCPointObject (which is not a public class)
- class CCPointObject : CCObject {
- CC_SYNTHESIZE(CCPoint, m_tRatio, Ratio)
- CC_SYNTHESIZE(CCPoint, m_tOffset, Offset)
- CC_SYNTHESIZE(CCNode *,m_pChild, Child) // weak ref
- };
- // Need to provide our own constructor
- CCParallaxNodeExtras::CCParallaxNodeExtras() {
- CCParallaxNode::CCParallaxNode() ; // call parent constructor
- }
- CCParallaxNodeExtras * CCParallaxNodeExtras::node() {
- return new CCParallaxNodeExtras() ;
- }
- void CCParallaxNodeExtras::incrementOffset(CCPoint offset,CCNode* node){
- for( unsigned int i=0;i < m_pParallaxArray->num;i++) {
- CCPointObject *point = (CCPointObject *)m_pParallaxArray->arr[i];
- CCNode * curNode = point->getChild() ;
- if( curNode->isEqual(node) ) {
- point->setOffset( ccpAdd(point->getOffset(), offset) );
- break;
- }
- }
- }
注意,很不幸的是CCPointObject在Cocos2d中并不是公共的类,所以我们需要借住一些小手段来hack。(重定义它为我们的类,并具有相同的签名)。
虽然它能工作的很好,但是他的缺点是,如果CCPointObject改动了,你这里也要跟着改动,否则程序会崩溃。
代码的重点是incrementOffset方法,他和 《如何使用cocos2d制作一个太空射击游戏》中的实现相同,只是用了不同的语言。
下一步,选择HelloWorldScene.h,在文件顶部的#include 语句之后添加这些代码:
- #include "CCParallaxNodeExtras.h"
然后像下面的代码一样,将private区域中_backgroundNode定义由CCParallaNode改为CCParallaxNodeExtras
- CCParallaxNodeExtras *_backgroundNode;
然后选择HelloWorldScene.cpp 用下面的代码替换掉section #1(_backgroundNode创建的地方)的第一行。
- _backgroundNode = CCParallaxNodeExtras::node() ;
最后,添加下面的代码,到update 方法的底部。
- CCArray *spaceDusts = CCArray::arrayWithCapacity(2) ;
- spaceDusts->addObject(_spacedust1) ;
- spaceDusts->addObject(_spacedust2) ;
- for ( int ii = 0 ; ii count() ; ii++ ) {
- CCSprite * spaceDust = (CCSprite *)(spaceDusts->objectAtIndex(ii)) ;
- float xPosition = _backgroundNode->convertToWorldSpace(spaceDust->getPosition()).x ;
- float size = spaceDust->getContentSize().width ;
- if ( xPosition < -size ) { _backgroundNode->incrementOffset(ccp(spaceDust->getContentSize().width*2,0),spaceDust) ;
- }
- }
- CCArray *backGrounds = CCArray::arrayWithCapacity(4) ;
- backGrounds->addObject(_galaxy) ;
- backGrounds->addObject(_planetsunrise) ;
- backGrounds->addObject(_spacialanomaly) ;
- backGrounds->addObject(_spacialanomaly2) ;
- for ( int ii = 0 ; ii count() ; ii++ ) {
- CCSprite * background = (CCSprite *)(backGrounds->objectAtIndex(ii)) ;
- float xPosition = _backgroundNode->convertToWorldSpace(background->getPosition()).x ;
- float size = background->getContentSize().width ;
- if ( xPosition < -size ) { _backgroundNode->incrementOffset(ccp(2000,0),background) ;
- }
- }
你可以看到,NSArray的替代品是基于STL (C++标准库) 实现的CCArray。我们用可以帮我们自动释放对象的arrayWithCapacity构造函数。注意这里同样也有一个更先进的CCMutableArray来用于存储集合元素。
最后的修改-因为你添加了新文件,你需要把它添加到android工程的Makefile来让他编译正确。于是用Eclipse打开Classes\Android.mk然后改动行LOCAL_SRC_FILES为下面的代码。
- LOCAL_SRC_FILES := AppDelegate.cpp \
- HelloWorldScene.cpp \
- CCParallaxNodeExtras.cpp
编译运行,现在背景可以无限滚动了!
添加星星
添加星星是非常简单的,只是添加下面的代码到HelloWorldScene.cpp的init方法的return之前。
- HelloWorld::addChild(CCParticleSystemQuad::particleWithFile("Stars1.plist")) ;
- HelloWorld::addChild(CCParticleSystemQuad::particleWithFile("Stars2.plist")) ;
- HelloWorld::addChild(CCParticleSystemQuad::particleWithFile("Stars3.plist")) ;
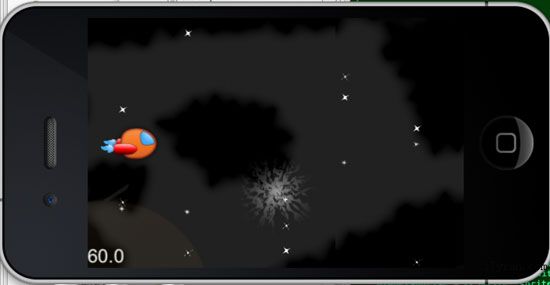
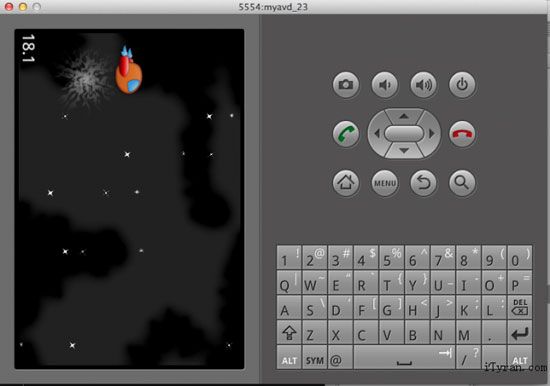
编译运行,漂亮!他已经开始看起来像一个太空游戏了。
使用加速计来移动飞船
在之前的Cocos2D space shooter tutorial里面,我们使用ios的加速计api来检测加速计输入。很明显,ios下面的加速计api是不可以跨平台的,那么我们怎么办呢?
幸运的是,cocos2d-x对加速计进行了封装,我们可以不用关心具体平台api,直接使用抽象后的加速计api就可以了。让我们看看它是怎么工作的吧。
首先,在HelloWorldScnee.H头文件里面添加一个新的私有成员变量:
- float _shipPointsPerSecY;
然后,添加一个新的public方法声明:
- virtual void didAccelerate(CCAcceleration* pAccelerationValue);
然后在HelloWorldScene.cpp的init方法的return语句之前添加下列代码:
- this->setIsAccelerometerEnabled(true);
接下来,在HelloWorldScene.CPP文件底部添加下面这些新方法定义:
- void HelloWorld::didAccelerate(CCAcceleration* pAccelerationValue) {
- #define KFILTERINGFACTOR 0.1
- #define KRESTACCELX -0.6
- #define KSHIPMAXPOINTSPERSEC (winSize.height*0.5)
- #define KMAXDIFFX 0.2
- double rollingX ;
- // Cocos2DX inverts X and Y accelerometer depending on device orientation
- // in landscape mode right x=-y and y=x !!! (Strange and confusing choice)
- pAccelerationValue->x = pAccelerationValue->y ;
- rollingX = (pAccelerationValue->x * KFILTERINGFACTOR) + (rollingX * (1.0 - KFILTERINGFACTOR));
- float accelX = pAccelerationValue->x - rollingX ;
- CCSize winSize = CCDirector::sharedDirector()->getWinSize();
- float accelDiff = accelX - KRESTACCELX;
- float accelFraction = accelDiff / KMAXDIFFX;
- _shipPointsPerSecY = KSHIPMAXPOINTSPERSEC * accelFraction;
- }
最后,在update方法的底部添加如下代码:
- CCSize winSize = CCDirector::sharedDirector()->getWinSize();
- float maxY = winSize.height - _ship->getContentSize().height/2;
- float minY = _ship->getContentSize().height/2;
- float diff = (_shipPointsPerSecY * dt) ;
- float newY = _ship->getPosition().y + diff;
- newY = MIN(MAX(newY, minY), maxY);
- _ship->setPosition(ccp(_ship->getPosition().x, newY));
这里的didAccelerate回调函数包含一个CCAcceleration对象,它包含加速计的x、y和z三个方向的数据。我们目前只需要使用x方向的加速计数据就行了,因为我们是沿着设备的x轴进行运动的。
注意: cocos2d-x会根据你的设备是处于portait模式还是landscape模式来切换加速计的x和y方向的值。
如果是Landscape right(也就是我们目前的情况),接收到的x值其实是-y,而y值是x。如果是Landscape left那么接收到的x值是y,而y值是-x。
有点头晕了?呵呵
编译,然后在你的iphone和android设备上测试一下吧,现在你可以倾斜你的设备来移动飞船啦!当然,此时,你不能在模拟器上进行测试,必须使用真机。
添加陨石
是时候给游戏添加一些陨石了!首先在 HelloWorldScene.h里面添加下面一些实例变量:
- CCMutableArray * _asteroids ;
- int _nextAsteroid ;
- float _nextAsteroidSpawn ;
然后,添加一些新的公有方法声明:
- float randomValueBetween( float low , float high );
- void setInvisible(CCNode * node);
- float getTimeTick();
接下来,回到HelloWorldScene.CPP,然后在文件最后添加刚刚的那些辅助方法的实现:
- float HelloWorld::randomValueBetween( float low , float high ) {
- return (((float) arc4random() / 0xFFFFFFFFu) * (high - low)) + low;
- }
- float HelloWorld::getTimeTick() {
- timeval time;
- gettimeofday(&time, NULL);
- unsigned long millisecs = (time.tv_sec * 1000) + (time.tv_usec / 1000);
- return (float) millisecs;
- }
randomValueBetween 是一个可以获得指定范围内的随机浮点数的辅助方法。而 getTimeTick 是一种可移植的方式来得到毫秒级别的时间。
接下来,在init方法的最后创建一个陨石的数组:
- #define KNUMASTEROIDS 15
- _asteroids = new CCMutableArray();
- for(int i = 0; i < KNUMASTEROIDS; ++i) { CCSprite *asteroid = CCSprite::spriteWithSpriteFrameName("asteroid.png");
- asteroid->setIsVisible(false) ;
- _batchNode->addChild(asteroid);
- _asteroids->addObject(asteroid);
- }
这里,我们使用cocos2d-x的CCMutableArray类来存储ccsprite的数组。注意,我们这里手动调用new操作符,而不是使用arrayWithCapacity来创建对象,这样可以避免使用autorelease机制。
最后,在update方法底部添加下列代码:
- float curTimeMillis = getTimeTick();
- if (curTimeMillis > _nextAsteroidSpawn) {
- float randMillisecs = randomValueBetween(0.20,1.0) * 1000;
- _nextAsteroidSpawn = randMillisecs + curTimeMillis;
- float randY = randomValueBetween(0.0,winSize.height);
- float randDuration = randomValueBetween(2.0,10.0);
- CCSprite *asteroid = _asteroids->getObjectAtIndex(_nextAsteroid);
- _nextAsteroid++;
- if (_nextAsteroid >= _asteroids->count())
- _nextAsteroid = 0;
- asteroid->stopAllActions();
- asteroid->setPosition( ccp(winSize.width+asteroid->getContentSize().width/2, randY));
- asteroid->setIsVisible(true) ;
- asteroid->runAction ( CCSequence::actions (
- CCMoveBy::actionWithDuration(randDuration,ccp(-winSize.width-asteroid->getContentSize().width,0)) ,
- CCCallFuncN::actionWithTarget(this,callfuncN_selector(HelloWorld::setInvisible)) ,
- NULL // DO NOT FORGET TO TERMINATE WITH NULL (unexpected in C++)
- ) ) ;
- }
再一次说明,这里的代码跟之前的cocos2d代码太像了!注意,这里的callfuncN_selector调用跟objc里面的selector机制太像了!
注意:由于CCSequence::actions方法的参数列表采用的是变长参数,你其实可以忽略掉最后一个NULL参数,因为对于c++来讲,这个参数没有意义。
但是,考虑到兼容性的原因,因为cocos2d-x开发者想保持跟cocos2d的高度一致,所以,这里需要一个NULL终止符。如果你在你的代码里面不提供的话,那么你的程序将会崩溃。
最后一步就是添加setInvisible回调函数的实现:
- void HelloWorld::setInvisible(CCNode * node) {
- node->setIsVisible(false) ;
- }
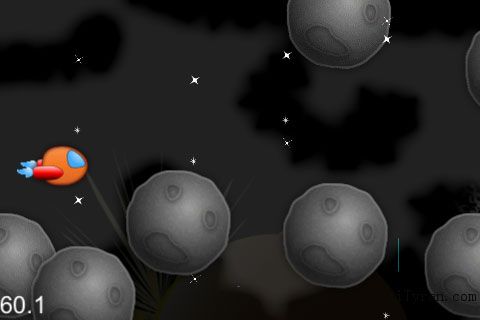
编译并运行,有陨石!下面是iphone3GS的运行效果截图:
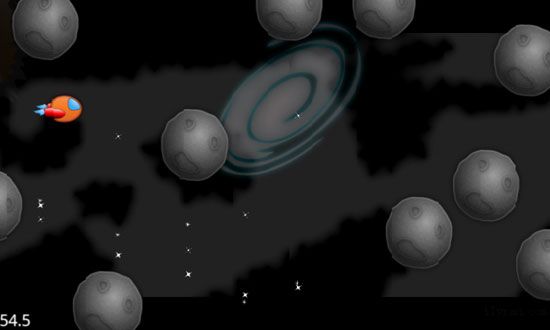
下面是Android Samsung Galaxy S的运行效果截图:
发射激光
是时候让我们的飞船发射激光了!在HelloWorldScene.h里面添加下列私有成员变量:
- CCMutableArray * _shipLasers ;
- int _nextShipLaser ;
现在,添加一个新的公有方法声明:
- virtual void ccTouchesBegan(cocos2d::CCSet* touches, cocos2d::CCEvent* event);
然后,在HelloWorldScene.cpp的init方法的return语句之前添加下列代码:
- #define KNUMLASERS 5
- _shipLasers = new CCMutableArray();
- for(int i = 0; i < KNUMLASERS; ++i) { CCSprite *shipLaser = CCSprite::spriteWithSpriteFrameName("laserbeam_blue.png");
- shipLaser->setIsVisible(false) ;
- _batchNode->addChild(shipLaser);
- _shipLasers->addObject(shipLaser);
- }
- this->setIsTouchEnabled(true) ;
最后,在文件的底部实现ccTouchesBegan方法;
- void HelloWorld::ccTouchesBegan(cocos2d::CCSet* touches, cocos2d::CCEvent* event)
- {
- CCSize winSize = CCDirector::sharedDirector()->getWinSize() ;
- CCSprite *shipLaser = _shipLasers->getObjectAtIndex(_nextShipLaser++);
- if ( _nextShipLaser >= _shipLasers->count() )
- _nextShipLaser = 0;
- shipLaser->setPosition( ccpAdd( _ship->getPosition(), ccp(shipLaser->getContentSize().width/2, 0)));
- shipLaser->setIsVisible(true) ;
- shipLaser->stopAllActions() ;
- shipLaser->runAction( CCSequence::actions (
- CCMoveBy::actionWithDuration(0.5,ccp(winSize.width, 0)),
- CCCallFuncN::actionWithTarget(this,callfuncN_selector(HelloWorld::setInvisible)) ,
- NULL // DO NOT FORGET TO TERMINATE WITH NULL
- ) ) ;
- }
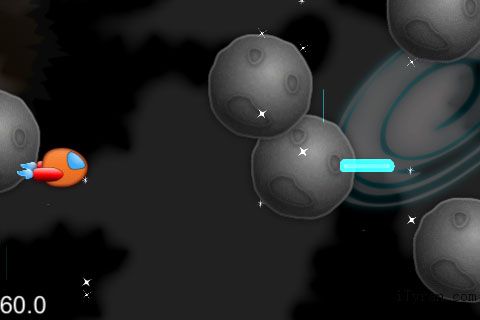
编译并运行,现在你可以发射激光了!下面是iphone 3GS下面的运行截图:
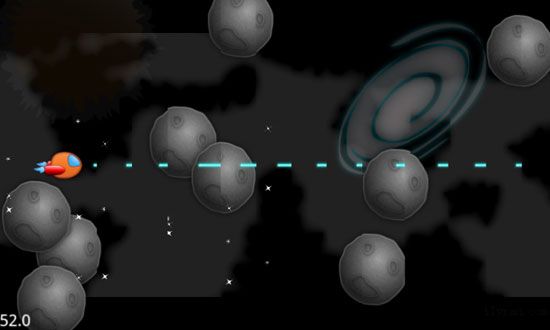
下面是Android Samsung Galaxy S的运行截图:
简单的碰撞检测
接下来,我们想添加一些代码来检测激光和小行星间的碰撞,以及当小行星被撞击时爆炸。完成这项功能的代码和《如何使用cocos2d制作一个太空射击游戏》中的相当相似,但是用到了一些新的语法。
注意,我们会介绍C++迭代器来处理CCMutableArray。首先,在HelloWorldScene.h添加一个新的私有变量:
- int _lives ;
接着,在HelloWorldScene.h的update函数的底部添加如下代码:
- // Asteroids
- CCMutableArray::CCMutableArrayIterator itAster , itLaser ;
- for ( itAster = _asteroids->begin() ; itAster != _asteroids->end() ; itAster++ ) {
- CCSprite *asteroid = (CCSprite *)*itAster;
- if ( ! asteroid->getIsVisible() )
- continue ;
- for ( itLaser = _shipLasers->begin() ; itLaser != _shipLasers->end() ; itLaser++ ) {
- CCSprite *shipLaser = (CCSprite *)*itLaser;
- if ( ! shipLaser->getIsVisible() )
- continue ;
- if ( CCRect::CCRectIntersectsRect(shipLaser->boundingBox(), asteroid->boundingBox()) ) {
- shipLaser->setIsVisible(false) ;
- asteroid->setIsVisible(false) ;
- continue ;
- }
- }
- if ( CCRect::CCRectIntersectsRect(_ship->boundingBox(), asteroid->boundingBox()) ) {
- asteroid->setIsVisible(false) ;
- _ship->runAction( CCBlink::actionWithDuration(1.0, 9)) ;
- _lives-- ;
- }
- }
编译并运行,现在你可以使小行星爆炸了!当然,你会发现当激光碰撞到小行星,他们并没有爆炸就消失了。这是因为我们没有为爆炸添加粒子效果。之前我们已经将星星添加到了粒子系统中,根据最初的教程,把爆炸加入粒子系统将是相当简单的任务。把这个当成额外的课外作业吧!
胜利/失败检测
将胜利或失败的检测代码转换到Cocos2D-X也是直截了当的。
切换回HelloWorldScene.h并在类的声明前添加一个枚举变量:
- typedef enum {
- KENDREASONWIN,
- KENDREASONLOSE
- } EndReason;
现在在HelloWorld类添加两个私有变量:
- double _gameOverTime ;
- bool _gameOver ;
接下来,添加两个私有方法的声明;
- void endScene( EndReason endReason ) ;
- void restartTapped() ;
接着,切换到HelloWorldScene.cpp并在init函数的return前添加如下代码:
- _lives = 3 ;
- double curTime = getTimeTick() ;
- _gameOverTime = curTime + 30000 ;
在update的结尾,添加如下代码:
- if ( _lives stopAllActions() ;
- _ship->setIsVisible(false) ;
- this->endScene(KENDREASONLOSE) ;
- } else if ( curTimeMillis >= _gameOverTime ) {
- this->endScene(KENDREASONWIN) ;
- }
最后,在文件的结尾添加新方法的实现:
- void HelloWorld::restartTapped() {
- CCDirector::sharedDirector()->replaceScene
- ( CCTransitionZoomFlipX::transitionWithDuration(0.5, this->scene()));
- // reschedule
- this->scheduleUpdate() ;
- }
- void HelloWorld::endScene( EndReason endReason ) {
- if ( _gameOver )
- return ;
- _gameOver = true ;
- CCSize winSize = CCDirector::sharedDirector()->getWinSize() ;
- char message[10] = "You Win" ;
- if ( endReason == KENDREASONLOSE )
- strcpy(message,"You Lose") ;
- CCLabelBMFont * label ;
- label = CCLabelBMFont::labelWithString(message ,"Arial.fnt" );
- label->setScale(0.1) ;
- label->setPosition( ccp( winSize.width/2 , winSize.height*0.6)) ;
- this->addChild(label) ;
- CCLabelBMFont * restartLabel ;
- restartLabel = CCLabelBMFont::labelWithString("Restart" ,"Arial.fnt" );
- CCMenuItemLabel *restartItem = CCMenuItemLabel::itemWithLabel(restartLabel, this, menu_selector(HelloWorld::restartTapped) );
- restartItem->setScale(0.1) ;
- restartItem->setPosition( ccp( winSize.width/2 , winSize.height*0.4)) ;
- CCMenu *menu = CCMenu::menuWithItems(restartItem, NULL);
- menu->setPosition(CCPointZero);
- this->addChild(menu) ;
- // clear label and menu
- restartItem->runAction( CCScaleTo::actionWithDuration(0.5, 1.0)) ;
- label ->runAction( CCScaleTo::actionWithDuration(0.5, 1.0)) ;
- // Terminate update callback
- this->unscheduleUpdate() ;
- }
注意最初的代码版本和Cocos2D-X代码版本的一个区别是我们不得不在游戏开始和结束时定时或取消定时对update的回调。
编译并运行,如果你的船撞击太多次就会死!
免费的音乐和音效
安卓不支持CAF格式的声音文件,所以我们要做的第一件事就是把原始声音文件替换为一种可在安卓上使用的格式。
打开终端,输入如下命令(不要忘记在第一个命令中用安卓项目的真实路径替换$PROJECT_HOME,否则命令将无法运行):
- cd $PROJECT_HOME/Resources
- afconvert -f WAVE -d UI8 SpaceGame.caf SpaceGame.wav
- afconvert -f WAVE -d UI8 explosion_large.caf explosion_large.wav
- afconvert -f WAVE -d UI8 laser_ship.caf laser_ship.wav
就像你可能猜到的那样,上面的命令将把文件从CAF格式转换为WAV格式。
一旦你转换完文件,回到你的Xcode项目并将转化好的文件添加到你的Resources文件夹(从Android目录中)——同你之前添加图片和其他资源一样。
困难的部分已经完成,现在播放这些声音吧!在HelloWorldScene.cpp的顶部添加如下代码:
- #include "SimpleAudioEngine.h"
- using namespace CocosDenshion ;
这里,我们导入了SimpleAudioEngine的头文件,同时声明了相应的名字空间。
下面的代码就很简单了,跟之前的教程没区别,只是语法表示上的差异。我们只需要在init方法的最后添加下列代码即可:
- SimpleAudioEngine::sharedEngine()->playBackgroundMusic("SpaceGame.wav",true) ;
- SimpleAudioEngine::sharedEngine()->preloadEffect("explosion_large.wav") ;
- SimpleAudioEngine::sharedEngine()->preloadEffect("laser_ship.wav") ;
接下来,在update行星部分用CGRectIntersectsRect检测是否一束激光和行星相撞的地方添加如下代码
(当飞船和激光碰撞你也应该添加一种音效,这将在相同的模块进行下个CGRectIntersectsRect测试,但飞船不能爆炸,你可能想要设置另一种声音: )):
- SimpleAudioEngine::sharedEngine()->playEffect("explosion_large.wav") ;
最后,在ccTouchesBegan函数添加如下代码:
- SimpleAudioEngine::sharedEngine()->playEffect("laser_ship.wav") ;
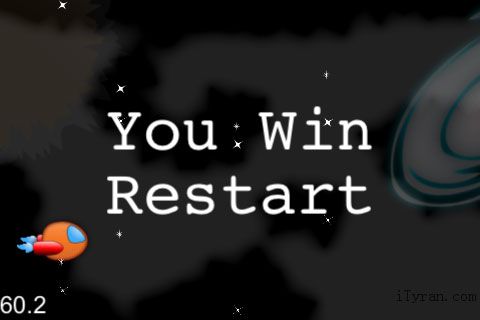
编译并运行,享受这些音效吧!下面是运行在iPhone 3GS的最终的项目:
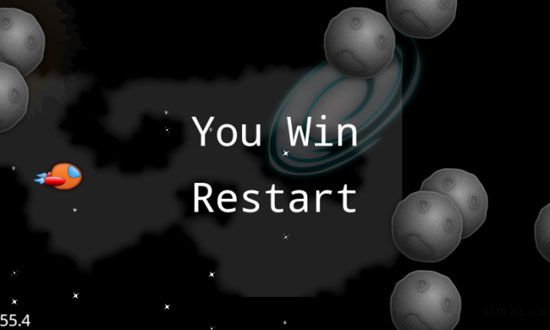
在安卓的Samsung Galaxy S中运行:
特定平台的错误和调整
Cocos 2D-X的开发者们已经做得很不错了,但是还不够完美,特别是在确保跨平台的兼容性上。如果你在各个平台上玩一下你的应用,你会发现它可以很流畅地运行在iOS平台上。但是,在Android上,你会发现它存在一下一些问题:
1. 当关闭或是从后台回到游戏里面时,通过CCParticelSystemQuad设置的sprites没有正确地被重绘,你看到的是一个空白的区域。这个算是Cocos2D-x 在Android上的一个问题。
2. 有时候在滚动的时可见区域的刷新过慢。
3. Cocos2D-x 在.11版本下,菜单选择会引起崩溃(幸好在.12版本的时候已经修复)
那么这些问题都是Cocos2D-X本身的一些问题,超出了本教程的范围(同时他们应该会在新的版本中修复这些,相信cocos2D-x团队会关注本教程的,所以大家拭目以待。Iven注)。
还有,你也许已经发现了星星只能显示在屏幕上有限的区域。这个是因为当粒子系统根据例子设计创建的时候,他们是假定根据iPhone屏幕的尺寸建立的。
要使他们在Android设备上正确工作,只有打开粒子系统,然后根据Android的屏幕尺寸进行编辑。大部分设备都要进行这样的设置:source pos Y720, variance 720, and sourcePos X 1088。然而,你也许还要根据你设备的屏幕尺寸,稍微调整一下这些设置。
为多个设备和分辨率开发
当你在iOS平台开发的时候,你只有两种屏幕比例:iPhone和iPad,同时每个有普通/高清两种分辨率。
然而,这对于Android来说要复杂的多,由于它有很多不同厂商生产的各种屏幕尺寸的设备。如果你有一个不同于iPhone屏幕尺寸的设备,那么游戏看上去会很不一样。但是不管用户用的是什么样的屏幕尺寸,我们都要让游戏看起来是OK的。
一般的方法是:可以基于屏幕的尺寸根据以下公式对图画位置进行变换:
- factor = min(targetWidth / DesignWidth, targetHeight / DesignHeight)
当对不同屏幕尺寸进行布局的时候,你需要动态的替换这些图片坐标,而不是硬编码坐标。
很不幸的是这篇教程已经够长了,但也只是对Cocos2D-X的一个简介,这里有一个练习留给你们!
何去何从?
恭喜你,你现在已经亲手体验了Cocos2D-X,同时已经创建了一个简单的跨平台游戏!