maven学习手记 - 3
学习目标
maven插件的定义;
maven插件的使用。
前言
在手记2中说过maven的阶段命令是通过插件实现的。在手记1中也有简单的示范过插件的用法。但是总觉得有些泛泛了,想在这里再捋一下,以期能更好地掌握maven的插件。
maven插件的定义
还是从插件的定义及创建开始吧。
这里要理解一个词mojo,mojo即Maven Plain Old Java Object,就是一个普通的Java类。每一个Mojo都要实现org.apache.maven.plugin.Mojo接口。
首先创建一个maven项目mvnplugin,配置信息如下:
  <groupId>net.ibuluo.mvnplugin</groupId>

  <artifactId>mvnplugin</artifactId>

  <version>1.0-SNAPSHOT</version>

  <packaging>jar</packaging>


  <name>mvnplugin</name>

  <url>http://maven.apache.org</url>


  <properties>

    <project.build.sourceEncoding>UTF-8</project.build.sourceEncoding>

  </properties>
修改pom.xml文件,添加依赖:
<dependency>

         <groupId>org.apache.maven</groupId>

         <artifactId>maven-plugin-api</artifactId>

         <version>2.0</version>

</dependency>
删除自带的App类,创建一个Tester类,继承AbstractMojo,实现execute方法:
package net.ibuluo.mvnplugin;


import org.apache.maven.plugin.AbstractMojo;

import org.apache.maven.plugin.MojoExecutionException;

import org.apache.maven.plugin.MojoFailureException;


public class Tester extends AbstractMojo{


    public void execute() throws MojoExecutionException, MojoFailureException{

        //System.out.println("Just a test!");

        getLog().info("Just a test!");

    }


}
修改下项目的配置信息,修改pom.xml文件,修改的是packaging属性:
  <groupId>net.ibuluo.mvnplugin</groupId>

  <artifactId>mvnplugin</artifactId>

  <version>1.0-SNAPSHOT</version>

  <packaging>maven-plugin</packaging>
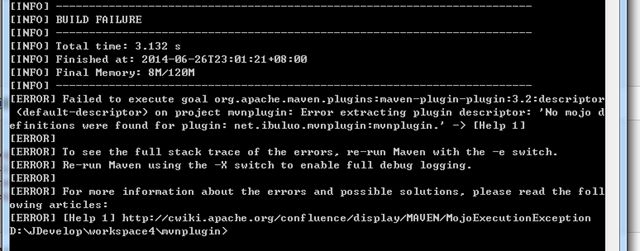
输入mvn compile执行编译,编译失败:
需要为Tester类添加注释,并添加@goal标记,修改如下:
/**

 *@goal tester

 **/

public class Tester extends AbstractMojo{
再次执行编译mvn clean compile:
可以看到编译通过。回过头来看一下错误信息’No mojo definations were fund for plugin’-找不到插件的mojo定义,明明已经继承了AbstractMojo类了?再看看修改的内容,是在类的注释里添加了“@goal tester ”这样一段信息。翻翻maven的官方文档,里面有这样一句话“a plug-in consists of one or more Mojos where a Mojo maps to a goal”-一个插件有多个mojo,每个mojo对应一个目标。勇敢的推断一下,每个goal都是由一个mojo实现的,“@goal tester”实际上是将一个mojo绑定到名为tester的goal上,系统编译时首先寻找goal,然后再去根据goal寻找对应的mojo。若未指出goal,那么编译的时候就会报出异常。
这里也可以使用maven-plugin-plugin插件跳过这个异常:
<build>

  <plugins>

    <plugin>

      <groupId>org.apache.maven.plugins</groupId>

      <artifactId>maven-plugin-plugin</artifactId>

      <version>3.0</version>

      <executions>

      </executions>

      <configuration>

        <!-- Needed for Java 5 annotation based configuration, for some reason. -->

        <skipErrorNoDescriptorsFound>true</skipErrorNoDescriptorsFound>

      </configuration>

    </plugin>

  </plugins>

  </build>
通过上面创建插件的步骤总结下maven插件项目和普通maven项目存在以下差别:
- 需要使用maven-plugin-api依赖;
- packaging属性为maven-plugin;
- 需要为mojo类添加注释并在注释中使用@goal标记,或者使用maven-plugin-plugin插件。
上面一步步的操作是为了让大家对maven插件定义有一个认识的过程。
实际上maven还提供了maven-archetype-plugin插件可以帮助我们创建插件,语句如下:
mvn archetype:create -DgroupId=net.ibuluo.mvnplugin -DartifactId=mvnplugin -DarchetypeArtifactId=maven-archetype-mojo
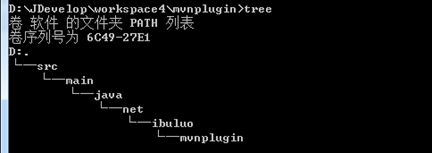
创建好的项目的目录:
还提供了参考代码:
package net.ibuluo.mvnplugin;


/*

 * Copyright 2001-2005 The Apache Software Foundation.

 *

 * Licensed under the Apache License, Version 2.0 (the "License");

 * you may not use this file except in compliance with the License.

 * You may obtain a copy of the License at

 *

 *      http://www.apache.org/licenses/LICENSE-2.0

 *

 * Unless required by applicable law or agreed to in writing, software

 * distributed under the License is distributed on an "AS IS" BASIS,

 * WITHOUT WARRANTIES OR CONDITIONS OF ANY KIND, either express or implied.

 * See the License for the specific language governing permissions and

 * limitations under the License.

 */


import org.apache.maven.plugin.AbstractMojo;

import org.apache.maven.plugin.MojoExecutionException;


import java.io.File;

import java.io.FileWriter;

import java.io.IOException;


/**

 * Goal which touches a timestamp file.

 *

 * @goal touch

 *

 * @phase process-sources

 */

public class MyMojo

    extends AbstractMojo

{

    /**

     * Location of the file.

     * @parameter expression="${project.build.directory}"

     * @required

     */

    private File outputDirectory;


    public void execute()

        throws MojoExecutionException

    {

        File f = outputDirectory;


        if ( !f.exists() )

        {

            f.mkdirs();

        }


        File touch = new File( f, "touch.txt" );


        FileWriter w = null;

        try

        {

            w = new FileWriter( touch );


            w.write( "touch.txt" );

        }

        catch ( IOException e )

        {

            throw new MojoExecutionException( "Error creating file " + touch, e );

        }

        finally

        {

            if ( w != null )

            {

                try

                {

                    w.close();

                }

                catch ( IOException e )

                {

                    // ignore

                }

            }

        }

    }

}
看完后删除这个类,新建Tester类(或是直接修改成Tester类)。将项目恢复到之前的样子。
要使用这个插件首先需要将插件部署到本地库,执行mvn install命令将插件发布到本地库。
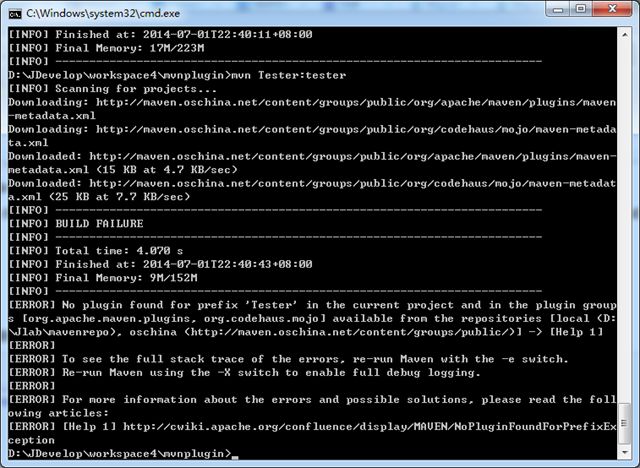
试着调用下这个插件,在手记2中提到过插件使用的方式是:mvn 插件名:目标名。好像我们没有做过定义插件名这样一件事。目标名根据之前的猜测应该是tester。不管了,先试试mvn Tester:tester,用类名做插件名试试:
果不其然,执行失败了。再试试“mvn net.ibuluo.mvnplugin.Tester:tester”或“mvn net.ibuluo.mvnplugin:tester”,依然执行失败。
不做无谓的尝试了,插件的运行方式是:mvn groupID:artifactID:version:goal。
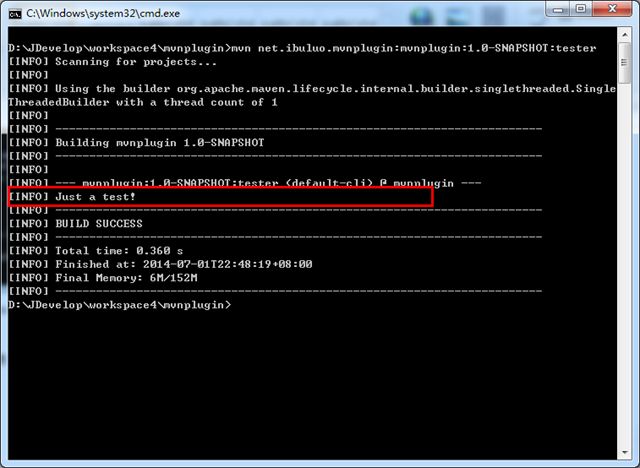
所以执行这个插件的指令应该是:mvn net.ibuluo.mvnplugin:mvnplugin:1.0-SNAPSHOT:tester。看下执行结果:
可以看到在控制台上输出了预期中的信息,执行成功了。
maven 插件的使用
还取出手记1中的pom文件,着重看看使用插件的部分(绿色背景的部分):
<project xmlns="http://maven.apache.org/POM/4.0.0" xmlns:xsi="http://www.w3.org/2001/XMLSchema-instance"

  xsi:schemaLocation="http://maven.apache.org/POM/4.0.0 http://maven.apache.org/xsd/maven-4.0.0.xsd">

  <modelVersion>4.0.0</modelVersion>


  <groupId>net.ibuluo.mvntest</groupId>

  <artifactId>mvntest</artifactId>

  <version>1.0-SNAPSHOT</version>

  <packaging>jar</packaging>


  <name>mvntest</name>

  <url>http://maven.apache.org</url>


  <properties>

    <project.build.sourceEncoding>UTF-8</project.build.sourceEncoding>

  </properties>


  <dependencies>

    <dependency>

      <groupId>junit</groupId>

      <artifactId>junit</artifactId>

      <version>3.8.1</version>

      <scope>test</scope>

    </dependency>

  </dependencies>


  <build>

      <plugins>

          <plugin>

            <groupId>org.apache.maven.plugins</groupId>

            <artifactId>maven-shade-plugin</artifactId>

            <version>1.2.1</version>

            <executions>

                <execution>

                  <phase>package</phase>

                  <goals>

                    <goal>shade</goal>

                  </goals>

                  <configuration>

                    <transformers>

                      <transformer implementation="org.apache.maven.plugins.shade.resource.ManifestResourceTransformer">

                      <mainClass>net.ibuluo.mvntest.App</mainClass>

                     </transformer>

                   </transformers>

                 </configuration>

                 </execution>

            </executions>

          </plugin>

      </plugins>

  </build>

</project>
再提下在文档上看到的知识:
- maven的插件有两大类:build插件和report插件。
- build插件在生命周期build(default)间执行,需要在<build></build>元素间定义。
- report插件在生命周期site间执行,需要在<reporting></reporting>元素间定义。
这里使用的显然是一个build插件。
之前已经提过,groupId、artificialId和version是一个mvn项目的唯一性坐标。插件也可以被视为mvn项目,因此在使用插件时这三项属性是必不可少的,maven需要使用这三项属性找到需要的插件。
然后是executions标签,在这个标签中可以有多个execution,如有多个execution需要为每个execution设置id属性。execution中的phase指明了执行插件的阶段,goal指明了要执行的插件的目标。对于configuration属性我也不甚了了,说不了什么。
调整下当前项目的pom.xml文件,使之调用我们刚才定义的插件。主要是添加<build>属性:
<project xmlns="http://maven.apache.org/POM/4.0.0" xmlns:xsi="http://www.w3.org/2001/XMLSchema-instance"

  xsi:schemaLocation="http://maven.apache.org/POM/4.0.0 http://maven.apache.org/xsd/maven-4.0.0.xsd">

  <modelVersion>4.0.0</modelVersion>


  <groupId>net.ibuluo.mvnplugin</groupId>

  <artifactId>mvnplugin</artifactId>

  <version>1.0-SNAPSHOT</version>

  <packaging>maven-plugin</packaging>


  <name>mvnplugin</name>

  <url>http://maven.apache.org</url>


  <properties>

    <project.build.sourceEncoding>UTF-8</project.build.sourceEncoding>

  </properties>


  <dependencies>

        <dependency>

            <groupId>org.apache.maven</groupId>

            <artifactId>maven-plugin-api</artifactId>

            <version>2.0</version>

        </dependency>

  </dependencies>


    <build>

      <plugins>

          <plugin>

            <groupId>net.ibuluo.mvnplugin</groupId>

            <artifactId>mvnplugin</artifactId>

            <version>1.0-SNAPSHOT</version>

            <executions>

                <execution>

                  <phase>compile</phase>

                  <goals>

                    <goal>tester</goal>

                  </goals>

                 </execution>

            </executions>

          </plugin>

      </plugins>

  </build>


</project>
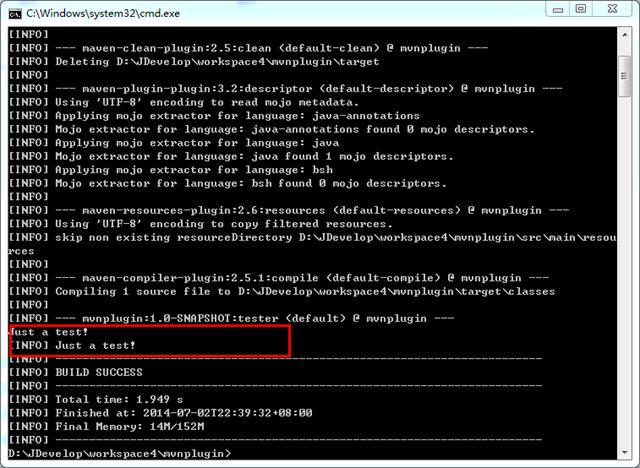
执行mvn clean compile指令:
使用插件成功了。
参考文章:
http://maven.apache.org/guides/mini/guide-configuring-plugins.html
http://blog.csdn.net/liulin_good/article/details/6069818
http://blog.csdn.net/csfreebird/article/category/1543235
http://somebody-hjh.iteye.com/blog/726086
11
