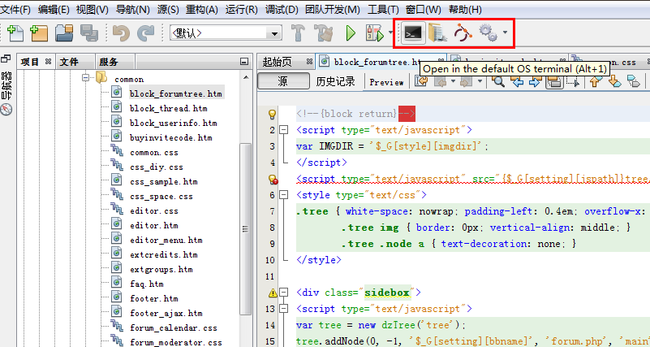
在NebBean中配置常用插件-调试/预览页面/打开项目文件夹/JS代码提示
一、安装配置xdebug
为php安装xdebug扩展,需要下载正确的xdebug版本。可用以下向导页面来判断下载php当前版本对应的xdebug版本。
在NebBean站点目录新建页面,并输出phpinfo()。复制phpinfo页面的全部信息,在版本分配向导页:http://xdebug.org/wizard.php的文本框中粘贴复制的文本。点击“分析phpinfo输出”按钮。会出现一些摘要信息。如我的php配置摘要如下:
Summary
Xdebug installed: no
Server API: Apache 2.0 Handler
Windows: yes - Compiler: MS VC9 - Architecture: x86
Zend Server: no
PHP Version: 5.4.6
Zend API nr: 220100525
PHP API nr: 20100525
Debug Build: no
Thread Safe Build: yes
Configuration File Path: C:\Windows
Configuration File: D:\Software\GreenSoft\Php\php5.4.6\php.ini
Extensions directory: D:\Software\GreenSoft\Php\php5.4.6\ext
Instructions
Download
Move the downloaded file to D:\Software\GreenSoft\Php\php5.4.6\ext
Edit D:\Software\GreenSoft\Php\php5.4.6\php.ini and add the line
zend_extension = D:\Software\GreenSoft\Php\php5.4.6\ext\
Restart the webserver
Xdebug具体的配置如下:
1.到xdebug下载页面下载对应php的版本(ts:线程安全版),当前选择PHP 5.4 VC9 TS (32 bit)版。
http://xdebug.org/download.php
将下载的dll文件放到php安装目录/ext文件夹下
2.到php安装目录下php.ini文件中添加以下配置
zend_extension = D:\Software\GreenSoft\Php\php5.4.6\ext\php_xdebug-2.2.2-5.4-vc9.dll
xdebug.remote_enable=on
xdebug.remote_handler=dbgp
xdebug.remote_mode=req
xdebug.remote_host=localhost
xdebug.remote_port=9999
3.重启Apache服务
4.在NebBean站点目录新建页面,并输出phpinfo(),在页面中查找xdebug support,能找到且为enabled。则已经配置成功并已经启用。
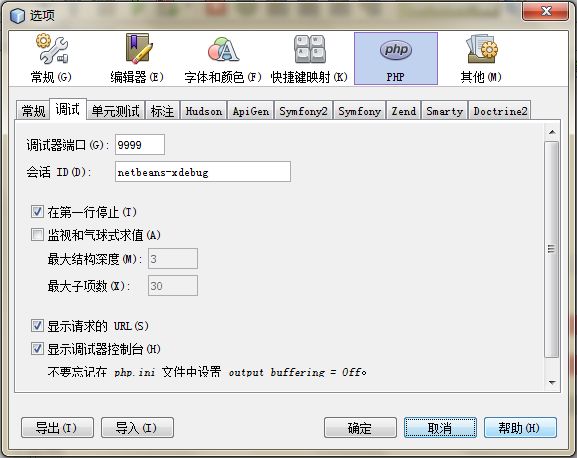
5.在NetBean工具菜单中点击选项,在弹出的窗口php选项中进行如下设置。
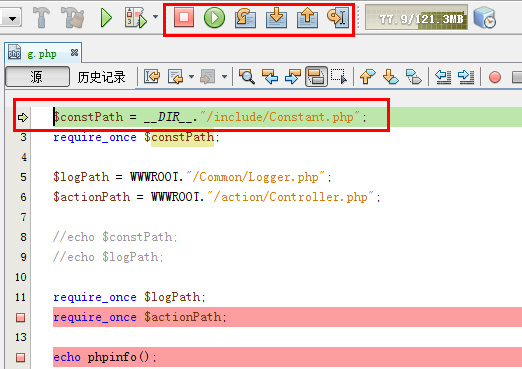
6.在NetBean中需要调试的php文件代码中加入断点,然后点击工具中的调试文件。如图:
7.由下图我们知道,调试功能OK了。
二、配置网页预览
1.在 工具->插件 中选择及安装以下两个插件
* Web Preview插件
* Embedded Browser UI - XUL Runner插件
2.在 工具->选项->常规->Web浏览器 中选择 "Embedded Mozilla Browser" 作为默认的Netbeans的浏览器即可
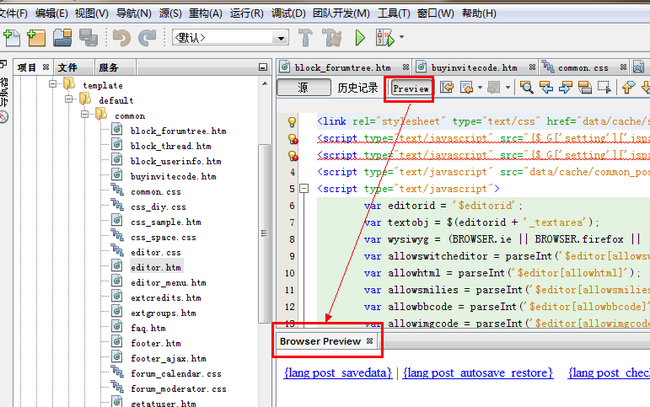
3.点开一个页.htm,.html页面,在页面tab位置可以看到 Preview 的按钮,点击即可以到页面的预览。
三、打开项目文件夹
1.在 工具->插件 中选择及安装以下两个插件之一:
* Explore from here
* QuickOpener
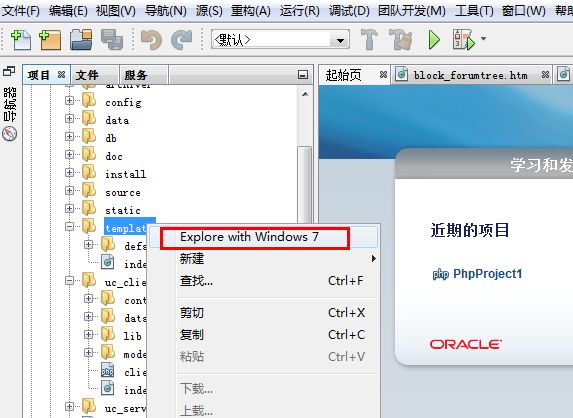
2.安装完成重启NetBeans后,在项目树中选择一个文件夹右键可以见到打开的选项。
Explore from here的界面菜单:
QuickOpener的命令菜单
目录版本比较(20130825最新版),前者只有选中文件夹才能显示菜单选项打开文件夹,后者没有右键菜单。
四、Javascript添加代码提示
需要安装CoffeeScript NetBeans插件.

