工作中常用的QTP操作Excel函数
前言
本文只是对工作中常用的EOM相关函数的整理,并不是要写个大而全的操作手册,如果想对EOM有更多的了解可以参考QTP的帮助文档或查看QTP安装目录\CodeSamplesPlus\UsingExcel.vbs文件。
自动化测试中,为了达到数据与脚本分离的目的,我们需要一种能够统一管理测试数据的工具。QTP自带的DataTable非常好用,但是不利于管理和维护,这时候Excel就进入了我们的视线,QTP提供了对Excel的强大支持,通过EOM(Excel Automation Object Model)即Excel自动化对象模型来对Excel进行操作,下面就介绍一下我在工作中经常用到的Excel操作函数,也当作一次整理和总结。
写单元格
-
功能:完成对Excel中指定单元格的写入
-
参数:路径,sheet,单元格行号列号,需写入的值
在D盘根目录下新建qtp.xlsx文件。
 1 '向Excel中指定单元格写入数据

 2 Function write_cell(filename,sheetname,number_of_row,number_of_column,value)

 3

 4     'filename:Excel完整路径

 5     'sheetname:sheet名称

 6     Dim excelapp,excelsheet,excelbook

 7     '生成Excel对象

 8     set excelapp=createobject("Excel.Application")

 9     '打开Excel

10     set excelbook=excelapp.WorkBooks.open(filename)

11     '切换sheet

12     Set excelsheet=excelbook.Worksheets(sheetname)

13     '写入值

14     excelsheet.cells(number_of_row,number_of_column)=value

15     '保存退出Excel

16     excelapp.Workbooks(1).Save

17     excelapp.Workbooks(1).Close

18     excelapp.Quit

19     Set excelapp=nothing

20 End Function

21

22 write_cell "D:\qtp.xlsx","sheet1",1,1,"hello,qtp"
执行后Excel中第一行第一列的值已设置

设置单元格样式
-
功能:设置单元格的颜色、字体等
-
参数:路径,sheet,单元格行号列号,字体颜色,背景颜色,对齐方式,字体,字号
 1 Function set_style(filename,sheetname,number_of_row,number_of_column,font_index,back_index,align,font_name,font_size)

 2     Dim excelapp,excelsheet,excelbook

 3     set excelapp=createobject("Excel.Application")

 4     set excelbook=excelapp.WorkBooks.open(filename)

 5     Set excelsheet=excelbook.Worksheets(sheetname)

 6     '设置背景色

 7     excelsheet.Cells(number_of_row,number_of_column).Interior.ColorIndex=back_index

 8     '设置字体颜色

 9     excelsheet.Cells(number_of_row,number_of_column).Font.ColorIndex=font_index

10     '设置字体类型

11     excelsheet.Cells(number_of_row,number_of_column).Font.Name=font_name

12     '设置字体大小

13     excelsheet.Cells(number_of_row,number_of_column).Font.Size=font_size

14     '设置单元格排列方式

15     excelsheet.Cells(number_of_row,number_of_column).HorizontalAlignment=align

16     '保存关闭Excel

17     excelapp.Workbooks(1).Save

18     excelapp.Workbooks(1).Close

19     excelapp.Quit

20 End Function

21

22 '红色背景,黄色字体,居中显示,微软雅黑18号字体

23 set_style "D:\qtp.xlsx","sheet1",1,1,6,3,3,"微软雅黑",18
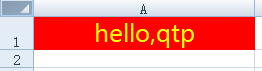
效果图,关于颜色的Index值可以参考颜色index列表
写多行多列
-
功能:有时测试中需要大批量的写入数据,每个单元格独立写入耗时耗力,通过数组形式一次写入则方便许多
-
参数:路径,sheet,写入的数组
 1 '写多行多列

 2 Function write_multiple(filename,sheetname,arr)

 3

 4     'filename:Excel完整路径

 5     'sheetname:sheet名称

 6     Dim excelapp,excelsheet,excelbook

 7     '生成Excel对象

 8     set excelapp=createobject("Excel.Application")

 9     '打开Excel

10     set excelbook=excelapp.WorkBooks.open(filename)

11     '切换sheet

12     Set excelsheet=excelbook.Worksheets(sheetname)

13     '写入值

14     For i=1 to ubound(arr,1)

15         For j=1 to ubound(arr,2)

16             excelsheet.cells(i,j)=arr(i,j)

17         Next

18     Next

19     '保存退出Excel

20     excelapp.Workbooks(1).Save

21     excelapp.Workbooks(1).Close

22     excelapp.Quit

23     Set excelapp=nothing

24 End Function

25

26 '定义二维数组

27 Dim arr(2,2)

28 arr(1,1)="hello"

29 arr(1,2)="qtp"

30 arr(2,1)="hi"

31 arr(2,2)="test"

32 '写入Excel

33 write_multiple "D:\qtp.xlsx","sheet1",arr
读取Excel文件以数组形式返回
-
功能:以二维数组的形式返回Excel中的数据
-
参数:路径,sheet
 1 '读取Excel文件,以数组形式返回

 2 Function read_excel(filename,sheetname)

 3     Dim excelapp,excelsheet,excelbook,number_of_row,number_of_column,arr()

 4     set excelapp=createobject("Excel.Application")

 5     excelapp.DisplayAlerts=Flase

 6     set excelbook=excelapp.WorkBooks.open(filename)

 7     Set excelsheet=excelbook.Worksheets(sheetname)

 8     '获得当前sheet总行数和列数

 9     number_of_row=excelsheet.UsedRange.Rows.Count

10     number_of_column=excelsheet.UsedRange.Columns.Count

11     '设置数组范围

12     ReDim arr(number_of_row,number_of_column)

13     '将当前sheet中的数据放入数组

14     For i=1 to number_of_row

15         For j=1 to number_of_column

16             arr(i,j)=excelsheet.cells(i,j)

17         Next

18     Next

19

20 read_excel=arr

21 '保存关闭Excel

22 excelapp.Workbooks(1).Save

23 excelapp.Workbooks(1).Close

24 excelapp.DisplayAlerts=true

25 excelapp.Quit

26 End Function

27

28 Dim data

29 data=read_excel("D:\qtp.xlsx","sheet1")

30 For i=1 to ubound(data,1)

31     For j=1 to ubound(data,2)

32         print "第"&i&"行第"&j&"列="&data(i,j)

33     Next

34 Next
获取数据在Excel中的起始和结束行号
-
功能:获取字符串在Excel中开始和结束的行号
-
参数:路径,sheet,匹配字符串
 1 '匹配脚本名称在Excel‘中占几行

 2 Function get_range(filename,sheetname,pattern_str)

 3     Dim excelapp,excelsheet,excelbook,number_of_row,arr(),number_of_begin,number_of_end,reg

 4     '设置数组范围

 5     ReDim arr(1,1)

 6     set excelapp=createobject("Excel.Application")

 7     excelapp.DisplayAlerts=Flase

 8     set excelbook=excelapp.WorkBooks.open(filename)

 9     Set excelsheet=excelbook.Worksheets(sheetname)

10     '获得当前sheet总行数

11     number_of_row=excelsheet.UsedRange.Rows.Count

12   '生成正则表达式对象

13    Set reg=new RegExp

14    reg.Pattern=pattern_str

15    reg.IgnoreCase=false

16

17    '查找开始及终止行数

18     For i=1 to number_of_row

19         if reg.Test(excelsheet.cells(i,1)) then

20             number_of_begin=i

21         For j=number_of_begin to number_of_row

22             if not reg.Test(excelsheet.cells(j,1)) then

23                 number_of_end=j-1

24                 Exit for

25             End if

26             If j=number_of_row Then

27                 number_of_end=number_of_row

28             End If

29         Next

30             Exit for

31         End if

32     Next

33

34     '起始行数

35     arr(0,0)=number_of_begin

36     '结束行数

37     arr(0,1)=number_of_end

38     get_range=arr

39     '保存关闭Excel

40     excelapp.Workbooks(1).Save

41     excelapp.Workbooks(1).Close

42     excelapp.DisplayAlerts=true

43     excelapp.Quit

44

45 End Function
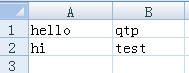
将qtp.xlsx中写入如下内容

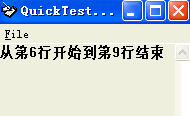
调用函数查找test开头的字符串在文件中的起止行号
Dim begin_end

begin_end=get_range("D:\qtp.xlsx","sheet1","test[0-9]+")

print "从第"&begin_end(0,0)&"行开始到第"&begin_end(0,1)&"行结束"
Excel操作类
如果对某一Excel的操作很集中,可以将对Excel的操作写成类的形式
 1 Class OperateExcel

 2

 3     Public filename,sheetname,excelapp,excelsheet,excelbook

 4     '实现构造方法,类实例化时自动执行

 5     Public default Function initilize(path,name)

 6         filename=path

 7         sheetname=name

 8         setExcelModel

 9         set initilize=Me

10     End Function

11

12     Private function setExcelModel()

13         set excelapp=createobject("Excel.Application")

14         set excelbook=excelapp.WorkBooks.open(filename)

15         Set excelsheet=excelbook.Worksheets(sheetname)

16     End Function

17

18     Function writeCell(number_of_row,number_of_column,value)

19         excelsheet.cells(number_of_row,number_of_column)=value

20     End Function

21

22     Function setColor(number_of_row,number_of_column,back_index)

23         '设置指定单元格背景颜色

24         excelsheet.Cells(number_of_row,number_of_column).Interior.ColorIndex=back_index

25     End Function

26

27     Function readExcel

28        content

29        ...

30     End Function

31     .....

32

33     Function closeExcel

34         '保存关闭Excel

35         excelapp.Workbooks(1).Save

36         excelapp.Workbooks(1).Close

37         excelapp.Quit

38     End Function

39

40 End Class

41

42 Function get_class(excelname,sheet)

43    set get_class=(new OperateExcel)(excelname,sheet)

44 End Function
这样使用起来很方便,只要记得在操作完成后调用关闭方法就可以了
1 Dim o_e

2 set o_e=get_class("D:\qtp.xlsx","sheet1")

3 o_e.writeCell 1,1,"kddddkk"

4 o_e.setColor 1,1,6

5 '关闭Excel对象

6 o_e.closeExcel