- UI学习——cell的复用和自定义cell
Magnetic_h
ui学习
目录cell的复用手动(非注册)自动(注册)自定义cellcell的复用在iOS开发中,单元格复用是一种提高表格(UITableView)和集合视图(UICollectionView)滚动性能的技术。当一个UITableViewCell或UICollectionViewCell首次需要显示时,如果没有可复用的单元格,则视图会创建一个新的单元格。一旦这个单元格滚动出屏幕,它就不会被销毁。相反,它被添
- Flutter学习之九 ListView
MQ_Twist
极端很容易,平衡才是最难的。Flutter学习之八Container前言Flutter中的ListView的地位,就好比于iOS中的UITableView,算是最常用的可滚动组件之一,它可以沿一个方向线性排布所有子组件,并且它也支持列表项懒加载(在需要时才会创建)。默认构造函数我们看看ListView的默认构造函数定义:ListView({...//可滚动widget公共参数AxisscrollD
- iOS使用UIScrollView实现左右滑动UITableView和UICollectionView
泥孩儿0107
ios开发
iOS使用UIScrollView实现左右滑动UITableView和UICollectionView标签:iOS左右滑动UIScrollViewUICollectionView在UIScrollView中嵌套UITableView的文章很多,但是项目需要,需要嵌套UICollectionView,而UICollectionView和UITableView有很多不同,有些知识到现在也没搞清楚,一遍
- 简单实现浮动按钮+上滑隐藏按钮+下滑显示按钮
AlanGe
#import"SlideShowOrHideVC.h"@interfaceSlideShowOrHideVC(){CGFloatlastContentOffset;BOOLhideBtn;BOOLisBottom;}@property(nonatomic,strong)UITableView*tableView;@property(nonatomic,strong)UIButton*myButt
- IOS 21 发现界面(UITableView)单曲列表(UITableView)实现
sziitjin
IOSiosUITableView
发现界面完整效果本文实现歌单列表效果文章基于IOS20发现界面(UITableView)歌单列表(UICollectionView)实现继续实现发现界面单曲列表效果单曲列表Cell实现实现流程:1.创建Cell,及在使用UITableView的Controller控制器上注册Cell;2.获取data列表数据,并调用UITableView的reloadData(),将数据更新到列表;3.将data
- Swift Cell重用池机制以及UINib
司南_01b7
functableView(_tableView:UITableView,cellForRowAtindexPath:IndexPath)->UITableViewCell{letreuseID="taskCell5555555"//务必填写模版nib名(此处仅限于有cell模版,若无可忽略)letnib=UINib(nibName:"test5TableViewCell",bundle:nil)
- IOS 20 发现界面(UITableView)歌单列表(UICollectionView)实现
sziitjin
IOSiosUITableViewCollectionView
发现界面完整效果本文实现歌单列表效果文章基于IOS19发现界面(UITableView)快捷按钮实现继续实现发现界面歌单列表效果歌单列表Cell实现实现流程:1.创建Cell,及在使用UITableView的Controller控制器上注册Cell;2.获取data列表数据,并调用UITableView的reloadData(),将数据更新到列表;3.将data的Item数据绑定UITableVi
- tableView reloadData 刷新结束后再执行后续操作
wg刚
[self.tableViewreloadData]并不会等待tableview更新结束后才执行后续代码,而是立即执行后续代码做个试验:代码如下@interfaceViewController()@property(nonatomic,strong)UITableView*tableView;@property(nonatomic,strong)NSArray*dataArr;@end@imple
- 关于UITableView的Cell复用
bidianzhang
iOS工作数据结构iphoneios手机
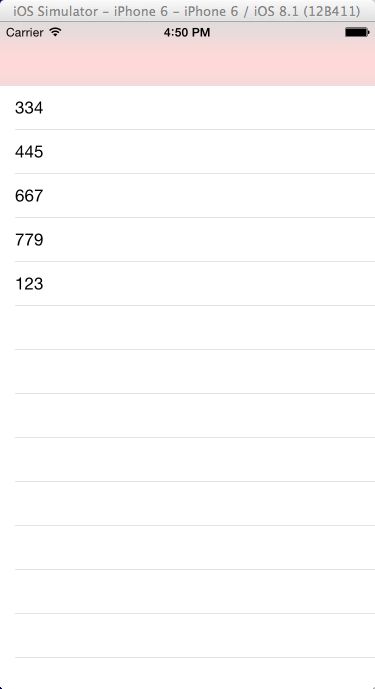
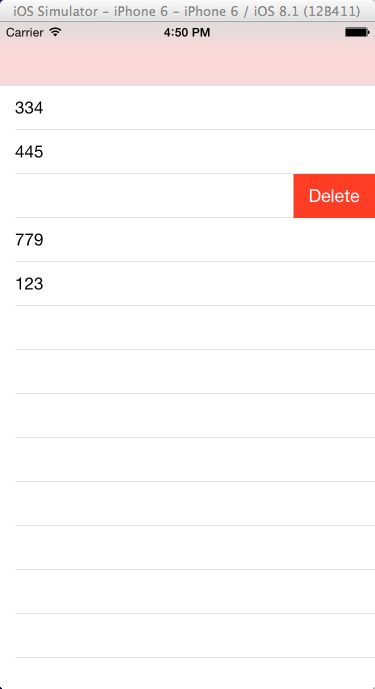
UITableView是ios开发中使用率极高的一个控件,就我个人来说,几乎我做的每一个View上都有她的身影。但是很长一段时间,我对她的理解都很肤浅。对我来说触动较大的两个东西,一个是前面提到的自定义UITableViewCell,再有就是今天要提的这个复用了。
所谓复用表面意思来理解就是重复利用了。大致的工作原理就是:UITableView属于lazyloading,也就是只加载会在界面上显示
- iOS总体框架介绍和详尽说明
诗雅颂
ios移动端框架苹果
iOS是由苹果公司开发的移动操作系统,为iPhone、iPad、iPodTouch等设备提供支持。iOS采用了基于Unix的核心(称为Darwin),并采用了类似于MacOSX的图形用户界面。以下是iOS的总体框架介绍和详尽说明:UIKit框架:UIKit是构建iOS应用程序用户界面的主要框架。它包括了各种视图控制器(如UITableViewController、UIViewController)
- UICollectionView使用
搬砖行家
首先我们自定义一个UICollectionViewCell,和自定义UITableViewCell差不多,只是这里定义的是一个网格。-(id)initWithFrame:(CGRect)frame{self=[superinitWithFrame:frame];if(self){//设置CollectionViewCell中的图像框self.imageView=[[UIImageViewalloc
- UITableView实时刷新失效问题解决
风雪山神喵
要完成的UITableView是:能够在点击了UICollectionView的item之后,刷新自己。很长一段时间,都在迷惑,为什么不能点了一下之后,就能够展示正确的数据?要点很多下,点的头都晕了。。。其实解决方法是://消除数据延迟导致的失灵[selectedDayArrremoveAllObjects];[mytableViewreloadData];这样子,也有问题,就是刷新了两次。实际的
- 11、UITableView 的优化
十二月_9d09
1、正确的复用cell;2、设计统一规格的cell;3、提前计算并缓存好cell的高度(布局),因为heightForRowAtIndextPath方法是调用最频繁的方法;4、异步绘制,遇到复杂界面、遇到性能瓶颈时,往往是突破口;5、滑动时按需加载,这个在大量图片展示、网络加载的时候很管用;6、减少子视图的层级关系;7、尽量使所有的视图不透明化以及做切圆操作;8、尽量不要动态地add或remove
- View层规范
紫藤花的魂
在viewController代码里面#pragmamark-lifecycleviewDidLoadviewWillAppear...#pragmamark-UITableViewDelegatemethods#pragmamark-CustomDelegatemethods#pragmamark-eventresponse-(void)didTappedConfirmButton:(UIBut
- 'NSUnknownKeyException', reason: '[ setValue:forUndefinedKe...
叶舞清风
无语了屏幕快照2018-12-21下午3.59.59.png屏幕快照2018-12-21下午4.02.34.png[图片上传失败...(image-ff7e18-1545379428606)]
- UITableViewCell嵌套UICollectionView
myk
UITableView和UICollection的嵌套使用1.在控制器中创建TableView,设置数据源和代理-(void)viewDidLoad{[superviewDidLoad];self.arrData=[NSMutableArrayarrayWithObjects:@"末",@"将",@"于",@"禁",@"愿",@"为",@"曹",@"家",@"世",@"代",@"赴",@"汤",@
- iOS UITableViewCell 多选时改变编辑状态图片
浅宇落
UITableViewCell编辑状态时会出现多选按钮,最近项目有需求这里要改成自己的图片和去掉一下点击效果,总结一下:最终结果最终结果.png1.创建一个继承与UITableViewCell的类EditCellEditCell.h#importNS_ASSUME_NONNULL_BEGIN@interfaceEditCell:UITableViewCell/**下标数*/@property(no
- 设计模式
灰溜溜的小王子
一、编程中的六大设计原则?1.单一职责原则通俗地讲就是一个类只做一件事1.CALayer:动画和视图的显示。2.UIView:只负责事件传递、事件响应。2.开闭原则对修改关闭,对扩展开放。要考虑到后续的扩展性,而不是在原有的基础上来回修改3.接口隔离原则使用多个专门的协议、而不是一个庞大臃肿的协议,例如tableView的代理和数据源代理:UITableviewDelegate,UITableVi
- ios UITableView 使用UITableViewStyleGrouped(分组类型)顶部会有留白处理方式
90后的晨仔
方法一:CGRectframe=CGRectMake(0,0,0,CGFLOAT_MIN);self.tableView.tableHeaderView=[[UIViewalloc]initWithFrame:frame];方法二:CGRectframe=CGRectMake(0,0,0,0.0001);self.tableView.tableHeaderView=[[UIViewalloc]in
- SwiftUI -- 取消List的分割线
jancywen
iOS13List的底层是UITableView,可以直接设置UITableView的separatorStyle为none来去除分割线在iOS14中List的实现不在是UITableView了,可以设置.listStyle(SidebarListStyle()),但会有很大的边距。也可以用Scrollview+LazyVStack替代List,Thestackis"lazy,"inthatthe
- tableview
花开半夏又一年
tableview自适应高度functableView(_tableView:UITableView,heightForRowAtindexPath:IndexPath)->CGFloat{switchindexPath.section{case0:return250default:returnUITableView.automaticDimension}}方法二:functableView(_t
- UIRefreshControl
絮语时光杨
UIRefreshControl是iOS6自带的UITableView下拉刷新控件。(instancetype)init;@property(nonatomic,readonly,getter=isRefreshing)BOOLrefreshing;@property(null_resettable,nonatomic,strong)UIColor*tintColor;@property(null
- 代码规范
YannChee
ViewController的代码结构划分以后可以按如下#pragmamark-lifecycle#pragmamark-UITableViewDelegate#pragmamark-CustomDelegate#pragmamark-EventResponse#pragmamark-PrivateMethods(后期往往需要抽取重构的部分)#pragmamark-Getter&Setter
- 表格——swift
呵邢
classMovieViewController:UIViewController,UITableViewDataSource,UITableViewDelegate{//表格属性vartable:UITableView=UITableView(frame:CGRect(x:0,y:0,width:scrWidth,height:scrHeight),style:UITableViewStyle.
- iOS13 Compositional Layout
LINGSHOW
阅读原文前言UITableView和UICollectionView是我们开发者最常用的控件了,大量的流式布局需要这两个控件来实现,因此这两个控件也是Apple重点优化的对象。在往届WWDC中,我们已经受益于UITableViewDataSourcePrefetching、优化版Autolayout等带来的性能提升,以及UITableViewDragDelegate带来的原生拖拽功能。今年,App
- UITableView方法的执行顺序
Rumbles
1.它会调用代理方法确定有几行[TableViewControllernumberOfSectionsInTableView:]2.确定每行的表头高和表尾高(如果设定了HeardView和FooterView)[TableViewControllertableView:heightForHeaderInSection:][TableViewControllertableView:heightFor
- iOS tableViewCell最右边显示箭头,字符,自定义分割线
Lee坚武
效果如图:image.png1.添加iOS系统自带的cell的箭头cell.accessoryType=UITableViewCellAccessoryDisclosureIndicator;2.去掉tableviewcell的间隔下划线_tableView.separatorStyle=UITableViewCellSeparatorStyleNone;3.添加自定义间隔线,加在下面的这个方法里
- UITableView 轻松自定义多选cell 不使用系统样式
Adgerc
1、先看效果UITableView.gif2、需要什么效果1.点击全选需要全选cell2.在全选状态下,取消任意一个,全选按钮为normal转态3.一个一个选择,直到全部选择,全选按钮为selected状态3、实现3.1.在cell中添加一个按钮或者图片,用来显示选择或者未选择中的转态,在初始化时默认设为未选择的转态或者图片,和透明度为0或hidden=YES,我使用的是按钮做这个状态的现实,只需
- iOS开发笔记-113:兼容ios14
原味蛋炒饭
1:iOS14中UITableViewCell如果子控件是加到cell上的会被cell的contentView所遮挡,contentView会在最上层。所以按钮UIbutton之类的要加在contentView上2:刘海屏statusBarFrame.size.height由44变成了48
- 设计模式
荷码人生
六大设计原则:单一职责原则、依赖倒置原则、开闭原则、里氏替换原则、接口隔离原则、迪米特法则;单一职责原则:一个类只负责一个事(UIView,Calayer)开闭原则:对修改关闭、对扩展开发。(避免对类的反复修改,类的数据结构设定后,可利用扩展的方式,修改)接口隔离原则:(UITableView的两个协议)使用多个专门协议,避免庞大协议:dataSource(数据源),delegate(回调代理事件
- sql统计相同项个数并按名次显示
朱辉辉33
javaoracle
现在有如下这样一个表:
A表
ID Name time
------------------------------
0001 aaa 2006-11-18
0002 ccc 2006-11-18
0003 eee 2006-11-18
0004 aaa 2006-11-18
0005 eee 2006-11-18
0004 aaa 2006-11-18
0002 ccc 20
- Android+Jquery Mobile学习系列-目录
白糖_
JQuery Mobile
最近在研究学习基于Android的移动应用开发,准备给家里人做一个应用程序用用。向公司手机移动团队咨询了下,觉得使用Android的WebView上手最快,因为WebView等于是一个内置浏览器,可以基于html页面开发,不用去学习Android自带的七七八八的控件。然后加上Jquery mobile的样式渲染和事件等,就能非常方便的做动态应用了。
从现在起,往后一段时间,我打算
- 如何给线程池命名
daysinsun
线程池
在系统运行后,在线程快照里总是看到线程池的名字为pool-xx,这样导致很不好定位,怎么给线程池一个有意义的名字呢。参照ThreadPoolExecutor类的ThreadFactory,自己实现ThreadFactory接口,重写newThread方法即可。参考代码如下:
public class Named
- IE 中"HTML Parsing Error:Unable to modify the parent container element before the
周凡杨
html解析errorreadyState
错误: IE 中"HTML Parsing Error:Unable to modify the parent container element before the child element is closed"
现象: 同事之间几个IE 测试情况下,有的报这个错,有的不报。经查询资料后,可归纳以下原因。
- java上传
g21121
java
我们在做web项目中通常会遇到上传文件的情况,用struts等框架的会直接用的自带的标签和组件,今天说的是利用servlet来完成上传。
我们这里利用到commons-fileupload组件,相关jar包可以取apache官网下载:http://commons.apache.org/
下面是servlet的代码:
//定义一个磁盘文件工厂
DiskFileItemFactory fact
- SpringMVC配置学习
510888780
springmvc
spring MVC配置详解
现在主流的Web MVC框架除了Struts这个主力 外,其次就是Spring MVC了,因此这也是作为一名程序员需要掌握的主流框架,框架选择多了,应对多变的需求和业务时,可实行的方案自然就多了。不过要想灵活运用Spring MVC来应对大多数的Web开发,就必须要掌握它的配置及原理。
一、Spring MVC环境搭建:(Spring 2.5.6 + Hi
- spring mvc-jfreeChart 柱图(1)
布衣凌宇
jfreechart
第一步:下载jfreeChart包,注意是jfreeChart文件lib目录下的,jcommon-1.0.23.jar和jfreechart-1.0.19.jar两个包即可;
第二步:配置web.xml;
web.xml代码如下
<servlet>
<servlet-name>jfreechart</servlet-nam
- 我的spring学习笔记13-容器扩展点之PropertyPlaceholderConfigurer
aijuans
Spring3
PropertyPlaceholderConfigurer是个bean工厂后置处理器的实现,也就是BeanFactoryPostProcessor接口的一个实现。关于BeanFactoryPostProcessor和BeanPostProcessor类似。我会在其他地方介绍。PropertyPlaceholderConfigurer可以将上下文(配置文件)中的属性值放在另一个单独的标准java P
- java 线程池使用 Runnable&Callable&Future
antlove
javathreadRunnablecallablefuture
1. 创建线程池
ExecutorService executorService = Executors.newCachedThreadPool();
2. 执行一次线程,调用Runnable接口实现
Future<?> future = executorService.submit(new DefaultRunnable());
System.out.prin
- XML语法元素结构的总结
百合不是茶
xml树结构
1.XML介绍1969年 gml (主要目的是要在不同的机器进行通信的数据规范)1985年 sgml standard generralized markup language1993年 html(www网)1998年 xml extensible markup language
- 改变eclipse编码格式
bijian1013
eclipse编码格式
1.改变整个工作空间的编码格式
改变整个工作空间的编码格式,这样以后新建的文件也是新设置的编码格式。
Eclipse->window->preferences->General->workspace-
- javascript中return的设计缺陷
bijian1013
JavaScriptAngularJS
代码1:
<script>
var gisService = (function(window)
{
return
{
name:function ()
{
alert(1);
}
};
})(this);
gisService.name();
&l
- 【持久化框架MyBatis3八】Spring集成MyBatis3
bit1129
Mybatis3
pom.xml配置
Maven的pom中主要包括:
MyBatis
MyBatis-Spring
Spring
MySQL-Connector-Java
Druid
applicationContext.xml配置
<?xml version="1.0" encoding="UTF-8"?>
&
- java web项目启动时自动加载自定义properties文件
bitray
javaWeb监听器相对路径
创建一个类
public class ContextInitListener implements ServletContextListener
使得该类成为一个监听器。用于监听整个容器生命周期的,主要是初始化和销毁的。
类创建后要在web.xml配置文件中增加一个简单的监听器配置,即刚才我们定义的类。
<listener>
<des
- 用nginx区分文件大小做出不同响应
ronin47
昨晚和前21v的同事聊天,说到我离职后一些技术上的更新。其中有个给某大客户(游戏下载类)的特殊需求设计,因为文件大小差距很大——估计是大版本和补丁的区别——又走的是同一个域名,而squid在响应比较大的文件时,尤其是初次下载的时候,性能比较差,所以拆成两组服务器,squid服务于较小的文件,通过pull方式从peer层获取,nginx服务于较大的文件,通过push方式由peer层分发同步。外部发布
- java-67-扑克牌的顺子.从扑克牌中随机抽5张牌,判断是不是一个顺子,即这5张牌是不是连续的.2-10为数字本身,A为1,J为11,Q为12,K为13,而大
bylijinnan
java
package com.ljn.base;
import java.util.Arrays;
import java.util.Random;
public class ContinuousPoker {
/**
* Q67 扑克牌的顺子 从扑克牌中随机抽5张牌,判断是不是一个顺子,即这5张牌是不是连续的。
* 2-10为数字本身,A为1,J为1
- 翟鸿燊老师语录
ccii
翟鸿燊
一、国学应用智慧TAT之亮剑精神A
1. 角色就是人格
就像你一回家的时候,你一进屋里面,你已经是儿子,是姑娘啦,给老爸老妈倒怀水吧,你还觉得你是老总呢?还拿派呢?就像今天一样,你们往这儿一坐,你们之间是什么,同学,是朋友。
还有下属最忌讳的就是领导向他询问情况的时候,什么我不知道,我不清楚,该你知道的你凭什么不知道
- [光速与宇宙]进行光速飞行的一些问题
comsci
问题
在人类整体进入宇宙时代,即将开展深空宇宙探索之前,我有几个猜想想告诉大家
仅仅是猜想。。。未经官方证实
1:要在宇宙中进行光速飞行,必须首先获得宇宙中的航行通行证,而这个航行通行证并不是我们平常认为的那种带钢印的证书,是什么呢? 下面我来告诉
- oracle undo解析
cwqcwqmax9
oracle
oracle undo解析2012-09-24 09:02:01 我来说两句 作者:虫师收藏 我要投稿
Undo是干嘛用的? &nb
- java中各种集合的详细介绍
dashuaifu
java集合
一,java中各种集合的关系图 Collection 接口的接口 对象的集合 ├ List 子接口 &n
- 卸载windows服务的方法
dcj3sjt126com
windowsservice
卸载Windows服务的方法
在Windows中,有一类程序称为服务,在操作系统内核加载完成后就开始加载。这里程序往往运行在操作系统的底层,因此资源占用比较大、执行效率比较高,比较有代表性的就是杀毒软件。但是一旦因为特殊原因不能正确卸载这些程序了,其加载在Windows内的服务就不容易删除了。即便是删除注册表中的相 应项目,虽然不启动了,但是系统中仍然存在此项服务,只是没有加载而已。如果安装其他
- Warning: The Copy Bundle Resources build phase contains this target's Info.plist
dcj3sjt126com
iosxcode
http://developer.apple.com/iphone/library/qa/qa2009/qa1649.html
Excerpt:
You are getting this warning because you probably added your Info.plist file to your Copy Bundle
- 2014之C++学习笔记(一)
Etwo
C++EtwoEtwoiterator迭代器
已经有很长一段时间没有写博客了,可能大家已经淡忘了Etwo这个人的存在,这一年多以来,本人从事了AS的相关开发工作,但最近一段时间,AS在天朝的没落,相信有很多码农也都清楚,现在的页游基本上达到饱和,手机上的游戏基本被unity3D与cocos占据,AS基本没有容身之处。so。。。最近我并不打算直接转型
- js跨越获取数据问题记录
haifengwuch
jsonpjsonAjax
js的跨越问题,普通的ajax无法获取服务器返回的值。
第一种解决方案,通过getson,后台配合方式,实现。
Java后台代码:
protected void doPost(HttpServletRequest req, HttpServletResponse resp)
throws ServletException, IOException {
String ca
- 蓝色jQuery导航条
ini
JavaScripthtmljqueryWebhtml5
效果体验:http://keleyi.com/keleyi/phtml/jqtexiao/39.htmHTML文件代码:
<!DOCTYPE html>
<html xmlns="http://www.w3.org/1999/xhtml">
<head>
<title>jQuery鼠标悬停上下滑动导航条 - 柯乐义<
- linux部署jdk,tomcat,mysql
kerryg
jdktomcatlinuxmysql
1、安装java环境jdk:
一般系统都会默认自带的JDK,但是不太好用,都会卸载了,然后重新安装。
1.1)、卸载:
(rpm -qa :查询已经安装哪些软件包;
rmp -q 软件包:查询指定包是否已
- DOMContentLoaded VS onload VS onreadystatechange
mutongwu
jqueryjs
1. DOMContentLoaded 在页面html、script、style加载完毕即可触发,无需等待所有资源(image/iframe)加载完毕。(IE9+)
2. onload是最早支持的事件,要求所有资源加载完毕触发。
3. onreadystatechange 开始在IE引入,后来其它浏览器也有一定的实现。涉及以下 document , applet, embed, fra
- sql批量插入数据
qifeifei
批量插入
hi,
自己在做工程的时候,遇到批量插入数据的数据修复场景。我的思路是在插入前准备一个临时表,临时表的整理就看当时的选择条件了,临时表就是要插入的数据集,最后再批量插入到数据库中。
WITH tempT AS (
SELECT
item_id AS combo_id,
item_id,
now() AS create_date
FROM
a
- log4j打印日志文件 如何实现相对路径到 项目工程下
thinkfreer
Weblog4j应用服务器日志
最近为了实现统计一个网站的访问量,记录用户的登录信息,以方便站长实时了解自己网站的访问情况,选择了Apache 的log4j,但是在选择相对路径那块 卡主了,X度了好多方法(其实大多都是一样的内用,还一个字都不差的),都没有能解决问题,无奈搞了2天终于解决了,与大家分享一下
需求:
用户登录该网站时,把用户的登录名,ip,时间。统计到一个txt文档里,以方便其他系统调用此txt。项目名
- linux下mysql-5.6.23.tar.gz安装与配置
笑我痴狂
mysqllinuxunix
1.卸载系统默认的mysql
[root@localhost ~]# rpm -qa | grep mysql
mysql-libs-5.1.66-2.el6_3.x86_64
mysql-devel-5.1.66-2.el6_3.x86_64
mysql-5.1.66-2.el6_3.x86_64
[root@localhost ~]# rpm -e mysql-libs-5.1