从零开始Bootstrap3
从开发人员的角色编写 bootstrap3 的基础教程,初学者可以按此教程一步一步操作一遍,就可以掌握bootstrap3的基础用法。
目录
一、框架搭建:
1.1 引入文件
使用Bootstrap前需要先引入对应的CSS文件和JS文件
<!-- 新 Bootstrap 核心 CSS 文件 -->
<link rel="stylesheet" href="http://cdn.bootcss.com/bootstrap/3.3.4/css/bootstrap.min.css">
<!-- jQuery文件。务必在bootstrap.min.js 之前引入 -->
<script src="http://cdn.bootcss.com/jquery/1.11.2/jquery.min.js"></script>
<!-- 最新的 Bootstrap 核心 JavaScript 文件 -->
<script src="http://cdn.bootcss.com/bootstrap/3.3.4/js/bootstrap.min.js"></script>
1.2 布局容器
Bootstrap 需要为页面内容和栅格系统包裹一个 .container 容器。提供了两个作此用处的类(.container 和 .container-fluid)。注意,由于 padding等属性的原因,这两种 容器类不能互相嵌套。
.container 类用于固定宽度并支持响应式布局的容器。
<div class="container">
...
</div>
.container-fluid 类用于 100% 宽度,占据全部视口(viewport)的容器。
<div class="container-fluid">
...
</div>
1.3 栅格系统
1.3.1 栅格系统介绍
Bootstrap 提供了一套响应式、移动设备优先的流式栅格系统,随着屏幕或视口(viewport)尺寸的增加,系统会自动分为最多12列。栅格系统中的列是通过指定1到12的值来表示其跨越的范围。例如,三个等宽的列可以使用三个 .col-xs-4 来创建。
1.3.2 col类的区别
下表展示了.col-xs、.col-sm、.col-md、.col-lg区别
1.3.3 代码示例
示例1:
<div class="row">
<div class="col-md-8">.col-md-8</div>
<div class="col-md-4">.col-md-4</div>
</div>
代码实现效果如下图(把一行2比1分隔出来):
示例2:
<div class="row">
<div class="col-xs-6 col-md-4">.col-xs-6 .col-md-4</div>
<div class="col-xs-6 col-md-4">.col-xs-6 .col-md-4</div>
<div class="col-xs-6 col-md-4">.col-xs-6 .col-md-4</div>
</div>
代码实现效果如下图(代码实现了宽度>=992px的时候三等分一行,宽度<992px时候二等分一行【说明:bootstrap多余的列将另起一行排列】):
1.4 关于颜色
Bootstrap内置了多种颜色类:
.success ![]() .warning
.warning ![]() .danger
.danger ![]() .info
.info ![]()
2.1 文本操作
2.1.1 标题操作
HTML 中的所有标题标签,<h1> 到 <h6> 均可使用。在标题内还可以包含 <small> 标签或赋予 .small 类的元素,可以用来标记副标题。
代码示例:
<h1>h1. Bootstrap heading <small>Secondary text</small></h1>
<h2>h2. Bootstrap heading <small>Secondary text</small></h2>
<h3>h3. Bootstrap heading <small>Secondary text</small></h3>
代码实现效果如下图:
2.1.2 段落突出显示
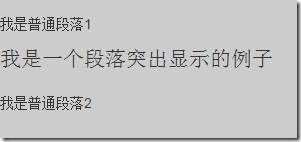
通过添加 .lead 类可以让段落突出显示。
代码示例:
<p class="lead">
...
</p>
实现效果:
2.1.3 删除文本(给文本加删除线)
对于被删除的文本使用<del>标签,对于没用的文本使用<s>标签。(实现的效果都是添加删除线)
代码示例:
<del>
This line of text is meant to be treated as deleted text.
</del>
实现效果:
2.1.4 插入文本(给文本加下划线)
额外插入的文本使用<ins>标签,为文本添加下划线,使用<u>标签。(实现的效果都是添加下划线)
代码示例:
<ins>
This line of text is meant to be treated as an addition to the document.
</ins>
实现效果:
2.1.5 文本的对齐
通过文本对齐类,可以简单方便的将文字重新对齐。
代码示例:
<p class="text-left">Left aligned text.</p>
<p class="text-center">Center aligned text.</p>
<p class="text-right">Right aligned text.</p>
<p class="text-justify">Justified text.</p>
<p class="text-nowrap">No wrap text.</p>
实现效果:
2.1.6 改变文本的大小写
通过这几个类可以改变文本的大小写。
代码示例:
<p class="text-lowercase">Lowercased text.</p>
<p class="text-uppercase">Uppercased text.</p>
<p class="text-capitalize">Capitalized text.</p>
实现效果:
2.1.7 缩略语
当鼠标悬停在缩写和缩写词上时就会显示完整内容,Bootstrap 实现了对 HTML 的<abbr>元素的增强样式。缩略语元素带有title属性,外观表现为带有较浅的虚线框,鼠标移至上面时会变成带有“问号”的指针。如想看完整的内容可把鼠标悬停在缩略语上(对使用辅助技术的用户也可见), 但需要包含 title 属性。
代码示例:
<abbr title="attribute">attr</abbr>
实现效果:
2.2 表格操作
2.2.1 表格的样式
为任意<table>标签添加.table类可以为其赋予基本的样式
代码示例:
<table class="table">
...
</table>
实现效果:
Bootstrap还提供了多种表格样式,以下列举几个常用的类:
.table-striped条纹状表格
.table-bordered 带边框表格
.table-hover 鼠标悬停响应效果表格
2.2.2 响应式表格
将任何.table元素包裹在.table-responsive元素内,即可创建响应式表格,其会在小屏幕设备上(小于768px)水平滚动。当屏幕大于 768px 宽度时,水平滚动条消失。
代码示例:
<div class="table-responsive">
<table class="table">
...
</table>
</div>
实现效果:
2.3 按钮
2.3.1 普通按钮
为 <a>、<button> 或 <input> 元素添加按钮类(button class)即可使用 Bootstrap 提供的样式。
代码示例:
<a class="btn btn-default" href="#" role="button">Link</a>
<button class="btn btn-default" type="submit">Button</button>
<input class="btn btn-default" type="button" value="Input">
<input class="btn btn-default" type="submit" value="Submit">
实现效果:
2.3.2 给按钮着色
使用Bootstrap内置的颜色类给按钮添加颜色,以下列举两种颜色。
代码示例:
<button type="button" class="btn btn-primary">(首选项)Primary</button>
<button type="button" class="btn btn-success">(成功)Success</button>
实现效果:
三、常用组件:
3.1 字体图标
BootStrap提供了250多个字体图标,以下列举几个:
示例代码:
<span class="glyphicon glyphicon-search" aria-hidden="true"></span>
实现效果:
3.2 下拉菜单
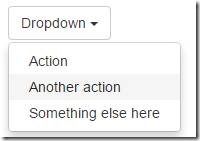
将下拉菜单触发器和下拉菜单都包裹在 .dropdown 里,就能实现下拉菜单效果
示例代码:
<div class="dropdown">
<button class="btn btn-default dropdown-toggle" type="button" id="dropdownMenu1" data-toggle="dropdown" aria-expanded="false">
Dropdown <span class="caret"></span>
</button>
<ul class="dropdown-menu" role="menu" aria-labelledby="dropdownMenu1">
<li role="presentation"><a role="menuitem" tabindex="-1" href="#">Action</a></li>
<li role="presentation"><a role="menuitem" tabindex="-1" href="#">Another action</a></li>
<li role="presentation"><a role="menuitem" tabindex="-1" href="#">Something else here</a></li>
</ul>
</div>
实现效果:
3.3 按钮组
通过按钮组容器把一组按钮放在同一行里。
代码示例:
<div class="btn-group" role="group" aria-label="...">
<button type="button" class="btn btn-default">Left</button>
<button type="button" class="btn btn-default">Middle</button>
<button type="button" class="btn btn-default">Right</button>
</div>
实现效果:
3.4 标签页
使用Bootstrap的标签页样式。注意 .nav-tabs 类依赖 .nav 基类。
代码示例:
<ul class="nav nav-tabs">
<li role="presentation" class="active"><a href="#">Home</a></li>
<li role="presentation"><a href="#">Profile</a></li>
<li role="presentation"><a href="#">Messages</a></li>
</ul>
实现效果:
3.5 警告框
警告框组件通过提供一些灵活的预定义消息,为常见的用户动作提供反馈消息。
代码示例:
<div class="alert alert-success" role="alert">
...
</div>
实现效果:
3.6 模态窗口
模态框包含了模态框的头、体和一组放置于底部的按钮。
代码示例:
<div class="modal fade">
<div class="modal-dialog">
<div class="modal-content">
<div class="modal-header">
<button type="button" class="close" data-dismiss="modal" aria-label="Close"><span aria-hidden="true">×</span></button>
<h4 class="modal-title">Modal title</h4>
</div>
<div class="modal-body">
<p>One fine body…</p>
</div>
<div class="modal-footer">
<button type="button" class="btn btn-default" data-dismiss="modal">Close</button>
<button type="button" class="btn btn-primary">Save changes</button>
</div>
</div><!-- /.modal-content -->
</div><!-- /.modal-dialog -->
</div><!-- /.modal -->
实现效果:
3.7 工具提示条
注释等详细信息显示时可考虑使用
代码示例:
<button type="button" class="btn btn-default" data-toggle="tooltip" data-placement="top" title="Tooltip on top">
Tooltip on top
</button>
实现效果:
4.1 引用BootStrap基础文件
<!DOCTYPE html>
<html lang="en">
<head>
<meta charset="utf-8">
<meta name="viewport" content="width=device-width, initial-scale=1">
<title>Hello Bootstrap</title>
<link rel="stylesheet" href="http://cdn.bootcss.com/bootstrap/3.3.4/css/bootstrap.min.css">
</head>
<body>
<h1>hello Bootstrap<h1>
</body>
<script src="http://cdn.bootcss.com/jquery/1.11.2/jquery.min.js"></script>
<script src="http://cdn.bootcss.com/bootstrap/3.3.4/js/bootstrap.min.js"></script>
</html>
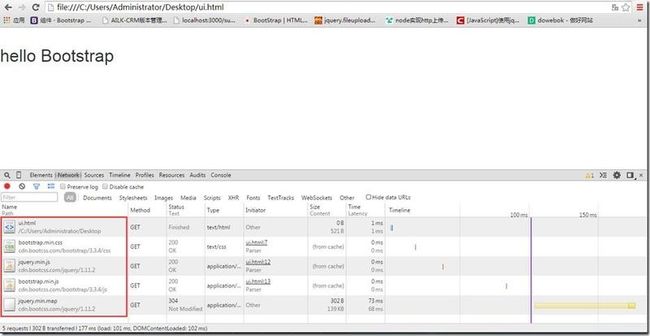
实现效果(成功引用了BootStrap的基础文件):
4.2 填充我的Hello World
<!DOCTYPE html>
<html lang="en">
<head>
<meta charset="utf-8">
<title>Hello Bootstrap</title>
<!-- Bootstrap core CSS -->
<link rel="stylesheet" href="http://cdn.bootcss.com/bootstrap/3.2.0/css/bootstrap.min.css">
<style type='text/css'>
body {
background-color: #CCC;
}
.titleWord{
color: white;
}
</style>
</head>
<body>
<!-- 导航栏 -->
<nav class="navbar navbar-inverse navbar-fixed-top" role="navigation">
<div class="container">
<div class="navbar-header">
<button type="button" class="navbar-toggle collapsed" data-toggle="collapse" data-target="#navbar" aria-expanded="false" aria-controls="navbar">
<span class="sr-only">Toggle navigation</span>
<span class="icon-bar"></span>
<span class="icon-bar"></span>
<span class="icon-bar"></span>
</button>
<a class="navbar-brand" href="#"><span class="titleWord">首页</span></a>
<a class="navbar-brand" href="#"><span class="titleWord">讨论区</span></a>
<a class="navbar-brand" href="#"><span class="titleWord">关于我们</span></a>
</div>
<div id="navbar" class="navbar-collapse collapse">
<form class="navbar-form navbar-right" role="form">
<div class="form-group">
<input type="text" placeholder="刷脸进系统或报上名来" class="form-control">
</div>
<div class="form-group">
<input type="password" placeholder="颜值不够,老实输密码吧" class="form-control">
</div>
<button type="submit" class="btn btn-success">开门的都是好芝麻</button>
</form>
</div><!--/.navbar-collapse -->
</div>
</nav>
<!-- 内容 -->
<div class="jumbotron">
<div id='content' class='row-fluid'>
<h2>初识 BootStrap!</h2>
<p class="blog-post-meta">2015-04-02 by <a href="#">WangFeng</a></p>
<p>Bootstrap,来自 Twitter,基于 HTML、CSS、JAVASCRIPT,简洁灵活,使得 Web 开发更加快捷。</p>
<p><a class="btn btn-primary btn-lg" role="button" id="readMore" data-toggle="modal" data-target=".bs-example-modal-sm">阅读全文 »</a></p>
</div>
</div>
<!-- 模态窗口 -->
<div class="modal fade bs-example-modal-sm" tabindex="-1" role="dialog" aria-labelledby="mySmallModalLabel" aria-hidden="true">
<div class="modal-dialog modal-sm">
<div class="modal-content">
<!-- 模态窗口内容 -->
<div class="modal-body" id="modelContent"></div>
<!-- 模态窗口页脚 -->
<div class="modal-footer">
<button type="button" class="btn btn-default" id="unAgree">不同意</button>
<button type="button" class="btn btn-primary" data-dismiss="modal">我同意</button>
</div>
</div>
</div>
</div>
</body>
<script src="http://cdn.bootcss.com/jquery/1.11.2/jquery.min.js"></script>
<script src="http://cdn.bootcss.com/bootstrap/3.3.4/js/bootstrap.min.js"></script>
<script type="text/javascript">
$('#unAgree').click(function(event) {
$('#modelContent').html('不得不同意');
});
$('#readMore').click(function(event) {
$('#modelContent').html('一目千行,全文已在你心中!');
});
</script>
</html>
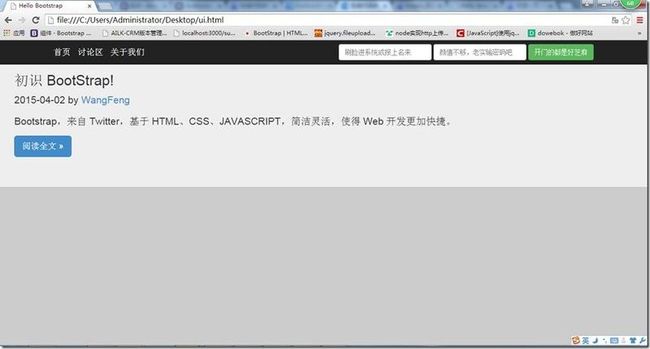
实现效果:


