Android自己定义组件系列【2】——Scroller类
在上一篇中介绍了View类的scrollTo和scrollBy两个方法,对这两个方法不太了解的朋友能够先看《自己定义View及ViewGroup》
scrollTo和scrollBy尽管实现了视图的偏移,可是却没有更好的控制移动过程,移动是瞬间进行的。Scroller类就是为解决问题而设计的。
打开Scroller的源码,能够看到startScroll方法:
    /**
     * Start scrolling by providing a starting point and the distance to travel.
     *
     * @param startX Starting horizontal scroll offset in pixels. Positive
     *        numbers will scroll the content to the left.
     * @param startY Starting vertical scroll offset in pixels. Positive numbers
     *        will scroll the content up.
     * @param dx Horizontal distance to travel. Positive numbers will scroll the
     *        content to the left.
     * @param dy Vertical distance to travel. Positive numbers will scroll the
     *        content up.
     * @param duration Duration of the scroll in milliseconds.
     */
    public void startScroll(int startX, int startY, int dx, int dy, int duration) {
        mMode = SCROLL_MODE;
        mFinished = false;
        mDuration = duration;
        mStartTime = AnimationUtils.currentAnimationTimeMillis();
        mStartX = startX;
        mStartY = startY;
        mFinalX = startX + dx;
        mFinalY = startY + dy;
        mDeltaX = dx;
        mDeltaY = dy;
        mDurationReciprocal = 1.0f / (float) mDuration;
    }
能够看到,这种方法的作用是将View从一个起始位置通过给定移动偏移量和时间运行一段动画移动到目标位置。以下再来看一下View类提供的computeScroll方法
   /**
     * Called by a parent to request that a child update its values for mScrollX
     * and mScrollY if necessary. This will typically be done if the child is
     * animating a scroll using a {@link android.widget.Scroller Scroller}
     * object.
     */
    public void computeScroll() {
    }
为了易于控制滑屏控制,Android框架提供了 computeScroll()方法去控制这个流程。在绘制View时,会在draw()过程调用该方法。为了实现偏移控制,一般自己定义View/ViewGroup都须要重载该方法 。
@Override
protected void dispatchDraw(Canvas canvas){
    ...

    for (int i = 0; i < count; i++) {
        final View child = children[getChildDrawingOrder(count, i)];
        if ((child.mViewFlags & VISIBILITY_MASK) == VISIBLE || child.getAnimation() != null) {
            more |= drawChild(canvas, child, drawingTime);
        }
    }
}
protected boolean drawChild(Canvas canvas, View child, long drawingTime) {
    ...
    child.computeScroll();
    ...
}
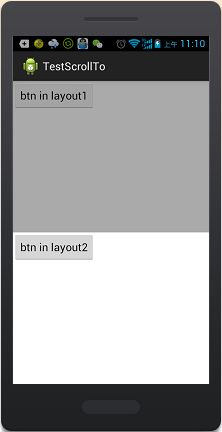
以下我们来用《
Android Scroller类的具体分析》给我们提供的代码分析一下
package com.example.testscrollto;

import android.app.Activity;
import android.content.Context;
import android.graphics.Canvas;
import android.os.Bundle;
import android.util.Log;
import android.view.View;
import android.view.View.OnClickListener;
import android.widget.Button;
import android.widget.LinearLayout;
import android.widget.Scroller;

public class MainActivity extends Activity {
	private static final String TAG = "TestScrollerActivity";
	LinearLayout lay1, lay2, lay0;
	private Scroller mScroller;

	@Override
	public void onCreate(Bundle savedInstanceState) {
		super.onCreate(savedInstanceState);

		mScroller = new Scroller(this);
		lay1 = new MyLinearLayout(this);
		lay2 = new MyLinearLayout(this);

		lay1.setBackgroundColor(this.getResources().getColor(
				android.R.color.darker_gray));
		lay2.setBackgroundColor(this.getResources().getColor(
				android.R.color.white));
		lay0 = new ContentLinearLayout(this);
		lay0.setOrientation(LinearLayout.VERTICAL);
		LinearLayout.LayoutParams p0 = new LinearLayout.LayoutParams(
				LinearLayout.LayoutParams.FILL_PARENT,
				LinearLayout.LayoutParams.FILL_PARENT);
		this.setContentView(lay0, p0);

		LinearLayout.LayoutParams p1 = new LinearLayout.LayoutParams(
				LinearLayout.LayoutParams.FILL_PARENT,
				LinearLayout.LayoutParams.FILL_PARENT);
		p1.weight = 1;
		lay0.addView(lay1, p1);

		LinearLayout.LayoutParams p2 = new LinearLayout.LayoutParams(
				LinearLayout.LayoutParams.FILL_PARENT,
				LinearLayout.LayoutParams.FILL_PARENT);
		p2.weight = 1;

		lay0.addView(lay2, p2);
		MyButton btn1 = new MyButton(this);
		MyButton btn2 = new MyButton(this);
		btn1.setText("btn in layout1");
		btn2.setText("btn in layout2");
		btn1.setOnClickListener(new OnClickListener() {
			@Override
			public void onClick(View v) {
				mScroller.startScroll(0, 0, -30, -30, 50);
			}
		});
		btn2.setOnClickListener(new OnClickListener() {
			@Override
			public void onClick(View v) {
				mScroller.startScroll(20, 20, -50, -50, 50);
			}
		});
		lay1.addView(btn1);
		lay2.addView(btn2);
	}

	class MyButton extends Button {
		public MyButton(Context ctx) {
			super(ctx);
		}

		@Override
		protected void onDraw(Canvas canvas) {
			super.onDraw(canvas);
			Log.d(TAG, this.toString() + " onDraw------");
		}
	}

	class MyLinearLayout extends LinearLayout {
		public MyLinearLayout(Context ctx) {
			super(ctx);
		}

		@Override
		/**
		 * Called by a parent to request that a child update its values for mScrollX
		 * and mScrollY if necessary. This will typically be done if the child is
		 * animating a scroll using a {@link android.widget.Scroller Scroller}
		 * object.
		 */
		public void computeScroll() {
			Log.d(TAG, this.toString() + " computeScroll-----------");
			if (mScroller.computeScrollOffset())// 假设mScroller没有调用startScroll,这里将会返回false。
			{
				// 由于调用computeScroll函数的是MyLinearLayout实例,
				// 所以调用scrollTo移动的将是该实例的孩子,也就是MyButton实例
				scrollTo(mScroller.getCurrX(), 0);
				Log.d(TAG, "getCurrX = " + mScroller.getCurrX());

				// 继续让系统重绘
				getChildAt(0).invalidate();
			}
		}
	}

	class ContentLinearLayout extends LinearLayout {
		public ContentLinearLayout(Context ctx) {
			super(ctx);
		}

		@Override
		protected void dispatchDraw(Canvas canvas) {
			Log.d(TAG, "contentview dispatchDraw");
			super.dispatchDraw(canvas);
		}
	}
}
点击上面按钮,log输出例如以下:

当点击Button的时候背景发生了变化,就须要重绘,这时button调用invalidate方法请求重绘,这就是scroll动态效果的触发源,Scroller对象的实例是一个封装位置和速度的变量,startScroll()方法是对一些成员变量进行设置,设置的唯一效果是导致mScroller.computeScrollOffset()方法返回true.在button重绘的同一时候mScroller.startScroll()方法被调用,此时mScroller变量设置了有效的值。接下来的过程就是View自上而下的绘制了。在绘制lay1的时候就会调用drawChild方法,这时候就会运行computeScrll()方法:
		public void computeScroll() {
			Log.d(TAG, this.toString() + " computeScroll-----------");
			if (mScroller.computeScrollOffset())// 假设mScroller没有调用startScroll,这里将会返回false。
			{
				// 由于调用computeScroll函数的是MyLinearLayout实例,
				// 所以调用scrollTo移动的将是该实例的孩子,也就是MyButton实例
				scrollTo(mScroller.getCurrX(), 0);
				Log.d(TAG, "getCurrX = " + mScroller.getCurrX());

				// 继续让系统重绘
				getChildAt(0).invalidate();
			}
		}
直到startScroll中设置的时间到了,mScroller.computeScrollOffset()才返回false.
