heroku全体验
环境之建立git库
Win7, heroku客户端
之所以安装heroku客户端, 是为了更好地使用heroku功能.
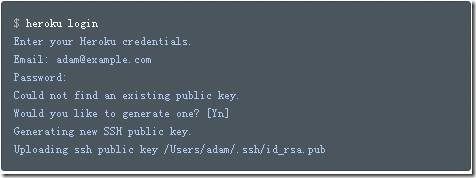
首先,你使用heroku login,然后输入用户名,密码。如果登录成功,heroku客户端会上传你的公钥。如果不存在公钥,他会帮你创建一对密钥,然后上传你的公钥,保留你的密钥。
看heroku文档上面的截图:
之后整个电脑就可以无限制使用你这个已经登陆的账户了。
但更重要的, 你需要通过heroku客户端建立一个app,使用heroku create +app名字.
可以看到heroku已经建立起一个noprofile的名字的git库了。
我们用git clone拷贝这个库。
部署web服务
在heroku上部署web服务有三种,一种是jetty,一种是jetty runner,第三种是tomcat
Jetty跟jetty runner有什么区别呢?
Heroku上有说明:
“Jetty is a lightweight Java application server that offers a flexible array of options for how it can be launched. One popular option is using embedded Jetty the way that the java quickstart does. Another good option is the Jetty Runner jar file. Each version of Jetty that is released includes a Jetty Runner jar. This jar can be run directly from the java command and can be passed a war file to load right on the command line.”
① 使用jetty,在heroku新手速成指南中有提到,见https://devcenter.heroku.com/articles/java
源码见github:https://github.com/heroku/devcenter-java
(同见F:\yun\heroku\文档docs\herokuSampleOnGithub\devcenter-java)
② 使用jetty runner, 见heroku文档:
https://devcenter.heroku.com/articles/deploy-a-java-web-application-that-launches-with-jetty-runner
这种方法, heroku没有提供源码。
上述两种方法都不是我的菜,所以我也不多看了。
主要介绍下面的tomcat
③ tomcat 。。 文档见:
https://devcenter.heroku.com/articles/create-a-java-web-application-using-embedded-tomcat
源码有:https://github.com/heroku/devcenter-embedded-tomcat
接下来的任务是解读源码:
先将源码“除了.git文件”放在刚才建立起来的noprofile库下。
首先是在包launch下里面有一个Main类,(这个类很重要,是用来启动tomcat的)
然后就
git add- - -commit- - -push ..
这时候heroku 服务器就帮你重启tomcat,然后我们打开网址:
可以看到他访问到了index.jsp文件了。
我们发现在servlet包下面有一个web service类。我们也可以访问他。
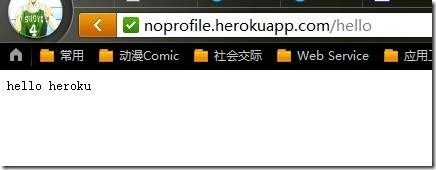
成功部署在tomcat上了。。
那么我们在本地访问noprofile呢。。 很简单。
使用mvn package命令打包整个noprofile项目。
然后我们发现在noprofile下多了一个target文件夹,记得不要上传到git上面去。
然后双击 /target/bin/webapp.bat 文件就能运行tomcat。但是这样会出bug。
是因为Main.class文件中,对应的
String webappDirLocation = "src/main/webapp/";
这样他就会去找bin下面的 src/main/wbapp目录,但是找不到,解决方法就是将src/main/webapp 目录拷贝到 /target/bin下面..
关于嵌入式tomcat中.没有web.xml 文件。
我们在上文中已经看到tomcat能跑webapp下的jsp文件了,也能操作servlet文件。。
但是web.xml 是没有的,也就是说,你无法操作web.xml 文件,这样就是无法使用jersey等框架了,因为jersey是在web.xml中写入一个servlet文件,然后再做相应的配置。
但如果你强行要这么干的话,只会报错。。
使用spring mvc
Heroku使用soring mvc框架,可以代替jersey等框架。Heroku的spring mvc框架中没有提到strust,但是我觉得应该能在pom中加入struts,然后修改web.xml。 具体未知,我觉得openshift就挺好的。比heroku好用,没那么多限制。
关于数据库
可以免费使用Postgres database 这项add-ons,测试版不需要信用卡, 见文档:
https://devcenter.heroku.com/articles/connecting-to-relational-databases-on-heroku-with-java#using-the-in-plain-jdbc
但是使用其他add-ons诸如mongodb, 就算他是免费的,也必须进行信用卡确认。
Ends
下文写于2013年0908。
因为cloudfoundryV1废弃的缘故,不得不再去重启heroku。突然发现heroku是支持web.xml,支持spring-jersey的。将该处代码供出:https://github.com/chinesejie/heroku-jersey-spring
此外,上文github代码是基于heroku的嵌入式tomcat运行。要特别强如果将jar包放在WEB-INF/lib目录下,嵌入式的tomcat是不会把该路径加入classpath的,这绝对是奇葩,因为无论是在eclipse中用tomcat运行maven的web项目还是在命令行下用jetty运行maven的web项目,默认WEB-INF/lib下的所有jar包都是classpath。 当然解决的方法是将 WEB-INF/lib路径写成file格式的仓库路径,然后通过依赖将jar包加入到maven pom文件中。


