菜鸟的Android之路-02《eclipse新建android project》
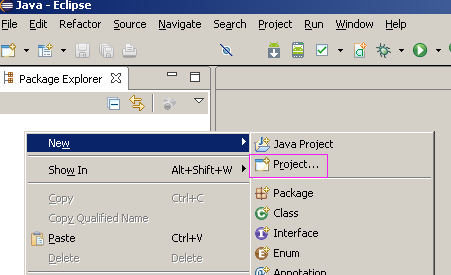
创建项目
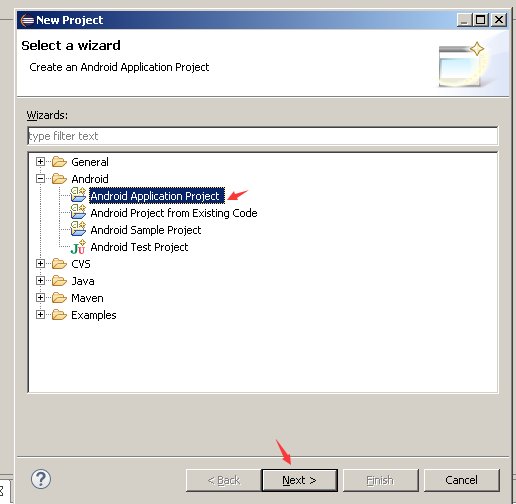
选择android项目
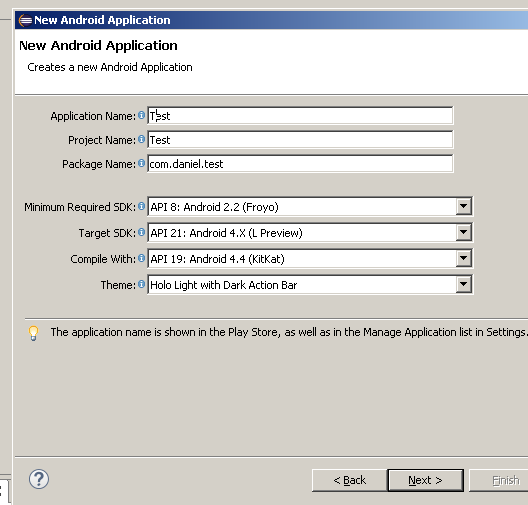
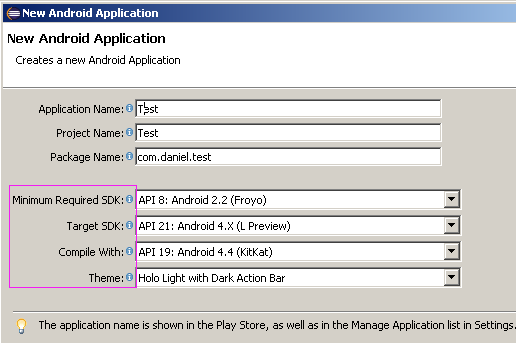
选择android应用的版本。warning自己看提示。
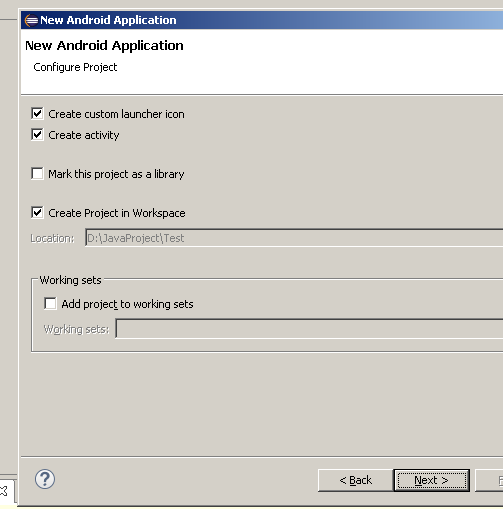
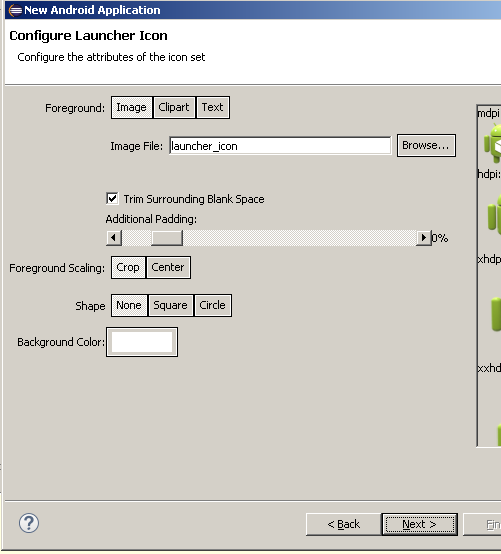
以下都是默认的,不要问我什么意思,我英语4级还没过。
还是默认
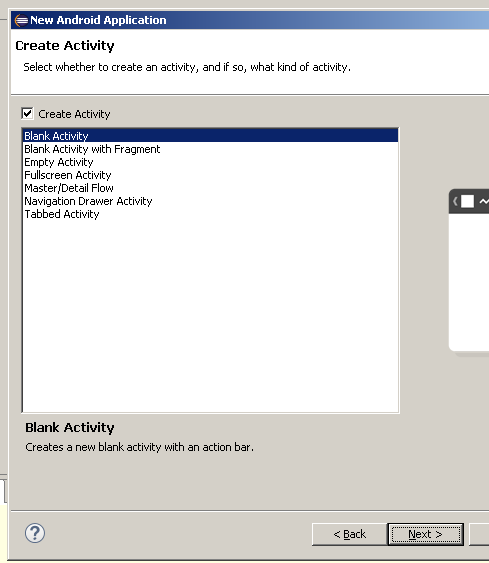
依然默认
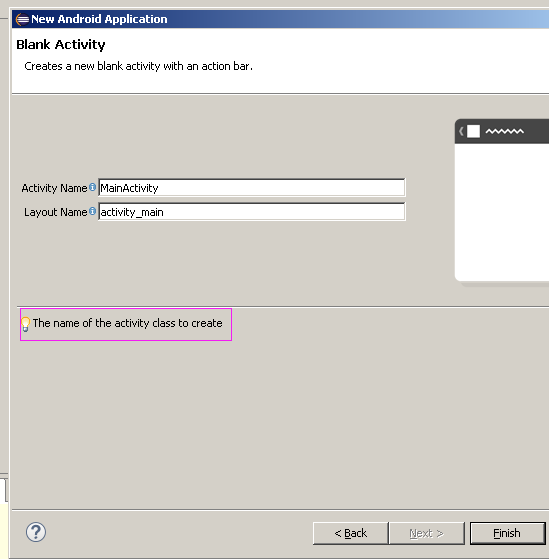
仍旧默认
果然悲剧还是发生了,报错了
[2015-01-11 12:09:46 - test] D:\JavaProject\test\res\values\styles.xml:7: error: Error retrieving parent for item: No resource found that matches the given name 'Theme.AppCompat.Light'.
[2015-01-11 12:09:46 - test]
[2015-01-11 12:09:46 - test] D:\JavaProject\test\res\values-v11\styles.xml:7: error: Error retrieving parent for item: No resource found that matches the given name 'Theme.AppCompat.Light'.
[2015-01-11 12:09:46 - test]
[2015-01-11 12:09:46 - test] D:\JavaProject\test\res\values-v14\styles.xml:8: error: Error retrieving parent for item: No resource found that matches the given name 'Theme.AppCompat.Light.DarkActionBar'.
[2015-01-11 12:09:46 - test]
[2015-01-11 12:09:49 - test] D:\JavaProject\test\res\values\styles.xml:7: error: Error retrieving parent for item: No resource found that matches the given name 'Theme.AppCompat.Light'.
[2015-01-11 12:09:49 - test]
[2015-01-11 12:09:49 - test] D:\JavaProject\test\res\values-v11\styles.xml:7: error: Error retrieving parent for item: No resource found that matches the given name 'Theme.AppCompat.Light'.
[2015-01-11 12:09:49 - test]
[2015-01-11 12:09:49 - test] D:\JavaProject\test\res\values-v14\styles.xml:8: error: Error retrieving parent for item: No resource found that matches the given name 'Theme.AppCompat.Light.DarkActionBar'.
[2015-01-11 12:09:49 - test]
百度红色字体后,参考贴:http://www.apkbus.com/android-182059-1-1.html
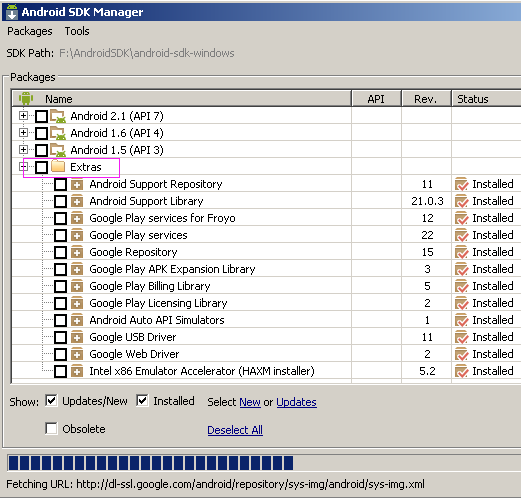
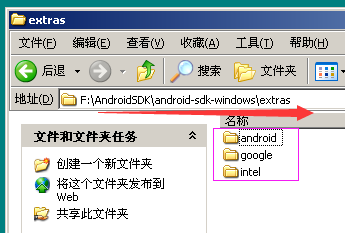
当我看到extras时,好像似曾相识,于是果断打开SDK Manager.exe
果断把extras下载了,再去看对应的文件夹发现东西变多了,原来是空的。
后来实践发现”其实下载android开头的两个和GOOGLE USB Driver“即可
没有按照参考贴的做法,想想东西已经有了,再新建一次就行了,于是又喜闻乐见地悲剧了,错误更多了。形式和上图差不多,也是这个没有那个没有。但是之前提示的'Theme.AppCompat.Light'没有再提示了。这就说明了,这个处理方法是对的。然后再仔细看了参考贴,明白了这些提示都是SDK下载不全的问题:(请看后文这是不对的!)
minimum required SDK: miniSdk, 是你程序最低支持的SDK版本,度娘知道说一般miniSDK设定一般为8或者10
target SDK:Project的目标SDK版本
Complie with:当前SDK的版本
Theme:主题。应该是一些外观问题。
参考贴:http://stackoverflow.com/questions/26431676/appcompat-v721-0-0-no-resource-found-that-matches-the-given-name-attr-andro 全英文的,看不懂的,去厕所自己哭吧。很激动,第一个project就要好了!
英文不好的结果就是依然悲剧。还是报错,但是报错信息变化了,大部分报错是“appcompat_v7\res\values-v21\styles_base.xml”。查询后发现很多人在更新了ADT和SDK后(15年最新版本)都有这个问题。结论是minimum required SDK选的版本太低了。为了向下兼容多出了一个appcompat_v7项目。appcompat_v7项目的报错并不影响编码。
表达不清,参考贴:http://jingyan.baidu.com/article/3ea51489e04eb852e61bbaa4.html
把最低版本的SDK提高,就解决了这个“appcompat_v7”多余项目的问题,个人感觉在后期程序实际运行的时候还是会出现问题的,毕竟有这个“appcompat_v7”project的出现。但是现在先不管,让它去屎!
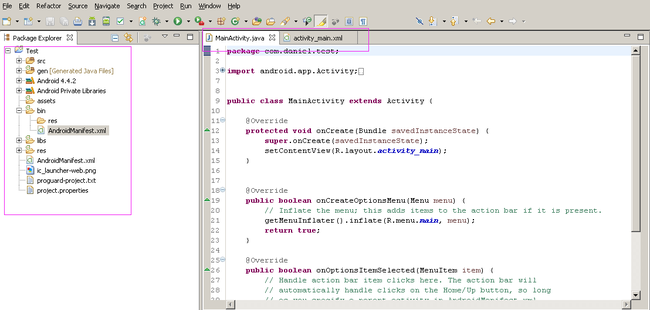
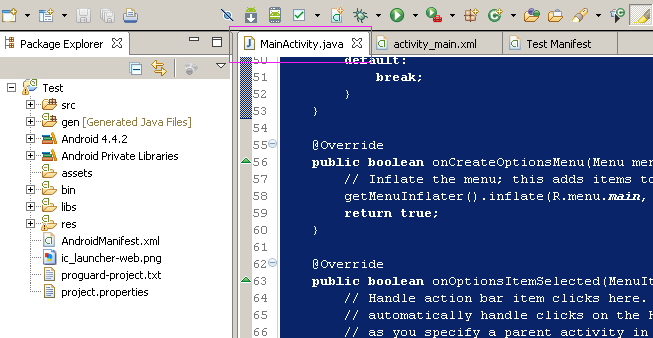
项目创建完毕的界面好激动!
还是网上找的简单程序实例,尼玛还是有错的,原帖我就不发了。
package com.daniel.test;
import android.app.Activity;
import android.os.Bundle;
import android.view.Menu;
import android.view.MenuItem;
import android.view.View;
import android.view.View.OnClickListener;
import android.widget.Button;
import android.widget.TextView;
import android.graphics.Color;
public class MainActivity extends Activity implements OnClickListener {

 TextView tv_show=null;
    Button greenBtn=null;
    Button blueBtn=null;
    Button yellowBtn=null;

    @Override
    protected void onCreate(Bundle savedInstanceState) {
        super.onCreate(savedInstanceState);
        setContentView(R.layout.activity_main);

        tv_show=(TextView)findViewById(R.id.showWord);
        greenBtn=(Button)findViewById(R.id.GreenBtn);
        blueBtn=(Button)findViewById(R.id.BlueBtn);
        yellowBtn=(Button)findViewById(R.id.YellowBtn);

        greenBtn.setOnClickListener(this);
        blueBtn.setOnClickListener(this);
        yellowBtn.setOnClickListener(this);
    }

    @Override
    public void onClick(View v) {
     switch (v.getId()) {
     case R.id.GreenBtn:
         tv_show.setTextColor(Color.RED);
         tv_show.setText("Lucky!Good Man!");
         break;
     case R.id.BlueBtn:
         tv_show.setTextColor(Color.BLUE);
         tv_show.setText("Do you love Mary?");
         break;
     case R.id.YellowBtn:
         tv_show.setTextColor(Color.YELLOW);
         tv_show.setText("Be Careful!Poor Man!");
         break;
     default:
         break;
     }
    }

    @Override
    public boolean onCreateOptionsMenu(Menu menu) {
        // Inflate the menu; this adds items to the action bar if it is present.
        getMenuInflater().inflate(R.menu.main, menu);
        return true;
    }
    @Override
    public boolean onOptionsItemSelected(MenuItem item) {
        // Handle action bar item clicks here. The action bar will
        // automatically handle clicks on the Home/Up button, so long
        // as you specify a parent activity in AndroidManifest.xml.
        int id = item.getItemId();
        if (id == R.id.action_settings) {
            return true;
        }
        return super.onOptionsItemSelected(item);
    }
}
XML文件如下:
 <RelativeLayout xmlns:android="http://schemas.android.com/apk/res/android"
    xmlns:tools="http://schemas.android.com/tools"
    android:layout_width="match_parent"
    android:layout_height="match_parent"
    android:paddingBottom="@dimen/activity_vertical_margin"
    android:paddingLeft="@dimen/activity_horizontal_margin"
    android:paddingRight="@dimen/activity_horizontal_margin"
    android:paddingTop="@dimen/activity_vertical_margin"
    tools:context=".MainActivity" >
    <TextView
        android:id="@+id/showWord"
        android:layout_width="wrap_content"
        android:layout_height="wrap_content"
        android:layout_alignLeft="@+id/GreenBtn"
        android:layout_alignParentTop="true"
        android:layout_alignRight="@+id/BlueBtn"
        android:layout_marginTop="17dp"
        android:text="Do you love Mary?"
        android:textStyle="bold" />
    <Button
        android:id="@+id/GreenBtn"
        android:layout_width="wrap_content"
        android:layout_height="wrap_content"
        android:layout_alignParentLeft="true"
        android:layout_below="@+id/showWord"
        android:layout_marginLeft="22dp"
        android:layout_marginTop="28dp"
        android:gravity="left|center_vertical|center_horizontal"
        android:text="Yes!" />
    <Button
        android:id="@+id/BlueBtn"
        android:layout_width="wrap_content"
        android:layout_height="wrap_content"
        android:layout_alignBaseline="@+id/YellowBtn"
        android:layout_alignBottom="@+id/YellowBtn"
        android:layout_toRightOf="@+id/YellowBtn"
        android:gravity="left|center_vertical|center_horizontal"
        android:text="Again" />
    <Button
        android:id="@+id/YellowBtn"
        android:layout_width="wrap_content"
        android:layout_height="wrap_content"
        android:layout_alignBaseline="@+id/GreenBtn"
        android:layout_alignBottom="@+id/GreenBtn"
        android:layout_toRightOf="@+id/GreenBtn"
        android:gravity="left|center_vertical|center_horizontal"
        android:text="No~" />
</RelativeLayout>
直接保存。然后就可以运行了。
A、先说AVD虚拟机运行。
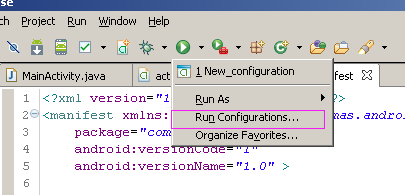
RUN边上的下三角,点击配置
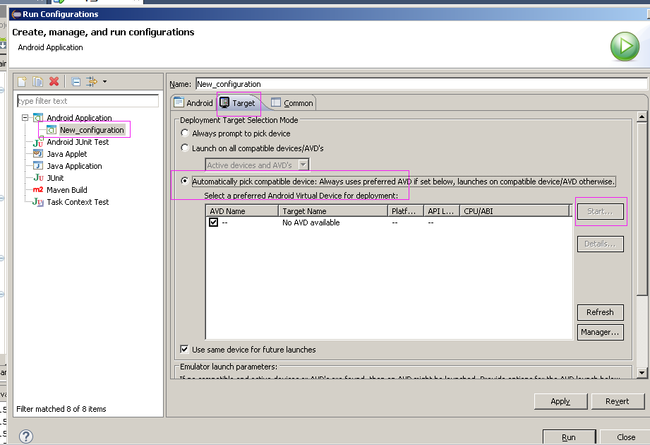
target前两个选项都是真机运行的。第三个是AVD虚拟机。如果没有虚拟机,就新建一个。具体方法看“菜鸟的Android之路-01”。如果你有真机,强烈建议用真机,因为AVD真的是“很慢”!!!
B、再说真机运行。
先上参考贴:http://www.cnblogs.com/lanxuezaipiao/archive/2013/03/11/2953564.html
提示,所有你能搜索到的帖子对于路径都高度统一,为“X:xxx\android-sdk-windows\tools”,但是我使用的SDK路径有点差别,为“X:xxx\android-sdk-windows\platform-tools“,该目录下有ADB.EXE。可能是版本问题,或者其他原因,不高兴去查。
简而言之:
1、先把真机连接到电脑上,把驱动装好,什么豌豆荚,91,360,各种助手随便HIGH.
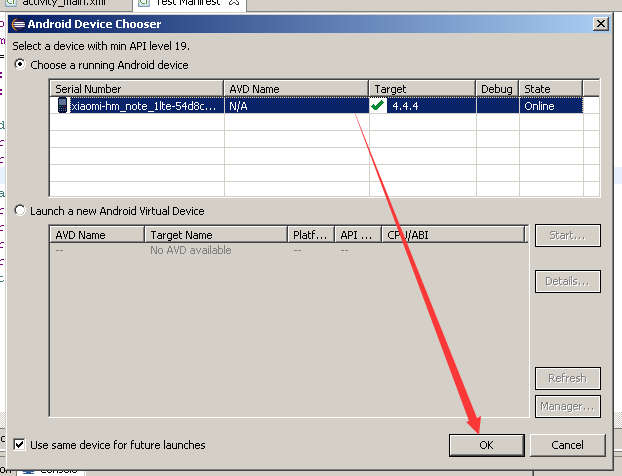
2、配置run configuration
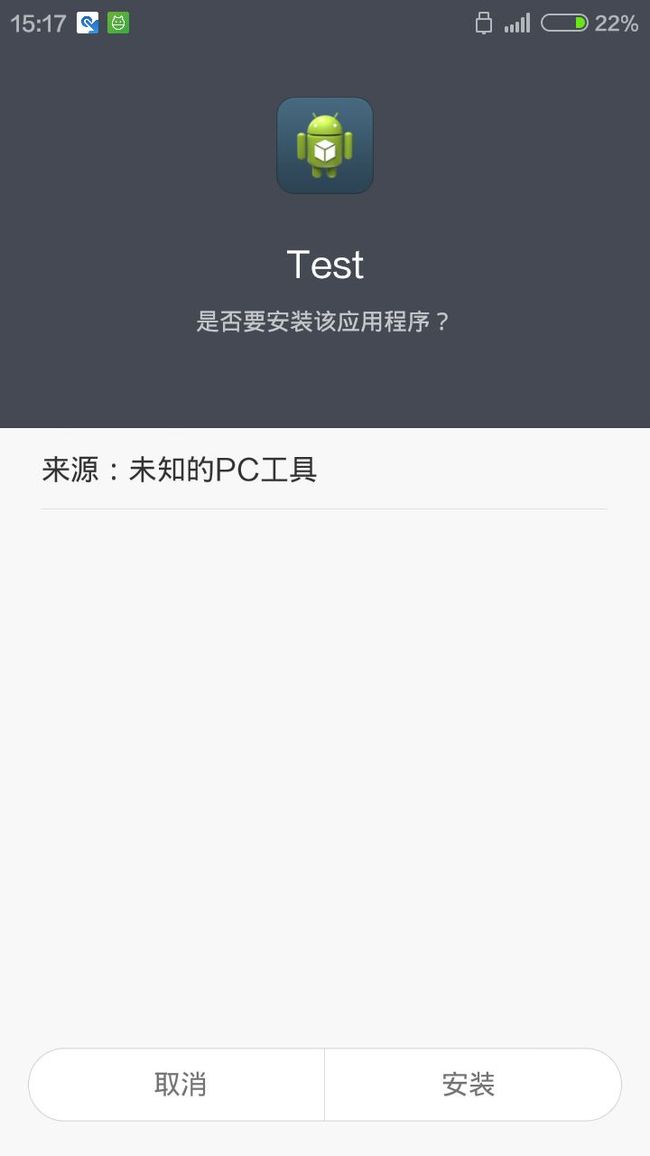
然后就是真机界面,如图,屌丝极品机,红米NOTE。
