AppleWatch开发入门七——watchOS中通知的应用
AppleWatch开发入门七——watchOS中通知的应用
一、引言
在iOS系统中,支持的通知有两种类型:本地通知和远程通知。本地通知多用于计时类通知,远程的又称推送,多用于一些提示动态的提示信息。这里有相关通知的一些知识总结:
本地推送:http://my.oschina.net/u/2340880/blog/405491。
远程推送:http://my.oschina.net/u/2340880/blog/413584。
在watch中,通知是和iphone同步的,在iphone上的App收到通知的同时,会默认也推送到watch上,基于watch的穿戴性,对用户来说,它上面的通知信息将比iphone更加及时。
二、WatchOS通知概览
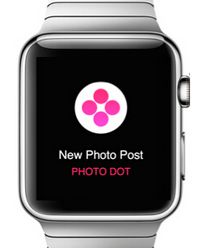
首先,watch上的通知分为两部分:short-look和long-lock。简而言之,short-look,可以理解为一个简单的通知预览,它会将通知发起的APP和主要标题等信息展示给你,让你一目了然,当用户抬起手腕,查看这个通知一定时间,这个短通知就会转换为long-look通知。short-look的通知界面我们不能够自定义,系统为我们设计好了模样,如下:
长通知的界面我们是可以进行一定程度上的自定义的,并且可以添加按钮等逻辑操作。
long-look也分为两种界面,静态界面和动态界面。这个也好理解,静态界面是我们在写程序时就定义好的界面,在通知发送到watch上时,界面会自动匹配通知内容进行显示。动态的界面则是当收到通知时,会先执行我们相应的配置代码,之后在进行通知界面的展示。一个long-look界面大致如下:
在long-lock中,界面定义为三个部分,头部标题栏,自定义视图栏和按钮交互区。头部的标题栏我们不能自定义,它是一个半透明的上面有App图标和名字的横栏。其下面是我们可以自定义的区域,我们可以在storyBoard中拉入文本和图片。最下面是一些交互按钮,其名称等配置信息在推送的文件中定义。
三、如何在模拟器上模拟远程推送
在watchOS模拟器上,Xcode为我们准备好了一种可以模拟测试推送的方式。如果我们创建项目时,选择了NotifacationScene,则Xcode会默认为我们创建一个apns文件:
这个文件就是模拟推送的相关配置文件,如果没有,我们也可以手动来创建:
文件中的内容格式如下:
{
    "aps": {
        "alert": {
            "body": "通知",
            "title": "通知来了"
        },
        "category": "myCategory"
    },

    "WatchKit Simulator Actions": [
        {
            "title": "First Button",
            "identifier": "firstButtonAction"

        }
    ],

    "customKey": "Use this file to define a testing payload for your notifications. The aps dictionary specifies the category, alert text and title. The WatchKit Simulator Actions array can provide info for one or more action buttons in addition to the standard Dismiss button. Any other top level keys are custom payload. If you have multiple such JSON files in your project, you'll be able to select them when choosing to debug the notification interface of your Watch App."
}
这是一些json格式的数据,其中alert是对推送内容的设置,body会显示在long-look的标题栏,title会显示在short-look的标题栏,Actions数组中是对按钮就行配置,每一个按钮可以设置一个标题和id,标题用于在推送界面显示,id用于处理点击按钮后触发的逻辑。
创建好这个,我们可以来试着测试一下推送的界面,选择推送工程,运行即可:
四、long-look的静态界面和动态界面
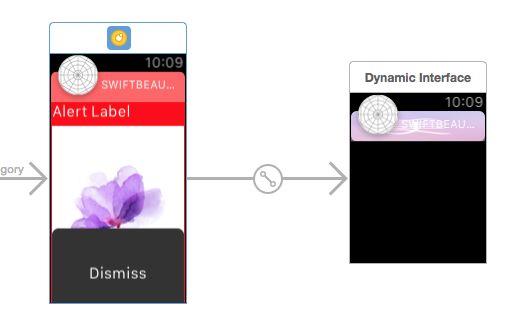
上面提到过,long-look分为静态界面和动态界面两种,当我们在storyBoard中拉入一个Notification Interface Controller的时候,可以选择同时创建动态界面,勾选 Has Dynamic Interface:
这时,在storyBoard中是如下模样:
我们在创建一个文件,继承于WKUserNotificationInterfaceController,并将storyBoard中动态的的推送controller的class设置为我们创建的类:
注意,这里设置的是动态的Interface,也就是上面右边的controller。之后运行,你会发现效果并没有什么改变,那是因为系统默认会从静态界面加载推送界面,我们需要在NotifacationController代码中做一些操作:
//在NotificationController中重写下面两个方法
//这个用于本地推送
override func didReceiveLocalNotification(localNotification: UILocalNotification, withCompletion completionHandler: ((WKUserNotificationInterfaceType) -> Void)) {
        //在这里做一些动态界面的加载操作,比如可以根据推送的数据 设置图片 文字等

        //下面这个方法决定是加载静态的界面还是动态的界面
        //Custom是加载动态界面
        //default是加载静态界面
        completionHandler(.Custom)
    }


//设个用于远程推送    和上面方法类似
override func didReceiveRemoteNotification(remoteNotification: [NSObject : AnyObject], withCompletion completionHandler: ((WKUserNotificationInterfaceType) -> Void)) {

        completionHandler(.Custom)
    }
五、触发推送点击事件
首先,我们多配置几个点击按钮,在apns文件中如下配置:
"WatchKit Simulator Actions": [
                                   {
                                   "title": "第一",
                                   "identifier": "one"

                                   },
                                   {
                                   "title": "第二",
                                   "identifier": "two"

                                   },
                                   {
                                   "title": "第三",
                                   "identifier": "three"

                                   }
                                   ],
在我们watch App的InterfaceController中实现如下的方法:
//重写下面两个方法来响应点击事件
//远程推送的方法
override func handleActionWithIdentifier(identifier: String?, forRemoteNotification remoteNotification: [NSObject : AnyObject]) {
        //通过我们配置的按钮id来区分点击的按钮 处理响应的逻辑
        print(identifier)
    }
//本地推送的方法
override func handleActionWithIdentifier(identifier: String?, forLocalNotification localNotification: UILocalNotification) {

    }


