GOOD centos + apache + mod_wsgi + python2.6 + django web环境搭建
centos + apache + mod_wsgi + python2.6 + django web环境搭建 - 望仔的日志 - 网易博客
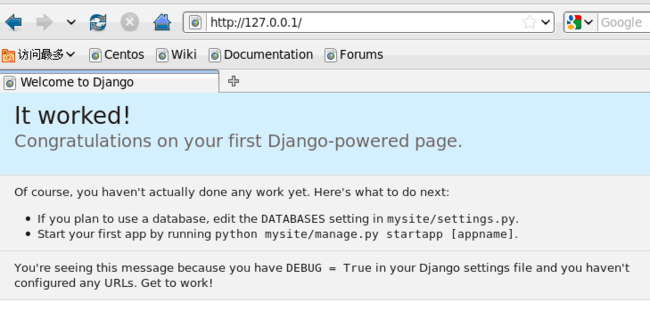
一、环境,python2.6.51、contos 5.52、apache2.2.63、Django-1.3.14、mod_wsgi-3.3二、安装djangopython setup.py install三、Apache2.2.6安装:./configure --prefix=/usr/local/apache2--enable-mods-shared=most--enable-rewrite--enable-forward--with-mpm=workermakemake install四、安装mod_wsgi:./configure --with-apxs=/usr/local/apache2/bin/apxs --with-python=/usr/bin/pythonmakemake install五、创建工程cd /usr/local/apache2/htdocsexport PATH=/usr/local/python/bin:$PATH/usr/bin/django-admin.py startproject mysite创建一个工程,会在htdocs下创建一个mysite目录cd mysitepython2.7 manage.py runserver 127.0.0.1:8000启动开发环境的web服务,可以在浏览器里访问此地址 http://127.0.0.1:8000注意的是python和django的命令尽量带上全路径,以防用成了系统自带的!!!!六、配置我的应用在/usr/local/apache2/htdocs下,名称叫mysite,在mysite中创建apache与media目录,然后在apache下创建两个文件apache_django_wsgi.conf 和 django.wsgi1、创建apache_django_wsgi.conf文件,内容如下:Alias /site_media/ /usr/local/apache2/htdocs/mysite/media/<Directory /usr/local/apache2/htdocs/mysite/media>Order allow,denyOptions IndexesAllow from allIndexOptions FancyIndexing</Directory>Alias /media/ /usr/lib/python2.6/site-packages/django/contrib/admin/media/<Directory /usr/lib/python2.6/site-packages/django/contrib/admin/media>Order allow,denyOptions IndexesAllow from allIndexOptions FancyIndexing</Directory>WSGIScriptAlias / /usr/local/apache2/htdocs/mysite/apache/django.wsgi<Directory /mnt/www/mysite>Order deny,allowAllow from all</Directory><Directory /mnt/www/mysite/apache>Allow from all</Directory>2、创建django.wsgi文件,内容如下:import os, sys#Calculate the path based on the location of the WSGI script.apache_configuration= os.path.dirname(__file__)project = os.path.dirname(apache_configuration)workspace = os.path.dirname(project)sys.path.append(workspace)os.environ['DJANGO_SETTINGS_MODULE'] = 'mysite.settings'os.environ['PYTHON_EGG_CACHE'] = '/tmp'import django.core.handlers.wsgiapplication = django.core.handlers.wsgi.WSGIHandler()print >> sys.stderr, sys.path3、设置apache的httpd.conf文件添加:LoadModule wsgi_module modules/mod_wsgi.soInclude /usr/local/apache2/htdocs/mysite/apache/apache_django_wsgi.conf七、效果:执行:/usr/local/apache2/bin/apachectl start访问http://127.0.0.1,显示如下:八、测试进入到mysite目录中,运行web测试服务器:
python manage.py runserver
提示在 http://127.0.0.1:8000/ 运行啦,可以访问一下看看。系统自动提示:It worked!
现在在mysite下创建一个文件,起名为:views.py,里面加入内容:
from django.http import HttpResponse
def hello(request):
return HttpResponse("Hello django!")更改urls.py的内容为:
from django.conf.urls.defaults import patterns, include, url
urlpatterns = patterns('',
('^hello/', 'mysite.views.hello')
)
http://127.0.0.1:8000/hello/
评论这张转发至微博
转发至微博
