使用Gitorious搭建私有代码仓库
简介
平时,我们会把开源的项目托管在Github上,但是在工作中,我们往往会需要一个私有的代码仓库。Bitbucket是一个不错的选择,这里我们将动手来搭建一个私有的代码仓仓库系统。 Gitorious 是一个基于 Git 版本控制系统的Web项目托管平台,使用 Ruby on Rails 开发。安装和配置起来相对繁琐,为了简化工作量,这里介绍一种比较简单的安装方法,即采用bitnami提供的stack包。
Gitorious安装和配置
首先,这里选择下载Linux平台的64位包,如需其他类型请访问http://bitnami.org/stack/gitorious :
wget  http://downloads.bitnami.org/files/stacks/gitorious/2.4.5-1/bitnami-gitorious-2.4.5-1-linux-x64-installer.run
chmod +x bitnami-gitorious-2.4.5-1-linux-x64-installer.run && ./bitnami-gitorious-2.4.5-1-linux-x64-installer.run
接着进行一些交互的设置,最后确认后就会进行安装:
----------------------------------------------------------------------------
Welcome to the BitNami Gitorious Stack Setup Wizard.
----------------------------------------------------------------------------
Installation folder
Please, choose a folder to install BitNami Gitorious Stack
Select a folder [/opt/gitorious-2.4.5-0]:
----------------------------------------------------------------------------
Create Admin account
BitNami Gitorious Stack admin user creation
Login [user]: admin
Password :
Please confirm your password :
Your real name [User Name]: admin
Email Address [[email protected]]: [email protected]
----------------------------------------------------------------------------
Web Server Port
Please enter the port that the bundled Apache Server will listen to by default.
Apache Web Server Port [80]:
----------------------------------------------------------------------------
Hostname that will be used to create internal URLs. If this value is incorrect ,
you may be unable to access your Gitorious installation from other computers. It
is advisable to use a Domain instead of an IP address for compatibility with
different browsers.
Domain [172.16.156.2]: git.test.com
Do you want to configure mail support? [y/N]: Y
----------------------------------------------------------------------------
Configure SMTP Settings
This is required so your application can send notifications via email.
Default email provider:
[1] GMail
[2] Custom
Please choose an option [1] : 1
----------------------------------------------------------------------------
Configure SMTP Settings
Default mail server configuration.
GMail address []: [email protected]
GMail password :
Re-enter :
----------------------------------------------------------------------------
Setup is now ready to begin installing BitNami Gitorious Stack on your computer.
Do you want to continue? [Y/n]:
这里需要提醒的几点:
- Gitorious必须要使用domain name来访问(至少chrome和Safari不行),直接使用ip会导致无法登陆的问题,这在官网文档以及网上能找到一大堆这样的问题。
- 你填写的用户是admin用户
- MySQL root密码是你前面输入的admin用户的密码
- 如果要使用注册功能,那么需要配置邮件服务器,否则就无法完成用户注册(因为要发送邮件)
- Gitorious的配置文件在apps目录下
- 备份直接对gitorious目录进行拷贝即可,可以跨不同的distro使用,注意权限正确
安装完成之后,所有相关服务都已经启动。如果要重启服务,修改配置文件,切换到 Gitorious安装目录下,执行ctlscript.sh脚本用于对服务进行相关操作。
root@git:/opt/gitorious-2.4.5-1# ./ctlscript.sh

usage: ./ctlscript.sh help

       ./ctlscript.sh (start|stop|restart|status)

       ./ctlscript.sh (start|stop|restart|status) mysql

       ./ctlscript.sh (start|stop|restart|status) apache

       ./ctlscript.sh (start|stop|restart|status) activemq

       ./ctlscript.sh (start|stop|restart|status) gitorious

help       - this screen

start      - start the service(s)

stop       - stop  the service(s)

restart    - restart or start the service(s)

status     - show the status of the service(s)
如果要修改apache、mysql等端口、路径的配置,不仅要对properties.ini文件进行编辑,还需要对相应服务的目录下的配置文件进行修改。要获得更详细的说明,请阅读README.txt文件和bitnami的wiki说明。
Gitorious的使用
Gitorious的使用和github类似,很快可以上手。这里简要地介绍一下。使用前面创建的admin用户登陆,默认会让你添加一个ssh Public key。这个key是你用于提交代码的公钥。
产生密钥对的方法如下:
ssh-keygen –C “[email protected]”
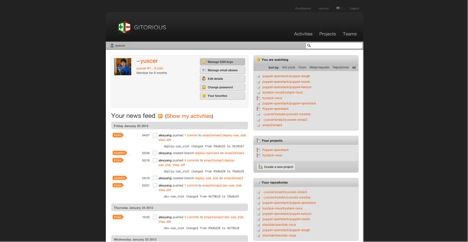
然后确认路径以及不对密钥设置密码,生成后将home目录下的~/.ssh/id_rsa.pub文件中的内容添加到浏览器中,即可完成。用户面板如下所示:
这里提醒一下,关于创建project的问题。当你点击Create a project的时候,project是一个仓库容器的概念,例如,我们创建一个称为Openstack的project,然后在里面创建nova, keystone, glance等repository。
对于clone repository,gitorious支持主流的三种协议,git只读,http明文,ssh需上传ssh public key。其中HTTP和git://是支持匿名访问的,因此必须要把它们禁用。
Gitorious的安全策略
Gitorious的配置文件中有几个选项与安全相关。
- public_mode默认值是true,每个人都可以浏览和下载repository。为了安全需要将其设置为false,此时将禁止匿名用户访问或者用户注册。
- enable_private_repositories默认是false,开启这个选项将允许用户可以控制所拥有的repository的读取访问。repository默认是public的,但是可以给单个用户或去租分配读权限来限制浏览和拉取代码的权限。更详细的说明参见https://gitorious.org/gitorious/pages/PrivateRepositories
- only_site_admins_can_create_projects 默认false,看参数名字就明白这个参数表示是否只能由管理员用户来创建project
- hide_http_clone_urls 默认false, 是否隐藏http url
- hide_git_clone_urls 默认false, 是否隐藏git:// url
- always_display_ssh_url 默认false,如果你设置隐藏了http和git url,那么这个就需要设置为true。
