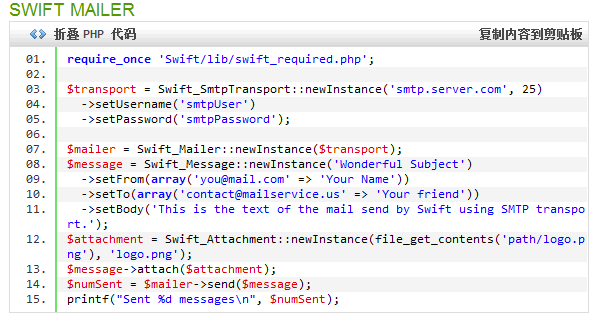
Swift Mailer插件的使用
swift mailer插件的使用
作者:zccst
2014-07-12
在PHP5.5中报错:
Undefined property: Swift_Transport_StreamBuffer::$_sequence
解决办法:
/var/www/zurmo/app/protected/extensions/swiftmailer/lib/classes/Swift/Transport/StreamBuffer.php
添加代码:
此外,在用户注册模块使用发送邮件激活等一系列实现,可参考:
PHP用户注册邮箱验证激活帐号
http://www.helloweba.com/view-blog-228.html
[img][/img]
一、SwiftMailer是什么
官网:http://swiftmailer.org/docs/messages.html
批注:PHP中三大主流邮件发送插件
Zend Framework 框架中 包含的邮件类。(http://framework.zend.com/)
Swift Mailer (http://swiftmailer.org/)
PHPMailer (http://phpmailer.worxware.com)
三者对比,请参考文章:http://www.phpchina.com/phper/phper27/06-1.html
二、在Yii中如何配置
1,配置(../config/main.php)
2,在yii的protected下的extension文件夹下
将附件中的mail.rar解压出来,形成'ext.mail.Message'路径即可。
其中,mail下的Mail.php和Message.php中有如何使用的相关解释。
三、Swift Mailer的基本使用
1,简单设置
2,关于上传附件
发送附件有静态和动态两种,分别为:
(1) $attachment = Swift_Attachment::fromPath("../path/helloworld.jpg");
使用路径的方式
(2) $attachment = Swift_Attachment::newInstance($data, $fileName, $fileType);
实时生成的数据($data)或从数据库中取出的数据($data)
然后:$message->attach($attachment);
例2

3,发送html格式的邮件
作者:zccst
2014-07-12
在PHP5.5中报错:
Undefined property: Swift_Transport_StreamBuffer::$_sequence
解决办法:
/var/www/zurmo/app/protected/extensions/swiftmailer/lib/classes/Swift/Transport/StreamBuffer.php
添加代码:
private $_sequence;
此外,在用户注册模块使用发送邮件激活等一系列实现,可参考:
PHP用户注册邮箱验证激活帐号
http://www.helloweba.com/view-blog-228.html
[img][/img]
一、SwiftMailer是什么
官网:http://swiftmailer.org/docs/messages.html
批注:PHP中三大主流邮件发送插件
Zend Framework 框架中 包含的邮件类。(http://framework.zend.com/)
Swift Mailer (http://swiftmailer.org/)
PHPMailer (http://phpmailer.worxware.com)
三者对比,请参考文章:http://www.phpchina.com/phper/phper27/06-1.html
二、在Yii中如何配置
1,配置(../config/main.php)
// autoloading model and component classes
'import'=>array(
	//...
	'ext.mail.Message',
	//...
),

'components'=>array(
    //...
    'mail' => array(
        'class' => 'ext.mail.Mail',
        'transportType' => 'smtp',
        'transportOptions' => array(
            'host' => 'email.corporation.com',
            'port' => 8082,
            'username' => '',
            'password' => '',
            //'encryption' => 'starttls'
        ),
        'viewPath' => 'application.views.mail',
        'debug' => false
    ),
    //...
),
2,在yii的protected下的extension文件夹下
将附件中的mail.rar解压出来,形成'ext.mail.Message'路径即可。
其中,mail下的Mail.php和Message.php中有如何使用的相关解释。
三、Swift Mailer的基本使用
1,简单设置
$message = new Message();

// subject
$message->subject = "XX公司XX通知";

// from
$message->from = '[email protected]';

// to
$message->to = array('[email protected]','[email protected]');

// cc and bcc

// content
$message->setBody($body);

// attachment
$attachments = Attachment::model()->findAll("ref_id = $repair_info_Id");
if(count($attachments) > 0){
	foreach ($attachments as $o){
		$attach = Swift_Attachment::newInstance(base64_decode($o->data),$o->file_path);
		$message->attach($attach);
	}
}

Yii::app()->mail->send($message);
2,关于上传附件
发送附件有静态和动态两种,分别为:
(1) $attachment = Swift_Attachment::fromPath("../path/helloworld.jpg");
使用路径的方式
(2) $attachment = Swift_Attachment::newInstance($data, $fileName, $fileType);
实时生成的数据($data)或从数据库中取出的数据($data)
然后:$message->attach($attachment);
例2

3,发送html格式的邮件