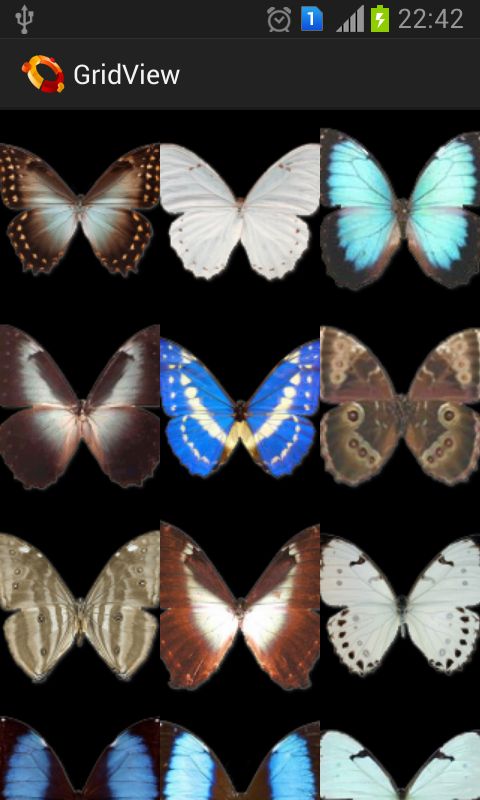
说到相册不得不介绍Android中一种重要的视图,网格视图:GridView是以网格形式显示所有的组件的,例如制作相册,所有的图片以相同大小显示在格子里
- 网格视图制作相册
两种方法,一种定义simpleAdapter这一种与前面ListView封装十分相似
那么一样要用到模板grid_layout.xml
<?xml version="1.0" encoding="utf-8"?>
<LinearLayout xmlns:android="http://schemas.android.com/apk/res/android"
    android:layout_width="wrap_content"
    android:layout_height="wrap_content"
    android:background="#000000"
    android:orientation="horizontal" >

    <ImageView
        android:id="@+id/img"
        android:layout_width="wrap_content"
        android:layout_height="wrap_content"
        android:padding="3px"
        android:scaleType="center" />

</LinearLayout>
我们只需要放图片,接着我们在drawable文件夹中保存几张图片,均以l开头格式
定义Main组件
<LinearLayout xmlns:android="http://schemas.android.com/apk/res/android"
    xmlns:tools="http://schemas.android.com/tools"
    android:id="@+id/LinearLayout1"
    android:layout_width="fill_parent"
    android:layout_height="fill_parent"
    android:orientation="vertical"

    tools:context=".MainActivity" >

    <GridView
        android:id="@+id/gridView"
        android:layout_width="fill_parent"
        android:layout_height="wrap_content"

        android:stretchMode="columnWidth"

        android:numColumns="3" >
    </GridView>

</LinearLayout>
在面代码中我们仍会定义一个initAdapter()方法,此方法通过反射机制取出定义的全部图片,这一节前一节课讲过。
定义Activity程序:
public class MainActivity extends Activity {
	private List<Map<String,Integer>> list=new ArrayList<Map<String,Integer>>();
	private SimpleAdapter simpleadapter=null;
	private GridView gridview=null;
	protected void onCreate(Bundle savedInstanceState) {
		super.onCreate(savedInstanceState);
		setContentView(R.layout.activity_main);
		this.gridview=(GridView)super.findViewById(R.id.gridView);
		this.initAdapter();//初始化适配器
		this.gridview.setAdapter(simpleadapter);//设置图片,将封装好的图片放入
		this.gridview.setOnItemClickListener(new ItemListener());//设置组件监听器
	}


	private class ItemListener implements OnItemClickListener{

		@Override
		public void onItemClick(AdapterView<?> arg0, View arg1, int position,
				long id) {
			// TODO Auto-generated method stub
			//相当于之前的转换工厂,不使用将会报错
			ImageView imageview=new ImageView(MainActivity.this);
			imageview.setBackgroundColor(0xFFFFFFFF);//设置背景
			imageview.setScaleType(ImageView.ScaleType.CENTER);//居中
			//自适应图片
			imageview.setLayoutParams(new ImageSwitcher.LayoutParams(LayoutParams.FILL_PARENT,LayoutParams.FILL_PARENT));

			//取出初始化适配器装入的map
			Map<String,Integer> map=(Map<String,Integer>)MainActivity.this.simpleadapter.getItem(position);
			//开始放图
			imageview.setImageResource(map.get("img"));
			Dialog dialog=new AlertDialog.Builder(MainActivity.this)
			.setIcon(R.drawable.check).setTitle("查看图片").setView(imageview)
			.setNegativeButton("关闭", null).create();
			dialog.show();


		}

	}
	public boolean onCreateOptionsMenu(Menu menu) {
		// Inflate the menu; this adds items to the action bar if it is present.
		getMenuInflater().inflate(R.menu.main, menu);
		return true;
	}
	private void initAdapter() {
		// TODO Auto-generated method stub
		Field[] field=R.drawable.class.getDeclaredFields();//取得全部属性,反射机制动态取图
		for(int i=0;i<field.length;i++){
			if(field[i].getName().startsWith("h")){
				Map<String,Integer> map=new HashMap<String,Integer>();
				try {
					map.put("img", field[i].getInt(R.drawable.class));//图片资源放入map
				} catch (IllegalAccessException e) {
					// TODO Auto-generated catch block
					e.printStackTrace();
				} catch (IllegalArgumentException e) {
					// TODO Auto-generated catch block
					e.printStackTrace();
				}
				this.list.add(map);    //保存map
			}
		}
		//使用参见listview博客
		this.simpleadapter=new SimpleAdapter(this,this.list,R.layout.grid_layout,//模板
				new String[]{"img"},//将要装入的键
				new int[]{R.id.img});//装的值

	}

}
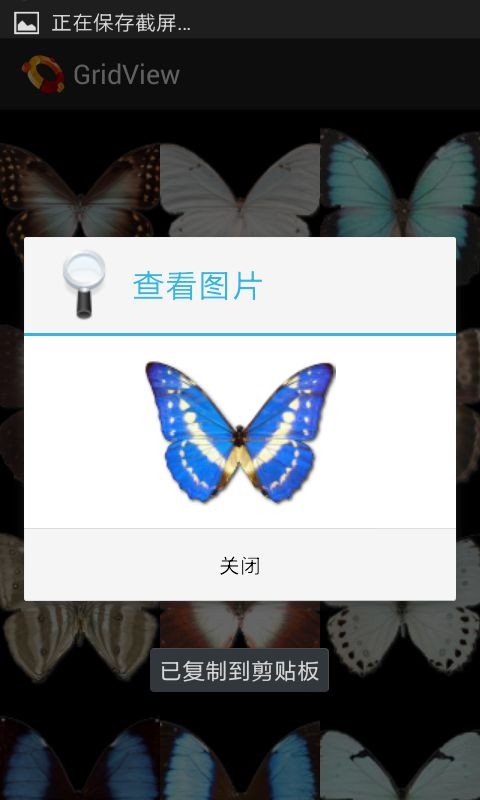
实现一个每当用户选择一张图片,就会弹出一个对话框显示用户选择的图片。程序运行效果如下:
点击某一图片后:
这里不再对第二种方法多做阐述,为了以后设计方便建议采用第一种方法,1符合MVC设计模式
- 时钟组件
直接布局文件中设置时钟组件
<LinearLayout xmlns:android="http://schemas.android.com/apk/res/android"
    xmlns:tools="http://schemas.android.com/tools"
    android:id="@+id/LinearLayout1"
    android:layout_width="match_parent"
    android:layout_height="match_parent"
    android:orientation="vertical"
    android:paddingBottom="@dimen/activity_vertical_margin"
    android:paddingLeft="@dimen/activity_horizontal_margin"
    android:paddingRight="@dimen/activity_horizontal_margin"
    android:paddingTop="@dimen/activity_vertical_margin"
    tools:context=".MainActivity" >

    <AnalogClock
        android:id="@+id/analogClock1"
        android:layout_width="wrap_content"
        android:layout_height="wrap_content" />

</LinearLayout>
然后效果图就出来了,可以再加上DIgitalClock
- 计时器:Chronometer 本节我们来做个秒表小小闹钟到点会震动提示
首先定义布局文件
<LinearLayout xmlns:android="http://schemas.android.com/apk/res/android"
    xmlns:tools="http://schemas.android.com/tools"
    android:id="@+id/LinearLayout1"
    android:layout_width="fill_parent"
    android:layout_height="fill_parent"
    android:orientation="vertical"

    tools:context=".MainActivity" >

    <Chronometer
        android:id="@+id/chronometer1"
        android:layout_width="wrap_content"
        android:layout_height="wrap_content"
        android:text="Chronometer" />

    <LinearLayout
        android:layout_width="match_parent"
        android:layout_height="wrap_content" >

        <Button
            android:id="@+id/button1"
            android:layout_width="wrap_content"
            android:layout_height="wrap_content"
            android:text="开始" />

        <Button
            android:id="@+id/button2"
            android:layout_width="wrap_content"
            android:layout_height="wrap_content"
            android:text="停止" />

        <Button
            android:id="@+id/button3"
            android:layout_width="wrap_content"
            android:layout_height="wrap_content"
            android:text="复位" />

        <Button
            android:id="@+id/button4"
            android:layout_width="wrap_content"
            android:layout_height="wrap_content"
            android:text="格式化显示" />

    </LinearLayout>

</LinearLayout>
然后定义acticity代码
public class MainActivity extends Activity {

	private Chronometer clock=null;
	private Button start=null;//开始计时
	private Button stop=null;//停止计时
	private Button base=null;//设置基准时间
	private Button format=null;//设置格式
	private Vibrator vibrator=null;
	protected void onCreate(Bundle savedInstanceState) {
		super.onCreate(savedInstanceState);
		setContentView(R.layout.activity_main);
		this.clock=(Chronometer)super.findViewById(R.id.chronometer1);
		this.start=(Button)super.findViewById(R.id.button1);
		this.stop=(Button)super.findViewById(R.id.button2);
		this.base=(Button)super.findViewById(R.id.button3);
		this.format=(Button)super.findViewById(R.id.button4);
		this.vibrator=(Vibrator)super.getApplication().getSystemService(Service.VIBRATOR_SERVICE);
		this.start.setOnClickListener(new StartListener());
		this.stop.setOnClickListener(new StopListener());
		this.base.setOnClickListener(new BaseListener());
		this.format.setOnClickListener(new FormatListener());
		this.clock.setOnChronometerTickListener(new OnChronometer());

	}
	private class OnChronometer implements OnChronometerTickListener{

		@Override
		public void onChronometerTick(Chronometer arg0) {
			// TODO Auto-generated method stub
			String time=clock.getText().toString().replaceAll("[^(\\d{2}:\\d{2})]", "");
			if("01:00".equals(time)){
				MainActivity.this.vibrator.vibrate(new long[]{1000, 10,1000,100},0);//设置震动周期以及循环震动
			}

		}

	}
	private class StartListener implements OnClickListener{

		@Override
		public void onClick(View arg0) {
			// TODO Auto-generated method stub
			MainActivity.this.clock.start();//开始计时


		}

	}
	private class StopListener implements OnClickListener{

		@Override
		public void onClick(View arg0) {
			// TODO Auto-generated method stub
			MainActivity.this.clock.stop();//停止计时
			MainActivity.this.vibrator.cancel();//取消震动

		}

	}
	private class BaseListener implements OnClickListener{

		@Override
		public void onClick(View arg0) {
			// TODO Auto-generated method stub

			MainActivity.this.clock.setBase(SystemClock.elapsedRealtime());//复位
		}

	}
	private class FormatListener implements OnClickListener{

		@Override
		public void onClick(View arg0) {
			// TODO Auto-generated method stub

			MainActivity.this.clock.setFormat("新显示格式:%s。");
		}

	}

	@Override
	public boolean onCreateOptionsMenu(Menu menu) {
		// Inflate the menu; this adds items to the action bar if it is present.
		getMenuInflater().inflate(R.menu.main, menu);
		return true;
	}

}
最后记得配置权限
:
<uses-permission
       android:name="android.permission.VIBRATE"

        />
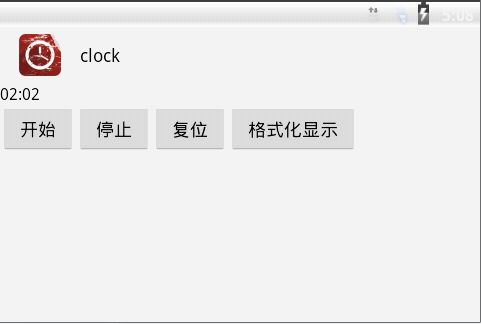
最后运行效果如下:
设置满一分钟震动


