使用annotation注解,整合DWR3 + Spring3 + Hibernate3
首先参考了wangcheng的一个博客:http://wangcheng.iteye.com/blog/409548
因为我的Spring已经是使用annotation注解,所以现在加入DWR框架一样使用annotation注解,Spring、Hibernate文件配置这里不做解释。
1.系统的业务类:
package com.gxuwz.shiplock.mainservice.service;

import java.util.List;

import javacommon.base.BaseManager;
import javacommon.base.EntityDao;

import org.directwebremoting.annotations.RemoteMethod;
import org.directwebremoting.annotations.RemoteProxy;
import org.springframework.beans.factory.annotation.Autowired;
import org.springframework.stereotype.Service;
import org.springframework.transaction.annotation.Transactional;

import com.gxuwz.shiplock.mainservice.dao.ServiceRegisterDao;
import com.gxuwz.shiplock.mainservice.model.ServiceRegister;
import com.gxuwz.shiplock.mainservice.vo.service.SchedulingParameters;

/**
 * @author  梧州学院 软件开发中心 庞光垚  [email protected]
 * @version  1.0
 * <br>Copyright (C), 2012, 梧州学院 软件开发中心
 * <br>This program is protected by copyright laws.
 * <br>Program Name: 船闸调度管理信息系统
 * @since 1.0
 */
@Service
@Transactional
@RemoteProxy
public class ShipLockSchedulManager extends BaseManager<ServiceRegister,Long>{
	//通过autowire自动设置对象属性
	@Autowired
	private ServiceRegisterDao serviceRegisterDao;

	public EntityDao getEntityDao() {
		return this.serviceRegisterDao;
	}

	/**
	 * 根据条件查询调度列表,用于船闸调度页面“已登记”列表
	 * @param schedulStatus 状态
	 * @param schedulDirection 方向
	 * @param sroom 闸室,-1为忽略当前 条件
	 * @param SchedulingParameters 调度条件列表
	 * @return 调度信息列表
	 */
	@Transactional(readOnly=true)
	@RemoteMethod
	public List<ServiceRegister> findRegisteredForDoScheduling(long schedulStatus,long schedulDirection,long sroom,SchedulingParameters schedulingParameters){
		return serviceRegisterDao.findRegisteredForDoScheduling(schedulStatus, schedulDirection,sroom, schedulingParameters);
	}

	@RemoteMethod
	public String sayHello(String name){
		return "您好!"+name;
	}
}
@RemoteProxy注解告诉DWR,这个Class是我们想暴露出来的。@RemoteMethod注解告诉DWR去暴露这个指定的方法,只有加了RemoteMethod注解的方法会被暴露,其它的不会。
这里也可以使用@RemoteProxy(name="userRemote")的方式指定DWR接口的名字。
以上红色部分是DWR注解,后面加的,其他是之前我们系统的Spring注解。
2.接下来上web.xml
    <!-- dwr 配置 -->
	<servlet>
		<servlet-name>dwr</servlet-name>
		<servlet-class>org.directwebremoting.spring.DwrSpringServlet</servlet-class>
		<init-param>
			<param-name>debug</param-name>
			<param-value>true</param-value>
		</init-param>
	</servlet>
	<servlet-mapping>
		<servlet-name>dwr</servlet-name>
		<url-pattern>/dwr/*</url-pattern>
	</servlet-mapping>
web.xml关于Spring等的其他配置文件这里不解释,直接把上段放到web.xml的最后面即可。为了区分原来的URL,我们使用dwr开头的url。
3.最重要的是Spring的配置文件
<?xml version="1.0" encoding="UTF-8"?>
<beans xmlns = "http://www.springframework.org/schema/beans"
xmlns:xsi = "http://www.w3.org/2001/XMLSchema-instance"
xmlns:dwr = "http://www.directwebremoting.org/schema/spring-dwr"
xmlns:context = "http://www.springframework.org/schema/context"
xmlns:aop = "http://www.springframework.org/schema/aop"
xsi:schemaLocation = "http://www.springframework.org/schema/beans
http://www.springframework.org/schema/beans/spring-beans-2.5.xsd
http://www.springframework.org/schema/context
http://www.springframework.org/schema/context/spring-context-2.5.xsd
http://www.directwebremoting.org/schema/spring-dwr
http://www.directwebremoting.org/schema/spring-dwr-3.0.xsd
http://www.springframework.org/schema/aop
http://www.springframework.org/schema/aop/spring-aop-2.5.xsd" default-autowire="byName" default-lazy-init="false">

    <!-- 隐式注册了 AutowiredAnnotationBeanPostProcessor 和 CommonAnnotationBeanPostProcessor -->
    <!-- <context:component-scan base-package = "com.gxuwz.shiplock.**.service" />  -->

    <!-- 扫描 spring 注解的类 , 使其成为客户端调用接口 -->
    <dwr:annotation-config id="dwrid"/>
    <!-- 扫描需要转换的 java 对象
        <dwr:annotation-scan scanRemoteProxy = "false" base-package = "com.gxuwz.shiplock.**.model" /> -->
    <!-- dwr 初始化配置
    <dwr:configuration >
    </dwr:configuration > -->

    <!-- 注意这里新增加的dwr tag, 为使其生效,文件头中要声明namespace -->
	<dwr:configuration />
	<dwr:url-mapping />

	<!-- 部署项目时, 请把debug设为false -->
	<dwr:controller id="dwrController" debug="false" />

	<!-- 多个包名用逗号隔开, 但不能有空格 -->
	<context:component-scan base-package="com.gxuwz.shiplock.**.service" />

	<!-- order值越小, 优先级越高
	<bean class="org.springframework.web.servlet.mvc.annotation.DefaultAnnotationHandlerMapping">
		<property name="order" value="1" />
	</bean>
	<bean class="org.springframework.web.servlet.handler.BeanNameUrlHandlerMapping">
		<property name="order" value="2" />
	</bean>-->
</beans>
为了跟之前的系统代码相分离,我新建立了一个xml文件,叫“applicationContext-dwr.xml”,内容就是上面的xml文件。
简单解释一下这些配置
•<dwr:annotation-config /> 要求DWR在Spring容器中检查拥有@RemoteProxy 和 @RemoteMethod注解的类。注意它不会去检查Spring容器之外的类。
•<dwr:url-mapping /> 要求DWR将util.js和engine.js映射到dwrController
•<dwr:controller id="dwrController" debug="true" /> 定义dwrController
•<dwr:configuration /> 此标签在这个例子中不是必须的,如果你想配置Spring容器之外的类,就需要它了。
总结:
至此,配置完成。
访问:http://127.0.0.1:8080/SHIPLOCK/dwr/test/ShipLockSchedulManager,如果看到以下内容,说明已经成功了。http://127.0.0.1:8080/SHIPLOCK/dwr/test/这一段是固定的,后面那个是java类的名称。
Methods For: ShipLockSchedulManager。。。。。
最后我们写一下测试页面:
<%@ page contentType="text/html;charset=UTF-8" %>
<%@ taglib uri="http://java.sun.com/jsp/jstl/core" prefix="c" %>
<%@ taglib tagdir="/WEB-INF/tags/simpletable" prefix="simpletable"%>
<%@ include file="/commons/taglibs.jsp" %>
<!DOCTYPE html PUBLIC "-//W3C//DTD XHTML 1.0 Transitional//EN" "http://www.w3.org/TR/xhtml1/DTD/xhtml1-transitional.dtd">
<html xmlns="http://www.w3.org/1999/xhtml">
<head>
<meta http-equiv="Content-Type" content="text/html; charset=utf-8" />
<title>无标题文档</title>
<script type='text/javascript' src='${ctx}/dwr/engine.js'></script>
<script type='text/javascript' src='${ctx}/dwr/interface/ShipLockSchedulManager.js'></script>
<script type='text/javascript' src='${ctx}/dwr/util.js'></script>
<script type="text/javascript">
<!--
function getService(){
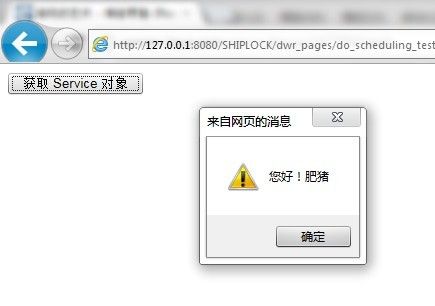
ShipLockSchedulManager.sayHello('肥猪',function (result){
alert(result);
});
}
//-->
</script>
</head>
<body>
<input type="button" value=" 获取 Service 对象 " onclick="getService()">
</body>
</html>
运行一下: