Cocos3D教程:Hello,World
如果你想要在iOS程序中使用3D模型,一般来说你有3个选择:使用OpenGL ES,或者使用其他的游戏引擎:如Unity 3D,最后就是我认为最好的方法:使用Cocos3D。
为什么我觉得Cocos3D是iOS上最好的使用3D模型的方法呢?首先是因为Cocos3D是cocos2D的拓展集,完全嵌入在Xcode中,更加好控制并且可以和iOS应用结合。其次还因为Cocos3D较OpenGL ES来说比较简单,使用的方法也比较高级。
这篇教程我们主要讲解Cocos3D的一些基础的内容,比如说如何设置灯光摄像机,如何绘制物体,如何设置物体运动,还有如何进行用户交互。
如何安装使用
首先你要先下载哦,要用mac的还用我说嘛亲?下载地址在这里。
如果你感兴趣,在下载站点的旁边有一个引擎作者写的详细说明,有兴趣也可以看看,还有翻译的哦亲:
作者说明 —— 翻译
至于安装,你可以看看Readme,很简单的,首先把cocos2d放在cocos3d的目录里,之后输入命令cd,进入cocos3d的文件夹,运行命令:
安装程序会搞定一切。
构建3D世界
首先打开Xcode,新建一个Cocos3d的项目,打开直接看class文件夹里的内容吧,其他的基本上都是资源文件。

一个新建的cocos3d项目本身就带有一个3d的自旋转的Hello,World模型,我们要知道它是如何构建的,只需要查看其代码就可以,找到下面的代码:
其实如果看过我之前的教程并且有一些编程基础的人都可以很容易的看懂这些代码,不过我还是要稍微讲解一下:
这段代码在创建一个摄像机,了解3D游戏编程的人一定了解这个概念,新手可以理解为用户的视角。
这段代码增加了一段灯光,请注意在最后设置为了摄像机的子物体,也就是说随着摄像机的移动,灯光也会移动的意思。
真正加载3D模型的语句就是这么一句,如果你在Resource文件夹中寻找的话,你就会发现有一个hello-world.pod文件,这个就是我们会显示的3D模型了。
更新方法
Cocos3d的模板中还提供了一系列的更新方法,注释中有很多的解释,我们来看看:
这段代码中主要就是4个方法:
如果你曾经使用过Unity3D的话,你就会熟悉它的Update函数,这个函数和他差不多,简单地说,就是每帧运行一次这里面的代码,或者用户设置的每一段时间。
这个函数和上面的很像,不赘述了
顾名思义,这个就是onStart函数,在开始的时候运行一次的。
同上,在结束的时候运行一次。
交互方法
cocos3D模板中提供的最后一个方法就是检测交互的方法,我们来看看:
很明显这个函数是根据用户点击的点进行交互的
而这个函数则不仅根据用户点击的点,还根据用户点击的类型进行排定并作出反应。
之后看些什么?
好了到这里我就把cocos3d模板文件的代码讲解完了,你可以自己拍动代码看看效果,我们接下来会推出一系列的具体cocos3d教程,有些还会配上视频,敬请关注:
《Cocos3D教程:如何将3D文件导入进Cocos3D工程中》
《Cocos3D教程:如何制作一个嵌入3D模型的iOS应用》
《Cocos3D教程:如何制作一个简单的3D小游戏》
欢迎关注我的围脖: @Oratis
在知乎和豆瓣上,我的名字也是Oratis
我会把之后发表的教程分享到这些社交网络中。
如果你有任何问题,欢迎在底下留言,也欢迎写信给我,我的邮箱地址是: [email protected]
为什么我觉得Cocos3D是iOS上最好的使用3D模型的方法呢?首先是因为Cocos3D是cocos2D的拓展集,完全嵌入在Xcode中,更加好控制并且可以和iOS应用结合。其次还因为Cocos3D较OpenGL ES来说比较简单,使用的方法也比较高级。
这篇教程我们主要讲解Cocos3D的一些基础的内容,比如说如何设置灯光摄像机,如何绘制物体,如何设置物体运动,还有如何进行用户交互。
如何安装使用
首先你要先下载哦,要用mac的还用我说嘛亲?下载地址在这里。
如果你感兴趣,在下载站点的旁边有一个引擎作者写的详细说明,有兴趣也可以看看,还有翻译的哦亲:
作者说明 —— 翻译
至于安装,你可以看看Readme,很简单的,首先把cocos2d放在cocos3d的目录里,之后输入命令cd,进入cocos3d的文件夹,运行命令:
./install-cocos3d.sh -f -2 “../../cocos2d/cocos2d-iphone-1.0.1″
安装程序会搞定一切。
构建3D世界
首先打开Xcode,新建一个Cocos3d的项目,打开直接看class文件夹里的内容吧,其他的基本上都是资源文件。
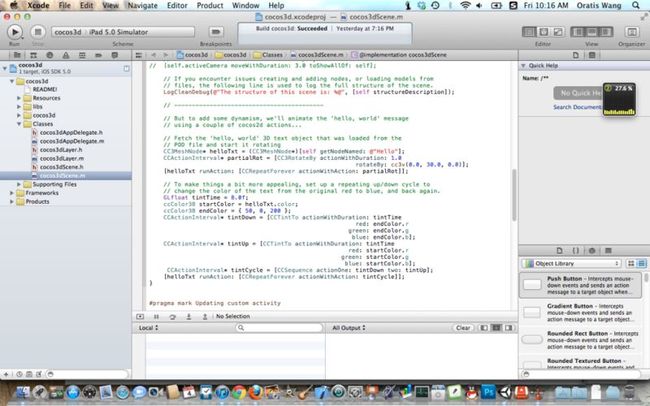
一个新建的cocos3d项目本身就带有一个3d的自旋转的Hello,World模型,我们要知道它是如何构建的,只需要查看其代码就可以,找到下面的代码:
-(void) initializeScene {


// Create the camera, place it back a bit, and add it to the scene

CC3Camera* cam = [CC3Camera nodeWithName: @"Camera"];

cam.location = cc3v( 0.0, 0.0, 6.0 );

[self addChild: cam];


// Create a light, place it back and to the left at a specific

// position (not just directional lighting), and add it to the scene

CC3Light* lamp = [CC3Light nodeWithName: @"Lamp"];

lamp.location = cc3v( -2.0, 0.0, 0.0 );

lamp.isDirectionalOnly = NO;

[cam addChild: lamp];


// This is the simplest way to load a POD resource file and add the

// nodes to the CC3Scene, if no customized resource subclass is needed.

[self addContentFromPODFile: @"hello-world.pod"];


// Create OpenGL ES buffers for the vertex arrays to keep things fast and efficient,

// and to save memory, release the vertex data in main memory because it is now redundant.

[self createGLBuffers];

[self releaseRedundantData];


// That's it! The scene is now constructed and is good to go.


// If you encounter problems displaying your models, you can uncomment one or

// more of the following lines to help you troubleshoot. You can also use these

// features on a single node, or a structure of nodes. See the CC3Node notes.


// Displays short descriptive text for each node (including class, node name & tag).

// The text is displayed centered on the pivot point (origin) of the node.

// self.shouldDrawAllDescriptors = YES;


// Displays bounding boxes around those nodes with local content (eg- meshes).

// self.shouldDrawAllLocalContentWireframeBoxes = YES;


// Displays bounding boxes around all nodes. The bounding box for each node

// will encompass its child nodes.

// self.shouldDrawAllWireframeBoxes = YES;


// Moves the camera so that it will display the entire scene.

// [self.activeCamera moveWithDuration: 3.0 toShowAllOf: self];


// If you encounter issues creating and adding nodes, or loading models from

// files, the following line is used to log the full structure of the scene.

LogCleanDebug(@"The structure of this scene is: %@", [self structureDescription]);


// ------------------------------------------


// But to add some dynamism, we'll animate the 'hello, world' message

// using a couple of cocos2d actions...


// Fetch the 'hello, world' 3D text object that was loaded from the

// POD file and start it rotating

CC3MeshNode* helloTxt = (CC3MeshNode*)[self getNodeNamed: @"Hello"];

CCActionInterval* partialRot = [CC3RotateBy actionWithDuration: 1.0

rotateBy: cc3v(0.0, 30.0, 0.0)];

[helloTxt runAction: [CCRepeatForever actionWithAction: partialRot]];


// To make things a bit more appealing, set up a repeating up/down cycle to

// change the color of the text from the original red to blue, and back again.

GLfloat tintTime = 8.0f;

ccColor3B startColor = helloTxt.color;

ccColor3B endColor = { 50, 0, 200 };

CCActionInterval* tintDown = [CCTintTo actionWithDuration: tintTime

red: endColor.r

green: endColor.g

blue: endColor.b];

CCActionInterval* tintUp = [CCTintTo actionWithDuration: tintTime

red: startColor.r

green: startColor.g

blue: startColor.b];

CCActionInterval* tintCycle = [CCSequence actionOne: tintDown two: tintUp];

[helloTxt runAction: [CCRepeatForever actionWithAction: tintCycle]];

}
其实如果看过我之前的教程并且有一些编程基础的人都可以很容易的看懂这些代码,不过我还是要稍微讲解一下:
// Create the camera, place it back a bit, and add it to the scene

CC3Camera* cam = [CC3Camera nodeWithName: @"Camera"];

cam.location = cc3v( 0.0, 0.0, 6.0 );

[self addChild: cam];
这段代码在创建一个摄像机,了解3D游戏编程的人一定了解这个概念,新手可以理解为用户的视角。
// Create a light, place it back and to the left at a specific

// position (not just directional lighting), and add it to the scene

CC3Light* lamp = [CC3Light nodeWithName: @"Lamp"];

lamp.location = cc3v( -2.0, 0.0, 0.0 );

lamp.isDirectionalOnly = NO;

[cam addChild: lamp];
这段代码增加了一段灯光,请注意在最后设置为了摄像机的子物体,也就是说随着摄像机的移动,灯光也会移动的意思。
[self addContentFromPODFile: @"hello-world.pod"];
真正加载3D模型的语句就是这么一句,如果你在Resource文件夹中寻找的话,你就会发现有一个hello-world.pod文件,这个就是我们会显示的3D模型了。
更新方法
Cocos3d的模板中还提供了一系列的更新方法,注释中有很多的解释,我们来看看:
-(void) updateBeforeTransform: (CC3NodeUpdatingVisitor*) visitor {}


/**

* This template method is invoked periodically whenever the 3D nodes are to be updated.

*

* This method provides your app with an opportunity to perform update activities after

* the transformMatrix of the 3D nodes in the scen have been recalculated.

*

* For more info, read the notes of this method on CC3Node.

*/

-(void) updateAfterTransform: (CC3NodeUpdatingVisitor*) visitor {}


#pragma mark Scene opening and closing


/**

* Callback template method that is invoked automatically when the CC3Layer that

* holds this scene is first displayed.

*

* This method is a good place to invoke one of CC3Camera moveToShowAllOf:... family

* of methods, used to cause the camera to automatically focus on and frame a particular

* node, or the entire scene.

*

* For more info, read the notes of this method on CC3Scene.

*/

-(void) onOpen {


// Uncomment this line to have the camera move to show the entire scene.

// This must be done after the CC3Layer has been attached to the view,

// because this makes use of the camera frustum and projection.

// [self.activeCamera moveWithDuration: 3.0 toShowAllOf: self];


// Uncomment this line to draw the bounding box of the scene.

// self.shouldDrawWireframeBox = YES;

}


/**

* Callback template method that is invoked automatically when the CC3Layer that

* holds this scene has been removed from display.

*

* For more info, read the notes of this method on CC3Scene.

*/

-(void) onClose {}


#pragma mark Handling touch events


/**

* This method is invoked from the CC3Layer whenever a touch event occurs, if that layer

* has indicated that it is interested in receiving touch events, and is handling them.

*

* Override this method to handle touch events, or remove this method to make use of

* the superclass behaviour of selecting 3D nodes on each touch-down event.

*

* This method is not invoked when gestures are used for user interaction. Your custom

* CC3Layer processes gestures and invokes higher-level application-defined behaviour

* on this customized CC3Scene subclass.

*

* For more info, read the notes of this method on CC3Scene.

*/
这段代码中主要就是4个方法:
-(void) updateBeforeTransform: (CC3NodeUpdatingVisitor*) visitor {}
如果你曾经使用过Unity3D的话,你就会熟悉它的Update函数,这个函数和他差不多,简单地说,就是每帧运行一次这里面的代码,或者用户设置的每一段时间。
-(void) updateAfterTransform: (CC3NodeUpdatingVisitor*) visitor {}
这个函数和上面的很像,不赘述了
-(void) onOpen {}
顾名思义,这个就是onStart函数,在开始的时候运行一次的。
-(void) onClose {}
同上,在结束的时候运行一次。
交互方法
cocos3D模板中提供的最后一个方法就是检测交互的方法,我们来看看:
-(void) touchEvent: (uint) touchType at: (CGPoint) touchPoint {}


/**

* This callback template method is invoked automatically when a node has been picked

* by the invocation of the pickNodeFromTapAt: or pickNodeFromTouchEvent:at: methods,

* as a result of a touch event or tap gesture.

*

* Override this method to perform activities on 3D nodes that have been picked by the user.

*

* For more info, read the notes of this method on CC3Scene.

*/

-(void) nodeSelected: (CC3Node*) aNode byTouchEvent: (uint) touchType at: (CGPoint) touchPoint {}


-(void) touchEvent: (uint) touchType at: (CGPoint) touchPoint {}
很明显这个函数是根据用户点击的点进行交互的
-(void) nodeSelected: (CC3Node*) aNode byTouchEvent: (uint) touchType at: (CGPoint) touchPoint {}
而这个函数则不仅根据用户点击的点,还根据用户点击的类型进行排定并作出反应。
之后看些什么?
好了到这里我就把cocos3d模板文件的代码讲解完了,你可以自己拍动代码看看效果,我们接下来会推出一系列的具体cocos3d教程,有些还会配上视频,敬请关注:
《Cocos3D教程:如何将3D文件导入进Cocos3D工程中》
《Cocos3D教程:如何制作一个嵌入3D模型的iOS应用》
《Cocos3D教程:如何制作一个简单的3D小游戏》
欢迎关注我的围脖: @Oratis
在知乎和豆瓣上,我的名字也是Oratis
我会把之后发表的教程分享到这些社交网络中。
如果你有任何问题,欢迎在底下留言,也欢迎写信给我,我的邮箱地址是: [email protected]