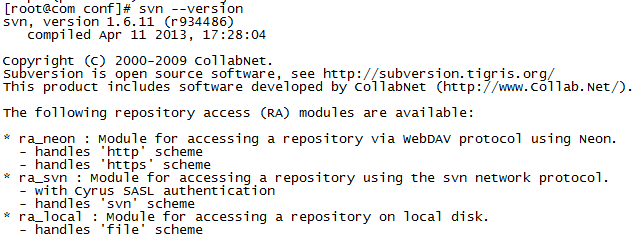
RT, 软件采用yum方式安装。
一、软件安装
1. 安装SVN、Apache及其他相关
yum install httpd mod_dav_svn subversion mod_ssl
2. 测试安装是否成功
Apache:
出现截图所示内容表示安装成功,下面开始配置
二、配置SVN
1.初始化版本仓库
新建SVN目录
mkdir /www/svn
新建SVN仓库
svnadmin create /www/svn/project
初始化版本仓库
cd /www/svn/project
mkdir project project/server project/client project/test
svn import project/ file:///home/svn/project -m “Init the repository”
删除临时目录
rm -rf /www/svn/project/project
2.配置配置权限、用户等
修改/www/svn/project/conf/下的authz和passwd文件,添加账户并设置目录权限
passwd如:
[users]
usera=888888
userb=888888
auth如:
[groups]
super=usera
normal=userb

[/]
@super=rw
*=

[project:/]
@super=rw
@normal=r
*=
启用自定义配置:
vi /www/svn/project/conf/svnserve.conf
启用[general]的几行
anon-access = read
auth-access = write
password-db = passwd
authz-db = authz
3.启动测试SVN
启动SVN
svnserve -d -r /home/svn
svn co svn://machine_ip/project
按提示输入最后出现类似“Checked out revision 2”表示成功
三、Apache+SVN整合
编辑Apache的Subversion配置文件
<Location /project>
   DAV svn
   SVNPath /www/svn/project/
      #SSLRequireSSL

      AuthType Basic
      AuthName "Subversion for project"
      AuthUserFile /www/svn/project/conf/passwd_httpd
      AuthzSVNAccessFile /www/svn/project/conf/authz
      Satisfy all
      Require valid-user
</Location>
Apache的账户不支持SVN的明文密码,我们用下面的命令来添加SVN账户:
htpasswd -bcm /www/svn/project/conf/passwd_httpd usera 888888
设置资源库文件所属账户
chown -R apache.apache /www/svn
重启Apache:
service httpd restart
现在就可以在浏览器尝试访问了:
http://svn_machine_ip/project
按提示输入用户名密码。
访问不了?查看下apache日志:
tail -100f /etc/httpd/logs/error_log
[Mon Oct 07 01:20:37 2013] [error] [client 192.168.1.108] (13)Permission denied: Could not open password file: /home/svn/project/conf/webpasswd
[Mon Oct 07 01:20:37 2013] [error] [client 192.168.1.108] access to /project failed, reason: verification of user id 'usera' not configured
[Mon Oct 07 01:20:45 2013] [error] [client 192.168.1.108] (13)Permission denied: Could not open password file: /home/svn/project/conf/webpasswd
[Mon Oct 07 01:20:45 2013] [error] [client 192.168.1.108] access to /project failed, reason: verification of user id 'usera' not configured
[Mon Oct 07 01:21:26 2013] [error] [client 192.168.1.108] (13)Permission denied: Could not open password file: /home/svn/project/conf/webpasswd
[Mon Oct 07 01:21:26 2013] [error] [client 192.168.1.108] access to /project failed, reason: verification of user id 'usera' not configured
[Mon Oct 07 01:22:02 2013] [error] [client 192.168.1.108] (13)Permission denied: Could not open password file: /home/svn/project/conf/webpasswd
[Mon Oct 07 01:22:02 2013] [error] [client 192.168.1.108] access to /project failed, reason: verification of user id 'usera' not configured
对于这个问题有人说关掉SElinux,个人没试过,不过肯定不好,影响主机安全性。
执行如下命令即可:
chcon -R -h -t httpd_sys_content_t /www/svn
四、配置Https方式访问版本仓库
需要用到OpenSSL工具。
1.生成需要的证书、密钥
上面是以http方式访问的,安全性低,下面设置强制https访问svn:
2.配置Apache的Subversion强制使用Https
生成私钥
cd /etc/httpd/conf
openssl genrsa -out httpd.key 1024
用前面的私钥生成证书
openssl req -new -key httpd.key -out httpd.pem -days 3650 -x509
修改Apache的SSL配置文件
# vim /etc/httpd/conf.d/ssl.conf
SSLCertificateFile /etc/httpd/conf/httpd.pem
SSLCertificateKeyFile /etc/httpd/conf/httpd.key
配置subversion强制使用https访问
# vim /etc/httpd/conf/httpd.conf
启用SSLRequireSSL配置(去掉前面的注释符)
五、Eclipse中使用https连接svn
其实这点也没啥好说的,之所以列出来是因为中间出现了一点小问题,记录下:
1、Eclipse中https连接svn失败
首先之前用小乌龟客户端和浏览器是能够连接svn的,既然小乌龟客户端可以连接为什么Eclipse不能连接呢?
猜测可能和SVN插件版本(1.6)有关, 升级到1.8后,可以正常访问了^_^至于有人介绍的说什么修改Apache配置的SSL协议之类的也试过,也会出现错误,如:
RA layer request failed
svn: OPTIONS of 'https://xxxxx/project': SSL negotiation failed: SSL error: sslv3 alert handshake failure (https://xxxxx)
参考文章:
http://www.linuxidc.com/Linux/2013-03/81007p7.htm
http://zhumeng8337797.blog.163.com/blog/static/100768914201292642655560/


