HSQL实战使用手册.
不讲原理.只讲如何使用HSQL.
添加hsql 的jar包和链接包.
hsql的连接配置文件.
spring.properties
jdbc配置.
jdbc-context.xml
下面就是重点了,即如何启动HSQL,并添加数据.
启动服务器后,找到hsqldb-**.jar 右键点击 run as - java application
如下图.
首先启动hsql服务器.
接着我们就可以在控制台看到hsql启动成功.
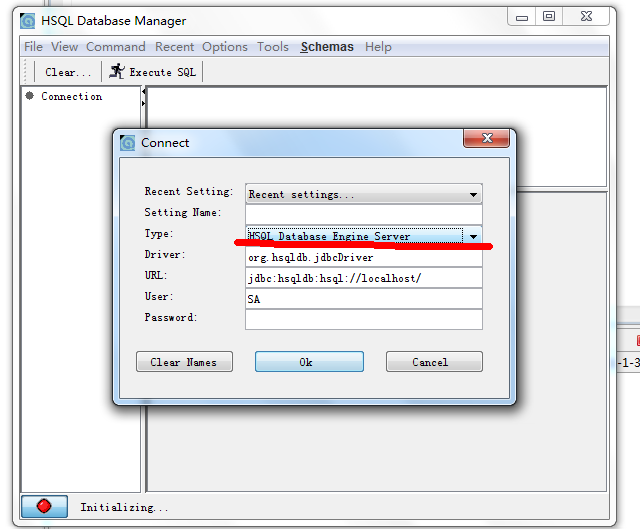
然后准备打开GUI界面,选择下面的服务.
出现图形配置界面后,选择图中的 Server 类型.
还有其它很多种类型,想知道各个的区别,自己google下就是了.这不讲理论,只讲使用.
点击OK.
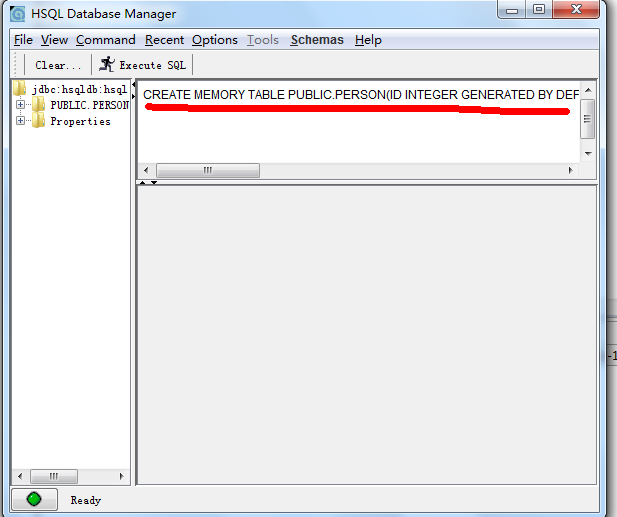
然后就是在图中创建表之类的操作了.
OVER!
GOOD LUCK!
<dependency>
    	<groupId>org.hsqldb</groupId>
    	<artifactId>hsqldb</artifactId>
    	<version>2.0.0</version>
    	<type>jar</type>
    	<scope>compile</scope>
    </dependency>
  <dependency>
    	<groupId>c3p0</groupId>
    	<artifactId>c3p0</artifactId>
    	<version>0.9.1.2</version>
    	<type>jar</type>
    	<scope>compile</scope>
    </dependency>
添加hsql 的jar包和链接包.
hsql的连接配置文件.
spring.properties
# database properties
app.jdbc.driverClassName=org.hsqldb.jdbcDriver
app.jdbc.url=jdbc:hsqldb:hsql://localhost
app.jdbc.username=sa
app.jdbc.password=
jdbc配置.
jdbc-context.xml
<?xml version="1.0" encoding="UTF-8"?>
<beans 	xmlns="http://www.springframework.org/schema/beans"
       	xmlns:xsi="http://www.w3.org/2001/XMLSchema-instance"
       	xmlns:p="http://www.springframework.org/schema/p"
       	xmlns:tx="http://www.springframework.org/schema/tx"
       	xmlns:context="http://www.springframework.org/schema/context"
       	xsi:schemaLocation="
			http://www.springframework.org/schema/beans
			http://www.springframework.org/schema/beans/spring-beans-3.0.xsd
			http://www.springframework.org/schema/tx
			http://www.springframework.org/schema/tx/spring-tx-3.0.xsd
			http://www.springframework.org/schema/context
			http://www.springframework.org/schema/context/spring-context-3.0.xsd
	   		">

	<context:property-placeholder location="/WEB-INF/spring.properties" />

    <!-- Enable annotation style of managing transactions -->
	<tx:annotation-driven transaction-manager="transactionManager" />

	<!-- Declare a datasource that has pooling capabilities-->
	<bean id="dataSource" class="com.mchange.v2.c3p0.ComboPooledDataSource"
				destroy-method="close"
				p:driverClass="${app.jdbc.driverClassName}"
				p:jdbcUrl="${app.jdbc.url}"
				p:user="${app.jdbc.username}"
				p:password="${app.jdbc.password}"
				p:acquireIncrement="5"
				p:idleConnectionTestPeriod="60"
				p:maxPoolSize="100"
				p:maxStatements="50"
				p:minPoolSize="10" />

	<!-- Declare a transaction manager -->
	<bean id="transactionManager" class="org.springframework.jdbc.datasource.DataSourceTransactionManager"
       			p:dataSource-ref="dataSource" />

</beans>
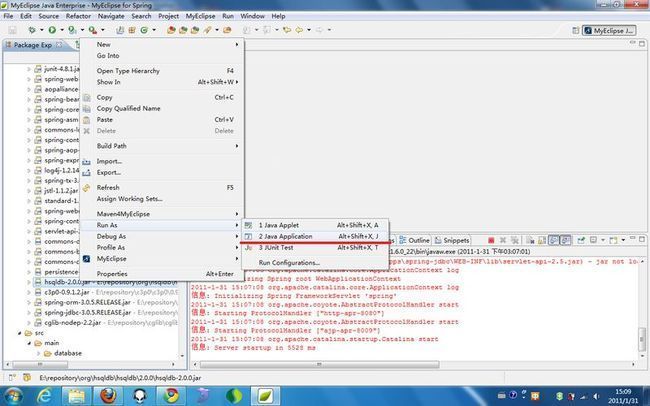
下面就是重点了,即如何启动HSQL,并添加数据.
启动服务器后,找到hsqldb-**.jar 右键点击 run as - java application
如下图.
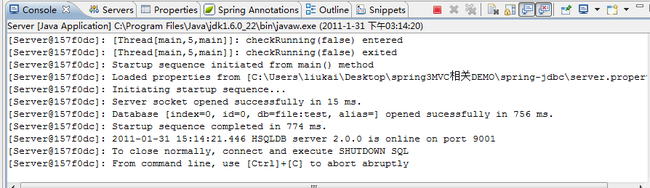
首先启动hsql服务器.
接着我们就可以在控制台看到hsql启动成功.
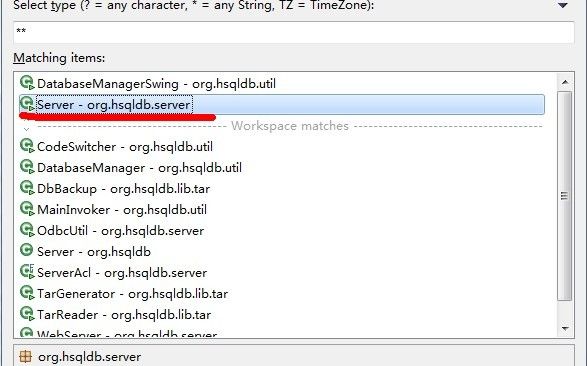
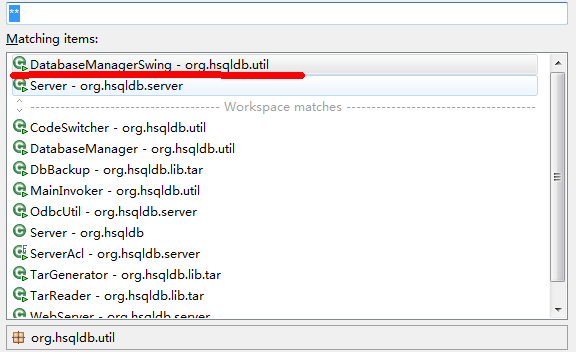
然后准备打开GUI界面,选择下面的服务.
出现图形配置界面后,选择图中的 Server 类型.
还有其它很多种类型,想知道各个的区别,自己google下就是了.这不讲理论,只讲使用.
点击OK.
然后就是在图中创建表之类的操作了.
OVER!
GOOD LUCK!