让最新的three20在xcode4.2下跑起来吧
也不太会“写字”,呵呵,全截图下来,随便看吧,很多朋友都配成功了!
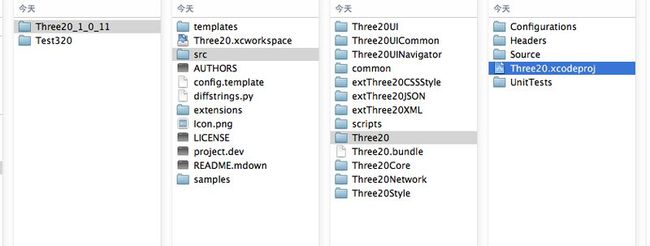
弄了好几天终于把three20弄到项目中了。
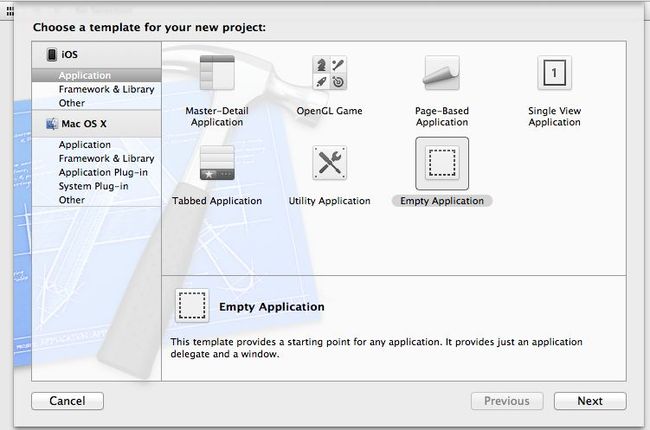
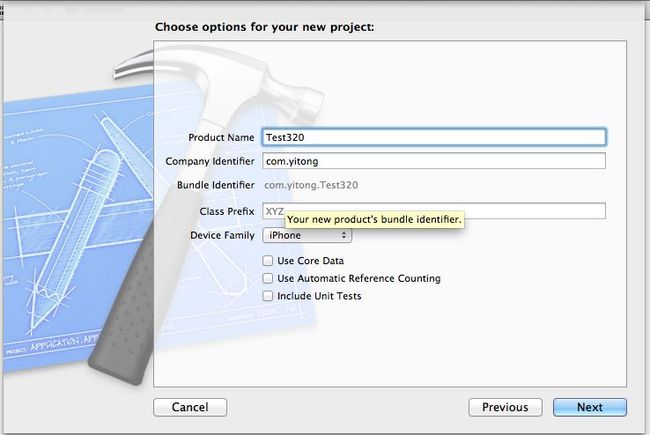
(1)新建一个空项目
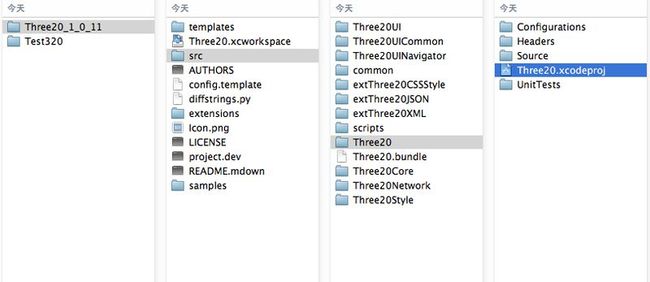
(2)将three20的文件夹复制到与新建的项目同级下(这个three20是改过一些文件后重新编译的所以文件名字改了下)
(3)选中下图中的文件
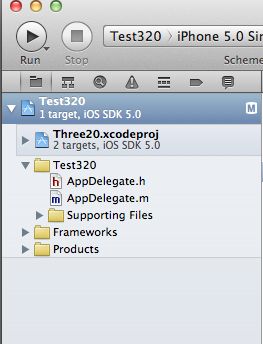
(4)将上面的文件托至新建的工程中,如下图
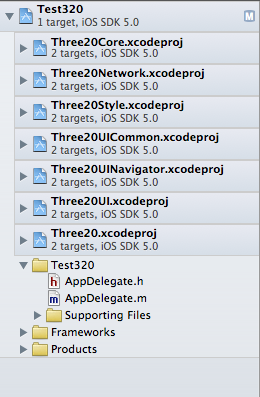
(5)看一下新拖进来的文件的结构
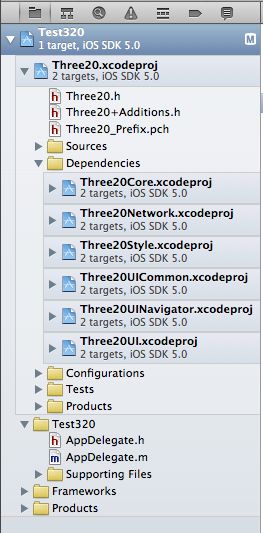
(6)选中“Dependencies文件夹”下的几个文件同样拖到新建工程下,和最先拖进来的文件同级。
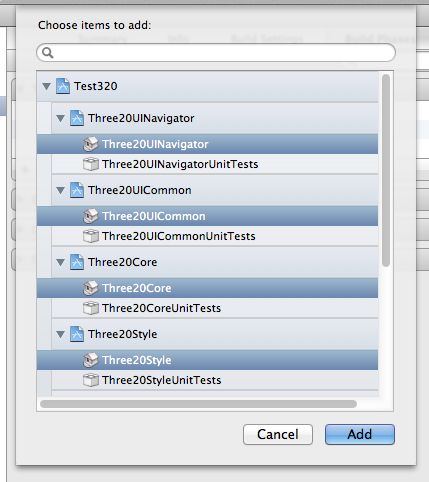
(7)点击工程 》TARGETS 》Test320 找到 “Target Dependencies” , 点击“+”号将带房子的文件加入到项目中。
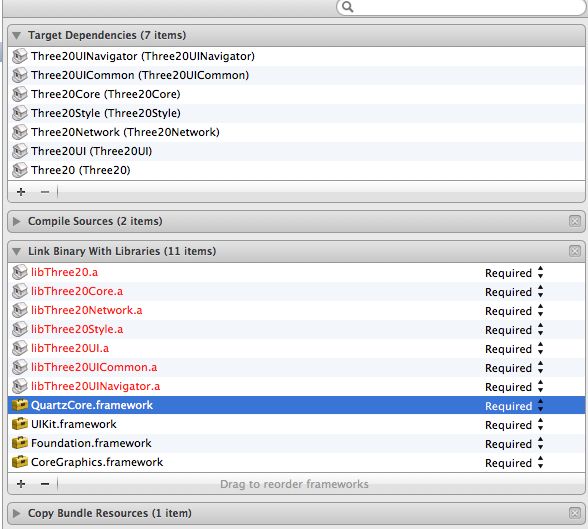
(8)点击工程 》TARGETS 》Test320 找到 “Link Binary With Libraies” , 点击“+”号将"xxx.a"的文件加入到项目中,并把QuartzCore.framework框架引入。
(9)再截个图,防止有些朋友找不到具体在那里配置
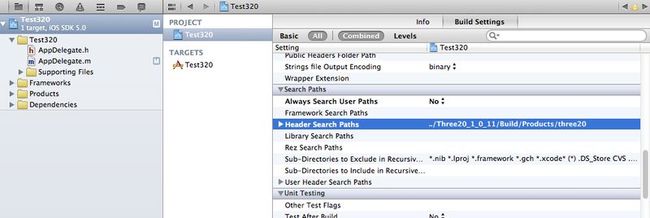
(10)点击PROJECT 下的Test320,点击选项卡的Build Settings,在Header Search Path添加Three20的头文件存放位置,下图只添加了一个包的路径(../Three20_1_0_11/Build/Products/three20),路径为相当路径,也可为绝对路径。
(11)同样的方法添加other link为-all_load -ObjC
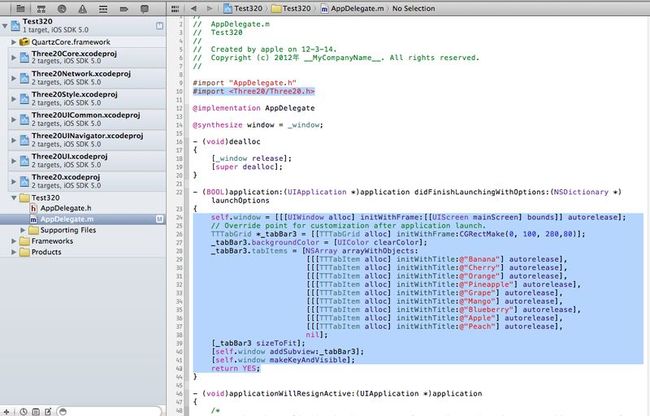
(12)开始测试吧,贴出代码,看图说话
#import <Three20/Three20.h>
⋯⋯⋯⋯⋯⋯⋯⋯⋯⋯⋯⋯⋯⋯
 self.window = [[[UIWindow alloc] initWithFrame:[[UIScreen mainScreen] bounds]] autorelease];
    // Override point for customization after application launch.
    TTTabGrid *_tabBar3 = [[TTTabGrid alloc] initWithFrame:CGRectMake(0, 100, 280,80)];
    _tabBar3.backgroundColor = [UIColor clearColor];
    _tabBar3.tabItems = [NSArray arrayWithObjects:
                         [[[TTTabItem alloc] initWithTitle:@"Banana"] autorelease],
                         [[[TTTabItem alloc] initWithTitle:@"Cherry"] autorelease],
                         [[[TTTabItem alloc] initWithTitle:@"Orange"] autorelease],
                         [[[TTTabItem alloc] initWithTitle:@"Pineapple"] autorelease],
                         [[[TTTabItem alloc] initWithTitle:@"Grape"] autorelease],
                         [[[TTTabItem alloc] initWithTitle:@"Mango"] autorelease],
                         [[[TTTabItem alloc] initWithTitle:@"Blueberry"] autorelease],
                         [[[TTTabItem alloc] initWithTitle:@"Apple"] autorelease],
                         [[[TTTabItem alloc] initWithTitle:@"Peach"] autorelease],
                         nil];
    [_tabBar3 sizeToFit];
    [self.window addSubview:_tabBar3];
    [self.window makeKeyAndVisible];
    return YES;
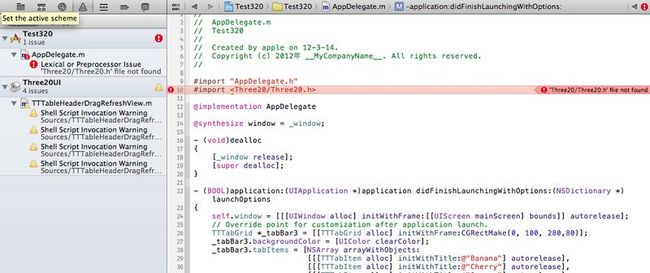
(13)现在编译运行,哈哈,回报错的。
(14)双击下图中的文件后再运行下工程
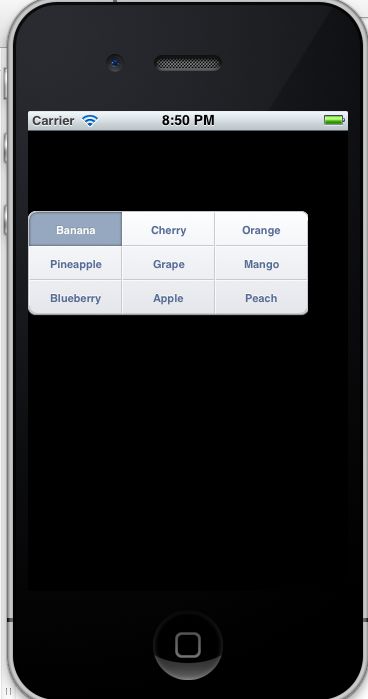
(15)成功拉
