在Eclipse中集成JRebel实现Java热部署
How to install and use JRebel in Tomcat, JBoss or Jetty with the Eclipse IDE
September 9th, 2009 by Toomas RömerAlthough this tutorial concerns the Tomcat container, exactly the same instructions also can be used for JBoss and Jetty containers.
Compared to other containers out there, the Tomcat web container is one of the fastest when it comes to startup and redeploy times. Still, in asurvey we conducted, developers estimate spending 18% of their coding time (about 145 hours annually, per developer – somewhere between 3-4, full, 40-hour workweeks) waiting for applications to redeploy. JRebel eliminates the need to redeploy in 80% of situations, and it’s easy to get started. In the embedded video you can take a quick look at how coding looks when using JRebel.
Tutorial
In this tutorial we explain how to install and use it step-by-step. We assume that you are using Eclipse 3.x with Tomcat 5.x or later. Most of the steps will be applicable to other versions as well, but it may look different from the screenshots included.
Contents:
- STEP 1: Install JRebel
- STEP 2: Installing JRebel Eclipse IDE plugin
- STEP 3: Make a rebel.xml for your application
- STEP 4: Configuring the Eclipse WTP IDE
- STEP 5: Configuring the Eclipse IDE
- STEP 6: Success!
STEP 1: Install JRebel
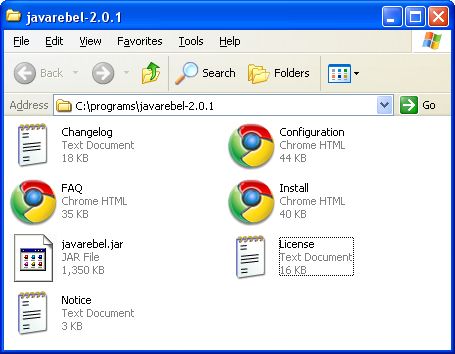
The latest stable version of JRebel can be downloaded here. Unpack it to a directory of your choice.
STEP 2: Installing JRebel Eclipse IDE plugin
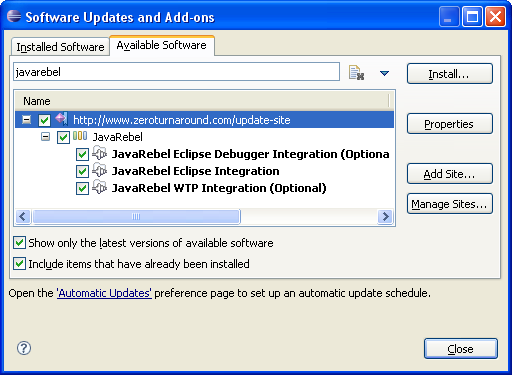
The JRebel Eclipse IDE plugin was introduced with JRebel 2.0 and makes configuring and using JRebel considerably easier. You can install the plugin by going to Help » Software updates » Available software » Add site and use the http://www.zeroturnaround.com/update-site/ URL as the update site.
STEP 3: Make a rebel.xml for your application
In order to do it’s magic, JavaRebel needs to know where your classes and resources are. We’ll use a rebel.xml configuration file to tell it. This is mandatory when you deploy your app as a WAR/EAR. You’ll need to have one rebel.xml file per module. This includes both web and EJB modules. The rebel.xml configuration file should be placed in your WEB-INF/classes directory in the case of a web module and in the jar root in the case of an ejb module. Put it in the root of a source or resource folder in your project (the same place where the .properties files are).
If you use Maven you can use the JavaRebel Maven plugin that will generate the rebel.xml in accordance with the module pom.xml as described in theMaven Plugin configuration manual.
In 99% of cases, you probably use one module per project. In these cases, the JavaRebel Eclipse IDE plugin can generate the rebel.xml file for you, on a per project basis. If your project is one of the exceptions, edit the file manually as described in the Installation manual, otherwise generate the rebel.xml like this:
Click on your project and pick Generate rebel.xml.
Repeat this for all projects that you’d like to update with JRebel.
If you’d like to use one rebel.xml for your whole team, start with the generated rebel.xml, then replace the absolute paths to your workspace with a system property. JavaRebel will expand expressions like “${myProject.root}” in rebel.xml to a system property that you can pass to the application container as -DmyProject.root=c:/myWorkspace/myProject. This allows to you to use a single configuration for everyone and then customize it when starting the server.
STEP 4: Configuring the Eclipse WTP IDE
You may skip this step if you run Tomcat outside of the Eclipse IDE.
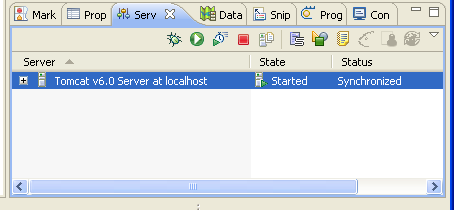
Open the Servers View and double click the Tomcat Server that your application is deployed to (if you don’t see the Servers View go to Window » Show View » Servers).
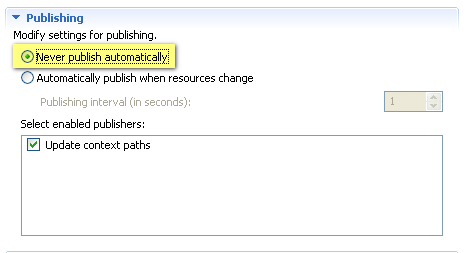
Open Publishing and choose Never publish automatically.
It may seem strange to disable automatic publishing, but as JRebel will take care of updates from now on it would just slow you down.
Open JavaRebel Integration and check Enable JavaRebel agent.
STEP 5: Configuring the Eclipse IDE
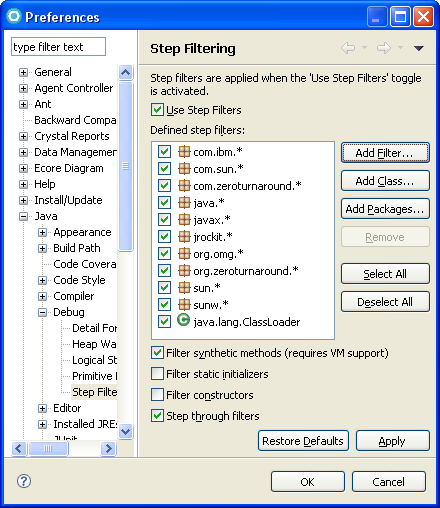
Go to Window » Preferences and from there to Java » Debug » Step Filtering.
Check Use Step Filters, Filter synthetic methods, and Step through filters. Now check all the default filters and use the Add Filter button to add com.zeroturnaround.* and org.zeroturnaround.*.
Now go to Project » Build automatically and make sure it is checked.
STEP 6: Success!
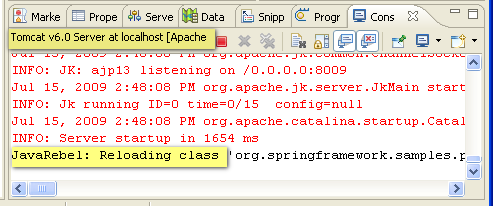
To check that the installation was successful, access a page that uses a class, change that class in the IDE, press Save, access the page again and look for the following message in the console:
Now that you’re up and running, it’s time to enjoy coding without the need to redeploy. If you have any specific questions JRebel, the Forum is the best place to ask, so that other people get to hear the answer as well. Otherwise, you can contact us at [email protected].
If you like what you see, please give us a quick mention on your blog or twitter (you can even follow us here).
Have a great day!
Find out more:
