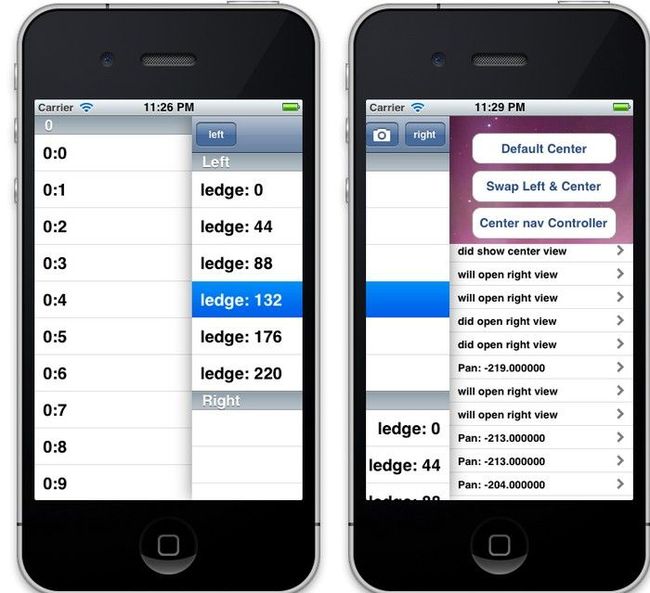
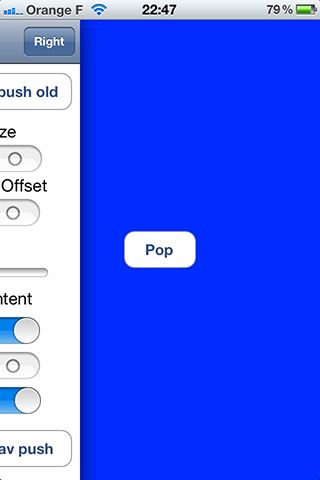
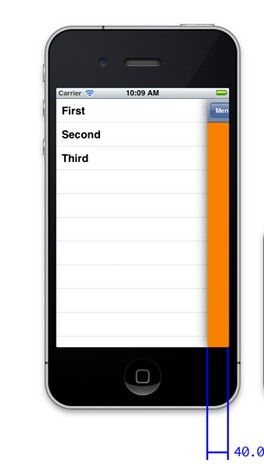
网 上有很多第三方的类库实现了这种效果,其实自己代码写的话也是很简单的,下面我将介绍两种方法实现slide view。---- 一种是用第三方类库IIViewDeckController这个类库实现的效果比起其他的都好,另一种是自己代码实现这种效果,效果还ok。
实现方法一(使用第三方库IIViewDeckController):
https://github.com/Inferis/ViewDeck 这个是类库的下载地址,上面有介绍具体如何使用。不过大都不是用storyboard实现的,那么这里我介绍的是如何用storyboard实现。
(1 )方法①
首先注意要导入相关的头文件,并且Link the QuartzCore.framework
然后在storyboard中添加三个navigation视图,分别表示中间,左边和右边的视图,并且创建相应的controller。
我的处理是初始化一个IIViewDeckController 实例然后作为子视图添加到最左边的视图中,而用右边的三个navigation视图 作为IIViewDeckController 实例对象的初始参数。
其中要注意的是,要分别在三个navigation视图添加identifier,注意是添加到的是navigation controller对应的视图(即第一个)。
下面看看代码:
[cpp] view plaincopyprint?
- - (void)viewDidLoad
- {
- [super viewDidLoad];
- // Do any additional setup after loading the view, typically from a nib.
- UIStoryboard *storyboard = [UIStoryboard storyboardWithName:@"MainStoryboard" bundle:nil];
- CenterViewController *centerController = (CenterViewController *)[storyboard instantiateViewControllerWithIdentifier:@"CenterViewController"];
- LeftViewController *leftController = (LeftViewController *)[storyboard instantiateViewControllerWithIdentifier:@"LeftViewController"];
- RightViewController *rightController = (RightViewController *)[storyboard instantiateViewControllerWithIdentifier:@"RightViewController"];
- self.containerController = [[IIViewDeckController alloc] initWithCenterViewController:centerController leftViewController:leftController rightViewController:rightController];
- self.containerController.leftSize = 100;
- self.containerController.rightSize = 200;
- self.containerController.view.frame = self.view.bounds;
- [self.view addSubview:self.containerController.view];
- }
这里创建一个IIViewDeckController 实例,然后把这个实例对象的视图作为子视图添加到这个view中,这样就实现了跳转到我们需要的IIViewDeckController那里了,让我们 创建的IIViewDeckController实例处理左右滑动出现侧边栏的任务了。
(2 )方法②
这里再介绍一种实现方式:让最左边这个视图继承自IIViewDeckController然后在实现文件添加这个方法:
[cpp] view plaincopyprint?
- - (id)initWithCoder:(NSCoder *)aDecoder
- {
- self = [super initWithCoder:aDecoder];
- UIStoryboard *storyboard = [UIStoryboard storyboardWithName:@"MainStoryboard" bundle:nil];
- self = [super initWithCenterViewController:[storyboard instantiateViewControllerWithIdentifier:@"CenterViewController"]
- leftViewController:[storyboard instantiateViewControllerWithIdentifier:@"LeftViewController"]
- rightViewController:[storyboard instantiateViewControllerWithIdentifier:@"RightViewController"]];
- if (self) {
- // Add any extra init code here
- }
- return self;
- }
实现的效果是:
实现方式二(不使用第三方库):
下面简单说说这种滑动出现 侧边栏是怎么回事,明显这就是一个视图层叠,那么简单点的话,就是往一个视图里面添加几个视图,然后添加swipe手势,左右滑动时,响应事件处理,在事 件处理中让最上面的视图的位置发生变化,也就是视图移动,这样就可以显示出下面的视图,这样大致就可以解决了。
这里同样也是使用storyboard。而且storyboard里面的内容和上面的一样(其实解决方式借鉴了上面的方法①)。
首先分别创建对应的中间,左边,右边视图的controller(tableview controller)。
然后创建三个对应的属性
[cpp] view plaincopyprint?
- @property(nonatomic, strong) MainViewController *centerController;
- @property(nonatomic, strong) RightViewController *rightController;
- @property(nonatomic, strong) LeftViewController *leftController;
- @property(nonatomic, strong) MainViewController *centerController;
- @property(nonatomic, strong) RightViewController *rightController;
- @property(nonatomic, strong) LeftViewController *leftController;
接着作为subview添加到视图中并添加swipe手势。处理的代码如下:
[cpp] view plaincopyprint?
- - (void)viewDidLoad
- {
- [super viewDidLoad];
- // Do any additional setup after loading the view.
- UIStoryboard *storyboard = [UIStoryboard storyboardWithName:@"MainStoryboard" bundle:nil];
- _centerController = (MainViewController *)[storyboard instantiateViewControllerWithIdentifier:@"MainViewController"];
- _leftController = (LeftViewController *)[storyboard instantiateViewControllerWithIdentifier:@"LeftViewController"];
- _rightController = (RightViewController *)[storyboard instantiateViewControllerWithIdentifier:@"RightViewController"];
- [self.view addSubview:_centerController.view];
- [_centerController.view setTag:1];
- [_centerController.view setFrame:self.view.bounds];
- [self.view addSubview:_leftController.view];
- [_leftController.view setTag:2];
- [_leftController.view setFrame:self.view.bounds];
- [self.view addSubview:_rightController.view];
- [_rightController.view setTag:3];
- [_rightController.view setFrame:self.view.bounds];
- [self.view bringSubviewToFront:_centerController.view];
- //add swipe gesture
- UISwipeGestureRecognizer *swipeGestureRight = [[UISwipeGestureRecognizer alloc] initWithTarget:self action:@selector(swipeGesture:)];
- [swipeGestureRight setDirection:UISwipeGestureRecognizerDirectionRight];
- [_centerController.view addGestureRecognizer:swipeGestureRight];
- UISwipeGestureRecognizer *swipeGestureLeft = [[UISwipeGestureRecognizer alloc] initWithTarget:self action:@selector(swipeGesture:)];
- [swipeGestureLeft setDirection:UISwipeGestureRecognizerDirectionLeft];
- [_centerController.view addGestureRecognizer:swipeGestureLeft];
- }
- -(void) swipeGesture:(UISwipeGestureRecognizer *)swipeGestureRecognizer {
- CALayer *layer = [_centerController.view layer];
- layer.shadowColor = [UIColor blackColor].CGColor;
- layer.shadowOffset = CGSizeMake(1, 1);
- layer.shadowOpacity = 1;
- layer.shadowRadius = 20.0;
- if (swipeGestureRecognizer.direction == UISwipeGestureRecognizerDirectionRight) {
- [_leftController.view setHidden:NO];
- [_rightController.view setHidden:YES];
- [UIView beginAnimations:nil context:nil];
- [UIView setAnimationCurve:UIViewAnimationCurveEaseIn];
- if (_centerController.view.frame.origin.x == self.view.frame.origin.x || _centerController.view.frame.origin.x == -100) {
- [_centerController.view setFrame:CGRectMake(_centerController.view.frame.origin.x+100, _centerController.view.frame.origin.y, _centerController.view.frame.size.width, _centerController.view.frame.size.height)];
- }
- [UIView commitAnimations];
- }
- if (swipeGestureRecognizer.direction == UISwipeGestureRecognizerDirectionLeft) {
- [_rightController.view setHidden:NO];
- [_leftController.view setHidden:YES];
- [UIView beginAnimations:nil context:nil];
- [UIView setAnimationCurve:UIViewAnimationCurveEaseOut];
- if (_centerController.view.frame.origin.x == self.view.frame.origin.x || _centerController.view.frame.origin.x == 100) {
- [_centerController.view setFrame:CGRectMake(_centerController.view.frame.origin.x-100, _centerController.view.frame.origin.y, _centerController.view.frame.size.width, _centerController.view.frame.size.height)];
- }
- [UIView commitAnimations];
- }
- }
下面稍稍解说一下在swipe手势的事件处理中的一些处理: ①为center视图添加阴影边框
②这里swipe手势响应的是左右滑动,右滑动时是要出现左视图,所以要隐藏右视图,同理就知道如何处理左滑动了。
③cente 视图移动时添加了动画
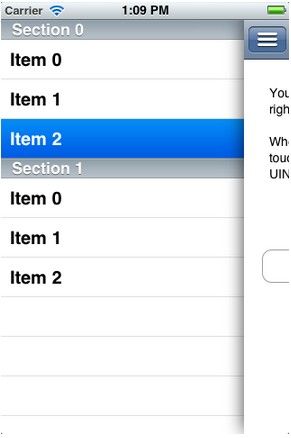
说明:我这样处理大致还是可以实现这种效果的。下面附上一张在我应用在sina weibo demo中的效果图:
还不错吧!
下面进行一点点补充:上面 我们实现的都是通过swipe滑动最上层的view来实现左右侧移,那么这样就太局限了,那么如何实现例如点击下面view中的LEFT按键来移动上层的 view呢?其实也很简单,我这里的处理是用notification通知,就是在button那里发送一个通知,在上层的view监听。当然呢,也可以 用delegate和kvo实现,但是这个。。。暂时没有研究,就算了,有空再了解一下。
下面附加一下代码:
在下面那层view的controller添加这个方法:
[cpp] view plaincopyprint?
- - (IBAction)BackButton:(id)sender {
- NSString *myString = @"back";
- [[NSNotificationCenter defaultCenter] postNotificationName: @"back" object:myString userInfo: nil];
- }
- - (IBAction)BackButton:(id)sender {
- NSString *myString = @"back";
- [[NSNotificationCenter defaultCenter] postNotificationName: @"back" object:myString userInfo: nil];
- }
在上面这个层的view的controller添加下面的代码:
[cpp] view plaincopyprint?
- [[NSNotificationCenter defaultCenter] addObserver:self selector:@selector(BackFunc:) name: @"back" object:nil];
- id) BackFunc:(NSNotification*) notification {
- NSString *get = [notification object];
- if ([get isEqualToString:@"back"]) {
- [UIView beginAnimations:nil context:nil];
- [UIView setAnimationCurve:UIViewAnimationCurveEaseOut];
- [_centerController.view setFrame:CGRectMake(0, _centerController.view.frame.origin.y, _centerController.view.frame.size.width, _centerController.view.frame.size.height)];
- [UIView commitAnimations];
- }
- [[NSNotificationCenter defaultCenter] addObserver:self selector:@selector(BackFunc:) name: @"back" object:nil];
- -(void) BackFunc:(NSNotification*) notification {
- NSString *get = [notification object];
- if ([get isEqualToString:@"back"]) {
- [UIView beginAnimations:nil context:nil];
- [UIView setAnimationCurve:UIViewAnimationCurveEaseOut];
- [_centerController.view setFrame:CGRectMake(0, _centerController.view.frame.origin.y, _centerController.view.frame.size.width, _centerController.view.frame.size.height)];
- [UIView commitAnimations];
- }
- }
IIViewDeckController/ViewDeck 附件:
| /cms/uploads/soft/130603/4196-1306031H336.zip |
类似 Path 2.0 的视图左右滑动的效果,可向左或者向右顺滑的滑动。支持ARC和non-ARC,默认ARC。
PPRevealSideViewController 附件:
| /cms/uploads/soft/130603/4196-1306031H409.zip |
PPRevealSideViewController实现了类似Facebook和Path的界面滑出效果,可以用来创建常见的抽屉式导航,包括Pan和Tap手势。支持ARC,兼容iOS 4.0-iOS 6.0系统。
JASidePanels 附件:
| /cms/uploads/soft/130603/4196-1306031H442.zip |
JASidePanels 是一个 UIViewController 容器,可从中间界面向左右滑动展现其他界面,设计来源于Path 2.0和Facebook的iOS app。
| /cms/uploads/soft/130603/4196-1306031H511.zip |
ECSlidingViewController灵感还是来来源于Path2.0和Facebook的iOS app,是一个ViewController容器,将子ViewController分成两层,显示下边一层内容时,上边一层不完全滑出,从而进行层的切换。
类似的还有MFSideMenu 附件:
| /cms/uploads/soft/130603/4196-1306031H537.zip |
OCExpandableButton:类似Sparrow(Mail App)可扩展按钮菜单
原生Objective C中一款简单的可扩展按钮菜单,可以展开或者隐藏,类似于Sparrow(Mail App)的风格,使用起来非常简单。


