重头开始学 Spring JPetStore 3
按
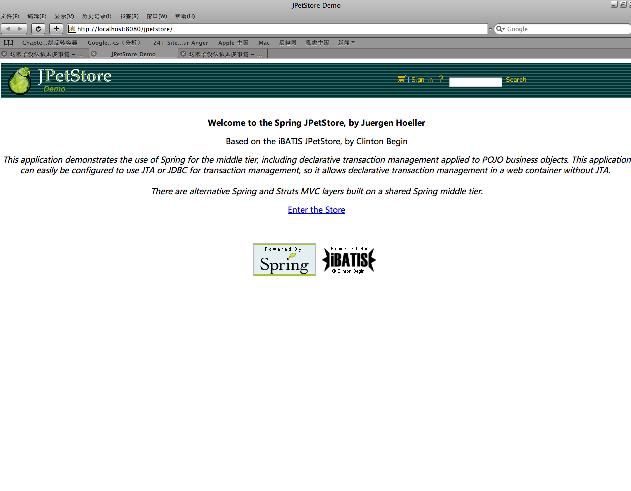
重头开始学 Spring JPetStore 2 中的提示部署启动成功。出现了以下页面。

现在让我们来看看它在启动过程中时到底做了什么?
先看看web.xml
<!--
- Loads the root application context of this web app at startup,
- by default from "/WEB-INF/applicationContext.xml".
- Note that you need to fall back to Spring's ContextLoaderServlet for
- J2EE servers that do not follow the Servlet 2.4 initialization order.
-
- Use WebApplicationContextUtils.getWebApplicationContext(servletContext)
- to access it anywhere in the web application, outside of the framework.
-
- The root context is the parent of all servlet-specific contexts.
- This means that its beans are automatically available in these child contexts,
- both for getBean(name) calls and (external) bean references.
-->
<listener>
<listener-class>org.springframework.web.context.ContextLoaderListener</listener-class>
</listener>
这里 spring 做了大量的工作完成了bean的组装,暂时先带过。
配置文件在
<context-param>
<param-name>contextConfigLocation</param-name>
<param-value>/WEB-INF/dataAccessContext-local.xml /WEB-INF/applicationContext.xml</param-value>
<!--
<param-value>/WEB-INF/dataAccessContext-jta.xml /WEB-INF/applicationContext.xml</param-value>
-->
</context-param>
中指定了。
加载spring mvc 配置文件。默认文件名称为{servlet-name}-servlet.xml 这里就是petstore-servlet.xml了。
下面这片配置文件是关于Struts ,Spring's HTTP invoker , Web Service remoting的配置文件
<!--
- Struts servlet that dispatches requests to registered actions.
- Reads its configuration from "struts-config.xml".
-
- A web app can just contain one such servlet.
- If you need multiple namespaces, use Struts' module mechanism.
-->
<servlet>
<servlet-name>action</servlet-name>
<servlet-class>org.apache.struts.action.ActionServlet</servlet-class>
<load-on-startup>3</load-on-startup>
</servlet>
<!--
- Dispatcher servlet definition for HTTP remoting via Hessian, Burlap, and
- Spring's HTTP invoker (see remoting-servlet.xml for the controllers).
-->
<servlet>
<servlet-name>remoting</servlet-name>
<servlet-class>org.springframework.web.servlet.DispatcherServlet</servlet-class>
<load-on-startup>4</load-on-startup>
</servlet>
<!--
- Servlet definition for Web Service remoting via Apache Axis
- (see server-config.wsdd for Axis configuration).
-->
<servlet>
<servlet-name>axis</servlet-name>
<servlet-class>org.apache.axis.transport.http.AxisServlet</servlet-class>
<load-on-startup>5</load-on-startup>
</servlet>
<!--
- Dispatcher servlet mapping for the main web user interface.
- Either refering to "petstore" for the Spring web MVC dispatcher,
- or to "action" for the Struts dispatcher.
-
- Simply comment out the "petstore" reference in favour of "action"
- to switch from the Spring web tier to the Struts web tier.
-->
<servlet-mapping>
<servlet-name>petstore</servlet-name>
<!--
<servlet-name>action</servlet-name>
-->
<url-pattern>*.do</url-pattern>
</servlet-mapping>
<!--
- Dispatcher servlet mapping for HTTP remoting via Hessian, Burlap, and
- Spring's HTTP invoker (see remoting-servlet.xml for the controllers).
-->
<servlet-mapping>
<servlet-name>remoting</servlet-name>
<url-pattern>/remoting/*</url-pattern>
</servlet-mapping>
<!--
- Servlet mapping for Web Service remoting via Apache Axis
- (see server-config.wsdd for Axis configuration).
-->
<servlet-mapping>
<servlet-name>axis</servlet-name>
<url-pattern>/axis/*</url-pattern>
</servlet-mapping>
所有 .do 的请求 都交给 org.springframework.web.servlet.DispatcherServlet 这个Spring控制器来分发了!
所有的 .action 请求都由 org.apache.struts.action.ActionServlet 也就是 Struts 处理。
下面类似的配置类似,就不再说了。
<welcome-file-list>
<welcome-file>index.html</welcome-file>
</welcome-file-list>
这个就不用说了吧。也就是刚看到的 展示页面了。
接下来 就顺着这个首页的 链接 顺藤摸瓜 看看spring mvc 的处理过程了吧

现在让我们来看看它在启动过程中时到底做了什么?
先看看web.xml
引用
<!--
- Loads the root application context of this web app at startup,
- by default from "/WEB-INF/applicationContext.xml".
- Note that you need to fall back to Spring's ContextLoaderServlet for
- J2EE servers that do not follow the Servlet 2.4 initialization order.
-
- Use WebApplicationContextUtils.getWebApplicationContext(servletContext)
- to access it anywhere in the web application, outside of the framework.
-
- The root context is the parent of all servlet-specific contexts.
- This means that its beans are automatically available in these child contexts,
- both for getBean(name) calls and (external) bean references.
-->
<listener>
<listener-class>org.springframework.web.context.ContextLoaderListener</listener-class>
</listener>
这里 spring 做了大量的工作完成了bean的组装,暂时先带过。
配置文件在
引用
<context-param>
<param-name>contextConfigLocation</param-name>
<param-value>/WEB-INF/dataAccessContext-local.xml /WEB-INF/applicationContext.xml</param-value>
<!--
<param-value>/WEB-INF/dataAccessContext-jta.xml /WEB-INF/applicationContext.xml</param-value>
-->
</context-param>
中指定了。
引用
<!--
- Spring web MVC servlet that dispatches requests to registered handlers.
- Has its own application context, by default defined in "{servlet-name}-servlet.xml",
- i.e. "petstore-servlet.xml" in this case.
-
- A web app can contain any number of such servlets.
- Note that this web app has a shared root application context, serving as parent
- of all DispatcherServlet contexts.
-->
<servlet>
<servlet-name>petstore</servlet-name>
<servlet-class>org.springframework.web.servlet.DispatcherServlet</servlet-class>
<load-on-startup>2</load-on-startup>
</servlet>
加载spring mvc 配置文件。默认文件名称为{servlet-name}-servlet.xml 这里就是petstore-servlet.xml了。
下面这片配置文件是关于Struts ,Spring's HTTP invoker , Web Service remoting的配置文件
引用
<!--
- Struts servlet that dispatches requests to registered actions.
- Reads its configuration from "struts-config.xml".
-
- A web app can just contain one such servlet.
- If you need multiple namespaces, use Struts' module mechanism.
-->
<servlet>
<servlet-name>action</servlet-name>
<servlet-class>org.apache.struts.action.ActionServlet</servlet-class>
<load-on-startup>3</load-on-startup>
</servlet>
<!--
- Dispatcher servlet definition for HTTP remoting via Hessian, Burlap, and
- Spring's HTTP invoker (see remoting-servlet.xml for the controllers).
-->
<servlet>
<servlet-name>remoting</servlet-name>
<servlet-class>org.springframework.web.servlet.DispatcherServlet</servlet-class>
<load-on-startup>4</load-on-startup>
</servlet>
<!--
- Servlet definition for Web Service remoting via Apache Axis
- (see server-config.wsdd for Axis configuration).
-->
<servlet>
<servlet-name>axis</servlet-name>
<servlet-class>org.apache.axis.transport.http.AxisServlet</servlet-class>
<load-on-startup>5</load-on-startup>
</servlet>
引用
<!--
- Dispatcher servlet mapping for the main web user interface.
- Either refering to "petstore" for the Spring web MVC dispatcher,
- or to "action" for the Struts dispatcher.
-
- Simply comment out the "petstore" reference in favour of "action"
- to switch from the Spring web tier to the Struts web tier.
-->
<servlet-mapping>
<servlet-name>petstore</servlet-name>
<!--
<servlet-name>action</servlet-name>
-->
<url-pattern>*.do</url-pattern>
</servlet-mapping>
<!--
- Dispatcher servlet mapping for HTTP remoting via Hessian, Burlap, and
- Spring's HTTP invoker (see remoting-servlet.xml for the controllers).
-->
<servlet-mapping>
<servlet-name>remoting</servlet-name>
<url-pattern>/remoting/*</url-pattern>
</servlet-mapping>
<!--
- Servlet mapping for Web Service remoting via Apache Axis
- (see server-config.wsdd for Axis configuration).
-->
<servlet-mapping>
<servlet-name>axis</servlet-name>
<url-pattern>/axis/*</url-pattern>
</servlet-mapping>
所有 .do 的请求 都交给 org.springframework.web.servlet.DispatcherServlet 这个Spring控制器来分发了!
所有的 .action 请求都由 org.apache.struts.action.ActionServlet 也就是 Struts 处理。
下面类似的配置类似,就不再说了。
引用
<welcome-file-list>
<welcome-file>index.html</welcome-file>
</welcome-file-list>
这个就不用说了吧。也就是刚看到的 展示页面了。
接下来 就顺着这个首页的 链接 顺藤摸瓜 看看spring mvc 的处理过程了吧