Nexus 2.0.5 私人服务器构建
1. 首先第一步,我们需要下载nexus-2.0.5-bundle.zip(此版本内置jetty容器,所以方便使用,不用安装其它如tomcat等容器)
2. 由于nexus运行依赖于JRE,所以我们需要设置JRE环境变量,如下图所示:

设置完JAVA_HOME环境变量以后,大家都知道需要将%JAVA_HOME%\bin添加到path中去,这里不多说,自己配置。
3. 下载完nexus并设置好JRE这些准备工作以后,下面进入主题,解压nexus-2.0.5-bundle.zip至任意磁盘,并进入nexus-2.0.5-bundle\nexus-2.0.5\bin\jsw\windows-x86-32目录下,首先运行install-nexus.bat安装服务,然后运行start-nexus.bat启动服务,若出现nexus started则表明nexus服务启动成功,若启动失败,有可能是JRE配置不对,自己检查下。
4. 启动成功以后,下面我们来访问nexus,在浏览器中输入http://localhost:8081/nexus:
nexus默认登录用户名/密码为:admin/admin123
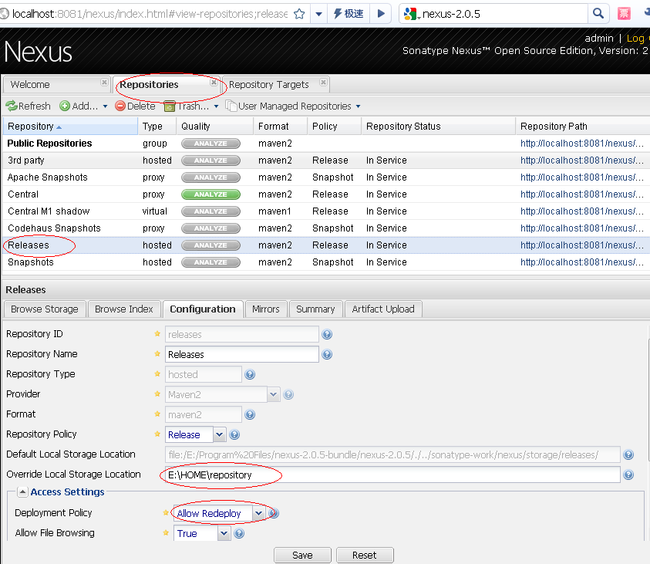
5. nexus有什么用,不用说大家都知道,登录成功进入Repositories选中Releases进行如上设置,如我们指定了nexus的本地仓库:E:\HOME\repository,发布策略一定要指定为:Allow Redeploy否则在进行mvn deploy不能发布。同样方式配置Snapshots,这里不多说,自己尝试配置。
6. 接下来我们将演示如何与maven结合使用发布项目,首先在pom.xml中配置distributionManagement:
<distributionManagement> <repository> <id>releases</id> <url>http://localhost:8081/nexus/content/repositories/releases</url> </repository> <snapshotRepository> <id>snapshots</id> <url>http://localhost:8081/nexus/content/repositories/snapshots</url> </snapshotRepository> </distributionManagement>
<plugin> <groupId>org.apache.maven.plugins</groupId> <artifactId>maven-release-plugin</artifactId> <version>2.0-beta-8</version> </plugin>
这里的repository和snapshotRepository一定要与nexus中的配置一样,否则deploy将不能成功:
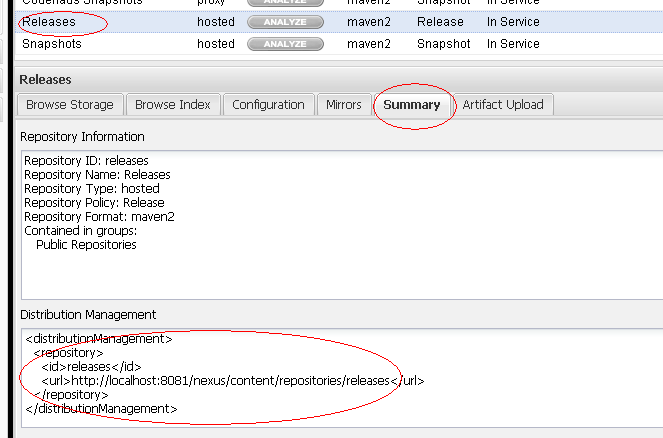
同样的方式进入Snapshots查看Summary中的配置,这里不多说了。
7. 在当前使用的settings.xml中配置nexus仓库ID和用户名密码:
<server> <id>releases</id> <username>admin</username> <password>admin123</password> </server>
8. 以后所有配置完以后,我们就可以发布我们的jar,war等文件了,切换到你当前maven创建的项目,并运行mvn deploy将进行构建并发布:
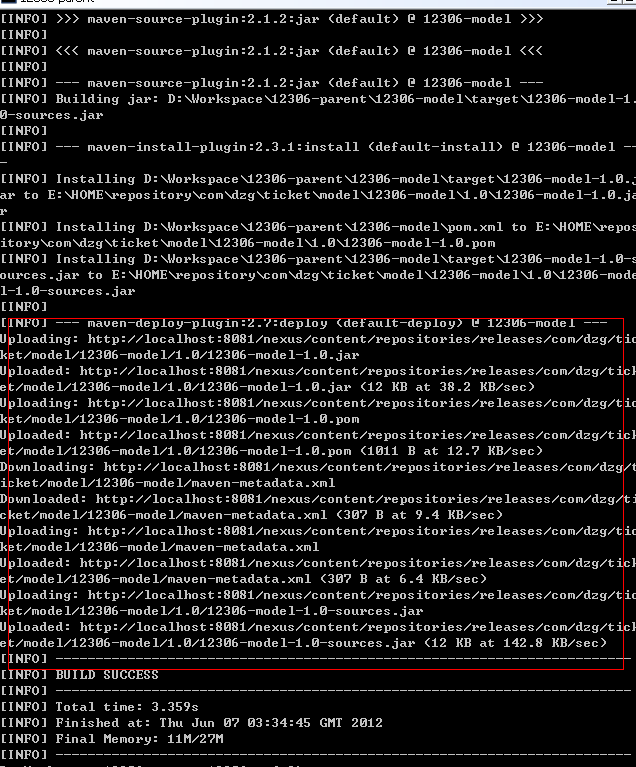
从上图我们可以看出,我们的jar已经成功发布到http://localhost:8081/nexus/content/repositories/releases
至此,所有nexus发布工作完毕,祝大家好运。
此发布过程以当前12306项目为例,项目成品可通过以下超链接进入: