Silverlight & Blend动画设计系列五:故事板(StoryBoards)和动画(Animations)
正如你所看到的,Blend是一个非常强大的节约时间的设计工具,在Blend下能够设计出很多满意的动画作品,或许他具体是怎么实现的,通过什么方式实现的我们还是一无所知。本篇将续前面几篇基础动画之上,详细介绍Silverlight里提供故事板(StoryBorards)的属性和各种不同类型的动画(Animations)的详细知识点,揭晓在Blend下设计动画的内幕故事。
一、故事板(StoryBoard)属性
Silvelight中的故事板(StoryBoard)提供了管理时间线的功能接口,可以用来控制一个或多个Silverlight动画进程,故我也称其为动画时间线容器。如下XAML代码块演示了通过StoryBoard来管理了名为GreenBall的元素在X坐标方向上的偏移变换动画。
< DoubleAnimationUsingKeyFrames BeginTime ="00:00:00" Storyboard.TargetName ="GreenBall"
Storyboard.TargetProperty ="(UIElement.RenderTransform).(TransformGroup.Children)[3].(TranslateTransform.X)" >
< EasingDoubleKeyFrame KeyTime ="00:00:02" Value ="540" />
</ DoubleAnimationUsingKeyFrames >
</ Storyboard >
StoryBoard提供了六个常用的动画属性选项,它们分别是:AutoReverse,BeginTime,Duration,FillBehavior,RepeatBehavior,SpeedRatio。通过这六个属性可以用来控制动画的基本行为动作,比如想要实现动画的缓冲时间,就需要用到Duration属性;设置动画的开始时间则用BeginTime;如果动画执行完后根据执行路线反向执行到原始状态则需要使用AutoReverse;如果需要设置动画的运行速度则使用SpeedRatio就可以完成。以下代码块演示了AutoReverse属性的使用,动画运行完后将按着原来的运行路线进行反向运行。更多详细可参考这篇博文介绍:《动画基础快速入门Animation》或者MSDN。
< DoubleAnimationUsingKeyFrames BeginTime ="00:00:00" Storyboard.TargetName ="GreenBall"
Storyboard.TargetProperty ="(UIElement.RenderTransform).(TransformGroup.Children)[3].(TranslateTransform.X)" >
< EasingDoubleKeyFrame KeyTime ="00:00:02" Value ="540" />
</ DoubleAnimationUsingKeyFrames >
</ Storyboard >
Storyboard的属性是可以组合应用的,如上代码块给动画设置了AutoReverse属性,使其在动画执行完后通过原来的运行路径进行回滚动画,可以给该动画时间线容器添加一个BeginTime属性,使其在程序加载后5秒钟才开始执行动画,这样就使用到了两个属性,如下代码块:
......
</ Storyboard >
二、动画类型(Types of animation)
Silverlight中的动画主要分From/To/By和关键帧动画两种类型。
From/To/By动画也称为线性插值动画(Linear Interpolation),是Silverlight类型中最简单的一种动画,只需要设置开始(From)、结束(To)和动画值(By)就可以完成动画的创建,Silverlight 3中提供了三种基础的From/To/By动画类型:DoubleAnimation、ColorAnimation和PointAnimation.
关键帧动画比From/To/By动画更加强大,无需指定动画的开始、结束以及动画缓冲时间等相关参数,只需要关注关键帧和如何去控制动画就行了。Silverlight 3中提供了四种基本的关键帧动画:缓和(Easing)、线性(Linear)、样条(Spline)和离散(discreet)。
DoubleAnimation的使用是非常简单的,只需要搞清楚From/To/By三要素就基本掌握了该类型动画的使用,下面是一个简单的通过DoubleAnimation实现的圆形移动的示例。
xmlns ="http://schemas.microsoft.com/winfx/2006/xaml/presentation"
xmlns:x ="http://schemas.microsoft.com/winfx/2006/xaml"
Width ="800" Height ="600" >
< UserControl.Resources >
< Storyboard x:Name ="Storyboard1" >
< DoubleAnimation Storyboard.TargetName ="Ellipse"
Storyboard.TargetProperty ="(UIElement.RenderTransform).(TransformGroup.Children)[3].(TranslateTransform.X)"
From ="0"
By ="150"
Duration ="00:00:01" />
</ Storyboard >
</ UserControl.Resources >
< Canvas x:Name ="LayoutRoot" Background ="White" >
< Ellipse Height ="200" Width ="200" Fill ="#FFFF0000" Canvas.Top ="181" Canvas.Left ="92" RenderTransformOrigin ="0.5,0.5" x:Name ="Ellipse" >
< Ellipse.RenderTransform >
< TransformGroup >
< ScaleTransform />
< SkewTransform />
< RotateTransform />
< TranslateTransform />
</ TransformGroup >
</ Ellipse.RenderTransform >
</ Ellipse >
</ Canvas >
</ UserControl >
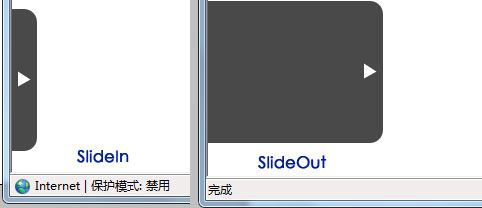
下面通过一个稍复杂的示例来演示DoubleAnimation动画的使用,如下动画代码块实现了名称为Slider对象的X坐标方向的移动动画:
< DoubleAnimation Storyboard.TargetName ="Slider"
Storyboard.TargetProperty ="(UIElement.RenderTransform).(TransformGroup.Children)[3].(TranslateTransform.X)"
Duration ="00:00:00.50" To ="150" />
</ Storyboard >
< Storyboard x:Name ="SlideIn" >
< DoubleAnimation Storyboard.TargetName ="Slider"
Storyboard.TargetProperty ="(UIElement.RenderTransform).(TransformGroup.Children)[3].(TranslateTransform.X)"
Duration ="00:00:00.50" To ="0" />
</ Storyboard >
如上动画定义代码块中定义了两个动画,一个实现将对象Slider向X坐标方向移动到150像素点的位置,第二个动画实现将名为Silder的对象向X方向移动到0像素点的坐标位置,这样其实就实现了一个呈现与不呈现的效果。这里我们发挥大脑的潜力想象一下,如果Slider是一个面板对象,通过鼠标指向和离开的事件使用上面两个动画进行控制其不就实现了面板的鼠标指向就显示,离开就退回到原来的位置了?答案却是如此,详细见下代码块:
{
public MainPage()
{
InitializeComponent();
Slider.MouseEnter += new MouseEventHandler(Slider_MouseEnter);
Slider.MouseLeave += new MouseEventHandler(Slider_MouseLeave);
}
private void Slider_MouseLeave( object sender,MouseEventArgse)
{
SlideIn.Begin();
}
private void Slider_MouseEnter( object sender,MouseEventArgse)
{
SlideOut.Begin();
}
}
通过上面的示例,是否觉得要在Silverlight中实现一个动画是非常简单的?上面的示例就是掩饰了如何使用From/To/By的DoubleAnimation实现了对象的移动动画,同样也可以使用关键帧动画(DoubleUsingKeyframes)来实现这一功能。如下代码片段演示了元素Silder向X坐标方向移动到150像素点。
DoubleAnimationUsingKeyFramesAnim = new DoubleAnimationUsingKeyFrames();
Storyboard.SetTargetName(Anim, " Slider " );
Anim.SetValue(Storyboard.TargetPropertyProperty,
new PropertyPath( " (UIElement.RenderTransform).(TransformGroup.Children)[3].(TranslateTransform.X) " ));
Anim.BeginTime = new TimeSpan( 0 , 0 , 0 );
SplineDoubleKeyFrameSKeyFrame = new SplineDoubleKeyFrame();
SKeyFrame.KeyTime = KeyTime.FromTimeSpan(TimeSpan.FromSeconds( 0.5 ));
SKeyFrame.Value = 150 ;
Anim.KeyFrames.Add(SKeyFrame);
MoveRight.Children.Add(Anim);
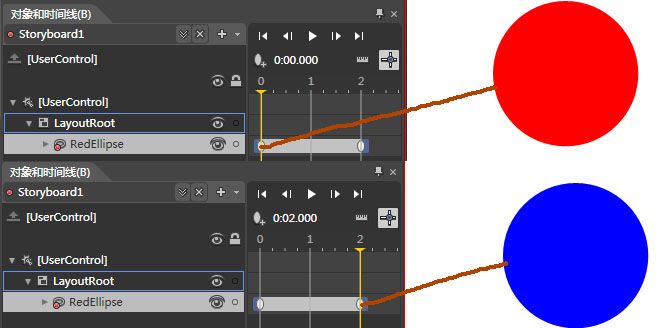
ColorAnimation类型动画主要应用于颜色上的变换动画效果,比如有一个圆,默认的填充颜色是红色(Red),设计一个动画通过2秒钟的动画换成将圆的填充颜色变换为蓝色。
可以通过Blend的设计器来完成这样的动画的创建,在对象和时间轴面板里新建动画容器时间线,然后选中RadEllipse圆形对象在0秒的时间线上填充其颜色为红色,2秒的时间线上填充其颜色为蓝色,详细设计如下图:
Blend最终生成的XAML代码如下:
< ColorAnimationUsingKeyFrames BeginTime ="00:00:00" Storyboard.TargetName ="RedEllipse"
Storyboard.TargetProperty ="(Shape.Fill).(SolidColorBrush.Color)" >
< EasingColorKeyFrame KeyTime ="00:00:00" Value ="Red" />
< EasingColorKeyFrame KeyTime ="00:00:02" Value ="Blue" />
</ ColorAnimationUsingKeyFrames >
</ Storyboard >
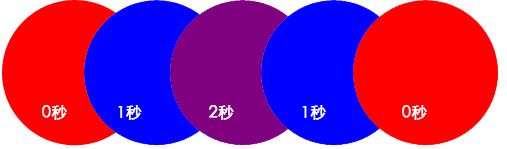
有Blend这样强大的设计工具是很幸运的,对于设计人员来说要实现一些动画需求直接通过界面设计就完成了。对于程序员来说就烦恼了,由于不熟悉设计工具,要实现某种动画只能通过编写程序代码来完成,这将是一个很庞大的工程,比如说当鼠标指向一圆的时候其填充颜色慢慢的向蓝色(Blue)渐变,鼠标离开的时候慢慢的恢复其默认颜色红色。实现这动画效果则需要写上如下长篇的程序代码:
private StoryboardTurnRed = new Storyboard();
private ColorAnimationBlueColor = new ColorAnimation();
private ColorAnimationRedColor = new ColorAnimation();
public MainPage()
{
InitializeComponent();
BlueColor.SetValue(Storyboard.TargetNameProperty, " RedEllipse " );
BlueColor.SetValue(Storyboard.TargetPropertyProperty, new PropertyPath( " (Shape.Fill).(SolidColorBrush.Color) " ));
BlueColor.To = Colors.Blue;
TurnBlue.Children.Add(BlueColor);
LayoutRoot.Resources.Add( " TurnBlue " ,TurnBlue);
RedColor.SetValue(Storyboard.TargetNameProperty, " RedEllipse " );
RedColor.SetValue(Storyboard.TargetPropertyProperty, new PropertyPath( " (Shape.Fill).(SolidColorBrush.Color) " ))
RedColor.To = Colors.Red;
TurnRed.Children.Add(RedColor);
LayoutRoot.Resources.Add( " TurnRed " ,TurnRed);
RedEllipse.MouseEnter += (senderRed,eRed) =>
{
TurnRed.Begin();
};
RedEllipse.MouseLeave += (senderBlue,eBlue) =>
{
TurnBlue.Begin();
};
}
这样的代码实现其实就是用程序代码创建了两个动画,一个由红色变换到蓝色,一个则由蓝色变换到红色,按照前面的方法直接在Blend中设计也是可以的。最终的运行效果如下图:
PointAnimation类型动画更好理解,也就是动画效果是通过不同的坐标点来控制的。比如说浪涛的效果,下面就以浪涛为示例来演示PointAnimation类型动画的使用。
< PointAnimationUsingKeyFrames BeginTime ="00:00:00" Storyboard.TargetName ="water" Storyboard.TargetProperty ="(Path.Data).(PathGeometry.Figures)[0].(PathFigure.Segments)[1].(BezierSegment.Point2)" >
< EasingPointKeyFrame KeyTime ="00:00:00" Value ="351.732116699219,36.4064197540283" />
< EasingPointKeyFrame KeyTime ="00:00:03" Value ="415.732116699219,84.4064178466797" />
</ PointAnimationUsingKeyFrames >
< PointAnimationUsingKeyFrames BeginTime ="00:00:00" Storyboard.TargetName ="water" Storyboard.TargetProperty ="(Path.Data).(PathGeometry.Figures)[0].(PathFigure.Segments)[1].(BezierSegment.Point3)" >
< EasingPointKeyFrame KeyTime ="00:00:00" Value ="425.502014160156,32.8349914550781" />
< EasingPointKeyFrame KeyTime ="00:00:03" Value ="489.502014160156,80.8349914550781" />
</ PointAnimationUsingKeyFrames >
< PointAnimationUsingKeyFrames BeginTime ="00:00:00" Storyboard.TargetName ="water" Storyboard.TargetProperty ="(Path.Data).(PathGeometry.Figures)[0].(PathFigure.Segments)[2].(BezierSegment.Point1)" >
< EasingPointKeyFrame KeyTime ="00:00:00" Value ="499.271911621094,29.2635669708252" />
< EasingPointKeyFrame KeyTime ="00:00:03" Value ="563.271911621094,77.2635650634765" />
</ PointAnimationUsingKeyFrames >
< PointAnimationUsingKeyFrames BeginTime ="00:00:00" Storyboard.TargetName ="water" Storyboard.TargetProperty ="(Path.Data).(PathGeometry.Figures)[0].(PathFigure.Segments)[0].(BezierSegment.Point2)" >
< EasingPointKeyFrame KeyTime ="00:00:00" Value ="112.729011535644,80.834991455078" />
< EasingPointKeyFrame KeyTime ="00:00:03" Value ="104.729011535645,32.8349914550781" />
</ PointAnimationUsingKeyFrames >
< PointAnimationUsingKeyFrames BeginTime ="00:00:00" Storyboard.TargetName ="water" Storyboard.TargetProperty ="(Path.Data).(PathGeometry.Figures)[0].(PathFigure.Segments)[0].(BezierSegment.Point3)" >
< EasingPointKeyFrame KeyTime ="00:00:00" Value ="185.502014160156,80.834991455078" />
< EasingPointKeyFrame KeyTime ="00:00:03" Value ="177.502014160156,32.8349914550781" />
</ PointAnimationUsingKeyFrames >
< PointAnimationUsingKeyFrames BeginTime ="00:00:00" Storyboard.TargetName ="water" Storyboard.TargetProperty ="(Path.Data).(PathGeometry.Figures)[0].(PathFigure.Segments)[1].(BezierSegment.Point1)" >
< EasingPointKeyFrame KeyTime ="00:00:00" Value ="258.275024414062,80.834991455078" />
< EasingPointKeyFrame KeyTime ="00:00:03" Value ="250.275024414063,32.8349914550781" />
</ PointAnimationUsingKeyFrames >
< PointAnimationUsingKeyFrames BeginTime ="00:00:00" Storyboard.TargetName ="water" Storyboard.TargetProperty ="(Path.Data).(PathGeometry.Figures)[0].(PathFigure.Segments)[2].(BezierSegment.Point2)" >
< EasingPointKeyFrame KeyTime ="00:00:00" Value ="600.704162597656,72.7879943847655" />
< EasingPointKeyFrame KeyTime ="00:00:03" Value ="608.704162597656,32.8349229097365" />
</ PointAnimationUsingKeyFrames >
< PointAnimationUsingKeyFrames BeginTime ="00:00:00" Storyboard.TargetName ="water" Storyboard.TargetProperty ="(Path.Data).(PathGeometry.Figures)[0].(PathFigure.Segments)[2].(BezierSegment.Point3)" >
< EasingPointKeyFrame KeyTime ="00:00:00" Value ="665.502014160156,72.7879943847655" />
< EasingPointKeyFrame KeyTime ="00:00:03" Value ="673.502014160156,32.8349229097365" />
</ PointAnimationUsingKeyFrames >
< PointAnimationUsingKeyFrames BeginTime ="00:00:00" Storyboard.TargetName ="water" Storyboard.TargetProperty ="(Path.Data).(PathGeometry.Figures)[0].(PathFigure.Segments)[3].(BezierSegment.Point1)" >
< EasingPointKeyFrame KeyTime ="00:00:00" Value ="730.299926757813,72.7879943847655" />
< EasingPointKeyFrame KeyTime ="00:00:03" Value ="738.299926757813,32.8349229097365" />
</ PointAnimationUsingKeyFrames >
< PointAnimationUsingKeyFrames BeginTime ="00:00:00" Storyboard.TargetName ="water" Storyboard.TargetProperty ="(Path.Data).(PathGeometry.Figures)[0].(PathFigure.Segments)[3].(BezierSegment.Point2)" >
< EasingPointKeyFrame KeyTime ="00:00:00" Value ="801.502014160156,40.8349914550781" />
< EasingPointKeyFrame KeyTime ="00:00:03" Value ="801.502014160156,56.8349229097366" />
</ PointAnimationUsingKeyFrames >
< PointAnimationUsingKeyFrames BeginTime ="00:00:00" Storyboard.TargetName ="water" Storyboard.TargetProperty ="(Path.Data).(PathGeometry.Figures)[0].(PathFigure.Segments)[3].(BezierSegment.Point3)" >
< EasingPointKeyFrame KeyTime ="00:00:00" Value ="801.502014160156,40.8349914550781" />
< EasingPointKeyFrame KeyTime ="00:00:03" Value ="801.502014160156,56.8349229097366" />
</ PointAnimationUsingKeyFrames >
< PointAnimationUsingKeyFrames BeginTime ="00:00:00" Storyboard.TargetName ="water" Storyboard.TargetProperty ="(Path.Data).(PathGeometry.Figures)[0].(PathFigure.Segments)[4].(BezierSegment.Point1)" >
< EasingPointKeyFrame KeyTime ="00:00:00" Value ="801.502014160156,40.8349914550781" />
< EasingPointKeyFrame KeyTime ="00:00:03" Value ="801.502014160156,56.8349229097366" />
</ PointAnimationUsingKeyFrames >
< PointAnimationUsingKeyFrames BeginTime ="00:00:00" Storyboard.TargetName ="water" Storyboard.TargetProperty ="(Path.Data).(PathGeometry.Figures)[0].(PathFigure.StartPoint)" >
< EasingPointKeyFrame KeyTime ="00:00:00" Value ="1.50201416015619,32.834991455078" />
< EasingPointKeyFrame KeyTime ="00:00:03" Value ="1.50201416015625,88.8349914550779" />
</ PointAnimationUsingKeyFrames >
< PointAnimationUsingKeyFrames BeginTime ="00:00:00" Storyboard.TargetName ="water" Storyboard.TargetProperty ="(Path.Data).(PathGeometry.Figures)[0].(PathFigure.Segments)[0].(BezierSegment.Point1)" >
< EasingPointKeyFrame KeyTime ="00:00:00" Value ="1.50201416015619,32.834991455078" />
< EasingPointKeyFrame KeyTime ="00:00:03" Value ="1.50201416015625,88.8349914550779" />
</ PointAnimationUsingKeyFrames >
</ Storyboard >

关于Silverlight中的动画相关的理论概论暂时就介绍这些,希望上面的简单介绍能帮助大家深入的理解和使用Blend进行各种不同的动画功能设计。更多信息可查阅下面的推资源连接。
推荐资源:
MSDN:http://msdn.microsoft.com/zh-cn/library/cc189090(VS.95).aspx
http://www.silverlight.net/learn/quickstarts/animations/
http://blog.csdn.net/ghj1976/archive/2009/12/22/5056916.aspx
Silverlight & Blend动画设计系列一:偏移动画(TranslateTransform)
Silverlight & Blend动画设计系列二:旋转动画(RotateTransform)