WebService大讲堂之Axis2(1):用POJO实现0配置的WebService
Axis2是一套崭新的WebService引擎,该版本是对Axis1.x重新设计的产物。Axis2不仅支持SOAP1.1和SOAP1.2,还集成了非常流行的REST WebService,同时还支持Spring、JSON等技术。这些都将在后面的系列教程中讲解。在本文中主要介绍了如何使用Axis2开发一个不需要任何配置文件的WebService,并在客户端使用Java和C#调用这个WebService。
一、Axis2
的下载和安装
读者可以从如下的网址下载Axis2
的最新版本:
在本文使用了目前Axis2
的最新版本1.4.1
。读者可以下载如下两个zip
包:
axis2-1.4.1-bin.zip
axis2-1.4.1-war.zip
其中axis2-1.4.1-bin.zip
文件中包含了Axis2
中所有的jar
文件, axis2-1.4.1-war.zip
文件用于将WebService
发布到Web
容器中。
将axis2-1.4.1-war.zip
文件解压到相应的目录,将目录中的axis2.war
文件放到<Tomcat
安装目录>\webapps
目录中(本文使用的Tomcat
的版本是6.x
),并启动Tomcat
。
在浏览器地址栏中输入如下的URL
:
如果在浏览器中显示出如图1
所示的页面,则表示Axis2
安装成功。
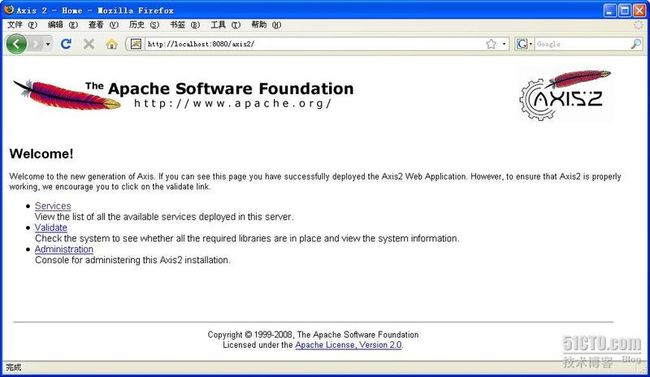
图1
<!-- /* Font Definitions */ @font-face {font-family:宋体; panose-1:2 1 6 0 3 1 1 1 1 1;} @font-face {font-family:""@宋体"; panose-1:2 1 6 0 3 1 1 1 1 1;} /* Style Definitions */ p.MsoNormal, li.MsoNormal, div.MsoNormal {mso-style-parent:""; margin:0cm; margin-bottom:.0001pt; text-align:justify; text-justify:inter-ideograph; font-size:10.5pt; font-family:"Times New Roman";} /* Page Definitions */ @page {} @page Section1 {size:612.0pt 792.0pt; margin:72.0pt 90.0pt 72.0pt 90.0pt;} div.Section1 {page:Section1;} -->
二、编写和发布WebService
对于用Java
实现的服务程序给人的印象就是需要进行大量的配置,不过这一点在Axis2
中将被终结。在Axis2
中不需要进行任何的配置,就可以直接将一个简单的POJO
发布成WebService
。其中POJO
中所有的public
方法将被发布成WebService
方法。
下面我们来实现一个简单的POJO
,代码如下:
<!--<br /> <br /> Code highlighting produced by Actipro CodeHighlighter (freeware)<br /> http://www.CodeHighlighter.com/<br /> <br /> -->
public
class
SimpleService
{
public String getGreeting(String name)
{
return " 你好 " + name;
}
public int getPrice()
{
return new java.util.Random().nextInt( 1000 );
}
}
{
public String getGreeting(String name)
{
return " 你好 " + name;
}
public int getPrice()
{
return new java.util.Random().nextInt( 1000 );
}
}
<!-- /* Font Definitions */ @font-face {font-family:宋体; panose-1:2 1 6 0 3 1 1 1 1 1;} @font-face {font-family:""@宋体"; panose-1:2 1 6 0 3 1 1 1 1 1;} /* Style Definitions */ p.MsoNormal, li.MsoNormal, div.MsoNormal {mso-style-parent:""; margin:0cm; margin-bottom:.0001pt; text-align:justify; text-justify:inter-ideograph; font-size:10.5pt; font-family:"Times New Roman";} /* Page Definitions */ @page {} @page Section1 {size:612.0pt 792.0pt; margin:72.0pt 90.0pt 72.0pt 90.0pt;} div.Section1 {page:Section1;} -->
在SimpleService
类中有两个方法,由于这两个方法都是public
方法,因此,它们都将作为WebService
方法被发布。
编译SimpleService
类后,将SimpleService.class
文件放到<Tomcat
安装目录>\webapps\axis2\WEB-INF\pojo
目录中(如果没有pojo
目录,则建立该目录)。现在我们已经成功将SimpleService
类发布成了WebService
。在浏览器地址栏中输入如下的URL
:
这时当前页面将显示所有在Axis2
中发布的WebService
,如图2
所示。

图2
图2
<!-- /* Font Definitions */ @font-face {font-family:宋体; panose-1:2 1 6 0 3 1 1 1 1 1;} @font-face {font-family:""@宋体"; panose-1:2 1 6 0 3 1 1 1 1 1;} /* Style Definitions */ p.MsoNormal, li.MsoNormal, div.MsoNormal {mso-style-parent:""; margin:0cm; margin-bottom:.0001pt; text-align:justify; text-justify:inter-ideograph; font-size:10.5pt; font-family:"Times New Roman";} /* Page Definitions */ @page {} @page Section1 {size:612.0pt 792.0pt; margin:72.0pt 90.0pt 72.0pt 90.0pt;} div.Section1 {page:Section1;} -->
在浏览器地址栏中输入如下的两个URL
来分别测试getGreeting
和getPrice
方法:
http://localhost:8080/axis2/services/SimpleService/getPrice
图3 和图4 分别显示了getGreeting 和getPrice 方法的测试结果。
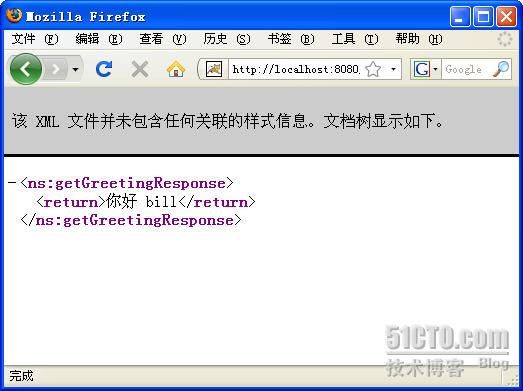

图3 和图4 分别显示了getGreeting 和getPrice 方法的测试结果。
图3 getGreeting方法的测试结果
图4 getPrice方法的测试结果
<!-- /* Font Definitions */ @font-face {font-family:宋体; panose-1:2 1 6 0 3 1 1 1 1 1;} @font-face {font-family:""@宋体"; panose-1:2 1 6 0 3 1 1 1 1 1;} /* Style Definitions */ p.MsoNormal, li.MsoNormal, div.MsoNormal {mso-style-parent:""; margin:0cm; margin-bottom:.0001pt; text-align:justify; text-justify:inter-ideograph; font-size:10.5pt; font-family:"Times New Roman";} /* Page Definitions */ @page {} @page Section1 {size:612.0pt 792.0pt; margin:72.0pt 90.0pt 72.0pt 90.0pt;} div.Section1 {page:Section1;} -->
在编写、发布和测试0
配置的WebService
时应注意如下几点:
1. POJO
类不能使用package
关键字声明包。
2. Axis2
在默认情况下可以热发布WebService
,也就是说,将WebService
的.class
文件复制到pojo
目录中时,Tomcat
不需要重新启动就可以自动发布WebService
。如果想取消Axis2
的热发布功能,可以打开<Tomcat
安装目录>\webapps\axis2\WEB-INF\conf\axis2.xml
,找到如下的配置代码:
<!--<br /> <br /> Code highlighting produced by Actipro CodeHighlighter (freeware)<br /> http://www.CodeHighlighter.com/<br /> <br /> -->
<
parameter
name
="hotdeployment"
>
true
</
parameter
>
将true
改为false
即可。要注意的是,Axis2
在默认情况下虽然是热发布,但并不是热更新,也就是说,一旦成功发布了WebService
,再想更新该WebService
,就必须重启Tomcat
。这对于开发人员调试WebService
非常不方便,因此,在开发WebService
时,可以将Axis2
设为热更新。在axis2.xml
文件中找到
<parameter name="hotupdate">false</parameter>
,将false
改为true
即可。
3.
在浏览器中测试WebService
时,如果WebService
方法有参数,需要使用URL
的请求参数来指定该WebService
方法参数的值,请求参数名与方法参数名要一致,例如,要测试getGreeting
方法,请求参数名应为name
,如上面的URL
所示。
4.
发布WebService
的pojo
目录只是默认的,如果读者想在其他的目录发布WebService
,可以打开axis2.xml
文件,并在<axisconfig>
元素中添加如下的子元素:
<!--<br /> <br /> Code highlighting produced by Actipro CodeHighlighter (freeware)<br /> http://www.CodeHighlighter.com/<br /> <br /> -->
<
deployer
extension
=".class"
directory
="my"
class
="org.apache.axis2.deployment.POJODeployer"
/>
上面的配置允许在<Tomcat
安装目录>\webapps\axis2\WEB-INF\my
目录中发布WebService
。例如,将本例中的SimpleService.class
复制到my
目录中也可以成功发布(但要删除pojo
目录中的SimpleService.class
,否则WebService
会重名)。
<!-- /* Font Definitions */ @font-face {font-family:宋体; panose-1:2 1 6 0 3 1 1 1 1 1;} @font-face {font-family:""@宋体"; panose-1:2 1 6 0 3 1 1 1 1 1;} /* Style Definitions */ p.MsoNormal, li.MsoNormal, div.MsoNormal {mso-style-parent:""; margin:0cm; margin-bottom:.0001pt; text-align:justify; text-justify:inter-ideograph; font-size:10.5pt; font-family:"Times New Roman";} /* Page Definitions */ @page {} @page Section1 {size:612.0pt 792.0pt; margin:72.0pt 90.0pt 72.0pt 90.0pt;} div.Section1 {page:Section1;} -->
三、
用Java
实现调用WebService
的客户端程序
WebService
是为程序服务的,只在浏览器中访问WebService
是没有意义的。因此,在本节使用Java
实现了一个控制台程序来调用上一节发布的WebService
。调用WebService
的客户端代码如下:
<!--<br /> <br /> Code highlighting produced by Actipro CodeHighlighter (freeware)<br /> http://www.CodeHighlighter.com/<br /> <br /> -->
package
client;
import javax.xml.namespace.QName;
import org.apache.axis2.addressing.EndpointReference;
import org.apache.axis2.client.Options;
import org.apache.axis2.rpc.client.RPCServiceClient;
public class RPCClient
{
public static void main(String[] args) throws Exception
{
// 使用RPC方式调用WebService
RPCServiceClient serviceClient = new RPCServiceClient();
Options options = serviceClient.getOptions();
// 指定调用WebService的URL
EndpointReference targetEPR = new EndpointReference(
" http://localhost:8080/axis2/services/SimpleService " );
options.setTo(targetEPR);
// 指定getGreeting方法的参数值
Object[] opAddEntryArgs = new Object[] { " 超人 " };
// 指定getGreeting方法返回值的数据类型的Class对象
Class[] classes = new Class[] {String. class };
// 指定要调用的getGreeting方法及WSDL文件的命名空间
QName opAddEntry = new QName( " http://ws.apache.org/axis2 " , " getGreeting " );
// 调用getGreeting方法并输出该方法的返回值
System.out.println(serviceClient.invokeBlocking(opAddEntry, opAddEntryArgs, classes)[ 0 ]);
// 下面是调用getPrice方法的代码,这些代码与调用getGreeting方法的代码类似
classes = new Class[] { int . class };
opAddEntry = new QName( " http://ws.apache.org/axis2 " , " getPrice " );
System.out.println(serviceClient.invokeBlocking(opAddEntry, new Object[]{}, classes)[ 0 ]);
}
}
<!-- /* Font Definitions */ @font-face {font-family:宋体; panose-1:2 1 6 0 3 1 1 1 1 1;} @font-face {font-family:""@宋体"; panose-1:2 1 6 0 3 1 1 1 1 1;} /* Style Definitions */ p.MsoNormal, li.MsoNormal, div.MsoNormal {mso-style-parent:""; margin:0cm; margin-bottom:.0001pt; text-align:justify; text-justify:inter-ideograph; font-size:10.5pt; font-family:"Times New Roman";} /* Page Definitions */ @page {} @page Section1 {size:612.0pt 792.0pt; margin:72.0pt 90.0pt 72.0pt 90.0pt;} div.Section1 {page:Section1;} -->
运行上面的程序后,将在控制台输出如下的信息:
<!--<br /> <br /> Code highlighting produced by Actipro CodeHighlighter (freeware)<br /> http://www.CodeHighlighter.com/<br /> <br /> -->
你好 超人
443
443
在编写客户端代码时应注意如下几点:
1.
客户端代码需要引用很多Axis2
的jar
包,如果读者不太清楚要引用哪个jar
包,可以在Eclipse
的工程中引用Axis2
发行包的lib
目录中的所有jar
包。
2.
在本例中使用了RPCServiceClient
类的invokeBlocking
方法调用了WebService
中的方法。invokeBlocking
方法有三个参数,其中第一个参数的类型是QName
对象,表示要调用的方法名;第二个参数表示要调用的WebService
方法的参数值,参数类型为Object[]
;第三个参数表示WebService
方法的返回值类型的Class
对象,参数类型为Class[]
。当方法没有参数时,invokeBlocking
方法的第二个参数值不能是null
,而要使用new Object[]{}
。
3.
如果被调用的WebService
方法没有返回值,应使用RPCServiceClient
类的invokeRobust
方法,该方法只有两个参数,它们的含义与invokeBlocking
方法的前两个参数的含义相同。
4.
在创建QName
对象时,QName
类的构造方法的第一个参数表示WSDL
文件的命名空间名,也就是<wsdl:definitions>
元素的targetNamespace
属性值,下面是SimpleService
类生成的WSDL
文件的代码片段:
<!--<br /> <br /> Code highlighting produced by Actipro CodeHighlighter (freeware)<br /> http://www.CodeHighlighter.com/<br /> <br /> -->
<?
xml version="1.0" encoding="UTF-8"
?>
< wsdl:definitions xmlns:wsdl ="http://schemas.xmlsoap.org/wsdl/" xmlns:ns1 ="http://org.apache.axis2/xsd"
xmlns:ns ="http://ws.apache.org/axis2" xmlns:wsaw ="http://www.w3.org/2006/05/addressing/wsdl"
xmlns:http ="http://schemas.xmlsoap.org/wsdl/http/" xmlns:xs ="http://www.w3.org/2001/XMLSchema"
xmlns:mime ="http://schemas.xmlsoap.org/wsdl/mime/" xmlns:soap ="http://schemas.xmlsoap.org/wsdl/soap/"
xmlns:soap12 ="http://schemas.xmlsoap.org/wsdl/soap12/"
targetNamespace="http://ws.apache.org/axis2" >
< wsdl:types >

</ wsdl:types >
</ wsdl:definitions >
< wsdl:definitions xmlns:wsdl ="http://schemas.xmlsoap.org/wsdl/" xmlns:ns1 ="http://org.apache.axis2/xsd"
xmlns:ns ="http://ws.apache.org/axis2" xmlns:wsaw ="http://www.w3.org/2006/05/addressing/wsdl"
xmlns:http ="http://schemas.xmlsoap.org/wsdl/http/" xmlns:xs ="http://www.w3.org/2001/XMLSchema"
xmlns:mime ="http://schemas.xmlsoap.org/wsdl/mime/" xmlns:soap ="http://schemas.xmlsoap.org/wsdl/soap/"
xmlns:soap12 ="http://schemas.xmlsoap.org/wsdl/soap12/"
targetNamespace="http://ws.apache.org/axis2" >
< wsdl:types >
</ wsdl:types >
</ wsdl:definitions >
<!-- /* Font Definitions */ @font-face {font-family:宋体; panose-1:2 1 6 0 3 1 1 1 1 1;} @font-face {font-family:""@宋体"; panose-1:2 1 6 0 3 1 1 1 1 1;} /* Style Definitions */ p.MsoNormal, li.MsoNormal, div.MsoNormal {mso-style-parent:""; margin:0cm; margin-bottom:.0001pt; text-align:justify; text-justify:inter-ideograph; font-size:10.5pt; font-family:"Times New Roman";} /* Page Definitions */ @page {} @page Section1 {size:612.0pt 792.0pt; margin:72.0pt 90.0pt 72.0pt 90.0pt;} div.Section1 {page:Section1;} -->
四、用wsdl2java
简化客户端的编写
也许有很多读者会说“有没有搞错啊,只调用两个WebService
方法用要写这么多代码,太麻烦了”。
不过幸好Axis2
提供了一个wsdl2java.bat
命令可以根据WSDL
文件自动产生调用WebService
的代码。wsdl2java.bat
命令可以在<Axis2
安装目录>"bin
目录中找到。在使用wsdl2java.bat
命令之前需要设置AXIS2_HOME
环境变量,该变量值是<Axis2
安装目录>
。
在Windows
控制台输出如下的命令行来生成调用WebService
的代码:
%AXIS2_HOME%\bin\wsdl2java -uri http://localhost:8080/axis2/services/SimpleService?wsdl -p client -s -o stub
其中-url
参数指定了wsdl
文件的路径,可以是本地路径,也可以是网络路径。-p
参数指定了生成的Java
类的包名,-o
参数指定了生成的一系列文件保存的根目录。在执行完上面的命令后,读者就会发现在当前目录下多了个stub
目录,在."stub"src"client
目录可以找到一个SimpleServiceStub.java
文件,该文件复杂调用WebService
,读者可以在程序中直接使用这个类,代码如下:
<!--<br /> <br /> Code highlighting produced by Actipro CodeHighlighter (freeware)<br /> http://www.CodeHighlighter.com/<br /> <br /> -->
package
client;
import javax.xml.namespace.QName;
import org.apache.axis2.addressing.EndpointReference;
import org.apache.axis2.client.Options;
import org.apache.axis2.rpc.client.RPCServiceClient;
public class StubClient
{
public static void main(String[] args) throws Exception
{
SimpleServiceStub stub = new SimpleServiceStub();
SimpleServiceStub.GetGreeting gg = new SimpleServiceStub.GetGreeting();
gg.setName( " 比尔 " );
System.out.println( stub.getGreeting(gg).get_return());
System.out.println(stub.getPrice().get_return());
}
}
<!-- /* Font Definitions */ @font-face {font-family:宋体; panose-1:2 1 6 0 3 1 1 1 1 1;} @font-face {font-family:""@宋体"; panose-1:2 1 6 0 3 1 1 1 1 1;} /* Style Definitions */ p.MsoNormal, li.MsoNormal, div.MsoNormal {mso-style-parent:""; margin:0cm; margin-bottom:.0001pt; text-align:justify; text-justify:inter-ideograph; font-size:10.5pt; font-family:"Times New Roman";} /* Page Definitions */ @page {} @page Section1 {size:612.0pt 792.0pt; margin:72.0pt 90.0pt 72.0pt 90.0pt;} div.Section1 {page:Section1;} -->
上面的代码大大简化了调用WebService
的步骤,并使代码更加简洁。但要注意的是,wsdl2java.bat
命令生成的Stub
类将WebService
方法的参数都封装在了相应的类中,类名为方法名,例如,getGreeting
方法的参数都封装在了GetGreeting
类中,要想调用getGreeting
方法,必须先创建GetGreeting
类的对象实例。
五、使用C#
调用WebService
从理论上说,WebService
可以被任何支持SOAP
协议的语言调用。在Visual Studio
中使用C#
调用WebService
是在所有语言中最容易实现的(VB.net
的调用方法类似,也同样很简单)。
新建一个Visual Studio
工程,并在引用Web
服务的对话框中输入如下的URL
,并输入Web
引用名为“WebService
”:
然后引用Web
服务的对话框就会显示该WebService
中的所有的方法,如图5
所示。
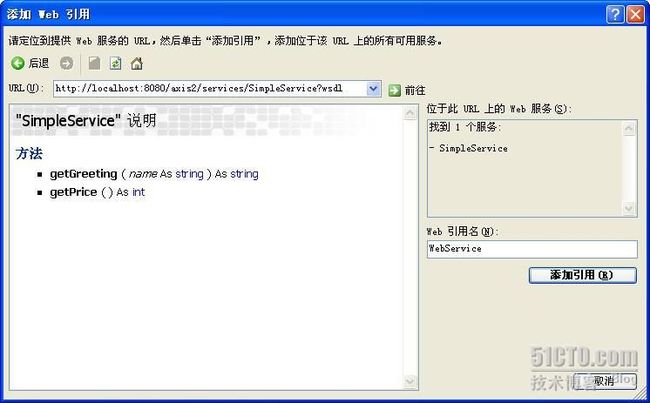
图5
<!-- /* Font Definitions */ @font-face {font-family:宋体; panose-1:2 1 6 0 3 1 1 1 1 1;} @font-face {font-family:""@宋体"; panose-1:2 1 6 0 3 1 1 1 1 1;} /* Style Definitions */ p.MsoNormal, li.MsoNormal, div.MsoNormal {mso-style-parent:""; margin:0cm; margin-bottom:.0001pt; text-align:justify; text-justify:inter-ideograph; font-size:10.5pt; font-family:"Times New Roman";} /* Page Definitions */ @page {} @page Section1 {size:595.3pt 841.9pt; margin:72.0pt 90.0pt 72.0pt 90.0pt; layout-grid:15.6pt;} div.Section1 {page:Section1;} -->
图5
在完成上面的工作后,只需要如下三行C#
代码就可以调用getGreeting
和getPrice
方法,并显示这两个方法的返回值:
<!--<br /> <br /> Code highlighting produced by Actipro CodeHighlighter (freeware)<br /> http://www.CodeHighlighter.com/<br /> <br /> -->
WebService.SimpleService simpleService
=
new
WSC.WebService.SimpleService();
MessageBox.Show( simpleService.getGreeting( " 比尔 " ));
MessageBox.Show(simpleService.getPrice()[email protected]());
MessageBox.Show( simpleService.getGreeting( " 比尔 " ));
MessageBox.Show(simpleService.getPrice()[email protected]());
在.net
解析WSDL
文件时直接将getGreeting
方法的参数映射为String
类型,因此,可以直接进行传值。
从上面的调用过程可以看出,添加Web 引用的过程就相当于在Java 中调用wsdl2java.bat 自动生成stub 类的过程。只是在调用stub 类时与C# 有一定的区别,但从总体上来说,都大大简化了调用WebService 的过程。
从上面的调用过程可以看出,添加Web 引用的过程就相当于在Java 中调用wsdl2java.bat 自动生成stub 类的过程。只是在调用stub 类时与C# 有一定的区别,但从总体上来说,都大大简化了调用WebService 的过程。
本文出自 “软件改变整个宇宙” 博客,请务必保留此出处http://androidguy.blog.51cto.com/974126/215254