JSP总结之六:创建第一个简单的JSP页面
手工创建
1、在Tomcat 6.0的安装目录的webapps目录下新建一个目录,起名叫myapp。
2、在myapp目录下新建一个目录WEB-INF,注意,目录名称是区分大小写的。
3、WEB-INF下新建一个文件web.xml,内容如下:
<?xml version="1.0" encoding="gb2312"?>
<web-app>
<display-name>My Web Application</display-name>
<description>
An application for test.
</description>
</web-app>
4、在myapp下新建一个测试的jsp页面,文件名为index.jsp,文件内容如下:
<html>
<body>
<center>Now time is: <%=new java.util.Date()%></center>
</body>
</html>
5、重启Tomcat。
6、打开浏览器,输入http://localhost:8080/myapp/index.jsp 。
Eclipse创建
1、 安装好JDK1.6.0和TOMCAT6.0后,将Eclipse软件拷贝到本地硬盘的一个文件夹里。
2、 安装Eclipse的插件MyEclipse。
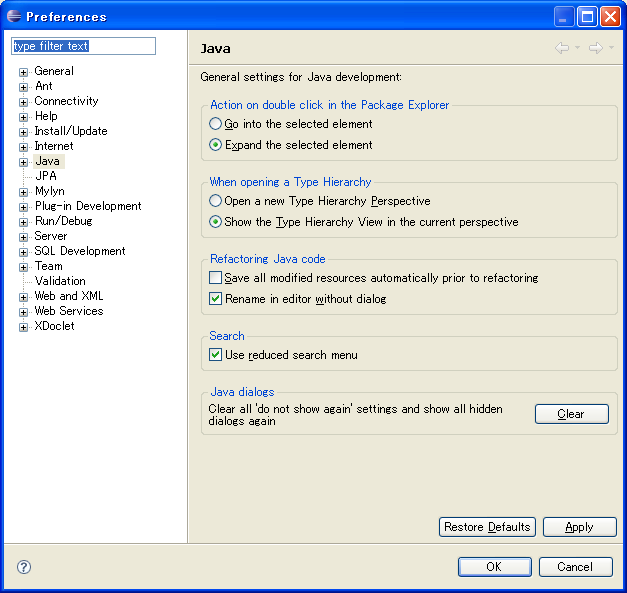
3、 运行eclipse.exe文件,打开后,选择路径Window->Preferences,弹出页面如下:
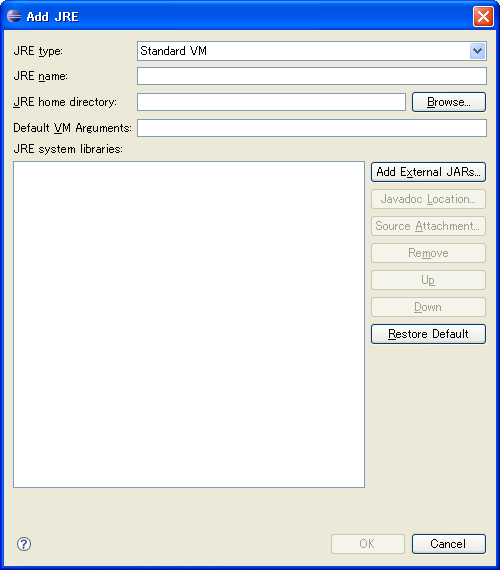
4、选择Java->Installed JREs,点击“Add”按钮,弹出:
5、在“JRE home directory”栏中选择JDK1.6.0的安装路径(如“C:/jdk1.6.0_02
”), 在JRE name 栏中填写标识名字(如“jdk1.6.0_02
”)。 填好后,点击“OK”确定。
6、然后选择路径Server-> Installed Runtimes,弹出框如下:
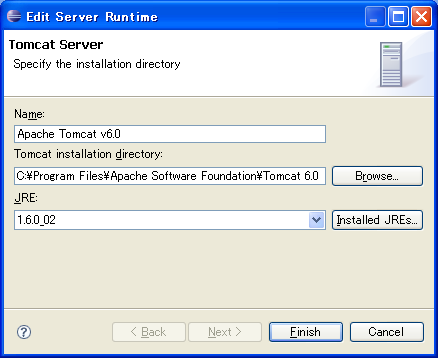
7、选择Apache Tomcat v6.0,点击“Next”,弹出:
选择要用的Tomcat和JDK,然后点击“Finish”关闭窗口,退出Preferences窗口。
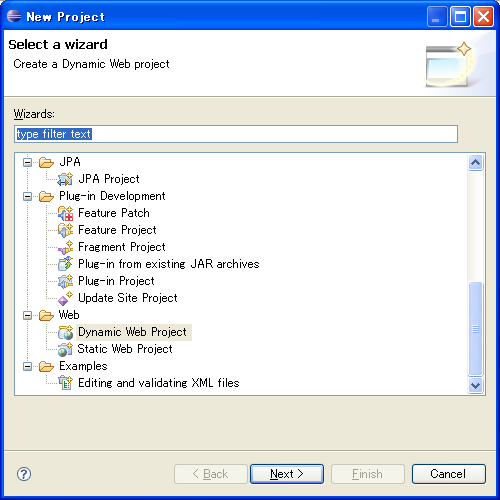
8、在Eclipse中选择file->new->project,新建项目。弹出:
9、然后选择“Dynamic Web Project”,点击“Next”,在按提示填写项目名(如“test1
”)等内容,最后点击“Finish”,项目新建成功。
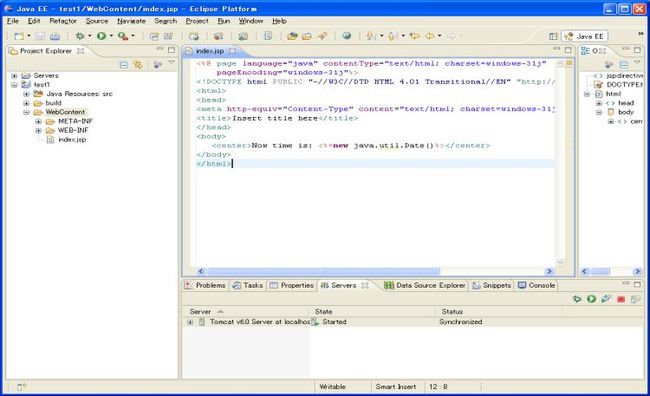
10、在新建的项目中,右键点击“WebContent”文件夹,选择新建“JSP”文件,取名为“index.jsp”。 “index.jsp”的<body></body>中填写“<center>Now time is: <%=new java.util.Date()%></center>”。
11、在Eclipse的右下栏选择“Servers”,然后点击中间有白色三角形的绿色运行按钮。当“Servers”的“State”显示为“Started”时,运行成功。
12、在浏览器的地址栏里输入“http://localhost:8080/test1/index.jsp”,就可以看到一个显示时间的JSP页面了。
NetBeans创建
NetBeans6.0 Milestone10是目前最好的NetBeans系列软件。具备了强大的可视化开发功能,无论是用于Java Swing还是JSP。Sun公司计划在今年11月正式发布NetBeans 6。明年11月正式发布NetBeans 7。由于Eclipse的可视化开发需要依赖各种插件,而功能最强大的插件MyEclipse是商业软件,MyEclipse和NetBeans功能相当。因此建议使用NetBeans6,因为它是开源的,免费的,使用它是合法的,而且免去了选择,安装各种Eclipse插件的工作。
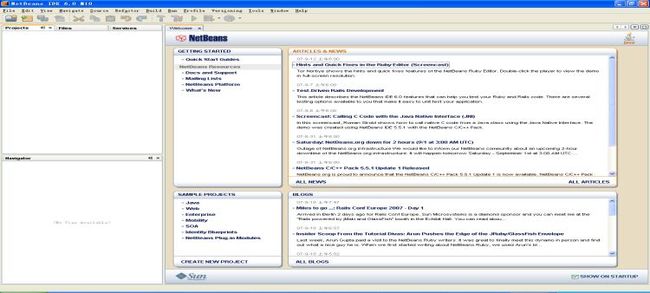
安装完NetBeans6后,启动画面如下:
启动完成后,进入主画面:
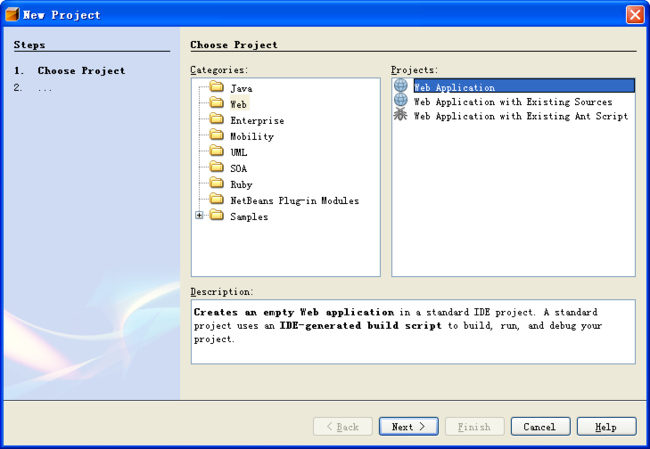
选择File->New Project菜单,然后选择Project的类别为Web,选定Web Application。如下图:
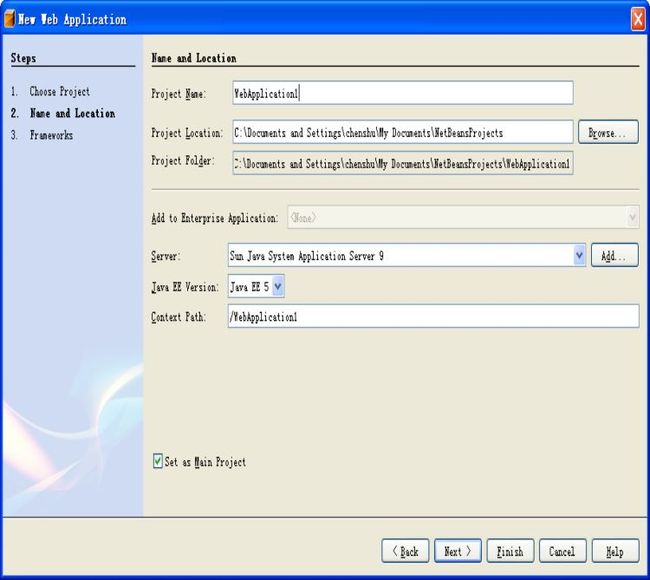
点击Next后,出现如下画面:
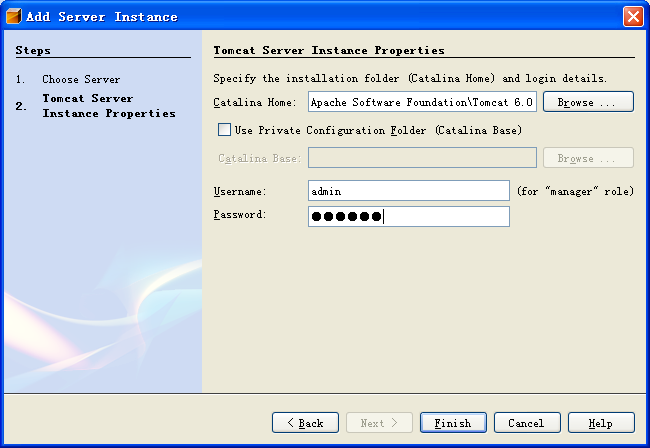
在Server一栏选择Add按钮,然后在下面的对话框中
设置好Tomcat的安装目录。
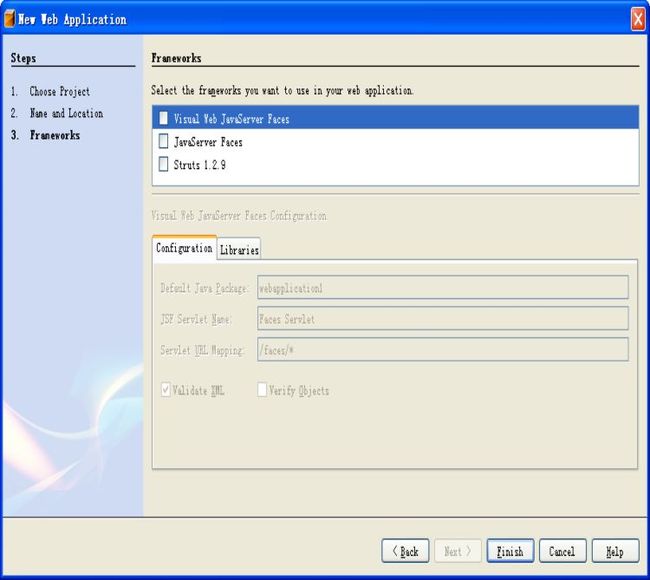
按下一步,出现如下画面:
不选择任何一个Framework,我们只要创建最简单的jsp网页。工程创建完成后,会显示index.jsp文件。源代码如下:
<%@page contentType="text/html"%>
<%@page pageEncoding="UTF-8"%>
<%--
The taglib directive below imports the JSTL library. If you uncomment it,
you must also add the JSTL library to the project. The Add Library... action
on Libraries node in Projects view can be used to add the JSTL 1.1 library.
--%>
<%--
<%@taglib uri="http://java.sun.com/jsp/jstl/core" prefix="c"%>
--%>
<!DOCTYPE HTML PUBLIC "-//W3C//DTD HTML 4.01 Transitional//EN"
"http://www.w3.org/TR/html4/loose.dtd">
<html>
<head>
<meta http-equiv="Content-Type" content="text/html; charset=UTF-8">
<title>JSP Page</title>
</head>
<body>
<h1>JSP Page</h1>
<%--
This example uses JSTL, uncomment the taglib directive above.
To test, display the page like this: index.jsp?sayHello=true&name=Murphy
--%>
<%--
<c:if test="${param.sayHello}">
<!-- Let's welcome the user ${param.name} -->
Hello ${param.name}!
</c:if>
--%>
</body>
</html>
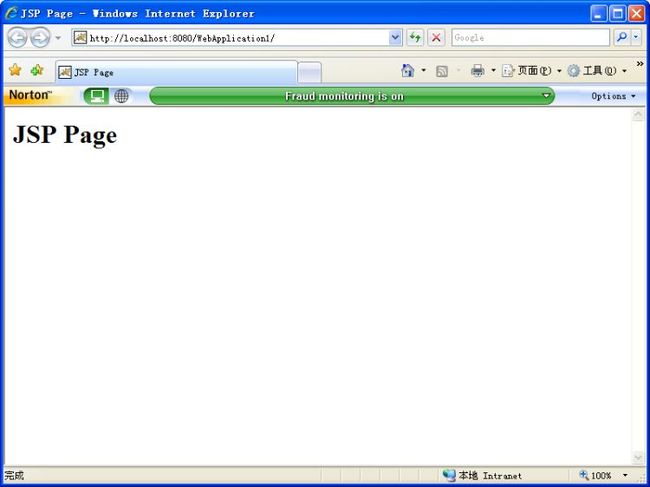
现在运行这个工程,工程会自动编译,并且部署到tomcat中,然后启动浏览器,看到如下画面:
原文链接: http://blog.csdn.net/sheismylife/article/details/1791282
