pxe在kickstart下的自动安装
一、kickstart的原理:
pxe的原理:PXE(preboot execute environment)是有Inter公司开发的最新技术。 工作于Client/Server的网络模式,支持工作站通过网络从远端服务器下载映像, 并由此支持来自网络的操作系统的启动过程,其启动过程中,终端要求服务器分配IP地址, 并用TFTP(trivial file transfer protocol)或MTFTP(multicase trivial file transfer protocol)下载一个启动软件包到本机内存中并执行,由这个启动软件包完成终端基本软件设置,从而引导预先安装在服务器中的终端操作系统。pxe可以引导多种操作系统。例如:Window 95/98/2000 linux等。
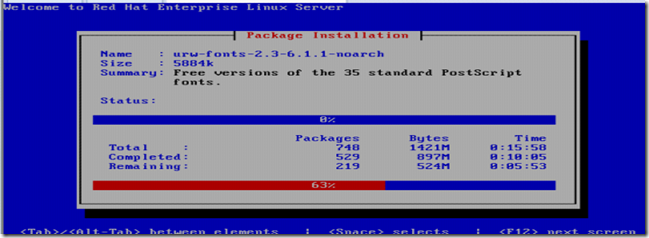
kickstart的原理:KickStart是一种无人职守安装方式。KickStart的工作原理是通过记录典型的安装过程中所需人工干预填写的各种参数,并生成一个名为ks.cfg的文件;在其后的安装过程中(不只局限于生成KickStart安装文件的机器)当出现要求填写参数的情况时,安装程序会首先去查找KickStart生成的文件,当找到合适的参数时,就采用找到的参数,当没有找到合适的参数时,才需要安装者手工干预。这样,如果KickStart文件涵盖了安装过程中出现的所有需要填写的参数时,安装者完全可以只告诉安装程序从何处取ks.cfg文件,然后去忙自己的事情。等安装完毕,安装程序会根据ks.cfg中设置的重启选项来重启系统,并结束安装。
二、pxe自动安装的实现步骤:
1、服务器地址配置为192.168.145.100
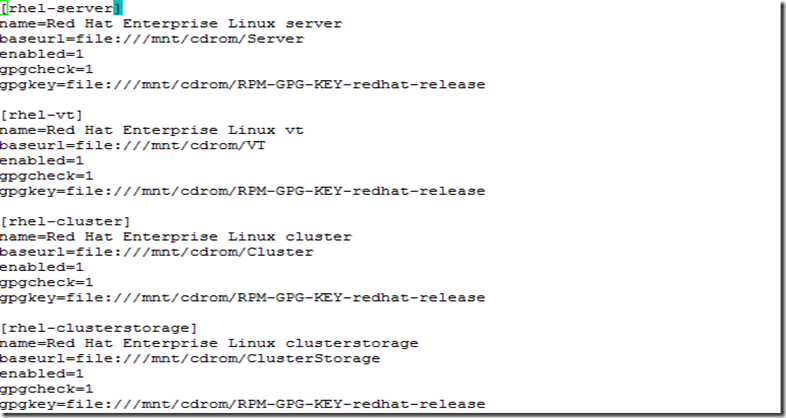
2、yum服务器的配置

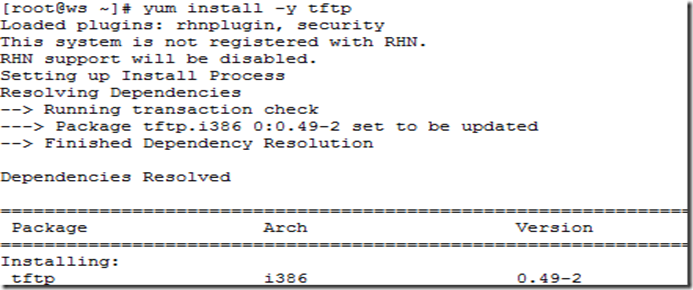
3、ftp服务器、dhcp服务器、tftp服务器的配置
[root@localhost ~]# yum install -y vsftpd
[root@localhost ~]# yum install -y dhcp
[root@localhost ~]# yum list all |grep tftp
[root@localhost ~]# service vsftpd start
[root@localhost ~]# chkconfig vsftpd on
[root@localhost ~]# cd /mnt/cdrom
[root@localhost cdrom]# cp -r . /var/ftp/pub
[root@localhost cdrom]# vim /etc/dhcpd.conf
# --- default gateway
option routers 192.168.145.254;
option subnet-mask 255.255.255.0;
option nis-domain "domain.org";
option domain-name "domain.org";
option domain-name-servers 222.88.88.88; //dns
option time-offset -18000; # Eastern Standard Time
# option ntp-servers 192.168.1.1;
# option netbios-name-servers 192.168.1.1;
# --- Selects point-to-point node (default is hybrid). Don't change this unless
# -- you understand Netbios very well
# option netbios-node-type 2;
range dynamic-bootp 192.168.145.2 192.168.145.253;
default-lease-time 21600;
max-lease-time 43200;
# we want the nameserver to appear at a fixed address
host ns {
next-server marvin.redhat.com;
hardware ethernet 12:34:56:78:AB:CD;
fixed-address 207.175.42.254;
}
}


[root@localhost ~]# service xinetd restart
[root@localhost ~]# cd /
[root@localhost /]# cd tftpboot
[root@localhost tftpboot]# ll
total 8
drwxr-xr-x 4 root root 4096 Jul 26 22:29 linux-install
[root@localhost tftpboot]# cp /usr/lib/syslinux/pxelinux.0 ./
[root@localhost tftpboot]# ll
total 24
drwxr-xr-x 4 root root 4096 Jul 26 22:29 linux-install
-rw-r--r-- 1 root root 13148 Jul 29 17:45 pxelinux.0
[root@localhost tftpboot]# cp /mnt/cdrom/images/
README boot.iso minstg2.img stage2.img
TRANS.TBL diskboot.img pxeboot/ xen/
[root@localhost tftpboot]# cp /mnt/cdrom/images/pxeboot/
README TRANS.TBL initrd.img vmlinuz
[root@localhost tftpboot]# cp /mnt/cdrom/images/pxeboot/vmlinuz ./
[root@localhost tftpboot]# cp /mnt/cdrom/images/pxeboot/initrd.img ./
[root@localhost tftpboot]# ll
total 8552
-r--r--r-- 1 root root 6855881 Jul 29 17:46 initrd.img
drwxr-xr-x 4 root root 4096 Jul 26 22:29 linux-install
-rw-r--r-- 1 root root 13148 Jul 29 17:45 pxelinux.0
-r--r--r-- 1 root root 1855956 Jul 29 17:45 vmlinuz
[root@localhost tftpboot]# mkdir -pv pxelinux.cfg
[root@localhost tftpboot]# cp /mnt/cdrom/isolinux/isolinux.cfg pxelinux.cfg/default
[root@localhost tftpboot]# cd pxelinux.cfg
[root@localhost pxelinux.cfg]# yum install -y system-config-kickstart
[root@localhost pxelinux.cfg]# system-config-kickstart
4、测试:

/etc/hosts成功修改主机名

/etc/sysconfig/network内容

/etc/sysconfig/network-scripts/ifcfg-eth0内容
