Linux网络管理之三:从windows访问Linux共享打印
环境:客户端为windows xp(10.0.0.10); 打印服务器为FC7(10.0.0.100)。
要求:客户端可以通过FC7上的打印机进行网络打印,并可进行基于Web的远程管理。
实现过程:
一、在FC7上安装SMB共享打印机
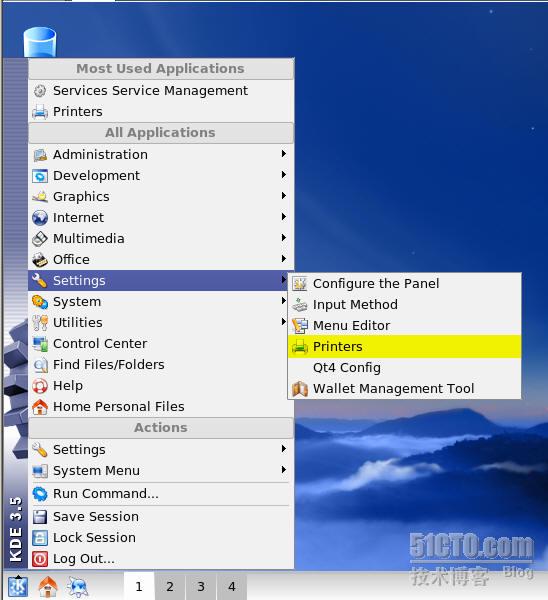
1、在FC7环境中,点击 settings---->printers,以便进行打印机的安装。
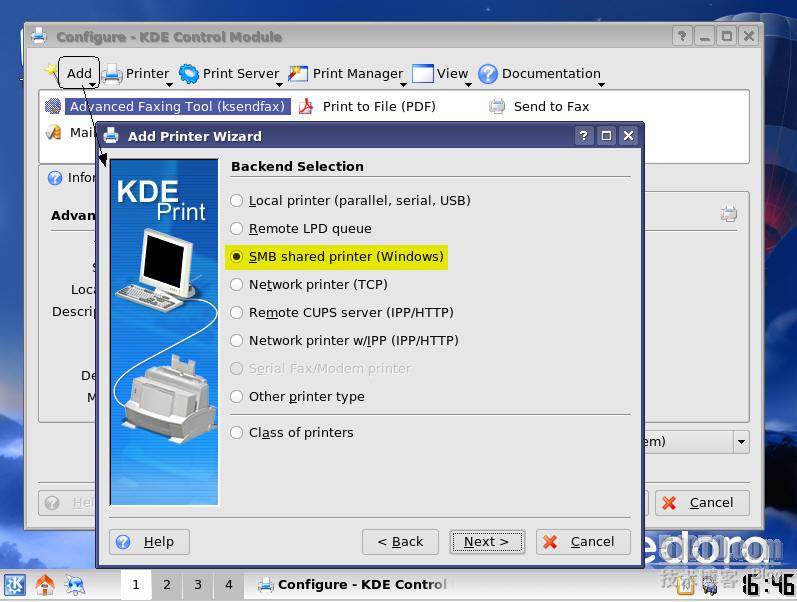
2、在打印配置窗口中中,点击Add按钮。然后在添加打印向导中,选择 SMB shared printer 以便实现windows客户端的连接访问。
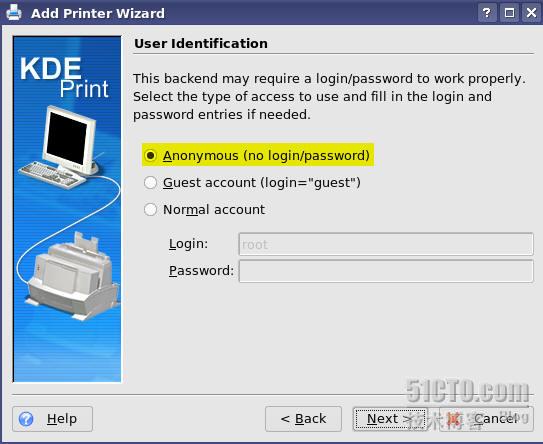
3、在用户凭证对话框中,选择 Anonymous 以允许匿名访问。
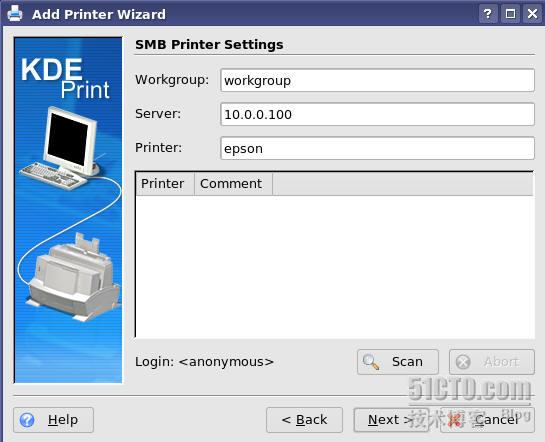
4、在打印设置中设置打印服务器IP、工作组名等信息。
5、在打印机选择中选择打印机生产厂商和打印机型号。
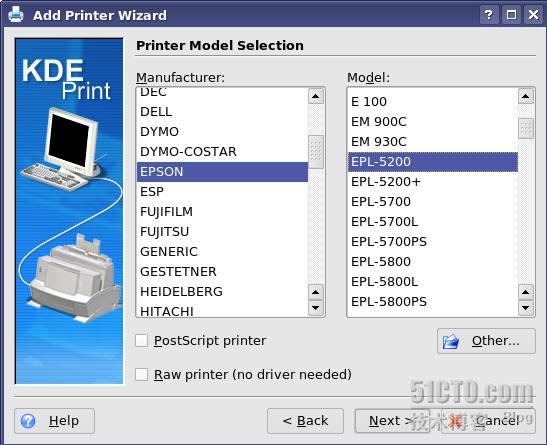
6、接受默认设置以完成打印机的安装。下图为完成安装前的确认信息。
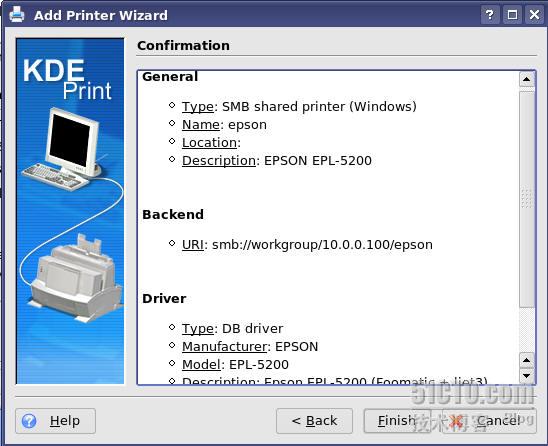
二、在FC7上修改 smb.conf 和 cupsd.conf 配置文件
1、配置smb.conf文件以允许windows客户端访问
[root@lgfc7 ~]# vi /etc/samba/smb.conf
#================= Global Settings ======================
[global]
# ----------------------- Netwrok Related Options -------------------------
#
# workgroup = NT-Domain-Name or Workgroup-Name, eg: MIDEARTH
…………# specifiy it as a per share option as well
#
workgroup = workgroup ----定义samba服务器所在的工作组或域
server string = printer server ----定义计算机的描述信息
netbios name = lgfc7
#
# workgroup = NT-Domain-Name or Workgroup-Name, eg: MIDEARTH
…………# specifiy it as a per share option as well
#
workgroup = workgroup ----定义samba服务器所在的工作组或域
server string = printer server ----定义计算机的描述信息
netbios name = lgfc7
; interfaces = lo eth0 192.168.12.2/24 192.168.13.2/24
; hosts allow = 127. 192.168.12. 192.168.13.
; hosts allow = 127. 192.168.12. 192.168.13.
# ----------------------- Standalone Server Options ------------------------
# Scurity can be set to user, share(deprecated) or server(deprecated)
…………# compatibility. tdbsam requires no further configuration.
security = share ---------------设置安全级别为共享级别
passdb backend = tdbsam
passdb backend = tdbsam
# --------------------------- Printing Options -----------------------------
#
# Load Printers let you load automatically the list of printers rather
# than setting them up individually
#
……# You can choose a non default printing system using the Printing option
load printers = yes -----自动加载打印机列表,设置yes后就不必单独设置每一台打印机的共享
cups options = raw
cups options = raw
printcap name = /etc/printcap
#obtain list of printers automatically on SystemV
; printcap name = lpstat
printing = cups ----打印系统名称为CUPS(Common UNIX Print System)
#================ Share Definitions ====================
#obtain list of printers automatically on SystemV
; printcap name = lpstat
printing = cups ----打印系统名称为CUPS(Common UNIX Print System)
#================ Share Definitions ====================
[homes]
comment = Home Directories
browseable = no
writable = yes
; valid users = %S
; valid users = MYDOMAIN\%S
comment = Home Directories
browseable = no
writable = yes
; valid users = %S
; valid users = MYDOMAIN\%S
[printers]
comment = All Printers
path = /var/spool/samba
browseable = no
guest ok = yes -----允许匿名访问共享打印机
writable = no
printable = yes ----允许打印
comment = All Printers
path = /var/spool/samba
browseable = no
guest ok = yes -----允许匿名访问共享打印机
writable = no
printable = yes ----允许打印
2、配置cupsd.conf文件以允许指定主机或网络访问
[root@lgfc7 cups]# pwd
/etc/cups
/etc/cups
[root@lgfc7 cups]# cp cupsd.conf cupsd.conf.bak ----先作备份,以便容错
[root@lgfc7 cups]# vi cupsd.conf
[root@lgfc7 cups]# vi cupsd.conf
#
# "$Id: cupsd.conf.in 5454 2006-04-23 21:46:38Z mike $"
#
# Sample configuration file for the Common UNIX Printing System (CUPS)
# scheduler. See "man cupsd.conf" for a complete description of this file.
……# Only listen for connections from the local machine.
# "$Id: cupsd.conf.in 5454 2006-04-23 21:46:38Z mike $"
#
# Sample configuration file for the Common UNIX Printing System (CUPS)
# scheduler. See "man cupsd.conf" for a complete description of this file.
……# Only listen for connections from the local machine.
port 631 ----------------------把系统监听本的631改为全地址的631
Listen /var/run/cups/cups.sock
# Show shared printers on the local network.
Browsing On
BrowseOrder allow,deny
# (Change '@LOCAL' to 'ALL' if using directed broadcasts from another subnet.) ---这个注释可参考一下
BrowseAllow @LOCAL
Browsing On
BrowseOrder allow,deny
# (Change '@LOCAL' to 'ALL' if using directed broadcasts from another subnet.) ---这个注释可参考一下
BrowseAllow @LOCAL
# Default authentication type, when authentication is required...
DefaultAuthType Basic
DefaultAuthType Basic
# Restrict access to the server...
<Location />
Order allow,deny
Allow from 10.0.0.10 ----允许访问的客户端主机
</Location>
<Location />
Order allow,deny
Allow from 10.0.0.10 ----允许访问的客户端主机
</Location>
# Restrict access to the admin pages...
<Location /admin>
Encryption Required
Order allow,deny
Allow from 10.0.0.10
</Location>
<Location /admin>
Encryption Required
Order allow,deny
Allow from 10.0.0.10
</Location>
# Restrict access to configuration files...
<Location /admin/conf>
AuthType Basic
Require user @SYSTEM
Order allow,deny
Allow from 10.0.0.10
</Location>
<Location /admin/conf>
AuthType Basic
Require user @SYSTEM
Order allow,deny
Allow from 10.0.0.10
</Location>
# Set the default printer/job policies...
<Policy default>
…… </Limit>
<Policy default>
…… </Limit>
# Only the owner or an administrator can cancel or authenticate a job...
<Limit Cancel-Job CUPS-Authenticate-Job>
Require user @OWNER @SYSTEM
Order deny,allow
</Limit>
<Limit Cancel-Job CUPS-Authenticate-Job>
Require user @OWNER @SYSTEM
Order deny,allow
</Limit>
<Limit All>
Order deny,allow
</Limit>
</Policy>
Order deny,allow
</Limit>
</Policy>
#
# End of "$Id: cupsd.conf.in 5454 2006-04-23 21:46:38Z mike $".
#
"cupsd.conf" 78L, 2453C written
# End of "$Id: cupsd.conf.in 5454 2006-04-23 21:46:38Z mike $".
#
"cupsd.conf" 78L, 2453C written
[root@lgfc7 cups]# service cups restart -----重启cups服务
Stopping cups: [ OK ]
Starting cups: [ OK ]
[root@lgfc7 cups]# service smb restart ------重启smb服务
Shutting down SMB services: [ OK ]
Starting SMB services: [ OK ]
[root@lgfc7 cups]# service httpd restart ------重启httpd服务以便基于web管理
三、在windows xp客户机实现网络打印
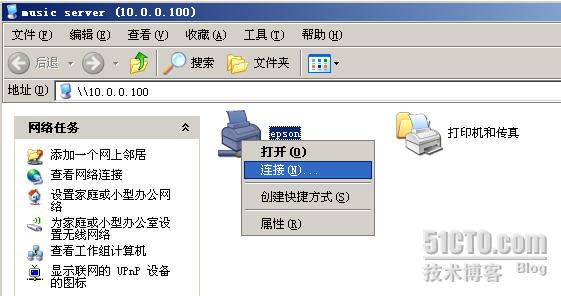
1、在windows xp客户机上,远程“开始---->运行”,然后输入“\\10.0.0.100”以便远程访问samba服务器FC7上的共享资源。
2、如下图,在出现的访问窗口中,可以看到服务器FC7上的共享资源。然后右击共享的打印机,在出现的菜单中选择“连接”。
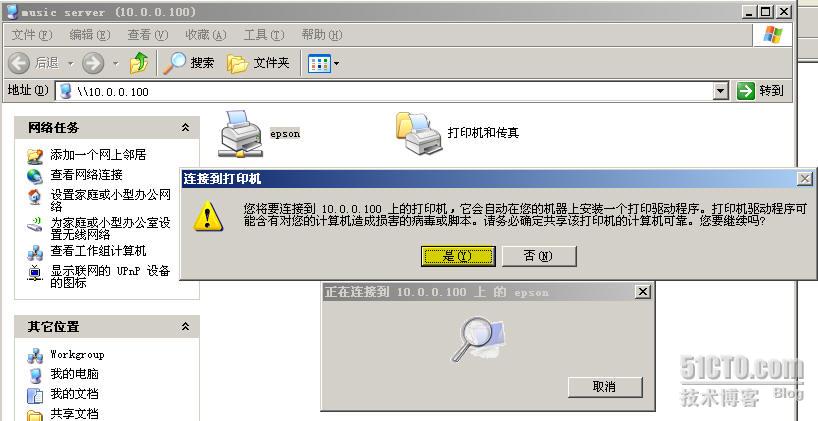
3、弹出的消息框要求在客户端安装打印驱动,选择“是”以便进行驱动的安装。
4、驱动安装成功后,即可将在本地建立一个连接到打印服务器FC7上的网络打印机。如下图所示,网络打印机在windows xp上已安装成功,并随时准备打印。

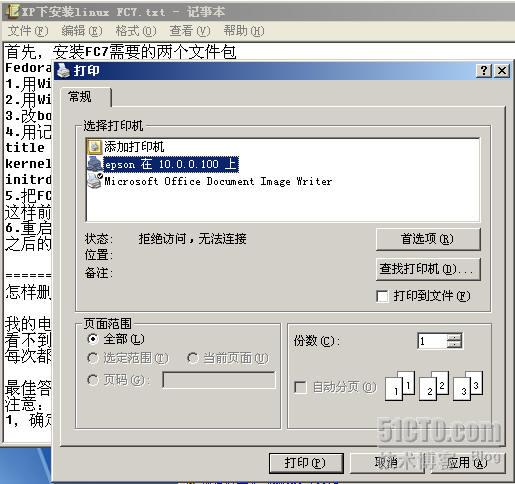
5、如下图所示,网络打印机建立成功后在windows xp客户端的文件就可通过服务器FC7上共享的打印机进行打印了。
四、在windows xp客户机实现基于Web远程管理
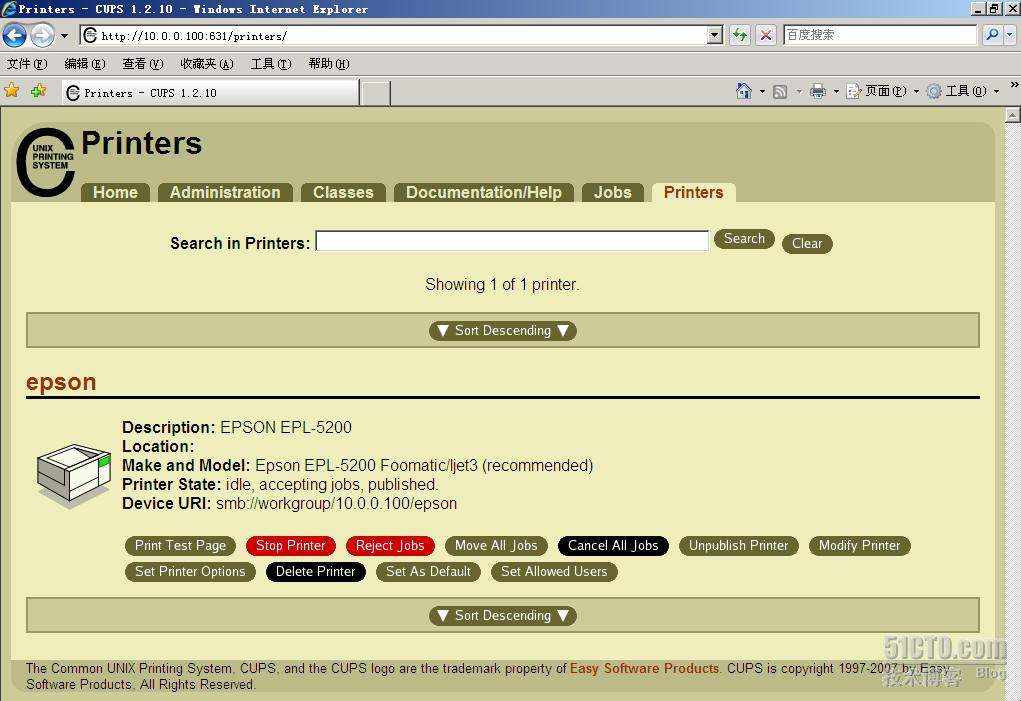
在windows xp客户端浏览器中,输入 [url]http://10.0.0.100/printers[/url],即可访问到FC7上共享的打印资源。如下图显示的是epson打印机的相关信息,管理员可在这个窗口对这台打印机执行进行相应的远程管理了。
总结:
首先服务器端建立 SMB 打印服务器,然后在客户端建立网络打印机。需要注意的是,为了设置访问权限以及基于web的远程管理,需要修改 cupsd.conf 文件相关部分。