Windows Nano Server VHD文件制作
有幸参加盆盆老师的微信课Windows Nano Server的介绍,有感这次盆盆老师的技术分享,所以简单的分享一下如何制作Windows Nano Server的过程,同时也非常感谢盆盆老师的技术分享。
1.先下载windows_server_technical_preview_2的iso(九叔无私分享提供):链接:http://pan.baidu.com/s/1gd8KP5D 密码:c0tc
2.下载转换的脚本:https://gallery.technet.microsoft.com/scriptcenter/Convert-WindowsImageps1-0fe23a8f
3.下载完毕windows_server_technical_preview_2,我们可以先挂载ISO,可以看到与以前的windows server 的ISO有所区别:
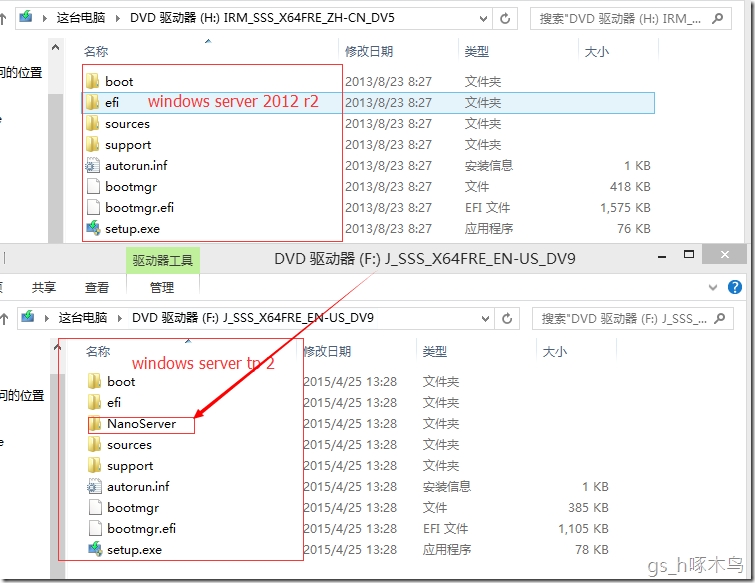
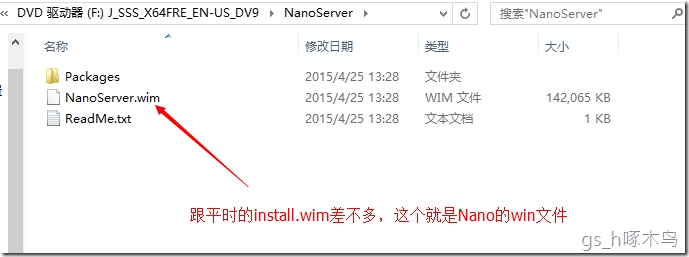

看到这么多的cab,大家也好奇这是啥东东,按照我的理解是跟windows添加角色功能的一样的,只不过是用cab打包好。如果我们需要,就打上相应的cab包添加角色。
Role or feature |
Package file |
Hyper-V 角色 |
Microsoft-NanoServer-Compute-Package.cab |
故障转移群集角色 |
Microsoft-NanoServer-FailoverCluster-Package.cab |
NanoServer主机虚拟机驱动(我更喜欢叫它集成服务) |
Microsoft-NanoServer-Guest-Package.cab |
存储和网卡驱动 |
Microsoft-NanoServer-OEM-Drivers-Package.cab |
文件服务器角色和其他存储组件 |
Microsoft-NanoServer-Storage-Package.cab |
从这里,我们可以看出Windows Nano Server 在整个Windows架构上可以作为Hyper-v,群集,扩展文件服务器,容器container以及来宾虚拟机。
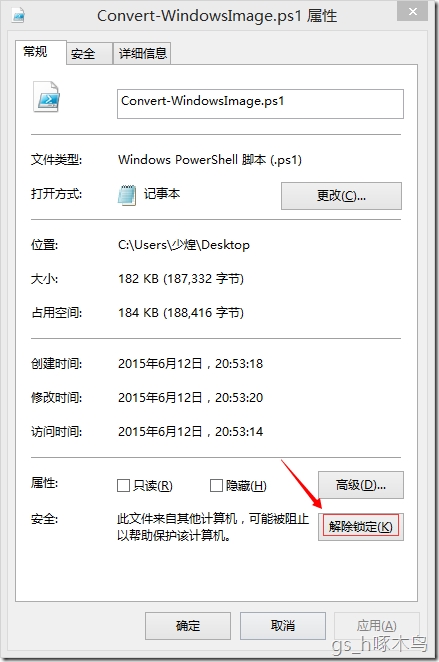
4.我们就开始制作Windows Nano Server吧。先解除脚本的锁定,
5.运行脚本
脚本格式如下:.\Convert-WindowsImage.ps1 -Sourcepath <path to wim> -VHD <path to new VHD file> �CVHDformat VHD -Edition 1

PS:这个制作过程大概不超过5分钟,整个vhd大概是483MB。

6.将vhd在windows Server TP2运行(目前只支持在TP2的环境运行),当然需要配置一下才可以作为VM运行。
1)需要在磁盘创建一个目录名NanoServer
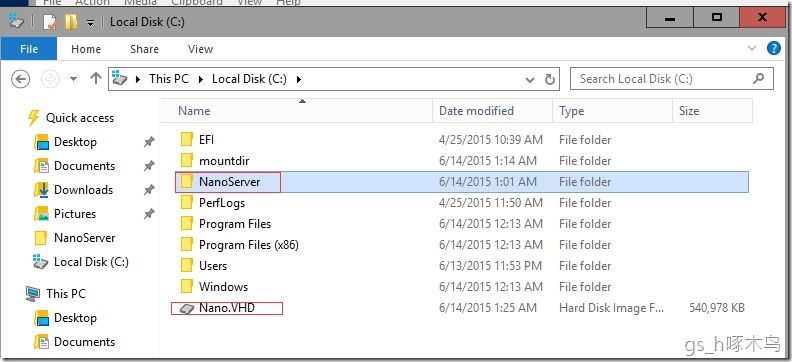
2)将windows Server TP2 iso里面提取cab复制到NanoServer里面

3)创建一个目录名为mountdir的文件

4)将nano.vhd挂载映像的形式挂载到mountdir目录下
dism /Mount-Image /ImageFile:c:\Nano.vhd /Index:1 /MountDir:.\mountdir

5)将Microsoft-NanoServer-Guest-Package.cab加载到NanoServer里面(盆盆老师说过nano作为VM的时候要加载这个cab,后来我自己试过没加载这个cab包启动vm,一直都是启动界面的)
dism /Add-Package /PackagePath:.\packages\Microsoft-NanoServer-Guest-Package.cab /Image:.\mountdir

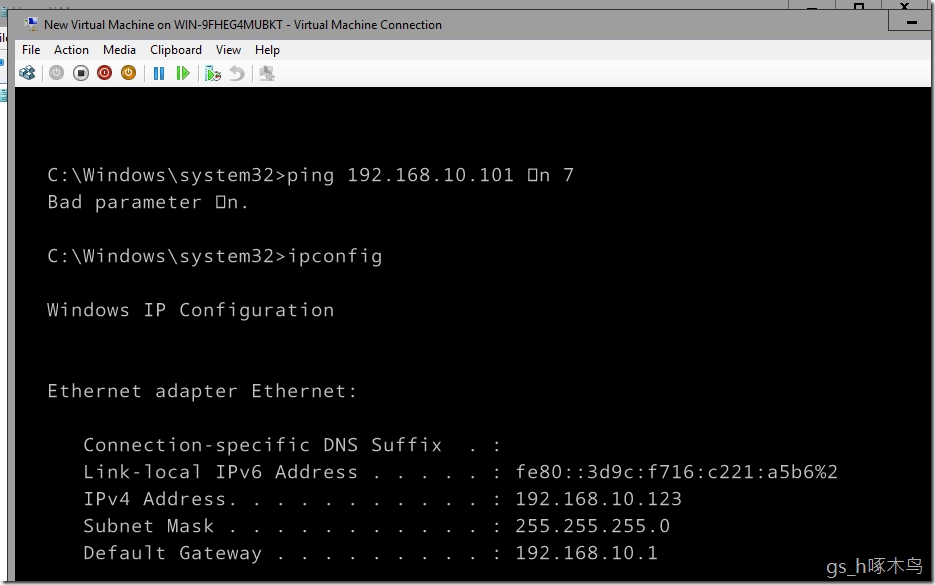
6)这一步是为了显示NanoServer 的ip信息(因为只有第一次启动nanoserver的时候,才会显示ip信息),创建两个文件,分别为SetupComplete.cmd和Startup.cmd.
SetupComplete.cmd脚本如下:
netsh advfirewall set domainprofile state off
netsh advfirewall set privateprofile state off
netsh advfirewall set publicprofile state off
netsh advfirewall set currentprofile state off
ipconfig
schtasks /create /tn "Start" /tr c:\windows\system32\Startup.cmd /sc onstart /ru "System"
Startup.cmd脚本如下:
ping 192.168.10.101 -n 7
ipconfig

先为SetupComplete.cmd创建脚本文件夹
md .\mountdir\Windows\Setup\Scripts

将两个脚本copy到NanoServer里面
copy .\SetupComplete.cmd .\mountdir\Windows\Setup\Scripts
copy .\Startup.cmd .\mountdir\Windows\System32
![]()
7)卸载NanoServer映像
dism /Unmount-Image /MountDir:.\MountDir /Commit

7.新建虚拟机,挂载nano.vhd,启动虚拟机
8.通过PowerShell连接NanoServer
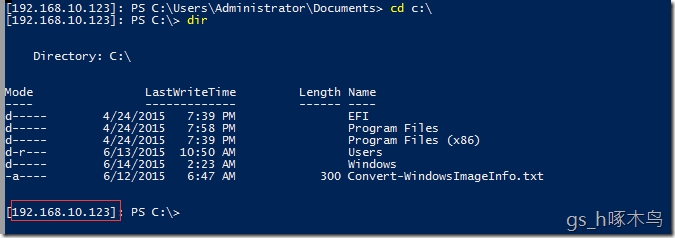
脚本如下:
$ip=”nano server ip address”
$user=”$ip\administrator”
Enter-PSSession -ComputerName $ip -Credential $user
administrator初始密码为空
![]()
就可以看到NanoServer的连接会话
NanoServer概述和配置具体详情可以访问:https://technet.microsoft.com/en-gb/library/mt126167.aspx
NanoServer启动脚本配置可以访问:http://blogs.technet.com/b/nanoserver/archive/2015/05/19/how-to-display-ipconfig-on-nano-server-every-time-it-boots.aspx
如果本文章有什么遗漏或者需要补充什么,麻烦指点下,多谢。
本文出自 “gs_hao” 博客,谢绝转载!