【IOS开发】多媒体操作
1、录音功能
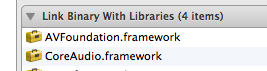
1)引入两个类库
2)
- //引入头文件
- #import <AVFoundation/AVFoundation.h>
- #import <CoreAudio/CoreAudioTypes.h>
- //在.h文件声明变量
- AVAudioRecorder *audioRecorder;
- //在.m文件
- AVAudioSession *audioSession = [AVAudioSession sharedInstance];
- [audioSession setCategory:AVAudioSessionCategoryPlayAndRecord error:nil];
- [audioSession setActive:YES error:nil];
- //此变量音频会话用来设置录音模式
- /****
- AVAudioSessionCategorySoloAmbient
- 这个类别非常像AVAudioSessionCategoryAmbient类别,除了会停止其他程序的音频回放,比如iPod程序。当设备被设置为静音模式,你的音频回放将会停止。
- AVAudioSessionCategoryRecord
- 这会停止其他应用的声音(比如iPod)并让你的应用也不能初始化音频回放(比如AVAudioPlayer)。在这种模式下,你只能进行录音。使用这个类别,调用AVAudioPlayer的prepareToPlay会返回YES,但是调用play方法将返回NO。主UI界面会照常工作。这时,即使你的设备屏幕被用户锁定了,应用的录音仍会继续。
- AVAudioSessionCategoryPlayback
- 这个类别会静止其他应用的音频回放(比如iPod应用的音频回放)。你可以使用AVAudioPlayer的prepareToPlay和play方法,在你的应用中播放声音。主UI界面会照常工作。这时,即使屏幕被锁定或者设备为静音模式,音频回放都会继续。
- AVAudioSessionCategoryPlayAndRecord
- 这个类别允许你的应用中同时进行声音的播放和录制。当你的声音录制或播放开始后,其他应用的声音播放将会停止。主UI界面会照常工作。这时,即使屏幕被锁定或者设备为静音模式,音频回放和录制都会继续。
- AVAudioSessionCategoryAudioProcessing
- 这个类别用于应用中进行音频处理的情形,而不是音频回放或录制。设置了这种模式,你在应用中就不能播放和录制任何声音。调用AVAPlayer的prepareToPlay和play方法都将返回NO。其他应用的音频回放,比如iPod,也会在此模式下停止。
- AVAudioSessionCategoryAmbient
- 这个类别不会停止其他应用的声音,相反,它允许你的音频播放于其他应用的声音之上,比如iPod。你的应用的主UI县城会工作正常。调用AVAPlayer的prepareToPlay和play方法都将返回YES。当用户锁屏时,你的应用将停止所有正在回放的音频。仅当你的应用是唯一播放该音频文件的应用时,静音模式将停止你程序的音频回放。如果正当iPod播放一手歌时,你开始播放音频,将设备设为静音模式并不能停止你的音频回放。
- ****/
- //创建音频文件的保存路径
- NSFileManager *fileManager = [NSFileManager defaultManager];
- NSString *recordGroupPath = [NSHomeDirectory() stringByAppendingString:[NSString stringWithFormat:@"/Documents/record"]];
- groupPath = [recordGroupPath retain];
- if (![fileManager fileExistsAtPath:recordGroupPath]) {
- NSLog(@"没有此路径");
- [fileManager createDirectoryAtPath:recordGroupPath withIntermediateDirectories:YES attributes:nil error:nil];
- }
- //根据当前时间给音频文件起名字,后缀名是caf
- NSDateFormatter *dateFormatter = [[[NSDateFormatter alloc] init] autorelease];
- [dateFormatter setDateFormat:@"HHmmss"];
- NSString *recordName = [NSString stringWithFormat:@"%@.caf", [dateFormatter stringFromDate:[NSDate date]]];
- NSString *recordPath = [recordGroupPath stringByAppendingFormat:@"/%@", recordName];
- NSURL *recordURL = [[NSURL alloc] initWithString:recordPath];
- //一些设置
- NSMutableDictionary *recordSetting = [[NSMutableDictionary alloc] init];
- [recordSetting setValue :[NSNumber numberWithInt:kAudioFormatLinearPCM] forKey:AVFormatIDKey];
- [recordSetting setValue:[NSNumber numberWithFloat:44100.0] forKey:AVSampleRateKey];
- [recordSetting setValue:[NSNumber numberWithInt: 2] forKey:AVNumberOfChannelsKey];
- [recordSetting setValue :[NSNumber numberWithInt:16] forKey:AVLinearPCMBitDepthKey];
- [recordSetting setValue :[NSNumber numberWithBool:NO] forKey:AVLinearPCMIsBigEndianKey];
- [recordSetting setValue :[NSNumber numberWithBool:NO] forKey:AVLinearPCMIsFloatKey];
- NSLog(@"recodrdURL = %@, recordSetting = %@",recordURL,recordSetting);
- //创建实例,参数recordURL是刚刚创建的音频文件的路径
- audioRecorder = [[AVAudioRecorder alloc] initWithURL:recordURL settings:recordSetting error:nil];
- [recordURL release], recordURL = nil;
- [recordSetting release], recordSetting = nil;
- if ([audioRecorder prepareToRecord]) {
- [audioRecorder record];
- }
- //结束录音
- [audioRecorder stop];
- //播放录音
- //继承代理AVAudioPlayerDelegate
- //.h文件声明
- AVAudioPlayer *audioPlayer;
- //.m文件
- NSURL *fileURL = [[NSURL alloc] initFileURLWithPath:recordPath];
- NSLog(@"fileURL = %@", fileURL);
- audioPlayer = [[AVAudioPlayer alloc] initWithContentsOfURL:fileURL error:nil];
- [audioPlayer setDelegate:self];
- NSLog(@"持续时间:%f", audioPlayer.duration);
- if ([audioPlayer prepareToPlay]) {
- [audioPlayer play];
- }
- [fileURL release], fileURL = nil;
- /* audioPlayerDidFinishPlaying:successfully: is called when a sound has finished playing. This method is NOT called if the player is stopped due to an interruption. */
- - (void)audioPlayerDidFinishPlaying:(AVAudioPlayer *)player successfully:(BOOL)flag
- {
- NSLog(@"播放完毕!");
- }
可以给录音界面加一个计时器,见效果图

之前见过这种效果觉得很神奇,这怎么做的呢,后来发现这只是一种字体!太坑爹了!
在.h文件
- NSTimer *timer;
- UILabel *timeLabel;
- NSDate *beginDate;
.m文件
- beginDate = [[NSDate date] retain];
- timer = [NSTimer scheduledTimerWithTimeInterval:(1.0) target:self selector:@selector(onTimer) userInfo:nil repeats:YES];
- timeLabel = [[UILabel alloc] initWithFrame:CGRectMake(100, 100, 320 - 200, 100)];
- [timeLabel setFont:[UIFont fontWithName:@"DBLCDTempBlack" size:24]];
- [timeLabel setBackgroundColor:[UIColor clearColor]];
- [timeLabel setTextAlignment:UITextAlignmentCenter];
- [timeLabel setTextColor:[UIColor whiteColor]];
- [timeLabel setText:@"00:00:00"];
- [self.view addSubview:timeLabel];
- //NSTimer调用方法
- - (void)onTimer
- {
- NSDate *nowDate = [NSDate date];
- NSCalendar *chineseClendar = [[NSCalendar alloc ] initWithCalendarIdentifier:NSGregorianCalendar];
- NSUInteger unitFlags = NSHourCalendarUnit | NSMinuteCalendarUnit | NSSecondCalendarUnit;
- NSDateComponents *dateComponent = [chineseClendar components:unitFlags fromDate:beginDate toDate:nowDate options:0];
- NSLog(@"%d:%d:%d", dateComponent.hour, dateComponent.minute, dateComponent.second);
- timeLabel.text = [NSString stringWithFormat:@"%0.2d:%0.2d:%0.2d", dateComponent.hour, dateComponent.minute, dateComponent.second];
- [chineseClendar release], chineseClendar = nil;
- }
在使用了NSTimer之后会发现dealloc方法不回被调用了,可以在- (void)viewDidDisappear:(BOOL)animated方法中释放内存。
2、拍照和录像
这两者放一块是因为两者都用到同一个类UIImagePickerController,操作非常类似
//继承代理UIImagePickerControllerDelegate
//.h文件声明
- UIImagePickerController *photoPicker;
- UIImagePickerController *videoPicker;
//.m文件
//拍照事件触发
- UIImagePickerControllerSourceType sourceType = UIImagePickerControllerSourceTypeCamera;
- if (![UIImagePickerController isSourceTypeAvailable:UIImagePickerControllerSourceTypeCamera])
- {
- sourceType = UIImagePickerControllerSourceTypePhotoLibrary;
- }
- photoPicker = [[UIImagePickerController alloc] init];
- photoPicker.delegate = self;
- // photoPicker.cameraCaptureMode = UIImagePickerControllerCameraCaptureModePhoto;
- //有人说在iPad中用UIImagePickerController要用UIPopOverController,最先我也用了,后来我发现不用设置photoPicer的cameraCaptureMode属性,其实可以不用UIPopOverController,这样可以使拍照界面全屏,比用UIPopOverController效果好多了!
- photoPicker.allowsEditing = YES;
- photoPicker.sourceType = sourceType;
- [self presentViewController:photoPicker animated:YES completion:nil];
//摄像事件触发
- UIImagePickerControllerSourceType sourceType = UIImagePickerControllerSourceTypeCamera;
- if (![UIImagePickerController isSourceTypeAvailable:UIImagePickerControllerSourceTypeCamera])
- {
- sourceType = UIImagePickerControllerSourceTypePhotoLibrary;
- }
- videoPicker = [[UIImagePickerController alloc] init];
- videoPicker.mediaTypes =[NSArray arrayWithObjects:(NSString*)kUTTypeMovie, nil];
- videoPicker.delegate = self;
- // photoPicker.cameraCaptureMode = UIImagePickerControllerCameraCaptureModeVideo;
- videoPicker.allowsEditing = YES;
- videoPicker.sourceType = sourceType;
- [self presentViewController:videoPicker animated:YES completion:nil];
- //与上边的拍照事件触发的方法对比,多了一个mediaTypes属性设置,这个属性是一个数组,添加pickerController支持的模式,默认支持拍照,但是也可以自己设置,此时你设置成支持什么模式,它就支持什么模式,如果我这样设置 videoPicker.mediaTypes =[NSArray arrayWithObjects:(NSString*)kUTTypeMovie, (NSString *)kUTTypeImage, nil];那此pickerController就支持拍照摄像双模式的转换,非常方便,所以,若不是项目需要,我就把拍照和摄像功能写成一个UIImagePickerController
代理
- #pragma mark - UIImagePickerController Delegate
- - (void)imagePickerController:(UIImagePickerController *)picker didFinishPickingMediaWithInfo:(NSDictionary *)info
- {
- [picker dismissModalViewControllerAnimated:YES];
- NSFileManager *fileManager = [NSFileManager defaultManager];
- //之前我并没有设置cameraCaptureMode属性,相反,设置了可能回引起程序崩溃,相信有很多人是在此引起程序崩溃后查原因发现有人说要用到UIPopOverController的,因为,我也是这样、、、但是不用设置此属性,系统回自动判断UIImagePickerController的属性的
- if (picker.cameraCaptureMode == UIImagePickerControllerCameraCaptureModePhoto) {
- //拍照
- NSString *imageGroupPath = [NSHomeDirectory() stringByAppendingString:[NSString stringWithFormat:@"/Documents/photo"]];
- if (![fileManager fileExistsAtPath:imageGroupPath]) {
- NSLog(@"没有此路径");
- [fileManager createDirectoryAtPath:imageGroupPath withIntermediateDirectories:YES attributes:nil error:nil];
- }
- UIImage *image = [info objectForKey:UIImagePickerControllerOriginalImage];
- NSData *imageData;
- if (UIImagePNGRepresentation(image) == nil) {
- imageData = UIImageJPEGRepresentation(image, 1);
- NSLog(@"jpeg");
- }else{
- imageData = UIImagePNGRepresentation(image);
- NSLog(@"png");
- }
- NSDateFormatter *dateFormatter = [[[NSDateFormatter alloc] init] autorelease];
- [dateFormatter setDateFormat:@"yyyyMMddHHmmss"];
- NSString *imageName = [NSString stringWithFormat:@"%@.png", [dateFormatter stringFromDate:[NSDate date]]];
- NSString *imagePath = [imageGroupPath stringByAppendingFormat:@"/%@", imageName];
- if (imageData) {
- [imageData writeToFile:imagePath atomically:YES];
- NSLog(@"保存成功!");
- }else{
- NSLog(@"数据有误!");
- }
- [tableview reloadData]; //更新下tableview或进行其他操作
- }else{
- //视频
- NSString *videoGroupPath = [NSHomeDirectory() stringByAppendingString:[NSString stringWithFormat:@"/Documents/video"]];
- if (![fileManager fileExistsAtPath:videoGroupPath]) {
- NSLog(@"没有此路径");
- [fileManager createDirectoryAtPath:videoGroupPath withIntermediateDirectories:YES attributes:nil error:nil];
- }
- NSDateFormatter *dateFormatter = [[[NSDateFormatter alloc] init] autorelease];
- [dateFormatter setDateFormat:@"yyyyMMddHHmmss"];
- NSString *videoName = [NSString stringWithFormat:@"%@.mov", [dateFormatter stringFromDate:[NSDate date]]];
- NSURL *videoURL = [info objectForKey:UIImagePickerControllerMediaURL];
- NSString *newFilePath = [videoGroupPath stringByAppendingFormat:@"/%@", videoName];
- // NSLog(@"newFilePath = %@", newFilePath);
- NSData *videoData = [NSData dataWithContentsOfURL:videoURL];
- if (videoData) {
- [videoData writeToFile:newFilePath atomically:YES];
- NSLog(@"保存成功!");
- }else{
- NSLog(@"数据有误!");
- }
- [tableview reloadData];
- }
- [picker release], picker = nil;
- }