为linux主机安装应用程序
为linux
主机安装应用程序
实验环境:
RHEL5操作系统,为了让linux服务器的易用性得到提高,需为其安装些用于服务管理及桌面的应用程序。
需求描述:
实验RPM包的方式安装下列软件:RealPlayer播放器,linux版本的QQ,Webmin管理软件,并使用rpm查询上述各软件的用途、文件列表:
使用源码包编译的方式安装zhcon中文虚拟控制台:
使用软件自带的向导安装Adobe R eader阅读器、OpenOffice办公套件:
实验步骤:
1. 下载所需软件包:
这里使用光盘镜像中的软件,这些软件可以从下列地址获得:
http://www.real.com/linux
http://im.qq.com/qq/linux/download.shtml
http://www.webmin.com/download.html
http://zhcon.sf.net/
http://get.adobe.com/cn/reader/otherversions/
http://download.openoffice.org/
[root@localhost ~]# mount /dev/cdrom /mnt ##挂载光盘
mount: block device /dev/cdrom is write-protected, mounting read-only
[root@localhost ~]# cd /mnt/1.linux系统管理/ ##进入光盘
[root@localhost 1.linux系统管理]# cd chapter05/
[root@localhost chapter05]# pwd
/mnt/1.linux系统管理/chapter05
[root@localhost chapter05]# ls #查看软件
adobereader_chs-8.1.7-1.i486.tar.gz realplayer11gold.rpm
firefox-3.0.10.tar.gz testfiles
fp-linux-x86_32-ws.tar.gz webmin-1.530-1.noarch.rpm
linuxqq-v1.0.2-beta1.i386.rpm zhcon-0.2.5.tar.gz
ooo_3.3.0_linux_x86_install-rpm-wjre_zh-cn.tar.gz zhcon-0.2.5-to-0.2.6.diff.gz
2. 安装RealPlayer、webmin、QQ
安装Realplayer:
[root@localhost chapter05]# rpm -ivh realplayer11gold.rpm
Preparing... ########################################### [100%]
1:RealPlayer ########################################### [100%]
安装QQ:
[root@localhost chapter05]# rpm -ivh linuxqq-v1.0.2-beta1.i386.rpm
Preparing... ########################################### [100%]
1:linuxqq ########################################### [100%]
[root@localhost chapter05]#
安装webmin:
[root@localhost chapter05]# rpm -ivh webmin-1.530-1.noarch.rpm
warning: webmin-1.530-1.noarch.rpm: Header V3 DSA signature: NOKEY, key ID 11f63c51
Preparing... ########################################### [100%]
Operating system is Redhat Enterprise Linux
1:webmin ########################################### [100%]
Webmin install complete. You can now login to http://localhost.localdomain:10000/
as root with your root password.
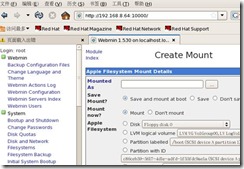
到图形界面验证:


Webmin界面:


3. 编译安装zhcon中文控制台:
安装准备:解压软件
[root@localhost ~]# mount /dev/cdrom /mnt
mount: block device /dev/cdrom is write-protected, mounting read-only
mount: /dev/cdrom already mounted or /mnt busy
mount: according to mtab, /dev/hdc is already mounted on /mnt
[root@localhost ~]# mount /dev/cdrom /mnt
[root@localhost ~]# cd /mnt/1.linux系统管理/
[root@localhost 1.linux系统管理]# cd chapter05/
[root@localhost chapter05]# tar zxvf zhcon-0.2.5.tar.gz -C /usr/src/ ##解压tar软件包、-C指定软件释放的目录
[root@localhost chapter05]# cp zhcon-0.2.5-to-0.2.6.diff.gz /usr/src ##拷贝软件到/usr/src目录
[root@localhost chapter05]# cd /usr/src
[root@localhost src]# gzip -d zhcon-0.2.5-to-0.2.6.diff.gz
配置:
[root@localhost src]# cd zhcon-0.2.5
[root@localhost zhcon-0.2.5]# patch -p1 < ../zhcon-0.2.5-to-0.2.6.diff ##使用pathch给当前软件打补丁
patching file ChangeLog
patching file NEWS
patching file configure
patching file configure.in
patching file src/configfile.cpp
patching file src/display/vgadev.cpp
patching file src/main.cpp
patching file src/zhcon.cpp
[root@localhost zhcon-0.2.5]# ./configure --prefix=/usr/local/zhcon ##配置软件,并指定安装目录
checking for a BSD-compatible install... /usr/bin/install -c
checking whether build environment is sane... yes
################省略####
Config complete, now type make to build zhcon.
Good Luck!
编译和安装:
[root@localhost zhcon-0.2.5]# make ##编译
[root@localhost zhcon-0.2.5]# make install ##安装
使用:
[root@localhost zhcon-0.2.5]# cd /usr/local/zhcon/
[root@localhost zhcon]# ls
bin etc lib man
[root@localhost zhcon]# cd bin/
[root@localhost bin]# ls
zhcon
[root@localhost bin]# ./zhcon --help
zhcon
A Fast CJK Console Environment
Usage: zhcon [OPTIONS]... [FILES]...
-h, --help Print help and exit
-V, --version Print version and exit
--utf8 use iconv filter to convert UTF-8 stream from/to system
encoding (default=off)
--drv=STRING specify video driver (auto, fb, ggi, vga) (default=`auto')
[root@localhost bin]#
以下命令须在字符终端使用:
[root@localhost bin]# kbd_mode �Ca ##设置使用ASCII键盘模式,以便使用输入法切换热键
[root@localhost bin]# /usr/local/zhcon/bin/zhcon --utf8 ##使用中文环境


4. 安装AdobeReader阅读器、 OpenOffice办公套件:
安装AdobeReader阅读器:
[root@localhost chapter05]# tar zxvf adobereader_chs-8.1.7-1.i486.tar.gz -C /root ##将软件解压到/root/中
[root@localhost chapter05]#cd
[root@localhost AdobeReader]# pwd
/root/AdobeReader
[root@localhost AdobeReader]# ls
COMMON.TAR ILINXR.TAR INSTALL ReadMe.htm
[root@localhost AdobeReader]# ./INSTALL
tar: Adobe/HelpViewer:时间戳 2010-07-07 23:10:07 是将来的 264632459 秒之后
验证:

安装OpenOffice办公套件:
[root@localhost chapter05]# tar zxvf ooo_3.3.0_linux_x86_install-rpm-wjre_zh-cn.tar.gz - /root/ ##将软件解压到/root/中
点击解压的目录及文件:

进入安装导向:

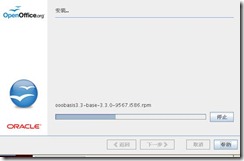
安装过程:

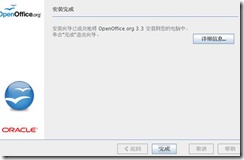
安装完成:

验证:

打开Writer:

本文出自 “沈工鬼斧” 博客,谢绝转载!